fbpx

Families With Grace

Helping Christian moms create homes filled with grace, love & faith

Fudgy chocolate cake recipe

The best chocolate cake recipe you’ll ever make!

I love all things chocolate, but I’ve struggle with chocolate cake. So many times, I get bakery chocolate cake that is dry. Ugh. While I’ve tweaked a chocolate cake mix with great results, this fudgy chocolate cake recipe tops them all hands down. It’s a mic drop sort of cake.

My parents don’t even eat chocolate cake and they love this cake. Same for my husband. It’s just its own level of yum! It’s somehow airy yet moist. And it just plain works. So, when I made it most recently for my son’s birthday, I knew I had to share it on the blog.

Usually I only make this chocolate cake recipe for birthdays, because we don’t have cake too often at home. Unfortunately, my daughter opts for Oreo ice cream cake for her birthday in October. But my son asks for this chocolate cake for his January birthday, and I always make it for my own birthday in May. I can hardly wait the two more months until my birthday!

And, I also encourage you to try this recipe even if you haven’t made a cake from scratch before. This is literally the only cake I make from scratch. Usually I do just tweak a box cake mix with awesome results, but this one is worth making from scratch. I promise you can do it — and you don’t even need special cake flour or other uncommon ingredients. In fact, I’d guess you have everything you need to make this cake in your kitchen right now!

Making the fudgy chocolate cake recipe

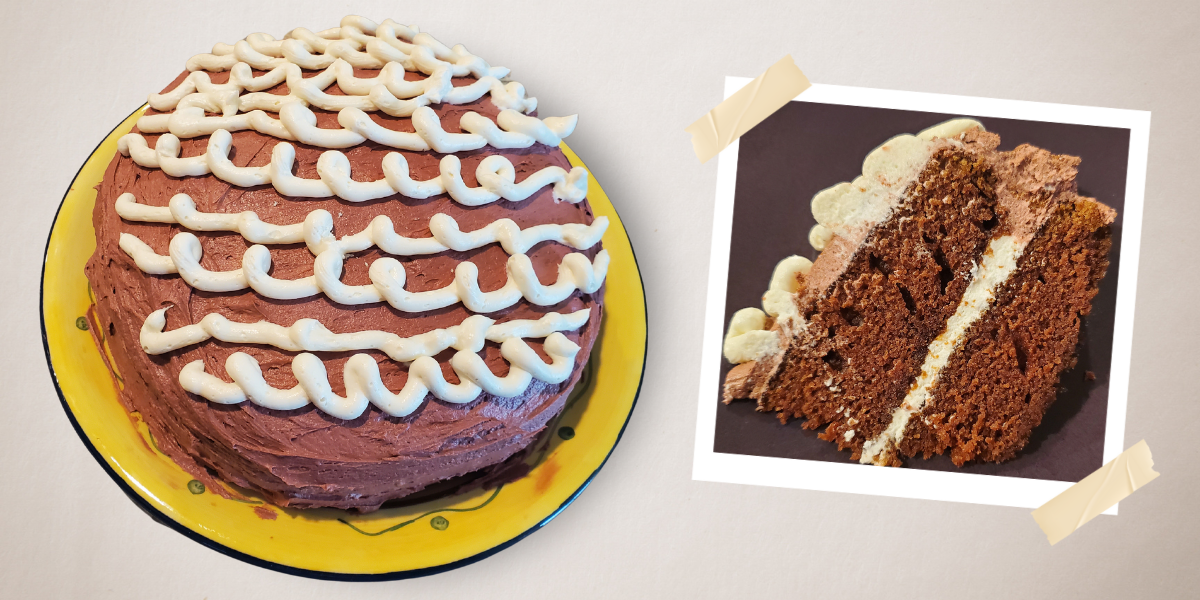
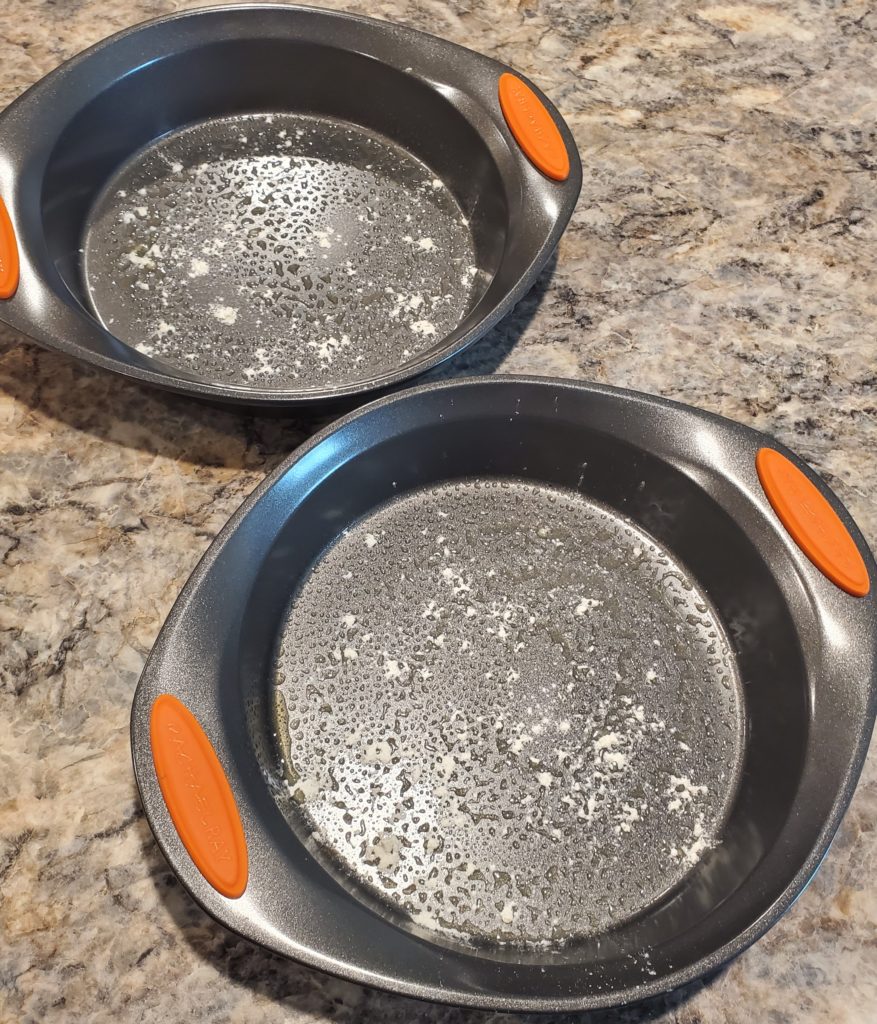
Like any baking recipe, start by preheating the oven. Turn the oven to 350-degrees and then prepare your baking pan(s). I usually bake this cake in a 9×13-inch pan, but this time I used to 9-inch cake pans to make a layer cake for my son. He wanted the cake to look like the one in a video game he likes.

Grease the pans or spray them with non-stick cooking spray, and then dust them lightly with flour. I use non-stick cooking spray because it’s easiest — and at least a bit healthier!

Sprayed and lightly floured cake pans ready for this fudgy chocolate cake recipe

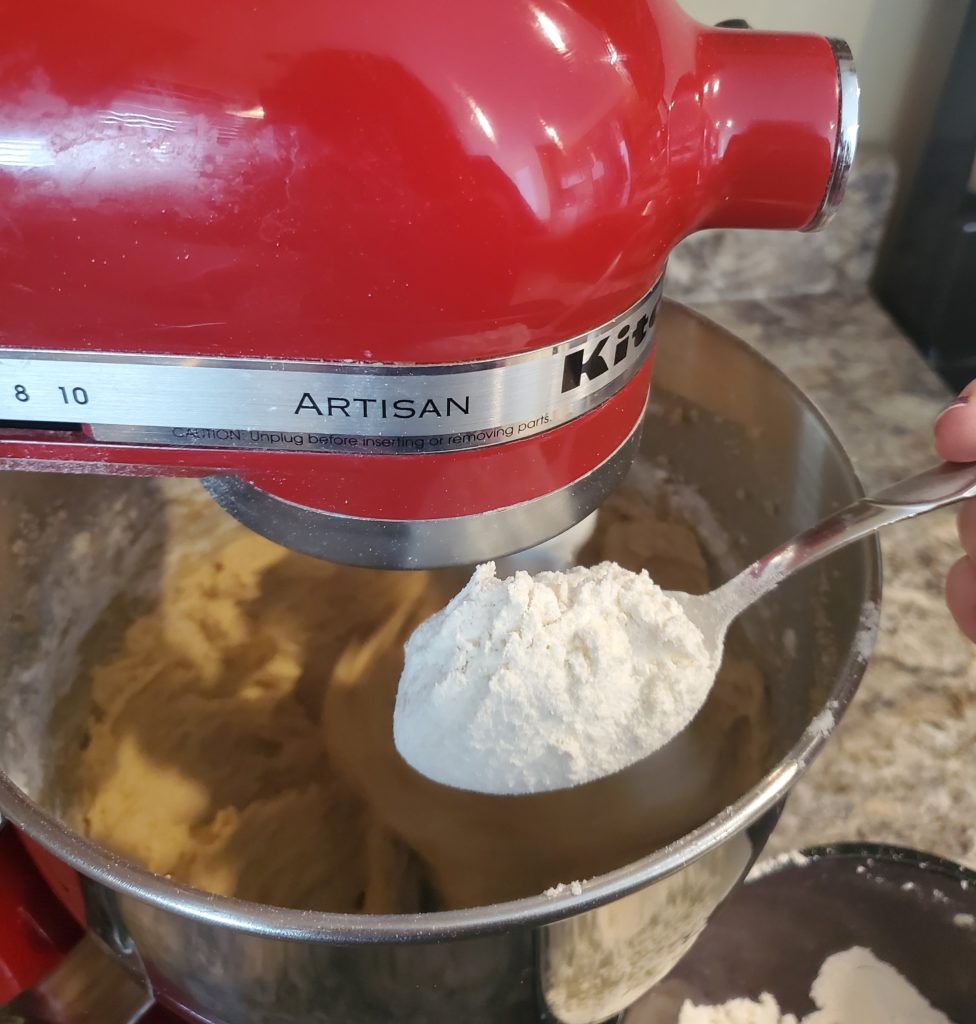
Next, stir together 2 cups of white sugar and 2 cups of all-purpose flour in a large mixing bowl. I use the bowl of my stand mixer, because this is the bowl you’ll be mixing the batter in later.

The flour and sugar mixed together in the bowl of my stand mixer for this fudgy chocolate cake recipe

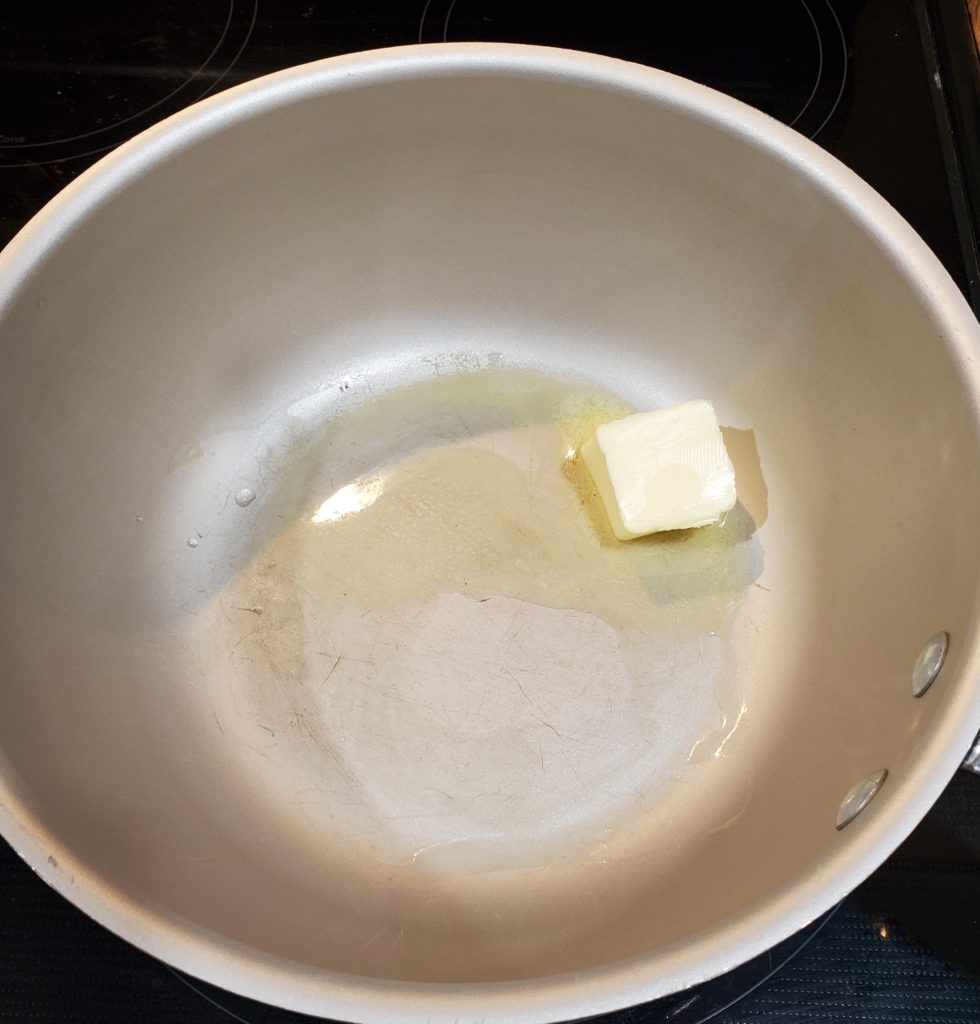
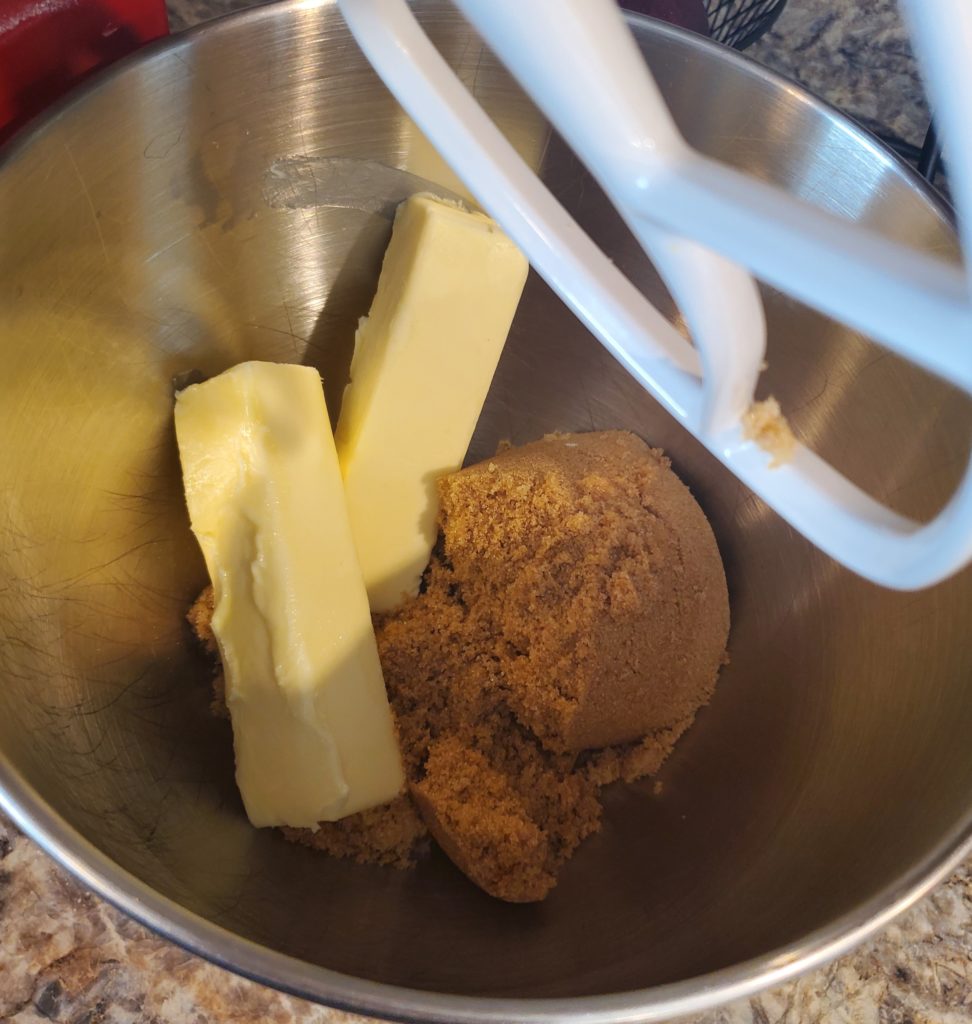
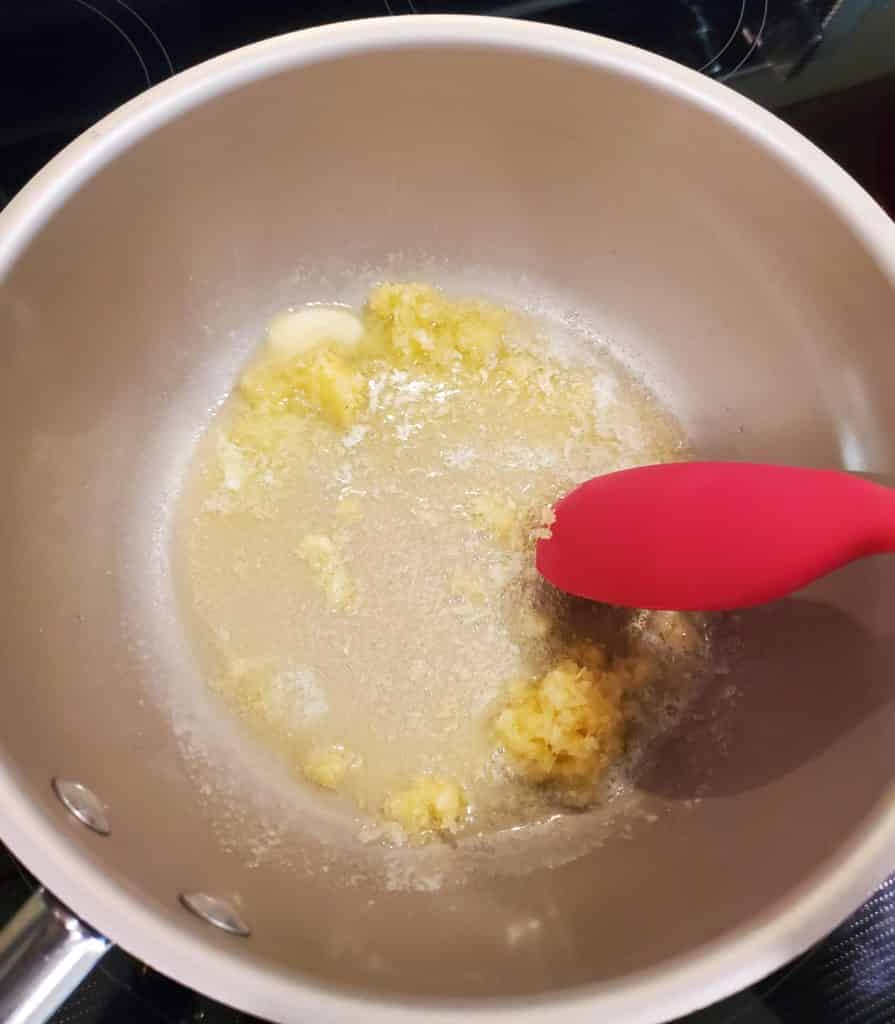
Let the flour and sugar hang out while you get out a medium saucepan. Put 2 sticks of butter, 1 cup of water and 3 tablespoons of cocoa powder into the saucepan over medium heat.

The butter, cocoa powder and water in a medium saucepan of medium heat
Part way through cooking the butter, cocoa powder and water in a medium saucepan of medium heat

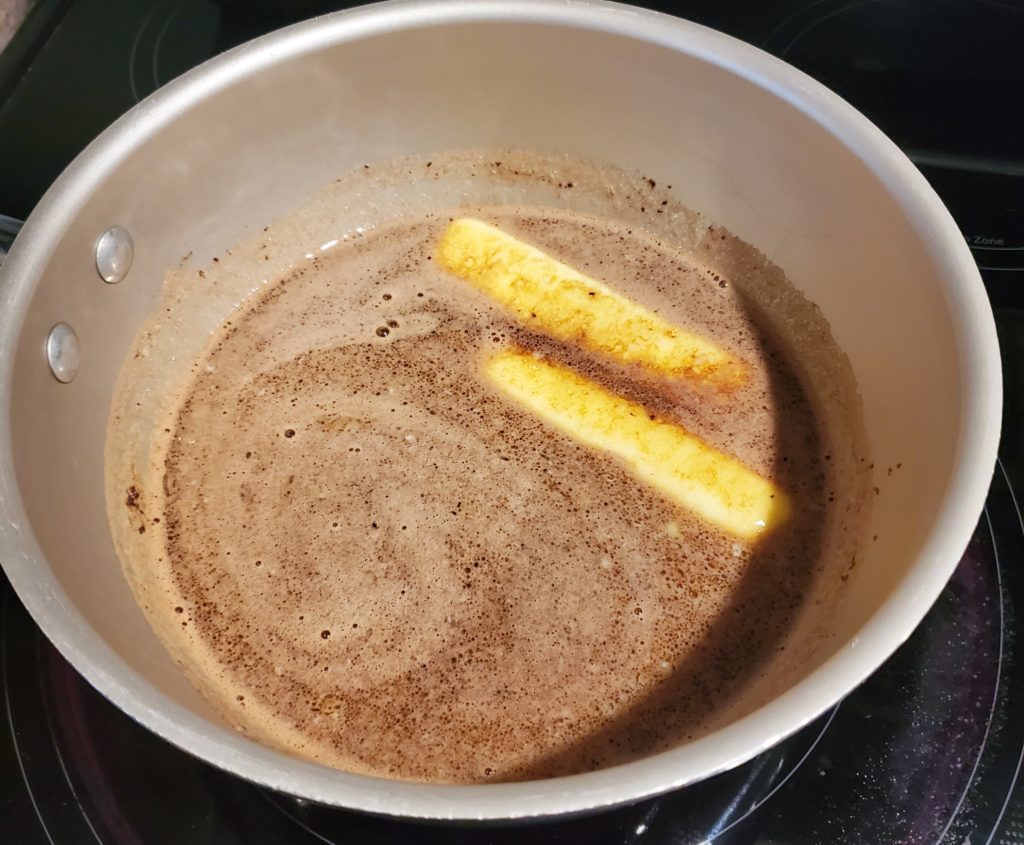
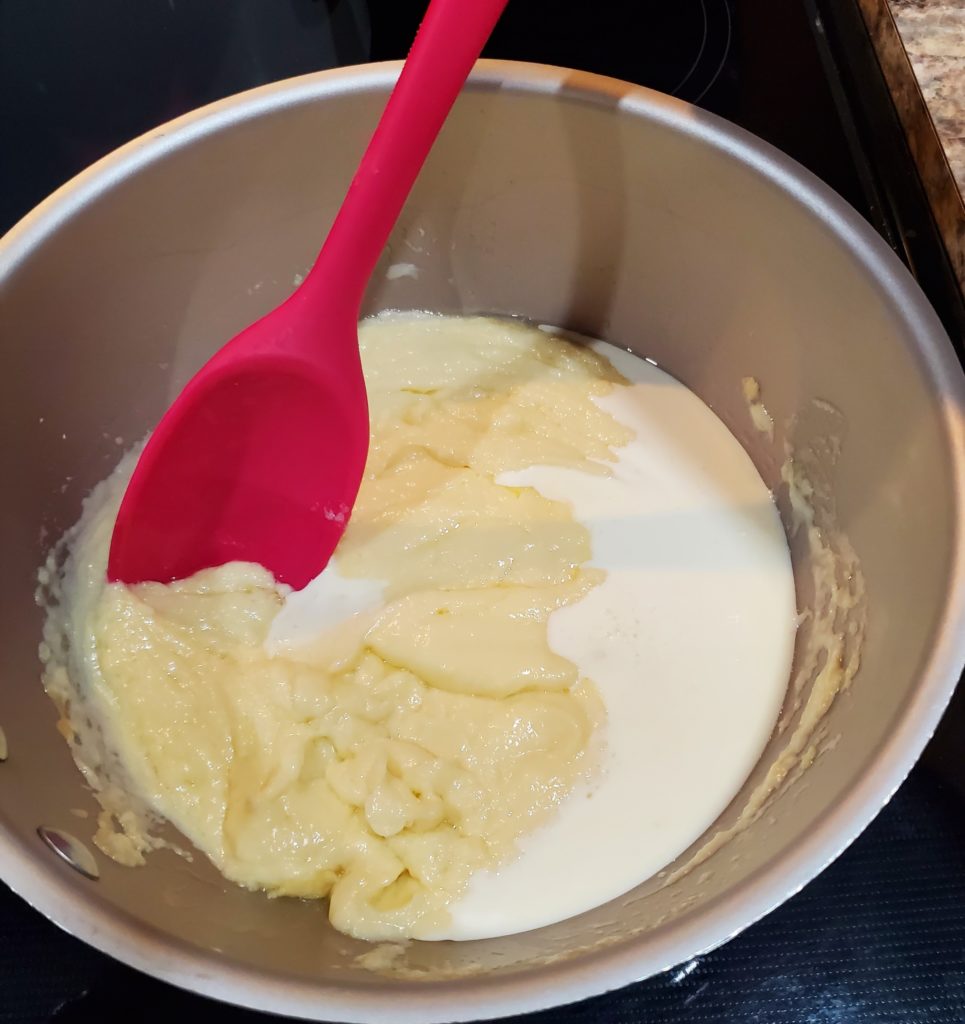
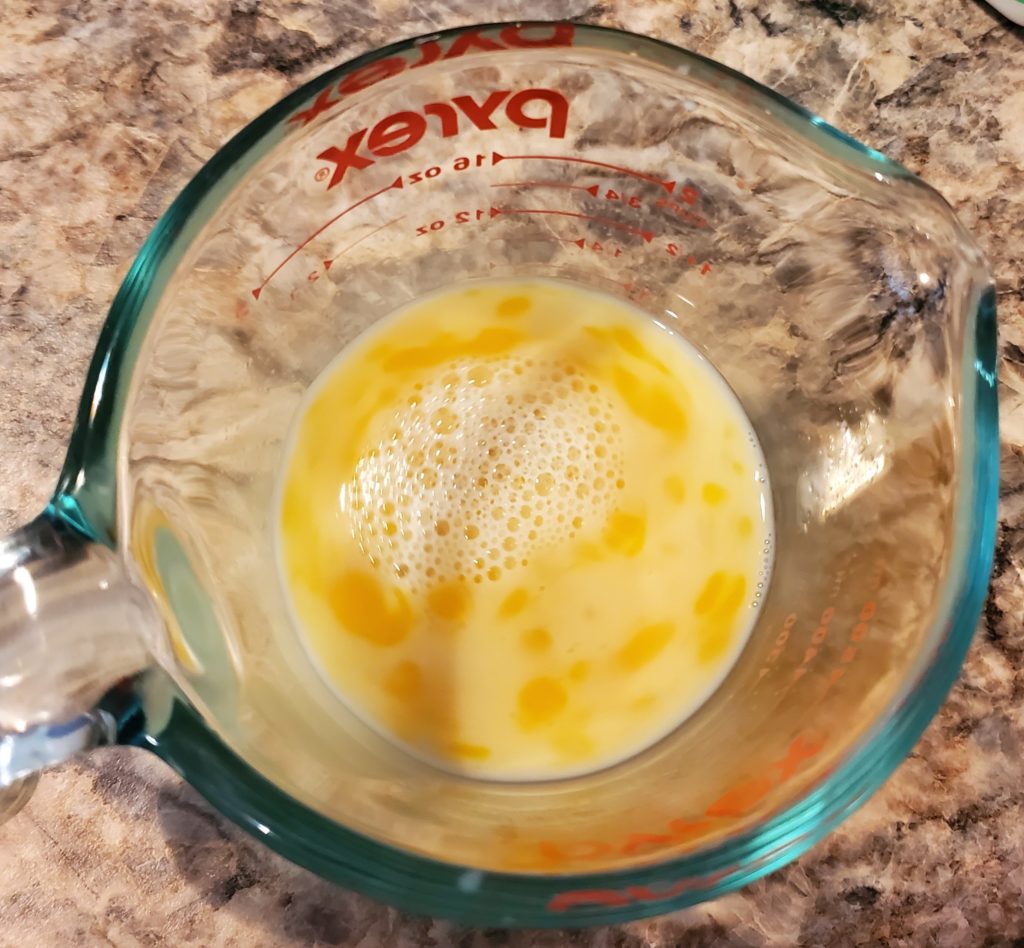
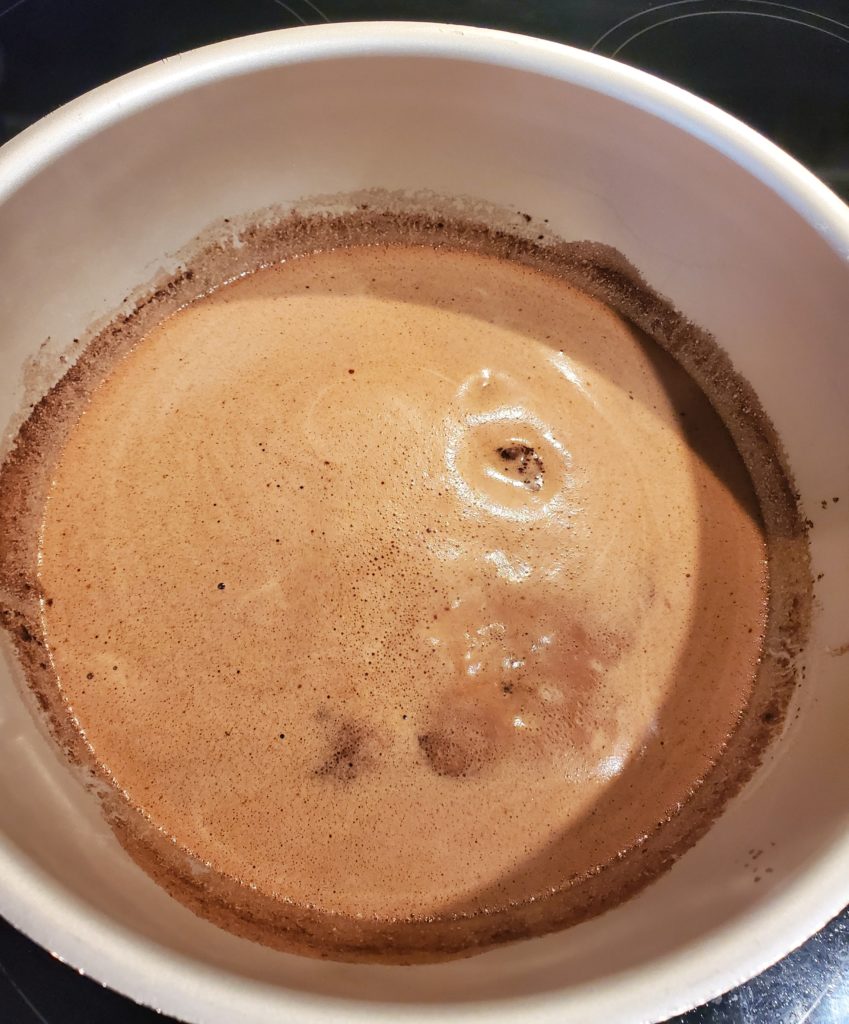
You want to bring it to a boil so that the liquid is bubbly and moving around. While I wait for it to boil, I move on to the next step of whisking 1/2 cup of milk, 1 teaspoon of vanilla, 1 teaspoon of baking soda and 2 eggs together. I measure the milk into my 2-cup measuring cup and then add in the rest of the ingredients. It’s easier to pour that way and I don’t end up with a dirty measuring cup and a dirty bowl!

The milk, vanilla, baking soda and eggs mixed together in a 2-cup measuring cup for this fudgy chocolate cake recipe

When the butter, water and cocoa powder reaches a boil, then it’s ready to remove from the stove.

The boiling cocoa powder mixture

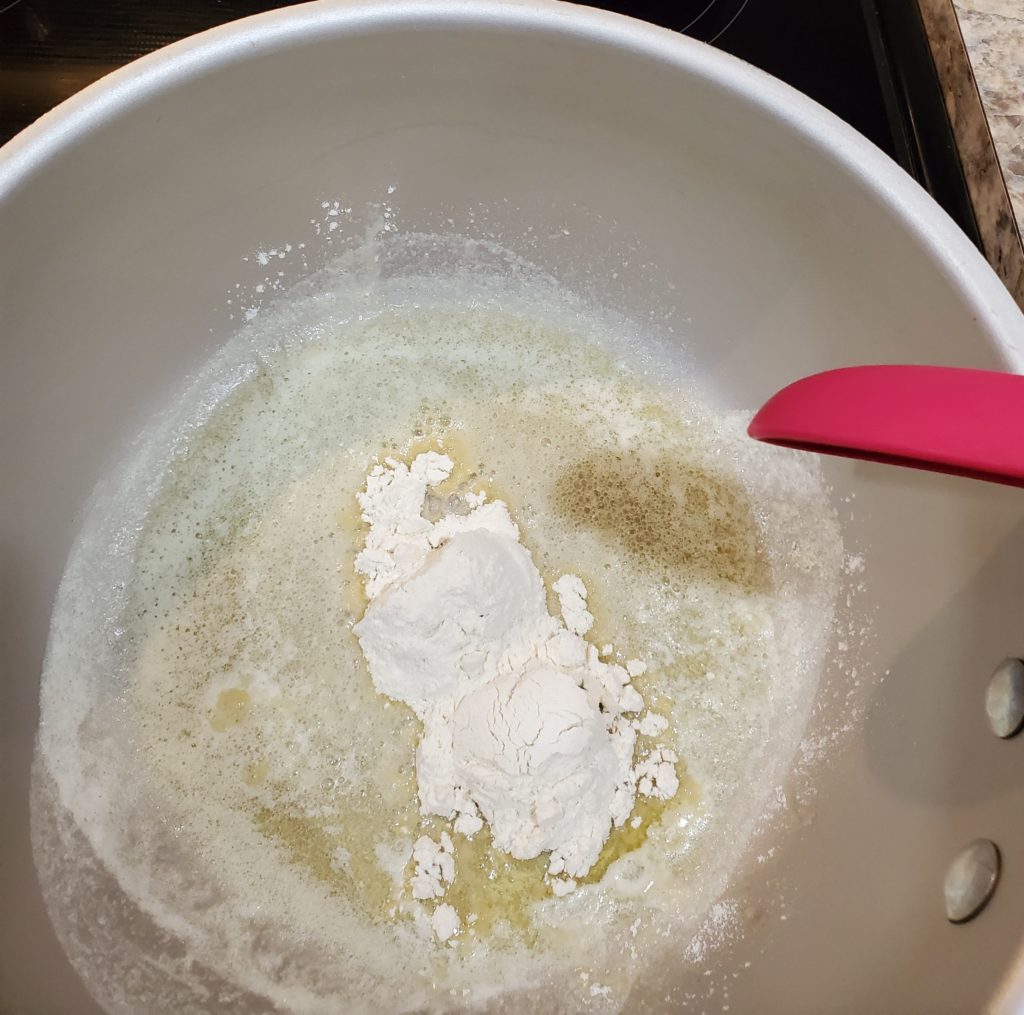
Pour the boiling mixture into the bowl with the flour and sugar mixture.

The boiling cocoa mixture poured over the flour and sugar mixture

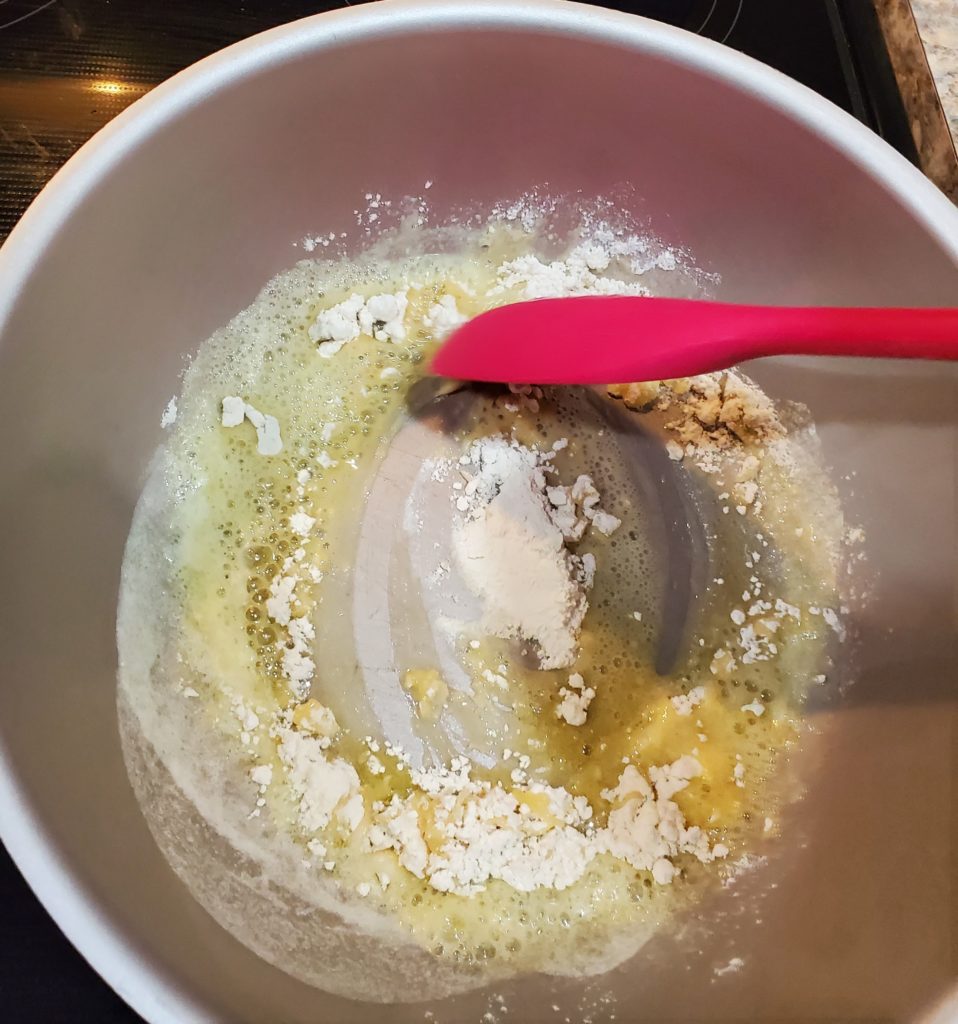
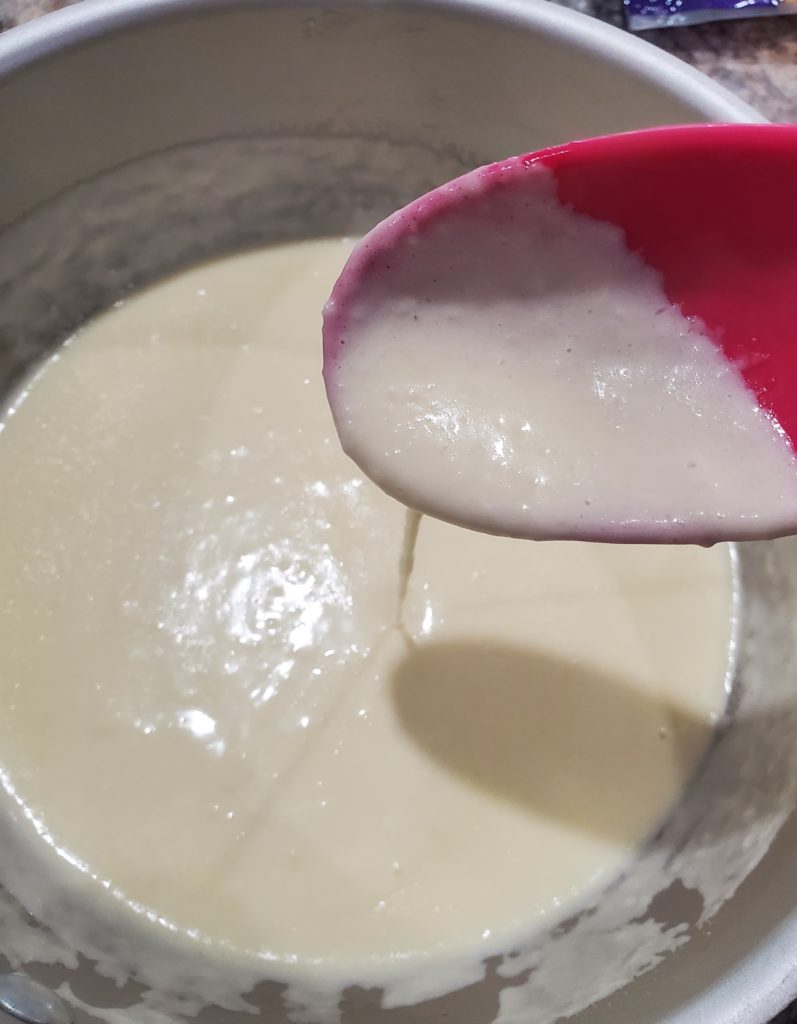
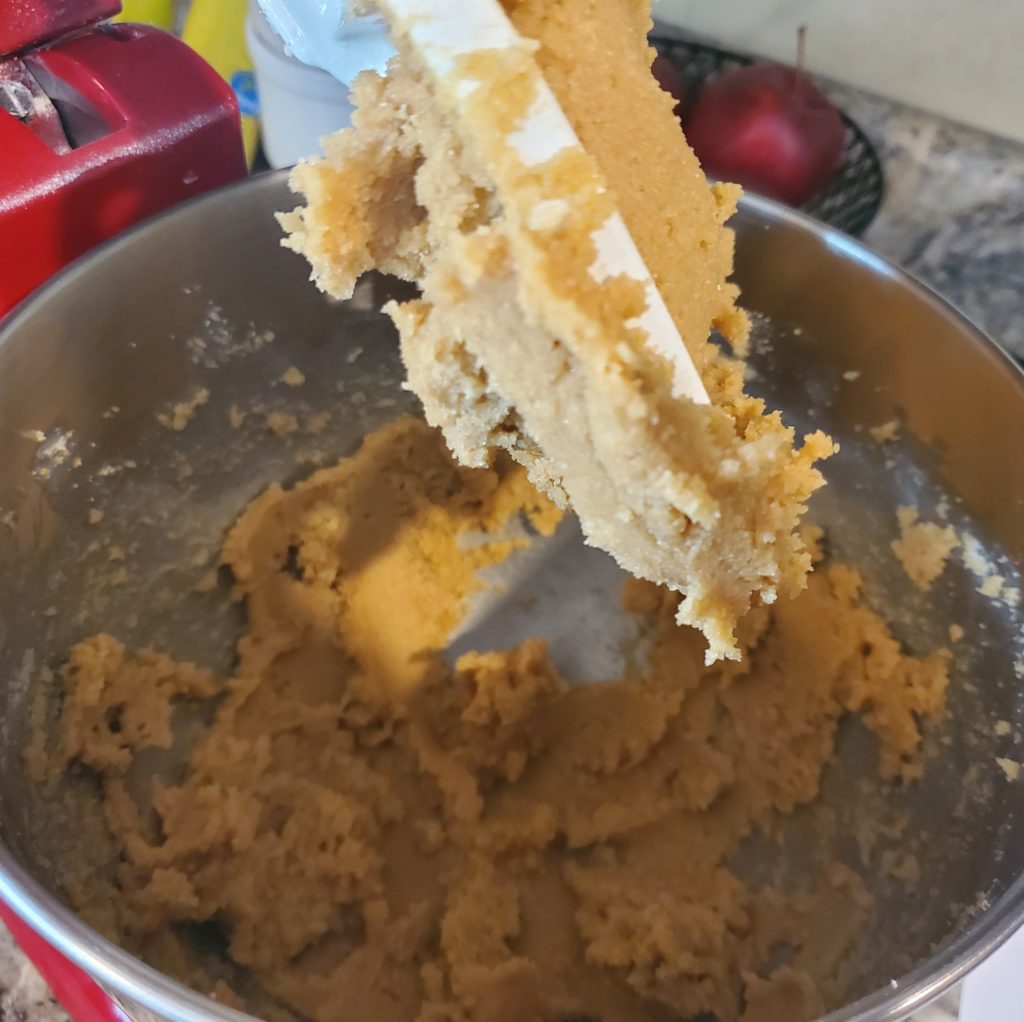
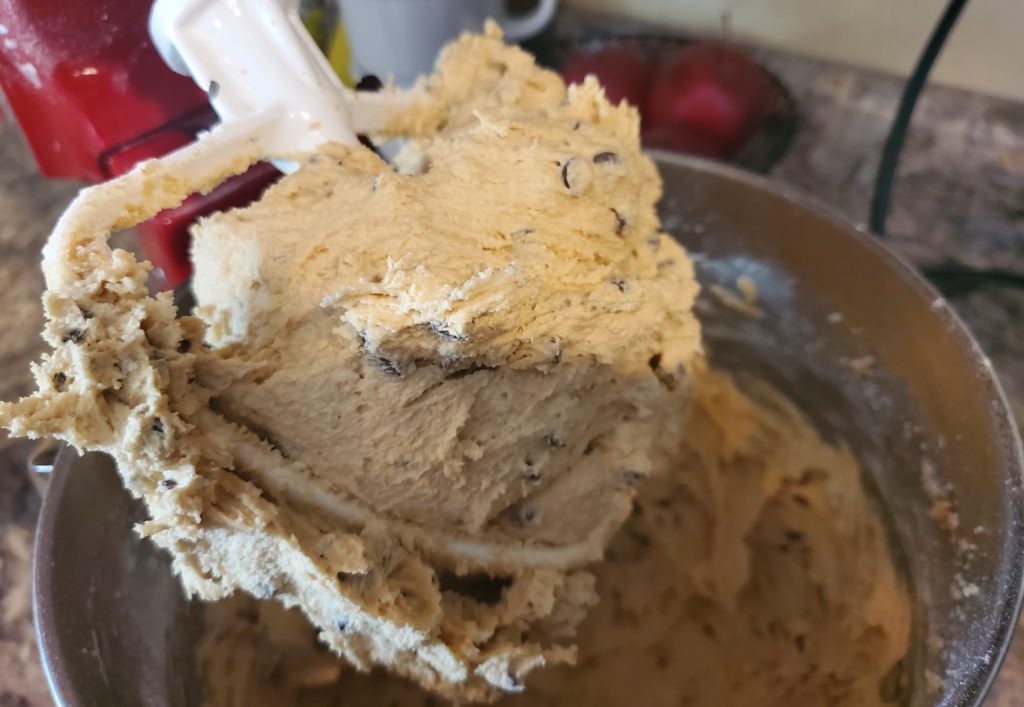
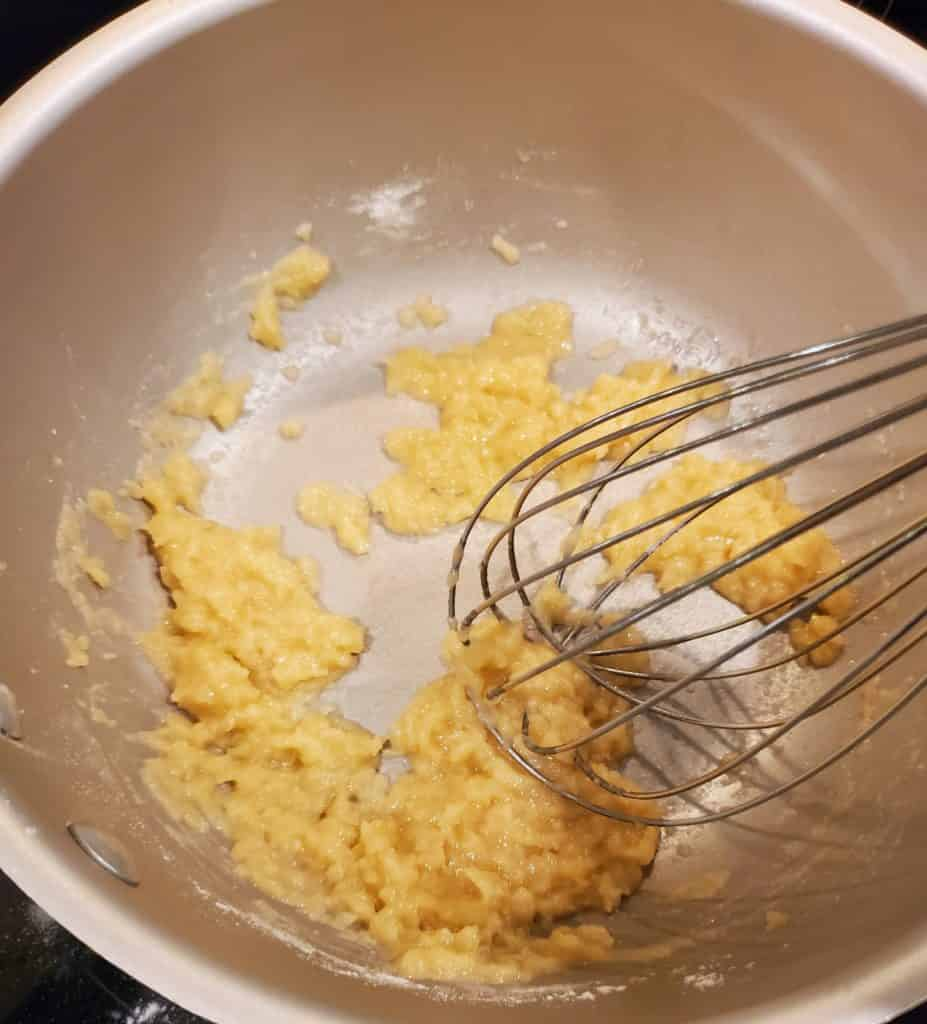
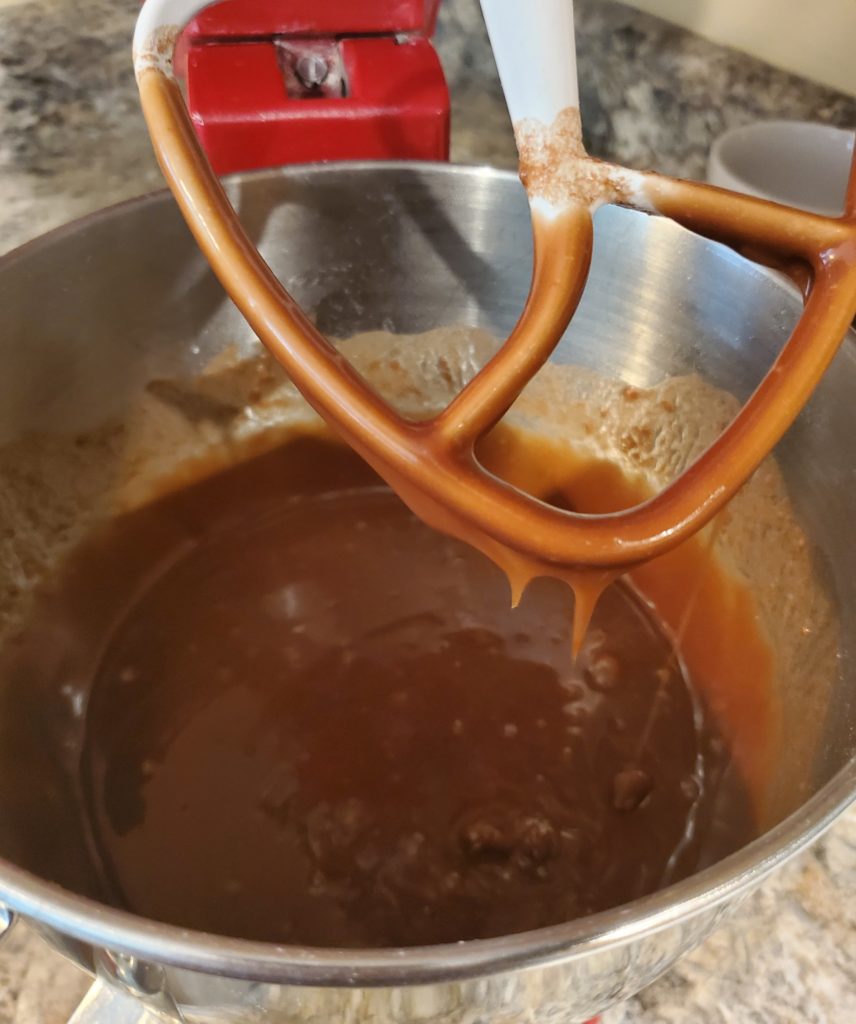
Stir the flour mixture and cocoa powder mixture together by hand or using a mixer. I use my stand mixer to make life easier. If you are using a mixer, start out on low speed until the ingredients have combined a bit before moving to medium speed to mix completely. If you start out too fast, then the boiling cocoa powder mixture will splash out. When it’s all combined the mixture will be loose.

The flour mixture and cocoa powder mixture all combined for this fudgy chocolate cake recipe

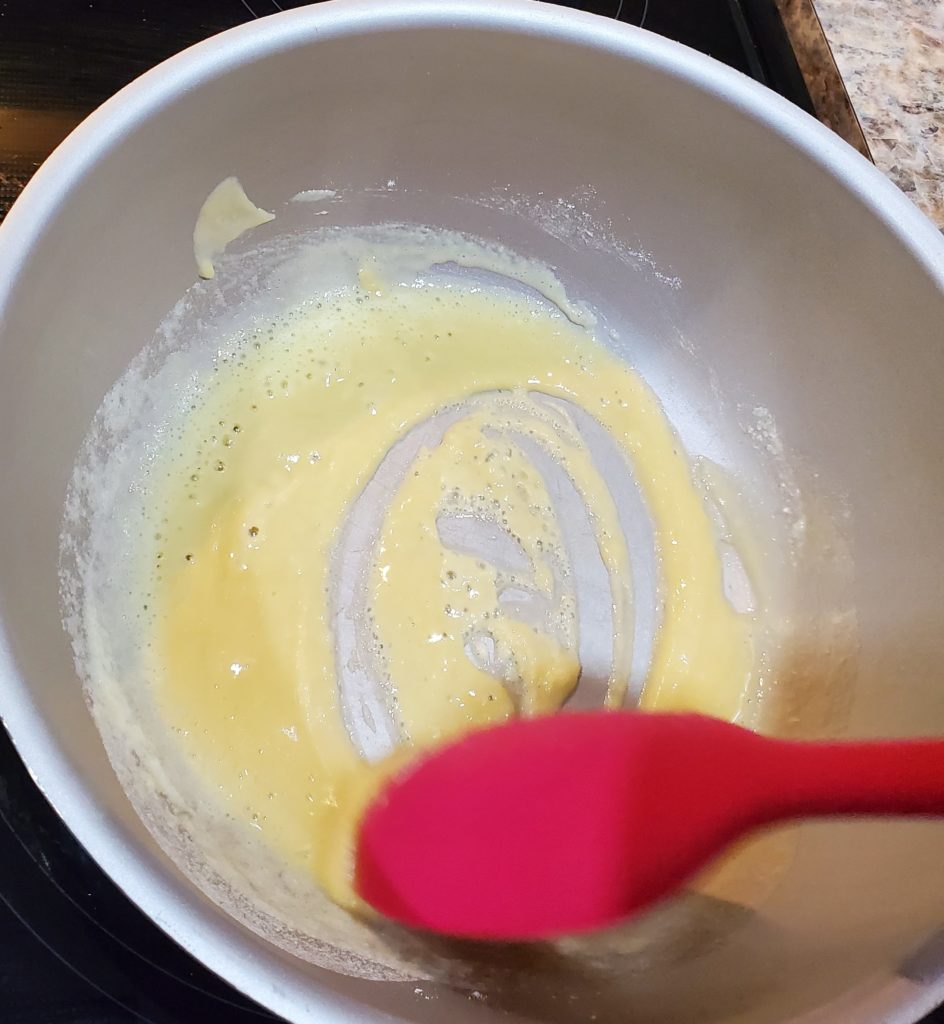
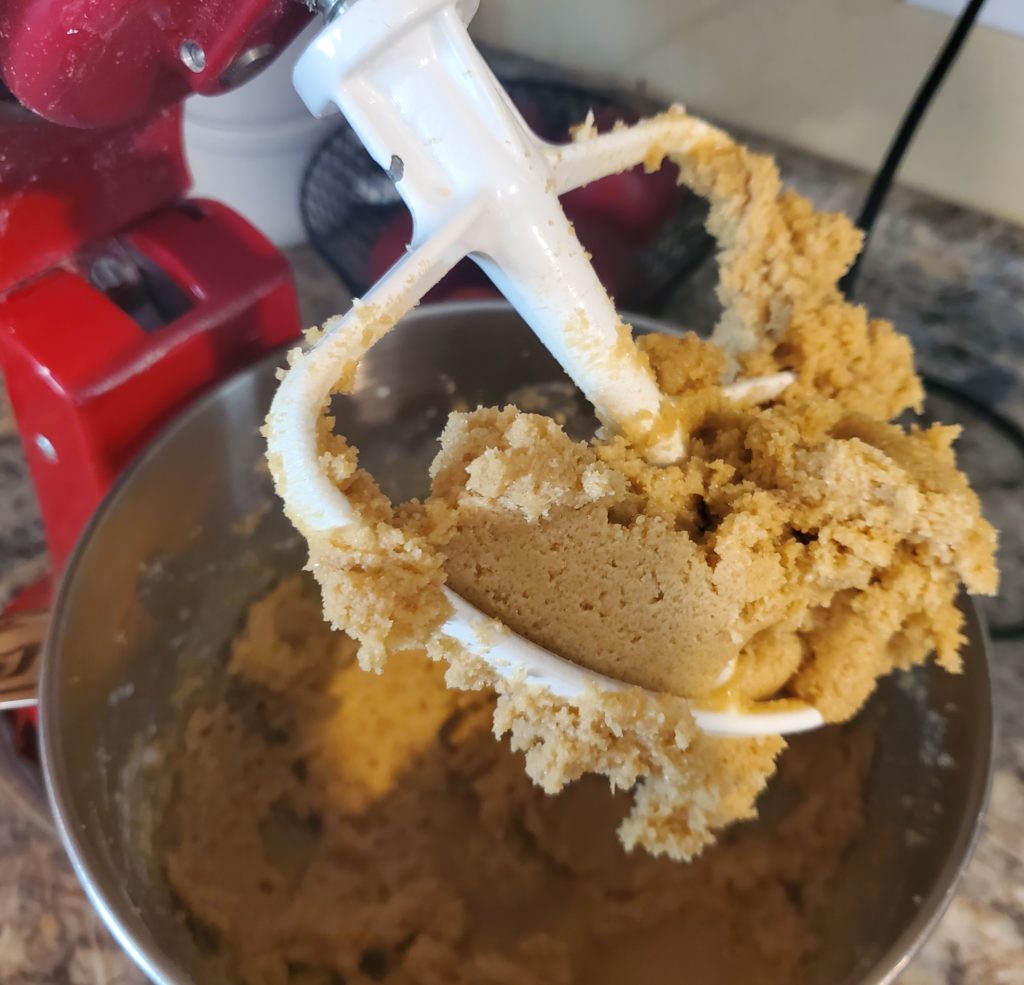
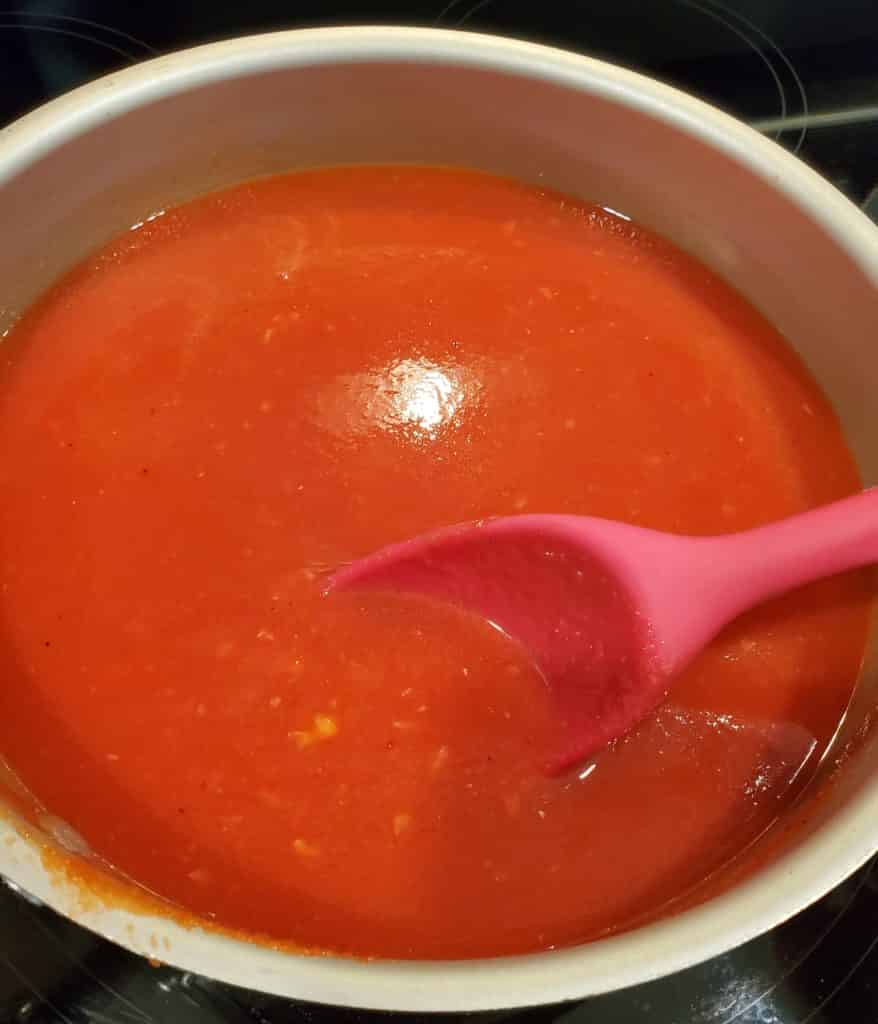
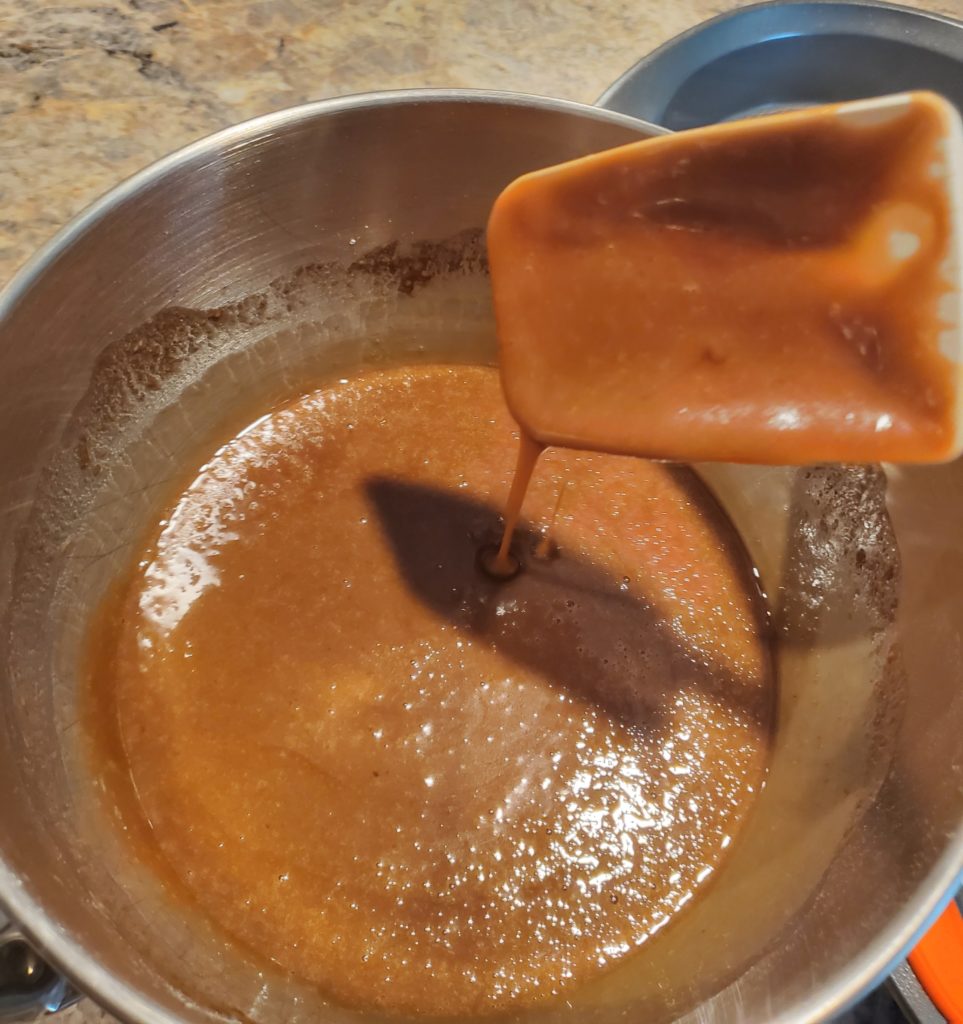
Add in the egg mixture and keep stirring or mixing until it’s incorporated. I usually add this in slowly while the mixer is running.

Once the egg mixture is incorporated, the cake batter is ready. It is going to be a thinner consistency than you might expect for cake batter, but that’s exactly correct!

The chocolate cake batter ready to be poured into the prepared cake pan(s)

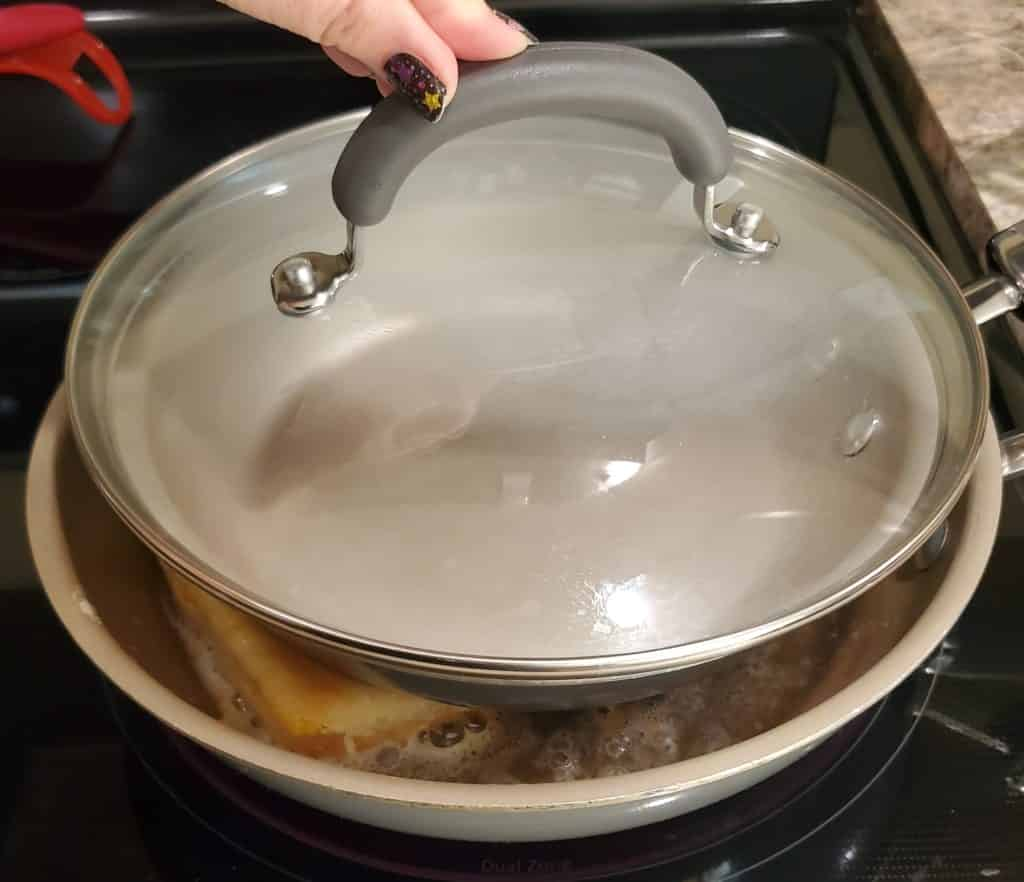
Pour the batter into your prepared cake pan(s), and place them in the oven.

The filled cake pans ready to go into the oven.

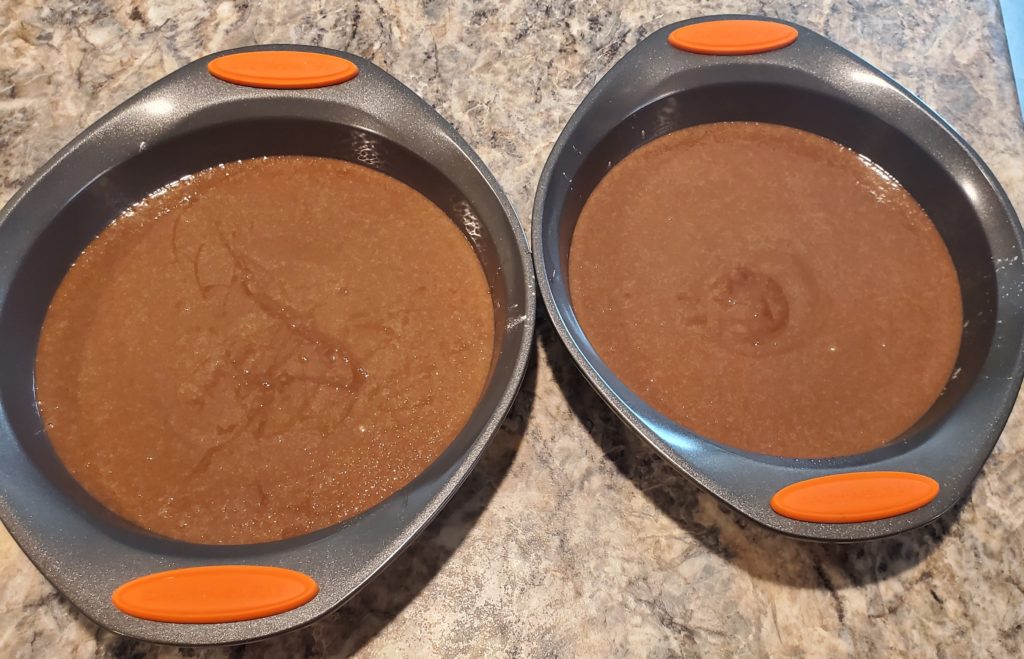
Bake for 25 to 30 minutes for two 9-inch pans or 30 to 35 minutes for a 9×13-inch pan. You’ll know the cake is finished when it begins to shrink away from the sides.

The baked fudgy chocolate cake shrinking away from the sides of the pan.

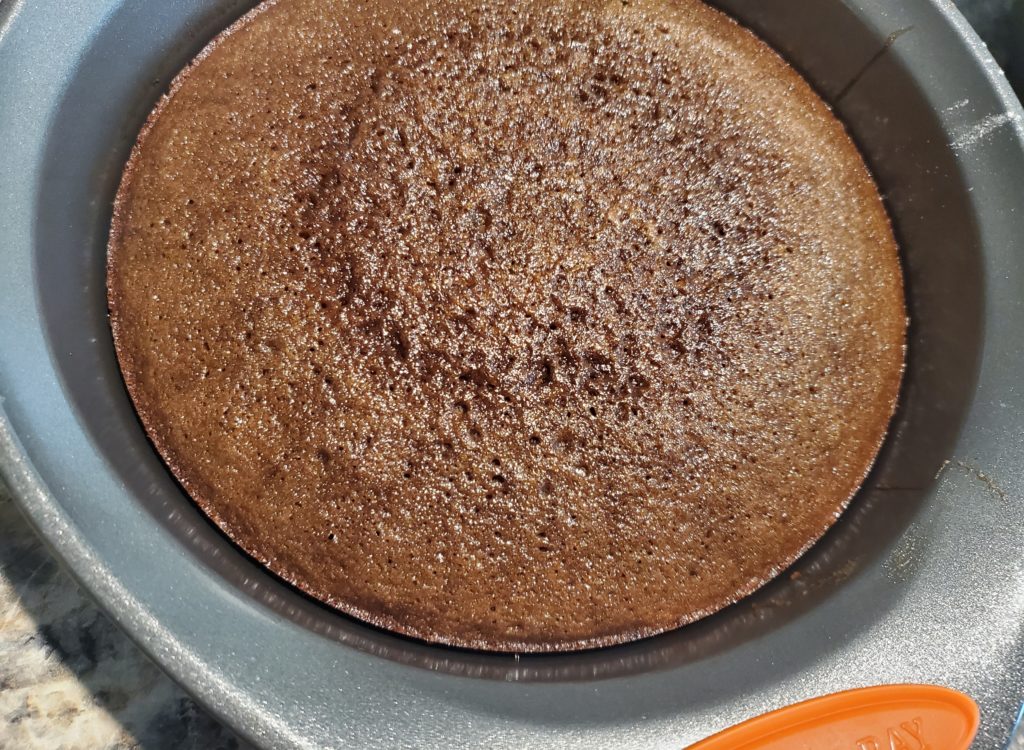
Let the cake cool for 10 minutes before removing it from the pan.

The finished cake out of the pan

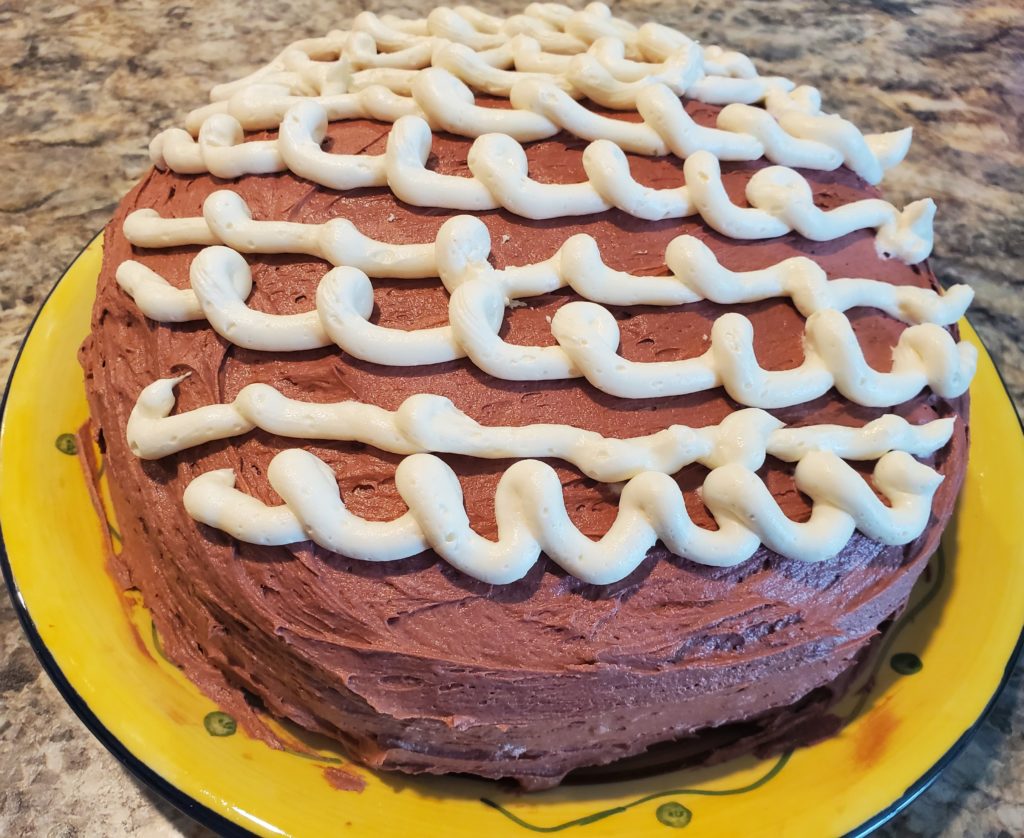
Let it cool completely before topping it with icing. This time around, I used my favorite quick, easy and oh-so-delicious homemade buttercream icing. I tinted it for the color to match the cake in the video game and did the swirl design in white like the same video game cake.

The completed and decorated fudgy chocolate cake

Look at the airy, yet moist inside of this fudgy chocolate cake recipe!

The inside of the completed fudgy chocolate cake recipe is both airy and moist!
Chocolate cake recipe Pinterest image 3

Fudgy chocolate cake

This is the all-time best fudgy chocolate cake recipe. It's both airy and moist. And this chocolate cake is way better than a bakery one!
Prep Time 20 minutes
Cook Time 30 minutes
Total Time 50 minutes
Course Dessert
Cuisine American

Ingredients
  

  • 2 cups white sugar
  • 2 cups all-purpose flour
  • 1 cup butter or margarine
  • 1 cup water
  • 3 tablespoons cocoa powder
  • 1/2 cup milk
  • 1 teaspoon vanilla
  • 1 teaspoon baking soda
  • 2 eggs

Instructions
 

  • Preheat the oven to 350-degrees (F). Prepare on 9×13 or two 9-inch cake pans by spraying with non-sticking cooking spray or coating with grease and then lightly sprinkling with flour.
  • In a large mixing bowl, combine the flour and sugar, then set it aside.
  • In a medium saucepan over medium heat, combine the butter, water and cocoa powder. Stir occasionally and cook until it comes to a boil.
  • While you're waiting for the cocoa powder mixture to boil, whisk together the milk, vanilla, baking soda and egg. Set aside.
  • Remove the boiling cocoa powder mixture from the stove and pour into the large mixing bowl with the flour and sugar. Stir together by hand or use a mixer to combine them thoroughly. (If you're using a mixer, be sure to start on low until the liquid has combined a bit before turning the mixer to medium.)
  • Once it is combined, pour in the egg mixture and mix until that is completely incorporated.
  • Pour the prepared batter (which will be relatively runny) into the prepared baking pan(s).
  • Bake in the oven for 35 to 30 minutes for 9-inch pans or 30 to 35 minutes for a 9×13-inch pan. You'll know the cake is finished when it starts to pull away from the edges of the pan.
  • Cool for 10 minutes before removing the cake from the pan. Cool completely before icing the cake.
Keyword Birthday cake, chocolate cake, fudgy chocolate cake, holiday baking, homemade cake, layer cake, scratch made

Find more delicious family recipes like this one in the “Favorite Recipes from Families with Grace” cookbook. Download your FREE copy today!

Favorite Recipes from Families with Grace cookbook
The Favorite Recipes from Families with Grace is a cookbook for modern families filled with easy-to-make, kid-friendly recipes you’ll love! #Cookbook #FavoriteRecipes #Freebie #DigitalDownload #WhatsForDinner #WeeknightDinner

The best baked mac and cheese with Ritz cracker topping

You’ll never have a better baked mac and cheese than this one inspired by a restaurant in St. Louis!

Nearly two years ago, we took a family vacation to St. Louis. We had a great time exploring the city and making lots of family memories. We also tried some incredible food. The hamburger from Hi-Pointe Drive-In was fabulous. Cookies from Insomnia Cookies hit a sweet spot. Floats from Fitz’s Root Beer were in their own category of sweet treats.

But, hands down, the most memorable for me was Salt + Smoke BBQ. My daughter and I went there solo while the boys ate elsewhere. The barbeque was good. Stupidly good. However, the baked mac and cheese with Ritz cracker topping stole my heart.

I literally said to my daughter as we were eating, “If I wasn’t already married to your dad, I’d marry this mac and cheese.” That may sound dramatic, but the mac and cheese really was that good. (I’m not even a big mac and cheese fan.)

Since we live a few hours away from St. Louis, I knew my odds of having that baked mac and cheese with Ritz cracker topping again were slim. If we go back someday, I’ll definitely hit it up. But until then, I’ve found and tweaked a recipe that tastes incredibly similar.

This baked mac and cheese with Ritz cracker topping has become a regular for Thanksgiving dinner at my house. I’ve served it to up beside sloppy joes. Most recently, I made it as a main dish and enjoyed every single bite of it. So much so that I seriously debated having its leftovers for breakfast the next day. You have got to try this simple recipe that only uses six ingredients (besides a bit of salt and pepper)!

Baked mac and cheese with Ritz cracker topping ingredients: triple cheddar shredded cheese, heavy whipping cream, flour, pasta shells, butter and Ritz crackers

Stovetop prep for the baked mac and cheese with Ritz cracker topping

Salt the water in a large pot and let it come to a boil, then add the pasta and cook until al dente, about 12 minutes. While the pasta cooks, preheat the oven to 300-degrees (F). The Salt + Smoke mac and cheese uses pasta shells, so that’s what I have used. You could use any pasta shape you prefer.

About four minutes before the pasta is finished getting, melt 2 tablespoons of butter into a medium saucepan over medium/high heat.

Butter for the baked mac and cheese with Ritz cracker topping melting in a medium saucepan over medium/high heat

When the pasta is finished cooking, strain it and return it to the pot, removed from the heat. Once the butter has melted, stir in 2 tablespoons of all-purpose flour. Cook for 1 to 2 minutes, stirring constantly. Here’s how it will look start to finish:

The flour and butter starting to be mixed for the baked mac and cheese with Ritz cracker topping
Add the flour to the melted butter.
Part way through mixing the flour and butter for this baked mac and cheese with Ritz crackers recipe
Stir the flour and butter constantly for 1 to 2 minutes.
The flour and butter mixture completely mixed together after cooking for 2 minutes over medium/high heat
How the butter and flour mixture looks when it is finished cooking.

Once the flour and butter are well combined and cooked together, begin adding in the heavy cream about 1/4 cup at a time. Let it mix in each time completely before adding more. It will go from a texture of runny oatmeal to mashed potatoes to pudding to sauce.

Starting to stir in the heavy cream for the baked mac and cheese with Ritz cracker topping
Adding the first 1/4 cup of heavy cream into the flour and butter mixture looks a bit like runny oatmeal.
Continuing to gradually stir the heavy cream in for this baked mac and cheese with Ritz cracker topping
As you keep adding, the cream, it starts to be more of a mashed potato consistency.

Once the cream is completely stirred in and the mixture is more sauce-like, continue cooking it over medium/high heat, stirring frequently. When it just starts to move around a bit, remove it from the heat. Do not let it boil. It will look like this:

The cooked sauce removed from the heat for this baked mac and cheese with Ritz cracker topping

Next, stir in 8 ounces of shredded cheddar cheese. Salt + Smoke uses white cheddar, I think, but I use triple cheddar blend because it’s easier for me to find. Add a dash of salt and pepper.

Stirring the cheese into the sauce for this baked mac and cheese with Ritz cracker topping
Pour the shredded cheese into the sauce.
Stir well until the cheese melts completely.

Getting it ready to bake

Once the cheese sauce is totally together, pour the sauce over the cooked and strained pasta.

The cooked pasta with the cheese sauce poured over the top of it for this baked mac and cheese with Ritz cracker topping

Stir together the sauce and pasta so it is well mixed and all the pasta is covered.

The pasta stirred together and coated with the cheese sauce for this baked mac and cheese with Ritz cracker topping

Transferred the coated pasta into a 9×13-inch baking dish, lightly sprayed with non-stick cooking spray. Use a spoon to spread it evenly throughout the dish.

The prepared mac and cheese being spread into a 9 x 13-inch baking dish

Crush the Ritz crackers for the topping and spread over the top of the prepared mac and cheese. I use about 8 to 10 Ritz crackers for this. I have store brand ingredients for everything except the crackers, because the buttery flavor of Ritz really does work best for this recipe. (Please note that I am in no way affiliated with or sponsored by Ritz crackers.)

The baked mac and cheese with Ritz cracker topping ready to go into the oven

Bake it in the preheated 300-degree oven for about 12 minutes until heated through. I often serve this with additional crackers on the side for added crunch if people want. Be sure to refrigerate any leftovers.

I promise this will become your favorite baked mac and cheese recipe! Look at this cheesy, yummy goodness!

A finished dish of the baked mac and cheese with Ritz topping
The cracker crust gives just a hint of crunch and extra buttery-ness!
A forkful of the finished baked mac and cheese with Ritz cracker topping
Doesn’t that just make your mouth water?!
Baked mac and cheese with Ritz cracker topping Pinterest image 4

Baked mac and cheese with Ritz cracker topping

This baked mac and cheese with Ritz cracker topping recipe is the best ever. With only 6 ingredients, it will quickly become a favorite!
Prep Time 20 minutes
Cook Time 12 minutes
Total Time 32 minutes
Course Main Course, Side Dish
Cuisine American
Servings 8 people

Ingredients
  

  • 1 pound medium pasta shells
  • 2 tablespoons salted butter
  • 2 tablespoons all-purpose flour
  • 2 cups heavy whipping cream
  • 8 ounces shredded cheddar cheese
  • 8-10 Ritz crackers crushed
  • salt & pepper to taste

Instructions
 

  • Bring a lot pot of salted water to a boil. Add the pasta and cook until al dente, about 12 minutes.
  • Preheat the oven to 300-degrrees (F).
  • About four minutes before the pasta is finished cooking, melt 2 tablespoons of butter in a medium saucepan over medium/high heat.
  • Add 2 tablespoons of flour to the butter and cook for 2 minutes, stirring constantly.
  • Drain the pasta and return it to its pot off the heat; set aside.
  • Slowly add the heavy cream to the butter and flour mixture. Stir in about 1/4 cup at a time, waiting until it's completely mixed in to add more.
  • Once the cream is all added, continue cooking over medium/high heat, stirring frequently, until the liquid starts to move. Do NOT let it come to a boil.
  • Remove the pot from the heat and stir in the 8 ounces of shredded cheddar cheese until completely melted and smooth. Add a dash of salt and pepper. (If you use unsalted butter, you may need to add more salt.)
  • Pour the cheddar cheese sauce over the cooked and drained pasta. Mix well so the sauce covers all the pasta.
  • Spritz a 9×13-inch baking dish lightly with non-stick cooking spray. Pour the pasta into the baking dish and spread it out evenly.
  • Crush the Ritz crackers by hand and sprinkle evenly over the top of the pasta.
  • Bake for 12 minutes until heated through. Serve immediately, and enjoy!
Keyword baked mac and cheese, carry-in, carry-in recipe, Christmas, family dinner, family friendly, family recipe, kid friendly, mac and cheese, macaroni and cheese, potluck, salt + smoke mac and cheese, Thanksgiving, weeknight dinner

Find more delicious family recipes like this one in the “Favorite Recipes from Families with Grace” cookbook. Download your FREE copy today!

Favorite Recipes from Families with Grace cookbook
The Favorite Recipes from Families with Grace is a cookbook for modern families filled with easy-to-make, kid-friendly recipes you’ll love! #Cookbook #FavoriteRecipes #Freebie #DigitalDownload #WhatsForDinner #WeeknightDinner

The best microwave baked potato recipe

Using the microwave and the oven for baked potatoes speeds up cooking time without compromising texture!

The best microwave baked potato recipe Pinterest image 2

I haven’t met a potato I didn’t like from cheesy party potatoes to mashed potatoes to potato soup to to french fries to potato chili, I love them all. When it comes to baked potatoes, I like them soft and tender. But baking them for hours isn’t really my jam. I don’t have time for that! Instead I take a trick from my mom using this microwave baked potato recipe. Because you start the potatoes in the microwave and finish them in the oven, they cook faster and you still get that nice oven-baked texture.

These microwave baked potatoes are incredibly easy. They’re perfect for weeknight or weekend dinners!

Microwave the baked potato

Turn your oven on to 450-degrees (F) to start preheating.

Before you put your baked potatoes in the microwave, you need to poke holes in the potatoes or else they will explode. I usually stab mine all over in random places with a fork. I don’t know that I need to make as many holes as I do, but I figure better safe than sorry. After all, I don’t want to clean up an exploded potato mess!

Raw potatoes on a plate being pierced with a fork

Put the potatoes on a microwave-safe plate, and then place them in the microwave. I cook them in the microwave at 100% power for about three minutes per potato. You can probably get away with two minutes per potato if they are smaller potatoes, but I usually do this with large ones and serve them as our main dish.

So, I cooked these three potatoes in the microwave for 12 minutes.

Prepare for the oven

A couple of minutes before the potatoes are finished in the microwave, I get set up to transfer them to the oven with a baking sheet, sheets of aluminum foil, vegetable oil with a tablespoon and coarse sea salt.

Set up to move the baked potatoes from the microwave to the oven with a baking sheet, aluminum foil sheets, vegetable oil with a tablespoon and coarse sea salt

When the microwave stops, take the potatoes out. The potatoes will be hot, so use oven mitts to pick them up one at a time to transfer them to the foil sheets.

Using an oven mitt to pick up a hot potato from the microwave

Once the potato is on a foil sheet, drizzle one tablespoon of vegetable oil over it.

A baked potato being drizzled with vegetable oil

Next, sprinkle the potato with the coarse sea salt, if desired.

A baked potato that has been drizzled with oil and sprinkled with coarse sea salt

Wrap the foil around the potatoes and place them onto a baking sheet. Cook them in the oven at 450-degrees (F) for 20 minutes.

Three potatoes wrapped in foil on a baking sheet and ready to go into the hot oven

Enjoy the potato

When the potatoes are finished cooking, take them out of the oven. Carefully open the foil to let them start to cool.

A hot potato fresh from the oven

Cut the potato open carefully and use a fork to mash the inside a bit, if you like it that way. (I sure do!)

A fully cooked baked potato with a soft center

Add your favorite toppings and you’re good to go! We usually have baked potatoes as our main dish, so I loaded this one up with butter, cheese, sour cream and bacon bits. On the night I took these photos, we had a total carb fest. I also served up this delicious homemade french bread! Another great pairing for these baked potatoes is my mom’s meatloaf with ketchup glaze.

A finished baked potato loaded with butter, cheese, sour cream and bacon bits

Microwave baked potato

This is the best microwave baked potato recipe because it starts in the microwave to cook faster but ends in the oven for a better texture.
Prep Time 10 minutes
Cook Time 52 minutes
Total Time 1 hour 2 minutes
Course Side Dish
Cuisine American
Servings 3 people

Ingredients
  

  • 3 large russet potatoes
  • 3 tablespoons vegetable oil
  • 1 teaspoon coarse sea salt optional
  • baked potato toppings as desired like butter, sour cream, cheese, bacon bits, etc.

Instructions
 

  • Preheat the oven to 450-degrees (F).
  • Scrub your potatoes until they're clean. Pierce each potato in numerous places with a fork to make holes.
  • Put the potatoes on a microwave-safe plate and cook in the microwave for 3 minutes per large potato. (For three large potatoes, cook for 12 minutes.)
  • Just before the potatoes finish in the microwave, get out sheets of aluminum foil to hold the potatoes along with a baking sheet, the vegetable oil and the salt, if desired.
  • Carefully transfer one potato at a time to a sheet of aluminum foil. (I use oven mitts for this because the potatoes are hot!)
  • Drizzle the potatoes with 1 tablespoon each of the vegetable oil. Sprinkle with the salt, if desired.
  • Wrap the potatoes in the foil, place them on a baking sheet and cook in your preheated oven for 20 minutes.
  • Carefully peel back the foil from the baked potatoes, cut them and serve them with your favorite baked potato toppings.
Keyword baked potato, family dinner, family friendly, microwave cooking, potato, weeknight dinner

Meatloaf recipe with ketchup glaze

My all-time favorite meatloaf recipe

There are so many different ways to make meatloaf. I’ve seen it with brown gravy over the top. Sometimes it’s dry. Other times it’s spicy. But, my all-time favorite meatloaf recipe topped with ketchup glaze comes from my mama. It’s one of my favorite dishes she makes.

Meatloaf recipe Pinterest image 3

I hadn’t made meatloaf myself until more recently. My husband and son won’t eat it. They don’t eat much meat. But after trying various meal kit delivery services, I learned making two different dinner options was sometimes worth it. I tried out some meatloaf recipes, and they were good enough. However, they weren’t my mom’s.

For just over a year, my parents have lived states away from me instead of five minutes away from me. So when they were here for a visit in the fall, I asked my mom to make meatloaf. She not only made it, but also froze some meatloaf patties that my daughter and I enjoyed later on for dinners. When my parents were back for my son’s recent birthday, I knew I had to write down her recipe, take photos and share it with you guys as well!

This meatloaf recipe is home-cooking at its finest. It’s not fancy, but it’s hearty and delicious. Serve it up with mashed potatoes or cheesy party potatoes and oven-roasted vegetables for a complete meal.

Figure out the meat

So the issue here is what kind of meat to use. You can use all ground beef (we use chuck at 80/20 fat) or a mix of ground beef and ground pork or sausage. It’s good all the ways! This particular time, we made it with the mix of ground beef and ground pork, because I had some leftover ground pork I wanted to use.

If you do use a mixture of meat, you want to use 3/4 ground beef and about 1/4 ground pork or sausage. We used 2.5 pounds of meat total for five adults (with leftovers), which broke down to 2 pounds of ground beef and 1/2 pound of ground pork.

The fresher your meat is, the better the meatloaf will be. If you have a butcher or butcher’s case at your grocery store, go with ground meat from there. You don’t need it to be all-organic and grass-fed (unless that’s your thing). You just want fresh. However, this time around, we used frozen meat I had, and it was still incredibly good.

Mix up your meatloaf

Switch your oven on to 350-degrees (F) to get it preheating, and then start mixing your meatloaf. Put all of the meat into a large mixing bowl. Add 1 egg, 1 teaspoon of sage (unless you use sausage, in which case omit this), salt, pepper, 1/2 cup diced onion, 3 tablespoons of ketchup and 3 tablespoons of honey barbeque sauce.

The meatloaf ingredients (minus the glaze ingredients) in a large mixing bowl ready to be combined

Cut up about three slices of bread into small pieces. You an use whatever bread you have. This time, I had leftover french bread from serving slow cooker potato soup for dinner a couple of nights prior, so I used that. But regular sandwich bread works. In a pinch, crumbled crackers can work as well.

Chopped bread crumbs ready to go into the meatloaf recipe

Add the bread pieces into the meat mixture and mix it all together well. You can use a spoon for this or your clean hands to do so. I think using your hands is easiest, but do what works for you.

The meatloaf ingredients all mixed together and ready to go into the pan

The next step in this meatloaf recipe is putting the meat into a 9×13 baking dish. My mom’s tip is to make a bit of a “well” around the meat in between the meat and the pan. The grease will collect there and be easier to drain off.

The meatloaf in the pan, with a small amount of space between the meat and pan, that's ready to go into the oven

After your meatloaf is in the pan, top it with the 6 ounces of tomato paste. Cover the pan with aluminum foil and place the meatloaf in your preheated oven for 45 minutes.

Finish the meatloaf

About five minutes before the 45-minute mark, mix up your glaze. The ketchup glaze in this meatloaf recipe is probably my favorite thing about it! Mix together 2 tablespoons of brown sugar, 2 tablespoons of ketchup and 2 tablespoons of honey barbeque sauce.

Pull the meatloaf out of the oven. The tomato paste will have baked into the top a bit and grease will have gathered around the sides.

The meatloaf after having baked covered for 45 minutes with the grease around the edges

If you want, an optional step for this meatloaf recipe is to drain off some of the grease. That’s what we chose to do. Here is what it looked like after we drained the grease.

The meatloaf after draining some of the grease out of it

Next, it’s time to spread the ketchup glaze over the meatloaf. Spread the mixed up glaze right on top of the tomato paste.

The meatloaf recipe topped with the ketchup glaze and ready to finish baking in the oven

Put the meatloaf back into the oven, uncovered, for 15 more minutes. Let it set for about five minutes and then slice and put onto a plate for serving. (You want to move it to a plate to serve from because baking the second time will create more grease that you don’t want the meat sitting in.)

Serve up with some cheesy party potatoes, oven-roasted vegetables or mashed potatoes and enjoy!

A slice of delicious meatloaf with ketchup glaze alongside some mashed potatoes
Meatloaf recipe Pinterest image 2

Meatloaf recipe with ketchup glaze

This meatloaf recipe with ketchup glaze is my mom's long-time recipe that makes the best meatloaf hands down. You've got to try it!
Prep Time 15 minutes
Cook Time 1 hour
Total Time 1 hour 15 minutes
Course Main Course
Cuisine American
Servings 6 people

Ingredients
  

  • 2 pounds ground beef
  • 0.5 pounds ground pork
  • 8 ounces tomato sauce
  • 3 slices bread chopped
  • 1/4 teaspoon sage
  • 1 egg
  • 1/2 cup onion diced
  • 5 tablespoons ketchup divided
  • 5 tablespoons honey barbeque sauce divided
  • 6 ounces tomato paste
  • 2 tablespoons brown sugar

Instructions
 

  • Preheat the oven to 350-degrees (F).
  • Put the ground beef and ground pork into a large mixing bowl. Add in the tomato sauce, bread, sage, egg and onion.
  • Add 3 tablespoons of ketchup and 3 tablespoons of barbeque sauce, and mix the ingredients well.
  • Put the meat mixture into a 9×13 baking dish. Flatten it out to the same thickness throughout and leave a small space between the sides of the dish and the meat.
  • Spread the tomato paste over the top of the meat. Then cover with aluminum foil and baked for 45 minutes.
  • About 5 minutes before the meatloaf is finished with the first round of baking, mix together 2 tablespoons brown sugar, 2 tablespoons ketchup and 2 tablespoons barbeque sauce to form the ketchup glaze.
  • Remove the meatloaf from the oven. If desired, drain some of the grease from the meatloaf. Then spread the glaze over the top of the tomato sauce.
  • Put the meatloaf back into the oven, uncovered, for an additional 15 minutes.
  • Remove the meatloaf from the oven and let it set for five minutes before slicing and transferring to another plate to serve.
Keyword family dinner, family recipe, ketchup glaze, kid friendly, meatloaf, traditional recipe

Edible chocolate chip cookie dough you can make in minutes!

A delicious cookie dough dessert without any raw eggs

I love chocolate. A lot. A super lot. My favorite cookies are chocolate chip cookies. And I definitely enjoy some chocolate chip cookie dough when I’m baking them.

But, I don’t eat it otherwise, because the risk of salmonella. My son loves chocolate chip cookie dough ice cream. So when I discovered an easy recipe for edible chocolate chip cookie dough, I knew I had to try it.

Edible chocolate chip cookie dough Pinterest image

I first made it in 2020 when we were spending lots of time at home thanks to COVID-19. Since then, I’ve made this edible chocolate chip cookie dough multiple times and learned a few things along the way.

The first being that I need to double the recipe. Making just the amount for the original recipe isn’t nearly enough for my family!

I’ve made a couple of other tweaks to the recipe and it’s the absolute best. I just made a couple of batches for my son’s 10th birthday and knew I had to share the recipe for this edible chocolate chip cookie dough. I can’t keep the deliciousness to myself!

Prepare the flour

My concern in eating raw chocolate chip cookie dough used to be just the salmonella in the eggs. However, I’ve more recently learned raw flour also poses a risk.

Processing grains into flour doesn’t kill the bacteria in the flour. So this recipe starts with cooking the flour to get rid of the bacteria.

The good news is that you can do this easily in your microwave. Pour two cups of all-purpose flour into a microwave-safe bowl and microwave in 30-second increments, stirring after each 30 seconds, until the flour reaches 165-degrees (F). My microwave usually does this in two run-throughs.

A bowl of flour to heat-treat for the edible chocolate chip cookie dough recipe

I grab my kitchen thermometer and really do measure the temperature for this process to be sure. If you don’t have a kitchen thermometer, then just heat the flour for at least 1 minute in 30-second increments.

Mixing the cookie dough

Once your flour is all prepped and ready to go, you just need to mix together all the ingredients. I use my beloved stand mixer, Dorothy, for making this edible chocolate chip cookie dough, but you can also use a hand mixer or spoon.

Put your prepared flour to the side and beat the 2 sticks of room temperature butter with 2 cups of packed brown sugar.

The butter and brown sugar in a mixing bowl ready to cream together for this edible chocolate chip cookie dough recipe

You’ll know it’s creamed when it is thoroughly combined and fluffy.

The creamed butter and brown sugar in the mixing bowl

Next, add in 1/4 cup milk, 2 teaspoons vanilla extract and 1 teaspoon of salt. Mix the ingredients together. (Be sure to slow down your mixer before adding in the wet ingredients to avoid getting splashed by them. Yes, I speak from experience!)

The mixture should be thick, but still wet and clumpy.

The mixture with the milk, vanilla and salt added into it

Now you’re ready to put treated flour to work. Mix it into the mixture in stages. I usually put it in with a heaping tablespoon at a time.

The mixing bowl with a tablespoon of flour ready to pour into the mixer and begin combining it for this edible chocolate chip cookie dough recipe

Once the flour is all mixed in, you should have the consistency of chocolate chip cookie dough that is thick and soft.

The thick, but soft "dough" that forms for this edible chocolate chip cookie dough recipe

Finally, it’s time to stir in the chocolate chips. You could use full-sized semi-sweet chocolate chips for this recipe, but the mini ones work better and are easier to eat.

I use my stand mixer’s “stir” setting to stir in the chocolate chips, but you could also do it by hand. You want to avoid a higher setting that will break up the chips.

The finished edible chocolate chip cookie dough in the stand mixer

Transfer the edible chocolate chip cookie dough into an airtight container and store it in the refrigerator. I can’t tell you how many days it lasts in the fridge beyond two or three, because my family doesn’t keep it around for long!

The edible chocolate chip cookie dough in an airtight container ready to go into the fridge

Serve it by itself, alongside fudgy brownies, with ice cream or however you think sounds best!

A "scoop" of edible chocolate chip cookie dough in a bowl with a spoon ready to be devoured!
Edible chocolate chip cookie dough Pinterest image

Edible Chocolate Chip Cookie Dough

This edible chocolate chip cookie dough recipe is delicious and easy. Eat it by the spoonful, with ice cream or with any other dessert!
Total Time 15 minutes
Course Dessert
Cuisine American

Ingredients
  

  • 2 sticks salted butter room temperature
  • 2 cups brown sugar packed
  • 1/4 cup milk
  • 2 teaspoons vanilla extract
  • 1 teaspoon salt
  • 2 cups flour heat treated (see instructions below)
  • 1 cup mini semi-sweet chocolate chips

Instructions
 

  • Heat treat the flour to kill any bacteria contained in it by placing it in a microwave-safe bowl and "cooking" it in the microwave for 30 seconds at a time, stirring between each 30 seconds, until the temperature throughout reaches 165-degrees (F). Set the flour aside.
  • In a stand mixer or using a handheld mixer, add the butter and brown sugar. Beat together until well combined and fluffy.
  • Turn the speed down and add in the milk, vanilla and salt. Mix until combined.
  • Slowly add in the heat-treated flour at low to medium speed until it is well mixed into a soft, thick "dough."
  • Stir in the chocolate chips.
  • Put the edible chocolate chip cookie dough into an airtight container and store in the refrigerator. Enjoy!
Keyword chocolate chip cookie dough, easy dessert, edible chocolate chip cookie dough, no bake dessert

“Grilled” hot dogs from the oven

Baked hot dogs have a fresh-from-the-grill flavor any time of year!

Affiliate links are used in this post, if you make a qualifying purchase via my link, I receive a small percentage of the sale at no additional cost to you. I only recommend products and services I use and love. It helps support my blog, so thank you for your support! Read my full disclosure here.

The first year my husband and I were married, he told me he liked hot dogs. Since he’s a relatively picky eater and I was a relatively awful cook, I made hot dogs. A lot. As a result, the guy won’t eat boiled or microwaved hot dogs any more.

Nothing beats a good grilled hot dog, unless it's freezing outside! This baked hot dog recipe is super simple and just as tasty as grilled!

As a Midwestern resident, I decided to look for a winter-friendly way to get a grilled hot dog taste that didn’t involve anyone standing out in the cold at the grill. I decided to try baked hot dogs and was pleasantly surprised. Even my husband agreed that baked hot dogs were nearly as good as grilled.

Picking the hot dogs

When it comes to hot dogs, my husband prefers what I call “old school” dogs. We skip the specialty or all-beef hot dogs. Bun length dogs don’t even have a place in our home. And forget the extra thick guys. So, we get regular length, skinny dogs. That’s all I’ve tried baking in the oven. If you are baking thicker or longer hot dogs, you may have to have a longer baking time. Just beware of that.

Let’s get baking!

This is an incredibly simple and straightforward recipe. Start by preheating the oven to 400-degrees (F). Line a baking dish with aluminum foil. I spritz mine very lightly with non-stick cooking spray, but I’m not sure that’s necessary.

For my family of four, I use my 8×8-inch glass baking dish. It easily fits eight hot dogs.

9x9 glass baking dish lined with aluminum foil that's been spritzed with non-stick cooking spray

Next, just put the hot dogs into the pan in one layer. (How simple is that?!)

Uncooked hot dogs in a foil-lined pan ready to go into the oven

Pop the hot dogs into your preheated oven. They baked for 15 minutes total. (Maybe more if they are thicker.) I usually set my time for 7 minutes and shake the baked hot dogs around halfway through. If you really want crispy or blackened hot dogs, you can broil them for the final couple minutes of baking time to the correct doneness. We like ours to be cooked with a bit of crisp on the outside but not color.

Baked hot dogs fresh from the oven that are a nice golden brown

And that’s it. I told you this was a simple recipe! Serve the hot dogs in buns with your favorite toppings. The baked hot dogs pair well with this super easy fire-roasted corn and red peppers. If you’re looking for a crunchy side, try this skillet queso with tortilla chips. And whip up some mint chocolate chip mousse for a simple and refreshing dessert!

Baked hot dogs

Nothing beats a good grilled hot dog, unless it's freezing outside! This baked hot dog recipe is super simple and just as tasty as grilled!
Prep Time 3 minutes
Cook Time 15 minutes
Total Time 18 minutes
Course Main Course
Cuisine American

Ingredients
  

  • 1 package hot dogs

Instructions
 

  • Preheat the oven to 400-degree (F).
  • Line a baking dish with aluminum foil. (The size of the dish depends on how many hot dogs you're making. You need enough space for them to be in a single layer.) Spritz lightly with non-stick cooking spray.
  • Arrange the hot dogs in a single layer on top of the foil.
  • Bake in the preheated oven for 15 minutes or until cooked through and golden. To add extra crispness or darkness, broil on low for the final 2 to 3 minutes of cooking time.
  • Serve with your favorite hot dog toppings!
Keyword baked hot dog, easy dinner, family dinner, grilled hot dog, Hot dog, Hot dogs, kid friendly, weeknight dinner

Fire-roasted corn and red peppers

A super simple side dish for family dinner

Fire-roasted corn and red peppers Pinterest image

When it comes to making dinner, I love easy recipes. And super simple sides that work in veggies are the best! I found a recipe for fire-roasted corn and red pepper salad that I decided to try without looking too closely. When I realized it was intended to be served cold, I decided to change it up and make it my own way. That’s how this fire-roasted corn and red peppers side dish was born.

It’s nearly as easy as oven roasted vegetables and certainly as tasty. It comes together in about 10 minutes and doesn’t take much babysitting, which leaves you free to make other things while the fire-roasted corn and red peppers are cooking. The last time I made this recipe, I paired it with grilled barbeque chicken for a delicious dinner.

Prepping

The prep work for this fire-roasted corn and red peppers dish is minimal. Start by opening a can of whole kernel fire-roasted corn and draining it. This is what I used:

Del Monte whole kernel fire-roasted corn blend

Then clean and dice one red bell pepper.

Diced red bell pepper for the fire-roasted corn and red pepper recipe

Cut 2 tablespoons of butter and separate them. Put a medium skillet on the stove over medium-high heat.

Cooking

Put the drained fire-roasted corn and 1 tablespoon of butter into the skillet.

Fire-roasted corn and 1 tablespoon of butter in a medium skillet over medium-high heat

Cook for 3 to 5 minutes until the butter is melted and the corn is heated. Add in the diced red bell pepper, 1 additional tablespoon of butter and salt and pepper to taste.

Fire-roasted corn and red peppers in a medium skillet cooking with an additional 1 tablespoon of butter

Continue cooking for 5 to 7 minutes until the red pepper pieces have begun to soften. Serve the fire-roasted corn and red peppers side warm.

Fire-roasted corn and red peppers finished in the skillet
Fire-roasted corn and red peppers on a plate
Fire-roasted corn and red peppers Pinterest image

Fire-roasted corn and red peppers

This fire-roasted corn and red peppers recipe is a super simple side that pairs well with so many main dishes. It's a perfect family dinner side!
Prep Time 3 minutes
Cook Time 10 minutes
Total Time 13 minutes
Course Side Dish
Cuisine American
Servings 4 people

Ingredients
  

  • 1 14.75 oz. can fire-roasted corn
  • 1 red bell pepper diced
  • 2 tablespoons butter separated
  • salt to taste
  • pepper to taste

Instructions
 

  • Open and drain the can of fire-roasted corn.
  • Clean and dice the red bell pepper.
  • In a medium skillet over medium-high heat, add the corn and 1 tablespoon of butter. Cook for about 3 minutes until heated through and the butter is melted.
  • Add the diced pepper and 1 more tablespoon of butter to the skillet. Season with salt and pepper to taste.
  • Cook for 5 to 7 minutes until the pepper begins to soften. Serve warm, and refrigerate any leftovers.
Keyword canned corn, corn, easy side, family friendly, fire-roasted corn, kid friendly, red bell pepper, red pepper, simple side, vegetables

Creamy tomato soup and ciabatta grilled cheese

An easy homemade, creamy tomato soup recipe to warm you up

I’m sort of late to the tomato soup and grilled cheese party. I know it’s been a staple kind of meal for generations, but I never got on board. The closest I got was Spaghetti-Os and grilled cheese. Canned tomato soup just never did that much for me. Then I tried making a creamy tomato soup recipe and not only loved the flavor but also loved how easy it is to make!

Creamy tomato soup with ciabatta grilled cheese

The same recipe I started with and have modified also recommended making grilled cheese on ciabatta rolls instead of with bread. I figured it couldn’t hurt to try. And I’m glad I did. Seriously. Pair this creamy tomato soup with ciabatta grilled cheese and you have a dinner hit on your hands. Even my particular eaters get down with this meal!

Making the creamy tomato soup

What sets apart this tomato soup from others is the garlic base. We love garlic in my family, so I use 4 cloves of fresh garlic. If you’re not as big on garlic, use 2 cloves. After you peel the garlic, use a grater to grate it finely. The first time I made this recipe, I didn’t have a grater and just chopped my garlic as finely as possible, so you can do that, too.

4 cloves of grated garlic for the creamy tomato soup

In a medium sized pot over medium-high heat, add 2 tablespoons of vegetable oil and 2 tablespoons of butter. Once the butter has melted, add in the garlic. Cook the garlic for about 30 seconds until it’s fragrant.

Garlic, butter and vegetable oil in the pot for the creamy tomato soup recipe

Then add 4 tablespoons of flour and whisk constantly for another 30 seconds until a paste forms.

Garlic paste in the pot for the creamy tomato soup recipe

Next, add a 29-ounce can of tomato sauce, 3 cups of water and 3 teaspoons of sugar to the pot. Add a good dash of salt and pepper as well. Bring the soup to a boil over high , then reduce the heat back down to medium-low and simmer until the soup thickens a bit, about 5 minutes.

The creamy tomato soup cooking on the stovetop

Soften the cream cheese and stir it into the soup. Once the cream cheese is melted, turn the heat off the creamy tomato soup, but leave it on the stovetop or cover it to keep it warm.

Cream cheese being added to the creamy tomato soup

Making the ciabatta grilled cheese

While the creamy tomato soup simmers, prepare your ciabatta rolls. Slice them completely apart and top the bottom of each roll with about 1/4-cup of shredded cheddar-jack cheese.

Ciabatta grilled cheese sandwiches ready to cook to go along with the creamy tomato soup

Add the tops onto the sandwiches.

A ciabatta grilled cheese sandwich ready to cook to go along with the creamy tomato soup

In a medium skillet over medium-high heat, melt 1/2 tablespoon of vegetable oil and 1 tablespoon of butter. Place two of the ciabatta sandwiches into the skillet.

Two ciabatta grilled cheese sandwiches in a skillet with melted butter and oil

Use a second skillet to press down onto the tops of the bread and cook for three minutes; flip the sandwiches and cook three more minutes until the outside is golden and crispy and the cheese is melted. I don’t hold the skillet down the entire time the sandwiches were cooking, but I press down every minute or so.

Cooking the ciabatta grilled cheese by pressing down with a second skillet over the top

The sandwich will get a nice crisp on the outside but still have a gooey cheese center. So yummy!

Ciabatta grilled cheese with a crispy outside and gooey, cheesy center pairs nicely with the creamy tomato soup!

Serve the creamy tomato soup in bowls along with the ciabatta grilled cheese. You don’t have to dip the grilled cheese into the soup, but that’s our favorite way to eat it!

A bowl of creamy tomato soup with half a ciabatta grilled cheese sandwich garnishing it
I didn’t soften my cream cheese before I made the soup this time around and it resulted in a few cream cheese “chunks” floating around in the soup. Those are the white specks you see in this photo.

Creamy tomato soup and ciabatta grilled cheese

A creamy tomato soup and ciabatta grilled cheese recipe that is hearty enough for a family dinner. Even your picky eaters will like this one!
Total Time 30 minutes
Course Main Course, Soup
Cuisine American
Servings 6 people

Ingredients
  

  • 2-4 cloves garlic grated
  • 1 29-ounce can of tomato sauce
  • 4 ounces cream cheese softened
  • 4 tablespoons vegetable oil divided
  • 4 tablespoons butter divided
  • 4 tablespoons flour
  • 3 cups water
  • 3 teaspoons sugar
  • 1-1/2 cups shredded cheddar jack cheese divided
  • 6 ciabatta rolls
  • salt
  • pepper

Instructions
 

  • Finely grate 2 to 4 cloves of garlic, depending on how much your family likes garlic. (We use 4.)
  • Heat 2 tablespoons of oil and 2 tablespoons of butter in a medium pot over medium-high heat. Add the garlic and stir occasionally for about 30 seconds until the garlic is fragrant.
  • Add 4 tablespoons of flour to the garlic and cook, whisking constantly, for 30 seconds until a paste consistency is formed.
  • Add into the pot the can of tomato sauce, 3 cups of water, 3 teaspoons of sugar, a dash of salt and a dash of pepper. Stir together and cook over medium-high heat until it boils.
  • Reduce the heat to medium-low and simmer until the soup thickens slightly.
  • While the soup is boiling and simmering, cut apart the ciabatta rolls. Divide the 1-1/2 cups of shredded cheese among the bottoms of each roll (about 1/4 cup of cheese for each). Place the top bun on the sandwiches.
  • In a large skillet over medium heat, melt 1 tablespoon of oil and 1 tablespoon of butter per two sandwiches. (My skillet fits two sandwiches at a time.)
  • Add the sandwiches to the skillet. Place a small skillet on top and press down on the sandwiches to flatten them. Cook for three minutes; flip the sandwiches and cook for three more minutes.
  • While the ciabatta grilled cheese is cooking, add the softened cream cheese to the soup. Stir and let it combine.
  • Serve the hot creamy tomato soup along with the ciabatta grilled cheese immediately.
Keyword autumn dinner recipe, ciabatta grilled cheese, creamy tomato soup, fall dinner recipe, family dinner, grilled cheese, hearty soup, tomato soup, winter dinner recipe

Looking for more soup recipes? Don’t miss these!

Taco soup

Slow cooker potato soup

Taco ranch meatball soup

Slow cooker potato chili

Skillet queso recipe

Restaurant-style skillet queso made easy!

Skillet queso recipe

I can’t resist a good queso. The mix of tortilla chips dipped into creamy cheese is just divine! I’ve tried making a few queso recipes through the years and this skillet queso recipe is one of my all-time favorites. It tastes almost exactly like the skillet queso we order at a chain restaurant named for a pepper.

Basically, you put all the ingredients into a skillet or pot, let them melt and combine together and then serve it with chips. I’ve made this as a side. (In fact, I made it for Thanksgiving last year as a side for my particular eaters.) Or you can also use the skillet queso as a topping for nachos rather than a dip. My son prefers them nacho style. I like it both ways — nacho style or dip. No matter how you eat it, it’s yummy!

Getting started

The most work you’ll do for this skillet queso recipe is prepping the cheese by cutting it into cubes. Not too shabby at all. It uses cheese loaf that is known for melting. The name-brand is Velveeta, but I use the store brand without an issue.

(If you’re not a fan of this processed cheese, don’t let that stop you from this recipe. This is the only thing I cook using it and does not have a strong flavor of the cheese, I promise! )

You need 16 ounces of the cheese. The last time I made this skillet queso, I was only able to get a 32-ounce block. So, I cut it in half by looking at it, wrapped one half in foil and placed it in a zip-top bag in my freezer. (You’ll notice I used the brand-name label just for easy identification!)

Put the cheese loaf on a cutting board and slice it into cubes for better melting. I first slice it in about 1-inch increments.

Then using two or three squares at a time, I cut those into nines.

And now you’re finished with the hardest part of this entire recipe. I told you it was easy!

Putting it together

Pull out a deep skillet or medium-sized pot and put it the cubed cheese into it. Place it on the stove over medium heat.

Add 1 cup of milk. I make this using 1% milk because that’s what my family drinks, and it works just fine.

Add in all the seasonings: 2 teaspoons paprika, 4 teaspoons chili powder, 1/2 teaspoon ground cumin and 1 tablespoon lime juice. (You can use fresh-squeezed lime juice, but I usually just buy a bottle of lime juice and keep in my fridge.)

Finally, add in one 15-ounce can of chili with NO beans.

Give it a good stir and let it hang out over medium heat for about 10 minutes until the cheese is melted. Stir it every few minutes to keep the cheese from sticking to the bottom.

Serve the queso with your favorite tortilla chips. You can use it as a dip or as a nacho topping, whichever you prefer!

You can also make this skillet queso in a slow cooker if you prefer. Put everything into your slow cooker on low and let it set for about an hour until melted. Alternatively, you can make it on the stove and keep it warm until serving from your slow cooker. It’s incredibly versatile and scrumptious!

Skillet queso

This skillet queso recipe tastes like something you'd get at a restaurant, but comes together in 15 minutes. Super easy and delicious!
Prep Time 5 minutes
Cook Time 15 minutes
Total Time 20 minutes
Course Side Dish
Cuisine Mexican

Ingredients
  

  • 16 oz. processed cheese loaf (like Velveeta)
  • 1 cup milk
  • 2 teaspoons paprika
  • 1 15-oz. can chili with no beans
  • 4 teaspoons chili powder
  • 1 tablespoon lime juice
  • 1/2 teaspoon ground cumin

Instructions
 

  • Cut the cheese into approximately 1-inch cubes.
  • Place the cheese into a deep skillet or medium-sized pot over medium heat.
  • Add the milk.
  • Add the paprika, chili powder, lime juice and ground cumin,
  • Add the can of chili, and stir well.
  • Continue cooking over medium heat, occasionally stirring, for about 15 minutes until the cheese is completely melted and smooth.
Keyword cheese dip, nachos, queso, tortilla chips

4-Ingredient Oreo ice cream cake recipe

Your family will go crazy for this Oreo ice cream cake!

This Oreo ice cream cake recipe has been a family favorite since I was child. The recipe has evolved a bit through the years and now is a heck of a lot easier to make with only four ingredients.

We still love this recipe. In fact, my daughter asks for this each year as her birthday dessert. It’s delicious, easy and is made ahead of time!

4-Ingredient Oreo ice cream cake

And, in the spirit of complete honesty, I’ve never made this Oreo ice cream cake recipe myself. My mom is who usually makes it these days.

In spite of her moving a few states away, she ended up being in town to make it for my daughter’s birthday this week, so I had her walk me through it and took some photos.

I no longer live in the land of sweet oblivion when it comes to making this dessert, but I don’t mind a bit. Because I knew I had to share this recipe with you guys and make sure I can re-create it myself in a pinch since my family loves it so much.

My mom actually made two of these this week so my daughter had one for her family birthday party last night and will have one for her friend birthday party this weekend. Her friends look forward to it every year as much as my daughter does.

Affiliate links are used in this post. If you make a qualifying purchase via my link, I receive a small percentage of the sale at no additional cost to you. Read my full disclosure here.

Cookies and cream

This is an ice cream cake recipe, so you don’t need to preheat the oven, but you do need to let your ingredients thaw a bit. Thaw your whipped topping.

Your ice cream needs to be softened. You can leave the ice cream sitting on the counter for 10-15 minutes or pop it in the microwave. We usually go for the countertop method because some of my family members think microwaving the ice cream gives it a different taste.

Once your ingredients are thawing, pull out a 9×13-inch or 3-quart baking dish. I love my glass 3-quart baking dish with a lid for this Oreo ice cream cake recipe because it’s easy to store in the freezer. And when we are finished, I can stick it in the dishwasher!

Fill the bottom of the pan with Oreo cookies. We use Double Stuf Oreos for this to have some extra cream in the mix. But regular Oreos work also!

I buy the family size pack of Oreos that is 20 ounces. We usually end up with about 10 to 15 cookies left and happily eat them. But, you can get a smaller pack if you don’t want any leftover Oreos.

Oreo layer

We added three more cookies after taking this photo. Mostly, you just want the bottom covered and then you’re ready to start smashing the cookies.

Like I said, my mom is the pro of this Oreo ice cream cake recipe. Through the years, she’s found the easiest way to crush the cookies is with the bottom of a drinking glass. Then she uses a butter knife to remove the excess from the bottom of the glass. Easy as that!

Oreo layer being crushed

You want the cookies to be crushed but still chunky. Move them around in your pan to so the bottom is completely covered. (If not, add more Oreos!)

Crushed Oreo layer

Add the layers

Next up, you layer on the ice cream. The original recipe for this used butter pecan ice cream. We now use vanilla. But you could use chocolate, cookies and cream, mint chocolate chip or whatever sounds best to you!

Either way, make sure your ice cream is softened. Then dollop it in mounds over the top of the cookie layer.

Oreo ice cream cake ice cream layer

Carefully smooth the ice cream over the cookie layer.

Oreo ice cream cake smoothed ice cream layer

Put the pan into the freezer to chill and harden for about 10 minutes. While the ice cream is freezing, get out the hot fudge sauce.

I got a store-brand hot fudge sauce that was 11.5 ounces in the jar. My mom usually gets Hershey brand, which is 12.8 ounces per jar. Both worked well.

In order for it to spread over the ice cream layer, the hot fudge sauce needs to be warmed up. It doesn’t need to be as hot as if you were making a hot fudge sundae. The sauce just needs to be hot enough to be pourable.

My mom says the best option she’s found is removing the lid and heating the hot fudge sauce in the microwave for 30 seconds. However you heat it, once it is nice and warm, pull your Oreo ice cream cake out of the freezer. Drizzle the hot fudge sauce all over the top. It doesn’t need to cover every inch, but should coat well.

Hot fudge sundae layer
Oreo ice cream cake hot fudge sauce layer

The final layer

The warm fudge layer softens the ice cream again. So, put the cake back in the freezer for about 10 minutes to let it refreeze some more.

Then carefully spread the whipped topping over the top of the fudge layer.

Oreo ice cream cake top layer

And that’s it for this Oreo ice cream cake recipe. Simple, easy and delicious! For birthdays, we often sprinkle some miniature M&Ms on top of the cake before serving. You can also used crushed Oreo cookies on top just before serving (any sooner and the cookies will get mushy) or chocolate chips.

Store the Oreo ice cream cake in the freezer and remove it 10 to 15 minutes before serving.

Oreo Ice cream cake recipe

Oreo Ice Cream Cake

With just four ingredients, this Oreo ice cream cake recipe easily comes together and makes a delectable dessert your family will love!
Prep Time 30 minutes
Course Dessert
Cuisine American
Servings 12 people

Ingredients
  

  • 1 package Oreos, regular or Double Stuf
  • 1 1.5 quart vanilla ice cream
  • 1 11.5 – 12.8 oz. jar hot fudge sundae sauce
  • 1 8 oz. container whipped topping

Instructions
 

  • Thaw the whipped topping and soften the ice cream by setting it on the counter or using the microwave.
  • Cover the bottom of a 9×13 or 3-quart oblong baking dish with Oreo cookies.
  • Use the bottom of a glass to press on the cookies and break them into large chunks. Make sure the bottom of the pan is fully covered with cookie pieces.
  • Dollop the softened ice cream in large globs over the top of the cookies. Use a spoon or spatula to spread the ice cream out evenly.
  • Put the ice cream cake in the freezer for about 10 minutes to harden a bit.
  • In the meantime, heat the hot fudge sundae sauce. It doesn't need to be as hot as for a sundae, but it does need to be hot enough to be pourable. I suggest removing the lid and heating it in the microwave for 30 seconds.
  • Pour the hot fudge sauce evenly over the top of the ice cream layer. It won't cover the ice cream completely,
  • Return the Oreo ice cream cake to the freezer for 10-15 minutes.
  • Dollop the whipped topping to make the top layer. Spread it gently and evenly over the fudge layer.
  • Serve immediately or place in the freezer. Let the cake thaw 10 to 15 minutes before cutting to serve.
Keyword 4 ingredient dessert, Birthday cake, easy dessert, easy recipe, Ice cream, Ice cream cake, no bake dessert, Oreo