Families With Grace

Helping Christian moms create homes filled with grace, love & faith

Tips you need for road trips with kids

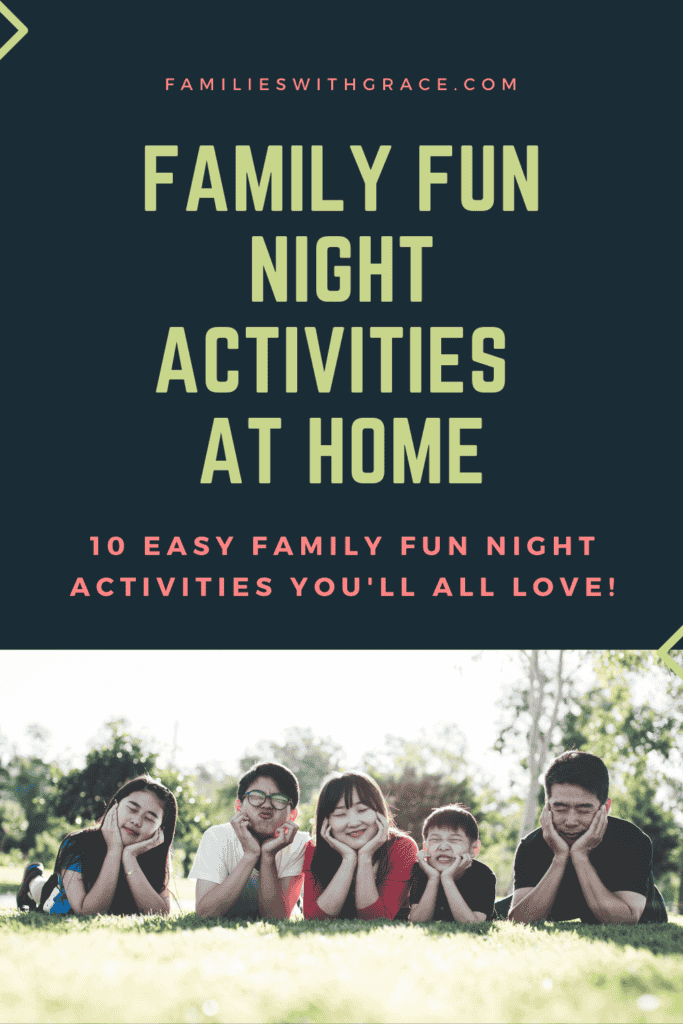
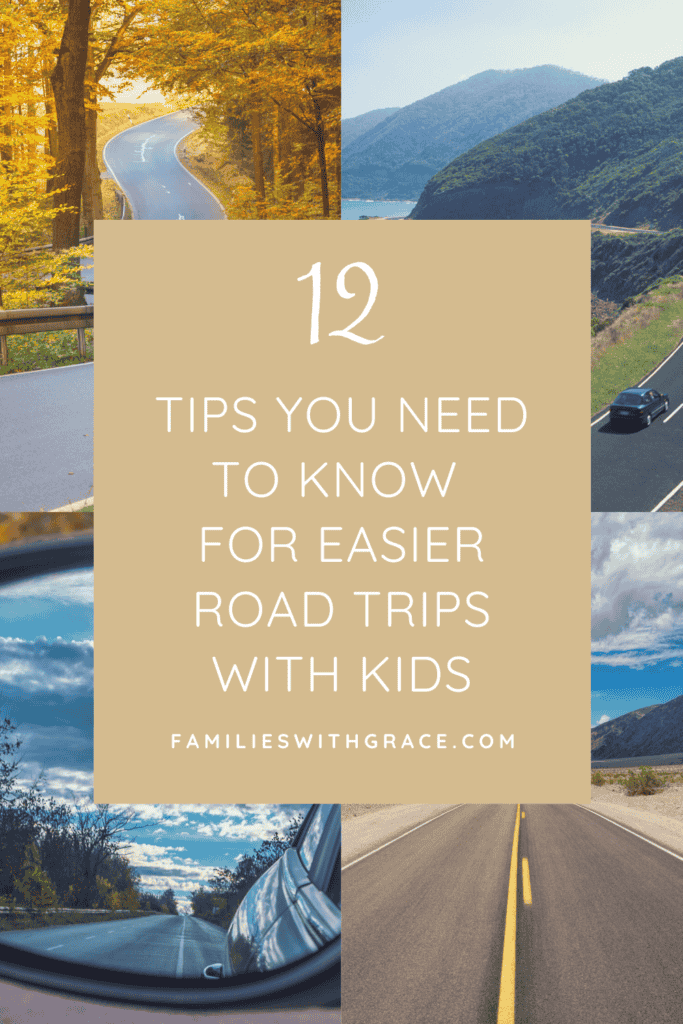
12 Ways to have easier road trips with kids

Whether you’re hitting the road for a vacation, family reunion or something else, taking road trips with kids are always an adventure! Patience isn’t exactly easy for little ones, and vehicles are small spaces for your family to be so close in.

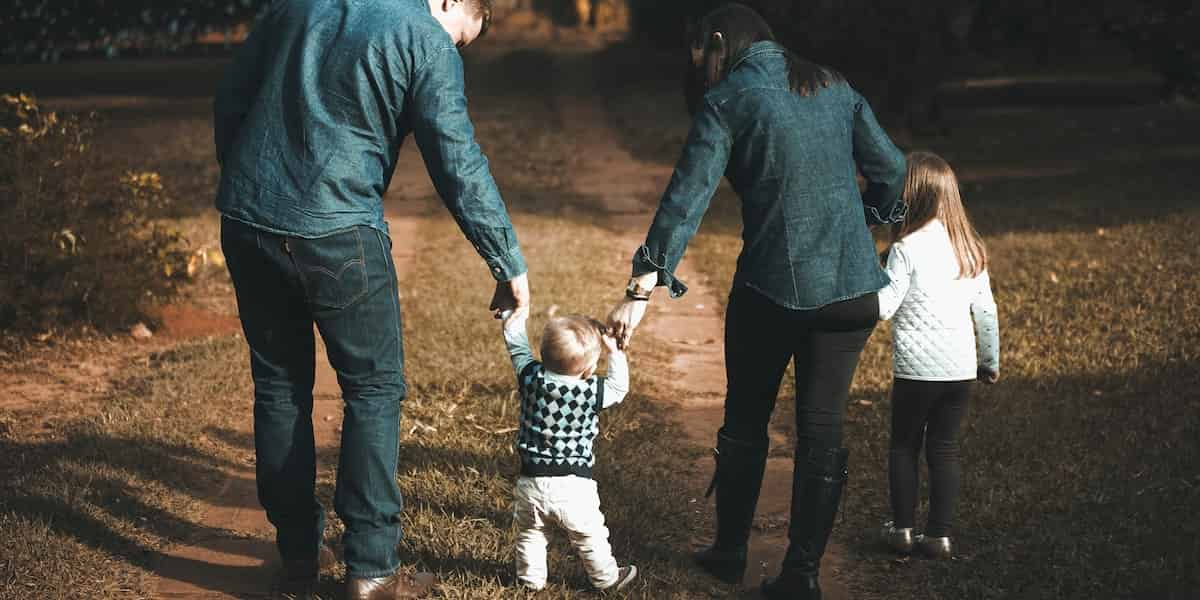
But, road trips with kids can be fun, too. Our oldest child is 11-1/2. In her lifetime, we’ve only traveled by plane once. Every other trip we’ve taken has involved a road trip that’s taken anywhere for two to 12 hours. We’ve not only survived them, but even had fun with them.

In a summer that may have more families thinking road trips to avoid flying, I figured this is a great time to share 12 tips for making road trips with kids a bit easier. If you have any to add, please leave them in the comments. I’d love to hear from you!

Affiliate links are used in this post, if you make a qualifying purchase via my link, I receive a small percentage of the sale at no additional cost to you. I only recommend products and services I use and love. It helps support my blog, so thank you for your support! Read my full disclosure here.

1. Utilize some snack hacks for family road trips.

It has to be a given that road trips with kids are going to involve snacks. I mean, road trips are made for snacks. I literally have some foods I eat only on road trips! I’ve found a few ways to make the snack business easier for our family.

Bring along your own snacks.

One of the easiest things to do is bring along your own snacks. You can pack a cooler with drinks, string cheese, yogurt pouches — whatever your family likes. Pack a bag with non-perishable snacks as well. Go for things that aren’t so messy and are easy to share.

Use zip-top bags.

I’m a big fan of zip-top bags for a variety of reasons. Before leaving home, you can transfer snacks into large zip-top bags for easy sealing and storage. And you can bring along snack-sized zip-top bags to divide up snacks on the go. For example, if I open a box of cheesy crackers, I can fill a snack-sized bag for each of my two children and pass the bags back to them. Everybody gets an equal portion and the bags keep messes to a minimum.

Another plus of serving up food in snack-sized zip-top bags is kids can more easily open and close them than individual portion bags. It also saves you money because the individual bags of snacks cost more. And you can mix snacks. For example, I might include a few M&Ms in with the cheesy crackers as a road trip treat.

Serve beverages with lids.

My kids love their insulated Thermoses. The steel Thermos keeps cold beverages cold forever. I love the 12-ounce Funtainer for traveling because their lids close and it’s nearly impossible to spill them. They’re prefect for the car! (We also use them for lunchboxes, on picnics and pretty much everywhere. They last forever!)

Let older kids help pick snacks.

One of my kids’ all-time favorite things to do on a road trip is pick out their own snacks. While we bring along snacks and food to eat on our trip, we usually let them go into a gas station once on the trip to pick out something savory and something sweet. They love picking out gas station snacks, and I tend to agree to snacks (within reason) that I wouldn’t otherwise.

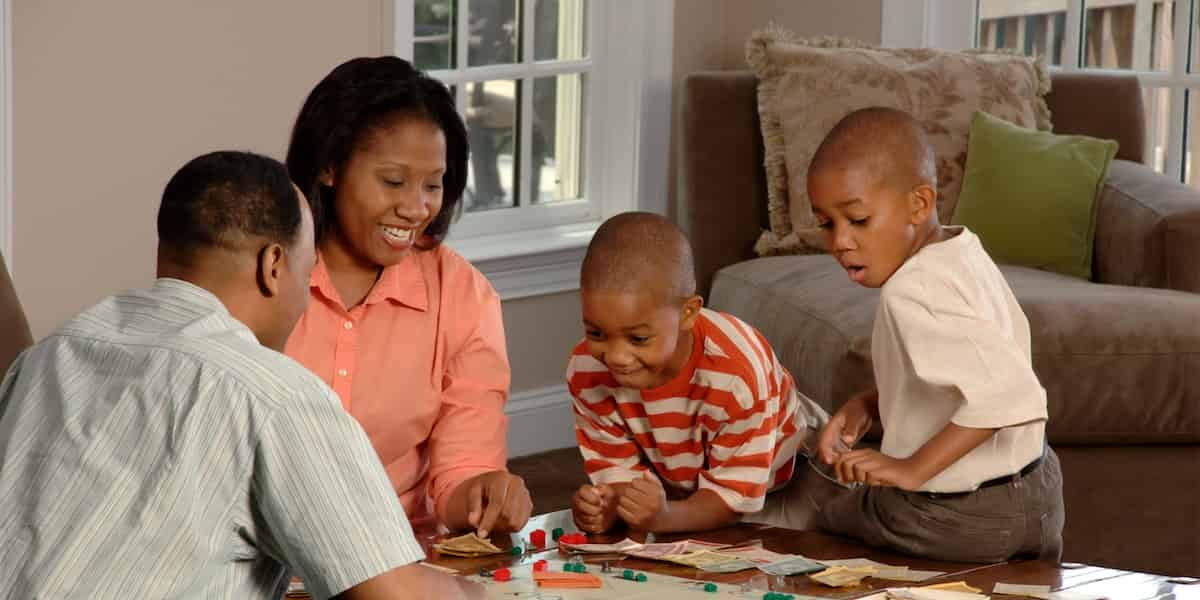
2. Find some easy family activities for the car.

One of our all-time favorite things to do in the car is Mad Libs. I’ve tried printing some out and downloading apps, but hands down buying the Mad Libs books are best. The books don’t usually cost more than $5 and are totally worth it. If you aren’t familiar with Mad Libs, they are stories with blanks in them. On a separate page, you fill in all the words for the blanks without knowing what the story says. It makes for some very silly stories! Our family takes turns going around and saying words. (And since it’s only saying a word, the driver also gets to participate, which is awesome!)

Mad Libs offer all sorts of fun options, including one about road trips! You can find a Mad Libs book to fit with your family’s interests including ninjas, Peanuts (as in Charlie Brown and the gang), Dungeons & Dragons, Disney’s Frozen, Star Wars, Pokémon, Marvel’s Avengers and so many more.

If words and word games aren’t as much your thing, consider other activities to do as a family. Pick up an automobile Bingo game, a scavenger hunt for the road card game or a “Would You Rather” book.

3. Read a book together on road trips with kids.

If your kids are older and want to read on their own, go for it. Even with kids who are readers, we still love reading books together as a family. (In fact, reading out loud is part of our bedtime routine.) You can use library books, books you own, ebooks or even audio books.

Here are some great books to read out loud:

4. Create a family playlist for your family vacation.

If your family likes music, you’ve got to create a playlist for your family for road trips. We have had a wide variety of musical choices throughout the last decade for our family road trips. We love Spotify, but whatever you usually use for listening to music works.

If your road trip happens to take you through some remote locations, consider downloading the songs from the playlist in case you lose your signal or go through an area with a spotty signal.

5. Give the kiddos paper-based activities to use in the car.

Paper-based activities are great for the car because they don’t weigh much and usually don’t take up too much room. If your kids are going to be writing or drawing, a clipboard comes in handy. We have tried lap desks, but they are bulky. The last thing we need is something taking up more space! Clipboards work best.

You can get any clipboard, including cheap ones from the dollar store, which I’ve done. But, our favorite are these Crayola Color Wonder clip boards with storage in them. First of all, the Color Wonder markers and paper are awesome because you don’t end up with marker on anything except the paper. And having the built-in storage keeps it all together, in one place. We have used these for a few years now and even switched out what’s inside of them a time or two.

One caveat for paper-based activities is to take along writing utensils that won’t melt if you’re traveling during summertime. Mostly that means avoid crayons! Opt for colored pencils, washable markers or pencils instead.

Aside from coloring and drawing, other lap and paper-based activities are great for car rides as well.

Ultimate Kids' Road Trip Activity Book and Journal

Utilize activity books and travel journals.

Activity books and travel journals are another great way to keep kids entertained. For kids 8 to 12, don’t miss the “Ultimate Kids’ Road Trip Activity Book and Journal.” For tweens and teens, you’ll want to grab the “Ultimate Teen Travel Activity Book and Journal.”

6. Make sure your kids have road trip toys.

Whenever we are going on a road trip with kids, we have them pick out a few car toys, a.k.a. toys to play with in the car. My daughter is getting away from this now and instead picks out her own books to read and such. I usually pack what I call a “car bag” that holds our car activities like the Mad Libs, clipboards and car toys. The bag stayed up front with me when the kids were younger, but now I put it in the backseat with them. Car toys usually have to be approved by us. We have found toys that are smaller (but not too small) and don’t make their own noises are usually best.

Another toy option for road trips is getting a few new toys for the kiddos. My kids have kept themselves occupied for an hour with a small toy from a vending machine at a restaurant. (Seriously!) It doesn’t have to be anything big or expensive. Think about hitting up your local dollar store to find some things. I would suggest not letting them play with (or really even see the toy) ahead of time. New toys hold kids’ attention longer, which is great for road trips!

7. Use electronics for kids wisely when traveling.

For shorter trips, we don’t use electronics for the kids at all. But if the road trip is going to last for 8 hours or more, then we talk about electronics to help pass the time. When my son was a toddler and my daughter a preschooler, we took a long trip to the beach. In order to help keep them entertained for 13 hours in the car, we made a DIY tablet holder with a gallon-sized zip-top bag and string that hung between our two headrests. The kids watched some episodes of the old Batman television show. If you have a minivan with screens, then watching a movie or show is even easier for longer trips.

Keep in mind that since you’re in a small space, you’re probably going to hear whatever electronic your kids are watching or playing (unless they’re wearing headphones). So consider that as you’re deciding what to allow and what to say no to.

One other thought is that we have found having time together that we are chatting, playing games or even just resting is far more fun than being on electronics. Kiddos don’t have to be constantly entertained.

8. Plan extra time for stops on road trips with kids.

While you can make good travel time with kids along, you also have to be prepared for extra stops and give them a chance to go to the bathroom and move around. We were a bit prepared for this because I have a bladder issue that means I need to make plenty of stops myself!

Plan some breaks from being in the car. You’ll want to stop for the bathroom, but also just allow kiddos a chance to move around and get out some energy. Being in car seats, especially, keeps them from being able to move around too much, so they need a chance to be out and stretch. In the baby and toddler years, we would even just let the kids have time in the car at stops to move around.

You can stop at rest parks and let them move around outside if the weather is nice. If the weather is cold or rainy, look for a big store or large gas station where they can stretch their legs. On one regular trip we take, we usually make a stop by Bass Pro Shops because it’s a fun store for the kids to explore with the live fish and various interactive displays.

When it comes to bathrooms, one of my favorite things when my kids were toddlers and preschoolers was a folding toilet seat. I kept it in a large zip-top bag in our diaper bag. It made using public bathrooms so much easier! For kids a bit older and bigger, these disposable toilet seat covers are ideal. It helps alleviate stress of finding great bathrooms, which can be challenging sometimes on road trips.

9. Play car games that don’t need anything.

Don’t forget about games you can easily play in the car with just your words. There are quite a few options that work as long as your kiddos can talk.

I Spy

My family likes playing “I Spy,” but it doesn’t last too long in the car because we have the rule it can only be an object inside the car while we are driving. Otherwise, there’s no chance we’d be able to spot it!

20 Questions

“Twenty Questions” is another good car game. One person has something in mind and everyone else asks questions to figure it out. If the guessers can’t come up with the item within 20 questions, then they lose. With kids, especially, you might want to have some parameters of items that are allowed and not allowed. As the mom of a little boy, I know some of the things he comes up with sometimes to be funny. And, of course, you also want to make sure the item is real and not imaginary.

The Alphabet Game

If your kids are preschool aged and up, a version of “The Alphabet Game” works well in the car. You can play it where you are all looking to spot words that start with the letters of the alphabet in order. Or you can play it where you build off of each other and come up with words that start with the next letter.

We have often done grocery shopping with “The Alphabet Game.” So I might say I’m going to the store to buy apples. Then my son would say he’s going to buy bananas. My daughter would go to by cheese. And so on and so forth. You can pick nearly any broad topic and come up with words related to it that go through the alphabet.

Tell a Story

Ultimate Teen Travel Activity Book and Journal: Road trip or plane activities for teens

Another creative option is to tell a story together. At home we use the game “Story Cubes” to do this. Because it uses dice, it’s not so conducive to playing in the car. So, we have told stories together where each person says one or two sentences and then the next person add their sentence or two and on it goes. We usually end up with lots of giggles!

Both the “Ultimate Kids’ Road Trip Activity Book and Journal” and the “Ultimate Teen Travel Activity Book and Journal” have story starters included along with other family verbal games.

10. Keep the vehicle and yourselves clean as you travel.

If you’re on a road trip with kids, you don’t want your vehicle to get too out-of-control messy. While messes and children go together, there are a few ways we’ve found to at least help keep our vehicle and ourselves relatively clean while on the road.

Have a bag for trash.

There is always trash to be dealt with on road trips. We use plastic bags from stores as a bag for trash and then toss them at our next stop. They hold enough but aren’t too big. Bring some along or just acquire them on your trip.

Be prepared for germs.

Even pre-pandemic, I was ready for germs and made my family clean their hands when we got back in the car from being in public places. Now, I’m even more vigilant. I have kept canisters of Wet Ones in the car to pass around. The original ones work well but don’t have alcohol to kill COVID germs. You can now get Wet Ones with alcohol in them to help kill COVID germs as well.

Since my kids are older, they use hand sanitizer gel effectively and without getting it everywhere. Find what works best for your family and go with it. You don’t want any germs tagging along on your vacation!

Bring wipes for faces.

Neither of my kids have been in diapers for a long time, but having unscented baby wipes along on trips comes in handy for messy faces.

Keep a stash of napkins.

Not all messes need a wipe. A stash of napkins in your snack bag or glove compartment can come in handy. You can get them from a drive-thru or pack your own to bring along. (I usually do both!)

11. Use technology to your advantage when traveling.

Aside from your smart phone being a potential source of entertainment for music or games, it’s also a great help on road trips. Of course you can use it for directions to your destination, but don’t forget other things you can do to help yourself as well.

Use maps to find bathrooms.

With smart phones, it’s easier than ever to plot out stops for bathroom breaks. You can find rest stops or other places you want to stop for bathroom breaks. You don’t have to rely solely on road signs any more to help you find the next best stop.

Find restaurants you know.

You can use the map to find restaurants you know. This comes in handy while traveling on the interstate, for example. If you’re looking for a particular restaurant where you know your whole family will eat well, pull up your phone and find one nearby.

Check out reviews.

If you are feeling advantageous and want to try a new restaurant with your family, you can also pull up reviews for local restaurants in the area. Oftentimes menus are available online as well so you can even go over with your kids (and yourself!) what you have in mind to order before you even stop.

Do trip research.

I’m a planner through and through and do research before we take trips. If you aren’t, being in the car is a great time to do some research on your smart phone. Even if you are like me and have everything planned, you can read through some ideas you have saved for your trip or look up interesting places to stop along the way when everyone is getting cranky and needs a road break.

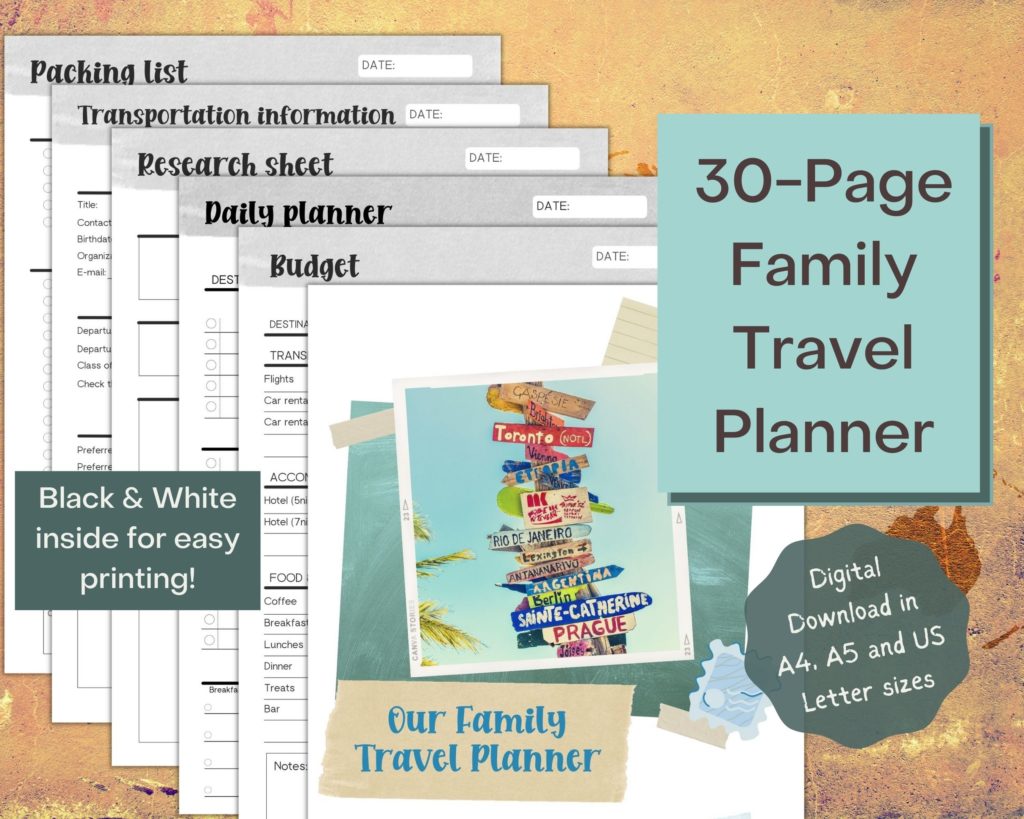
Be sure to check out this Family Travel Planner to plan your trip and stay organized! Use the code FWGFAN to save an extra 10%!

30-page family travel planner on Etsy

12. Prepare your kids before your family vacation.

I learned long ago that my kids do best when they know what to expect and what is expected from them. So, before we take a road trip with our kids, we talk with them about it. (We even do that when traveling just an hour away.) We go through a checklist of sorts to make sure everyone goes to the bathroom before we leave, the kids have whatever car toys they’ve chosen and cover our food bases.

When we start out on a trip, we also remind everyone that they need to let us know when they need bathroom breaks as soon as possible since finding a bathroom while traveling takes time.

Basically, if you can explain to your kids approximately how long you’ll be in the car and ideas you have to keep busy in the car, they handle it better. Remind them that where you’re going and the fun you’ll have once you’re there is worth being on the road for a while. And do your best to maintain a positive attitude about being on the road, so they will, too.

Find more great posts about traveling with your family:

Family travel advice

10 Family bonding ideas

Summer planning tips you can use

10 Ways to have a family life filled with grace, love and faith

How to create an atmosphere full of grace, love and faith

When I think of the perfect family life, I think of a family happily being together in a serene atmosphere. I envision lots of smiles and smells of homemade dinner wafting through the air. I can just imagine the delighted conversation the parents are having while the kids calmly play together. Everyone is well coiffed and put together.

But, in reality, our family life is different, because life isn’t perfect. Life is messy. You can look around my family and find one child hanging out in a messy bedroom and the other stretched out on the couch watching Minecraft videos on YouTube. My husband and I are working in the home office or scurrying around doing our household chores. The dog adds in his flare of barks for dramatic effect, and dinner is a frozen pizza stuck in the oven.

What we need most in the midst of that chaos is grace. I need grace from my husband and children when I get grumpy because I’m tired and overwhelmed. My kids needs grace from me when they are out of sorts. If everything was perfect, nobody would need grace!

Through the 21 years I’ve spent as a wife and 11-1/2 years I’ve spent as a mom, I’ve learned some things along the journey about how to create a family life filled with more grace, love and faith than irritation, grumpiness and grousing.

1. Pray for grace, love and faith.

Unsurprisingly, the first step of creating a happier family life starts with prayer. I cannot live a life filled with grace, love and faith on my own. Without God’s help, I’d be too irritated and annoyed to be loving and grace-filled. While we remember to pray for so many requests, we overlook this one.

One of my daily prayers is for God to help me be the kind of wife and mom my husband and children need me to be. I don’t believe that He put my husband and me together by accident or gave us the children we have without a reason. If I am called to be a wife and mother, I want to do it how God wants me to do it. I want to be who He created me to be. I can’t do it on my own.

On the days and in the moments when the day is lasting longer than our patience, we need Someone with more strength, grace and patience than we have to help us through.

2. Speak kindly to each other.

The words we speak reflect our hearts. They are so very important. My husband and I learned early on in our marriage to talk kindly to each other. We promised to not be passive aggressive. Instead of nagging and grousing, we ask each other for help and say “please” and “thank you.” Speaking in kindness goes a long way.

We have kept the same attitude with our children. Unless our kids are in danger, we start out kindly asking them to do things. We do our best to not start out with a stern or irritated attitude toward our kids. If that happens for no reason other than our own grumpiness, we also do our best to apologize.

We avoid teasing or making someone feel bad for something they prefer. My husband and I remind our kids often that anyone’s success in our family is a success for the whole family. We have to stick together and support each other — not tear each other down.

Think about whether you’d speak the same way to a complete stranger as you are to your family. I know. That gets to me! Sometimes we are more polite to someone we don’t know than to our family members who we love most. Of course we need to be free to have disagreements with our spouses and discipline our children, but we can still do so with a measure of kindness.

3. Listen to Christian music.

Listening to Christian music might sound like an odd way to improve your family life, but hear me out. Music is powerful. It can shift our moods and thoughts. Christian music can also help us focus on God throughout the busyness of life.

Being cranky with my kids is difficult when I’m humming or singing along to a song about God’s love! So many times I have heard God speak to my heart and been able to truly worship Him best through music. Making it part of our family life just makes sense.

(In fact, I feel so strongly about the importance of the music we listen to that I’ve created a Families with Grace playlist on Spotify and continue to add to it with songs I find inspiring and uplifting.)

4. Guard your family’s time and activities.

Because I’m an introvert who needs downtime to re-energize, I learned early on that I needed to be intentional with my family’s time and activities. I am protective of my time and energy because it’s limited. My chronic health issues impact how much of me there is to go around. I won’t say yes to something that will interfere with my relationship with my kids or my husband. After God, my family is my top priority, and I want to make sure there is enough of me left for them each day. Sometimes that’s easier said than done!

I am also protective of my kids’ time. I tell them that they have their entire lives to be busy. Childhood should be when they have downtime to just play or pursue a hobby for fun. For our family, that means limiting our kids to one ongoing extracurricular activity at a time during the school year. As they get older, that will evolve, but for now it’s what works best for us.

I’m doing my best to teach my children that it’s OK to say no to some things and not do absolutely everything all the time. Because if we are too busy to recharge and we are too overwhelmed by our schedule, then grace and love fly right out the window!

5. Put down electronics.

Pretty early in my motherhood journey, I realized I was more likely to snap at my kids when I was using my phone. While both my husband and I do work-related tasks from our phones, I do my best to limit any other activity on my phone when I’m with my kiddos. I want to be present in the moment with my family instead of caught up in a digital world that really doesn’t matter in the grand scheme.

I’ve also instated a policy when it comes to social media that has improved our family life. If I am on social media and come across a post that upsets me, then I log off of social media. Those feelings have a residual effect that then spills over in my attitude and how I interact with my family.

We also don’t allow electronics at the dinner table (unless we are watching a movie or show together).

6. Maintain a consistent routine or schedule.

I’m naturally predisposed to routines and schedules, because I thrive on them! I know not everyone is schedule-oriented, but having at least some non-negotiable times is a great idea. Schedules allow children (and adults!) to know what to expect when. Schedules also keep everyone sleeping and eating regularly, which helps maintain a happy family life because nobody feels like being full of grace and love when they’re tired and hungry!

My family does well with routines. The simpler a routine is, the easier it is to stick with. And sometimes you need to reassess routines to figure out if something isn’t working and needs to change. Through the years, for example, our bedtime routine has evolved and changed as our children have gotten older.

7. Have fun together!

Having fun looks different for every family based on what you like and enjoy. But its impact is the same: you make memories, have fun and aren’t grumpy. It’s not possible to have fun and be grumpy at the same time! While life isn’t all fun, find time regularly to have fun together as a family.

Figure out some small, everyday sort of things you can do for fun together. We enjoy watching movies, playing games and reading together. Of course we have bigger family fun, too, like trips to the zoo or an amusement park, but it’s the smaller activities with family fun that help our family bond most.

8. Communicate.

In creating a family life filled with grace, love and faith, you’ve got to have good communication. So many problems can be solved with communication. I know my husband can’t read my mind, so I tell him when I’m struggling. (Sometimes he knows based on how I’m acting or reacting!) I’ve learned to do the same thing with my children. If I need a moment alone to sit and read or just be, I tell them rather than assume they’ll figure it out.

My husband and I have learned we have to be intentional about communicating and connecting while raising our kiddos. We also have to be intentional about communicating individually with our kids. Since our kids were smaller, we have had one-on-one playtime. It was the best way to communicate with them. We’d set a timer for 20 or 30 minutes and each take a kiddo to play with one-on-one. When the time was up, we’d switch.

While we still do playtime like that every so often, now we’ve evolved into bedtime talks. Twice a week our 8-year-old gets to stay up with us past our bedtime routine to talk with us or read with us. And three times a week, our 11-year-old gets to do the same thing. We just finished reading through a book about middle school with her and are now reading a book about boys. We have had some great discussions!

9. Praise often!

When my children do something right, I try to praise them for it just like I would discipline them if they had made a bad choice. Everybody feels good to be acknowledged for what they’re doing. So when I see my daughter helping her little brother with something, I praise her. And when I notice my son doing a chore without being asked, I praise him. As a result, I have reinforced good behavior that improves my kids’ confidence as well as our family life.

I do the same with my husband. I tell him I appreciate the things he does around home. It can be as simple as saying, “Thanks for taking out the trash.”

10. Accept your family’s imperfections.

No matter what you do, you are going to fall short because you’re human. Your family is the same way. Your kids will behave badly. Or your husband will get grumpy. You’ll snap at all of them out of frustration. Give yourself and your family some grace. Of course do the best you can, but don’t put pressure on yourself to be perfect. It just isn’t possible.

Instead, show your family what it looks like to learn and grow from your mistakes. Even if you’ve made the same mistake 20 times already, the next time you move forward with something different, celebrate that. Just keep showing up and trying every day. Go back to square one when you have to. Press the reset button on a day after spending a few minutes praying for grace, love and faith. You aren’t on this journey alone!

This post is part of Realigned Motherhood: Juggling the Joys of Motherhood. Be sure to also check out the other posts linked below for more encouragement and tips!

Cultivating Connection in Your Home from Inspired by Family
14 Refreshing Bible Verses For The Struggling Moms from Mindy Jones
Self-Care Tips for Moms from Clothed with Dignity
What I’ve learned from Motherhood and Marriage from Life Notes Encouragement

Mother’s Day craft for kids 3 to 18

Free Mother’s Day craft printables to make gift-giving meaningful and easy for moms and grandmas

Affiliate links are used in this post, if you make a qualifying purchase via my link, I receive a small percentage of the sale at no additional cost to you. I only recommend products and services I use and love. It helps support my blog, so thank you for your support! Read my full disclosure here.

Maybe it’s because my kids are still relatively young, but one of my favorite kind of Mother’s Day gifts to receive are those from the heart. I love when my kids make a Mother’s Day craft for me that includes a bit of sentimental stuff to boot.

Because I’m not a crafty person, my favorite kind of crafts to do with my kids are simple ones that are more content-based than art-based. A few years ago, I did a Mother’s Day craft with my early elementary Sunday School class and it’s one of my favorites.

So, this year I took that idea and expanded on it. I created some free printables for kids to express their feelings for both their moms and grandmas. I broke them down into age groups to best match kids’ skillsets. And I’ve also included a free printable craft that I’ve done with my kids as toddlers and with my son’s entire kindergarten class a couple of years ago. It’s easy and adorable!

All About My Mom worksheets for preschool through 2nd grade

Mother’s Day crafts that have kids thinking about their moms and what she likes as well as what they like about her are my favorites! While some kids are writing up a storm throughout at least parts of this age group, others aren’t as much. My daughter loved writing from the first time she could figure out how to do so. My son, who is a current 2nd grader prefers drawing. So the preschool through 2nd grade All About My Mom worksheet is designed so that kids can do either.

You can totally do this for a group of other kids to give to their moms. But, you could even print it out or pass it along to your husband and let your kiddos do it on their own. I’ve got to be honest that I’m totally going to print these out for my kids just to see what they say. I have one kid in each age group!

There is also a sheet for grandmas designed the exact same way. It makes a great Mother’s Day gift that you can include with a nice card, a photo or even in a picture frame.

All About My Mom worksheets for 3rd through 12th grades

I didn’t want to leave out older kids by any means. I started this worksheet at 3rd grade, but definitely pick whichever one would best for your child and what they like to do as well as their skillset. For this Mother’s Day craft, I went a little deeper and made boxes for the kids to write in.

Yet again, there are versions for both moms and grandmas. Especially with this worksheet, you could easily print it out and let your big kids have a go at it by themselves. While we want them to come up with their own ideas for gifts, sometimes a nudge is OK. After all, you are still going to be surprised by what they write. I can pretty much guarantee it won’t be anything you expected!

I Love You to Pieces craft

And then there is this I Love You to Pieces craft. Along with the All About Mom (or Grandma) worksheet, this works for a card, especially for younger kids. I have done this with my own child when he was a toddler and with his entire kindergarten class. Basically, you print out the sheet, let your kiddo tear up some pieces of construction paper and then use a glue stick to attach the pieces to the heart. Don’t forget to include your child’s name and age as well. It’s a great Mother’s Day craft that moms and grandmas will love!

Picture frames

To kick up these Mother’s Day crafts a notch, go ahead and frame the printouts to make a nice keepsake. I found a few picture frames that would be great for these.

Looking for more Mother’s Day ideas? Check out these posts as well!

White and milk chocolate chip cookie recipe

With two different kinds of chocolate and optional Cadbury eggs, this cookie recipe will satisfy your sweet tooth!

Affiliate links are used in this post. If you make a qualifying purchase via my link, I receive a small percentage of the sale at no additional cost to you. I only recommend products and services I use and love. It helps support my blog, so thank you for your support! Read my full disclosure here

One of my favorite desserts to make — and eat! — is cookies. I’ve shared a couple of family favorite cookie recipes before like my peanut butter cookie recipe and my toffee chip cookie recipe. This white and milk chocolate chip cookie recipe, though, is perfect for springtime. I first made it eight years ago. Then I sort of forgot about it. I made it again this year and I’m trying to not eat my weight in these cookies!

I also LOVE Cadbury eggs. And I know. People either love or loathe them. I’m 100% in the love category. Their creamy goodness makes me happy. I’ve haven’t been as much into the mini, hard-shelled Cadbury eggs, though. But this recipe has changed that. You can totally make the recipe without the Cadbury eggs to enjoy it year-round. However, the Cadbury mini eggs make a nice addition to the cookie. (Pick some up on sale after Easter and toss them in your freezer to enjoy them year-round!)

The other nice thing about this white and milk chocolate chip cookie recipe is that it makes about 8-9 dozen cookies, which is double with a “normal” batch of cookie dough makes. In fact, since I wasn’t feeding a huge crowd, I baked out half the dough and put the other half in a flat gallon size zip-top storage bag in my freezer to bake later.

Dealing with the candy

If you’re going to use the mini Cadbury eggs with the crunchy candy shell, start there. You also opt for another milk or white choclate-ly candy if you find yourself with a lot of something else. Just follow the same steps. (If you’re not using any candy, skip this step and move on to the dough.) The recipe calls for one 10-ounce package, which looks like this:

You need to crush or rough chop the candy. I put it in a zip-top bag and hit it with my rolling pin. You can also use a spoon. My 8-year-old son helped me and quite enjoyed hitting and banging around in the kitchen.

You want the candy in small pieces, but not totally crushed. It should look something like this:

Moving on to the dough

Next, turn your oven on to 350-degrees to preheat. If you’re using candy set it aside for now. It’s time to get the dough going. Start with two sticks (1 cup) of slightly softened butter or margarine. I used butter this time but used margarine before and both work just fine. You want them ever-so-slightly soft like this:

One of the best ways to soften butter is in the microwave in about 30-second increments at about 30-40% power.

Put the softened butter into your mixing bowl or the bowl of your stand mixer if you’re using one. Add in both the white and brown sugar and beat until light and fluffy. I used my stand mixer and started at “stir” until they were combined, then I worked my way up to level 6. After about 2 to 3 minutes, the mixture looked like this:

Next, mix in each egg one at a time and then add the vanilla. Get a second mixing bowl and stir together the flour, salt, baking soda and baking powder until they are combined. Slowly add the dry mixture into the wet mixture and let your dough come together until everything is incorporated. It should thicken up and look like this:

Now it’s time to stir in the goodies. I stir in the white chocolate and milk chocolate chips first. Then I add the Cadbury mini egg pieces. If you are using other candy, stir it in last like the Cadbury eggs. If you are using only the chips, then do those. You can add extra white or milk chocolate chips if you’d like. One of my favorite things with this cookie recipe is that it has so many chips that each bite ends up with at least a chip of some sort.

Baking the cookies

Now you’re ready to start baking. I use parchment paper on my cookie sheets because it makes clean-up way easier and the cookies never, ever stick to the pan. I highly recommend it! No matter what, you want to form the dough into approximately 1-inch balls. I used a cookie scoop for mine because it is faster and easier. Place the dough balls on your cookie sheet.

Bake the cookies in your preheated to 350-degree oven for 10 minutes until the edges are slightly browned. Take them out of the oven and cool on the baking sheet for about a minute before transferring them to a cooling rack to finish cooling. Do your best to let them cool enough that they won’t burn your mouth before enjoying them!

Store them in an airtight container. I use gallon-sized zip-top bags. These white and milk chocolate chip cookies stay fresh for about a week.

White and chocolate chip cookie recipe

Servings 8 dozen cookies

Ingredients
  

  • 1 cup butter or margarine softened
  • 1-1/2 cups white sugar
  • 3/4 cup brown sugar
  • 3 eggs
  • 3 teaspoons vanilla
  • 3-1/2 cups flour
  • 1-1/2 teaspoons salt
  • 1-1/2 teaspoons baking soda
  • 1-1/2 teaspoons baking powder
  • 1 12- oz. package white chocolate chips
  • 1 11.5- oz. package milk chocolate chips
  • 1 10- oz. package Cadbury mini eggs with hard candy shell optional*
  • * You can substitute the Cadbury mini eggs for other white or milk chocolate candy you have more white chocolate chips, more milk chocolate chips or just omit them completely. The recipe is full of yummy flavor even without the adding candy or chocolate chips!

Instructions
 

  • Preheat the oven to 350-degrees Fahrenheit.
  • If you're using the Cadbury mini eggs with a hard candy shell (or other candy), put them into a large zip-top bag. Use a rolling pin or spoon to crush the candy into pieces around the size of chocolate chips. (Some bigger pieces are fine if that's what you like.)
  • Cream the butter and sugar together in a mixing bowl or with your stand mixer until it is light and fluffy. (It took mine about 2-3 minutes total.)
  • Add in the eggs one at a time and mix well after each.
  • Add in the vanilla and mix well.
  • In a separate bowl, mix together the flour, salt, baking soda and baking powder. Stir until combined.
  • Gradually add the dry mixture into the wet mixture and stir until incorporated.
  • Add the white chocolate chips, milk chocolate chips and prepared candy.
  • Roll the dough into 1-inch balls or use a cookie scoop. Place the dough balls onto a cookie sheet. (I cover mine with parchment paper for easier clean up.)
  • Bake at 350-degrees for about 10 minutes until the edges are lightly browned. Remove from the oven and let them cool for about 1 minute on the cookie sheet before removing them to a wire rack to cool.
  • Once cooled, store them in an air-tight container or zip-top bag.

How to connect with your spouse while raising children

6 ways to connect in the busyness of raising kiddos

My husband and I were married for 10 years before our first child was born. We had 10 years of being able to do things like talk without interruption! Now as the parents to an 11-year-old and an 8-year-old life is different, and we can struggle to finish a conversation. Learning how to connect with your spouse in the midst of raising a family can be challenging. We’ve found a few strategies that work for us.

Connecting with your spouse is about more than going on dates. While date night is awesome and I highly encourage it, connection means taking the time to really listen to each other. You certainly can (and sometimes need to) share your deepest feelings, but you also should share the small stuff as well.

I mean all the things you think about in the shower that you mean to talk to your spouse about but don’t get a chance to. Or all the things you start to say and get interrupted. I’d say it even includes some logistical details sometimes that you just need to communicate and connect about. Connection is about sharing life together.

1. Find good times to talk.

One of the best ways to connect with your spouse comes by communicating well. I learned pretty early on in our just over two decades of marriage to start important conversations with the question: “Is this a good time to talk?”

That one question has saved us some grief and arguments in our marriage. Since my husband and I work from home together, we have plenty of opportunities to interrupt each other at inopportune times. So in order to connect with each other, we start with finding the right time to do so.

He may have something he wants to discuss with me and connect with me about right when I’m in the middle of trying to finish an article before my deadline. Or I might need to talk with him about something that happened right when he is preparing for a conference call.

By asking if it’s a good time (and being kind and honest with the question and response), our chance to actually connect improves. Some times are just not convenient times to listen — really listen — to what someone is saying to you.

2. Set boundaries with your kids.

This one looks different depending on your kids’ ages. We haven’t dealt with this with teenagers since our oldest kiddo is 11, but we’ve dealt with it through every stage previous.

The baby days are hard because babies are unpredictable. So, you have to get creative in order to connect with your spouse. When our youngest was a newborn, my husband knew I was struggling. While our daughter had always been a good sleeper, our son wasn’t. I had many nights where I was up the entire night only able to sleep about two hours before our 3-year-old was up for the day. I would literally fall asleep in the middle of saying something to my husband when he got home from work.

One night, my husband left an encouraging note on the changing table reminding me that I could wake him if I needed to. That short note, written on a piece of paper torn from a notebook was the perfect way to connect at that point in our lives.

As our children got older, we got into routines as a family. Their bedtimes coincided. Quiet or nap times overlapped intentionally. Even now they both have to be in their rooms for the night at the same time. So, my husband and I know that by 8:15 p.m., both kiddos should be settled in for the night. That’s important because those are times we know we can connect.

And then there are other times (especially right now with virtual schooling) that we stop our kids from coming into the home office during the day because my husband and I need a moment to connect. Sometimes we connect even by grousing about school assignments together!

3. Utilize kid-free time.

Kid-free time seems like it would be a no-brainer to connect with your spouse, but sometimes we get distracted and spend that time doing other things. I’m an introvert and recharge with quiet. I completely understand that sometimes kid-free time means you just want to not talk or do anything productive. And you need those breaks!

Just make sure that you allow some time for your spouse in the midst of it. Make some time to chat about what’s been going on in your lives or thoughts. My husband and I even end up spending kid-free time talking about the kids. We are in this parenting thing together and sometimes we need to connect about how we’re doing it to make sure we stay on the same page.

When it comes simply to connecting, no topic is taboo, not even your kiddos. The act of sharing your thoughts and concerns with each other connects you with your spouse.

4. Do something fun together.

One of the best ways to connect with your spouse is doing something fun together. This totally depends on what you guys find fun, but look for something you both enjoy.

That said, don’t be afraid to branch out and try what your spouse thinks is fun and vice versa. Since he was a kid, my husband has been a gamer. He enjoys both video games and tabletop games, specifically role playing games. While I played video games with him occasionally, I resisted tabletop role playing games for year.

When I finally tries role playing games with my husband, I found that I enjoy them as well. It’s something fun we love doing together and lets me see a whole different side of my husband and his creativity. And we end up with memories made together that we can talk — and usually laugh — about later.

We also enjoy watching movies together. While it doesn’t sound like something to connect us, we talk about them afterward. We usually don’t have in-depth discussions (though it’s happened and you totally could), but even just sharing what we each thought of the movie helps us connect with each other.

5. Go for a ride or run errands together.

The car can be the perfect place for connecting with your spouse when it’s just the two of you. Nobody can interrupt your conversations! My husband and I have done some of our best connecting on car rides and/or while running errands together.

We’ve connected and had fun while shopping for our kids’ birthday gifts. When we go on road trips for doctor’s appointments for me, we spend part of that time talking and going over topics we care about. We’ve talked through all sorts of things in the car.

Another way we sometimes connect on longer trips is listening to Podcasts together. My husband has some favorite ones he’ll listen to while I read or nap. But there are some we like listening to together as well. (One of our joint favorite Podcasts is a role playing game.) You could also listen to audio books together if that’s more your style.

6. Don’t forget the small stuff.

Finally, connect with your spouse in small ways that make big differences. The right words can make your bond stronger. Say thank you when you notice your spouse doing chores or taking care of something so you don’t have to. Stop and give your spouse a hug when he or she is folding laundry. Pick up their favorite treat at the grocery store.

Connection in marriage happens in small ways every day. You don’t have to have long discussions on deep topics. Your actions and facial expressions can connect you just as much as words. I love the feeling when my husband and I share “a look” about something adorable our kids have done or even something frustrating that’s happened. It reminds me we are on the same page and on the same team going through life. And that’s what connection is all about!

20 Lessons from life with a newborn

Life with a newborn is exhausting, challenging and rewarding

I wrote this back in 2013 when I was just starting to feel a bit human again after having our second baby. I’ve done some slight editing, but left it mostly the same. I share for new mamas who are overwhelmed and exhausted. I promise you will survive this phase! The 12-week-old baby is new a thriving 8-year-old boy and his big sister is now 11.

Just when you think you know everything as a mother, things change around and you realize that you don’t know nearly as much as you thought you did to begin with. Having a second baby has reminded me of this. My son is days away from being 12 weeks old. He’s not much like his big sister who is 3-1/2. I’ve learned a few lessons from life with a newborn. I’ve also been reminded of some lessons I learned last time around.

So, I decided to compile a list. It’s far from comprehensive, but it’s a few things that have been floating around in my mind and my life these last nearly 12 weeks.

1. Not all babies are the same. 

I can’t say this enough. I knew this in my head, but having a second baby really taught me this lesson. My daughter loved the bouncy seat; my son doesn’t like it. The swing didn’t interest my daughter; my son loves it. My daughter couldn’t sleep when someone was holding her. Sometimes my son will only sleep when someone is holding him.

2. Just when you think you couldn’t possible be any more exhausted, you realize you can. 

I’ve had plenty of times when I thought if I were any more exhausted I’d be dead. And then the baby spent the night crying and I got only two hours of sleep before preschooler was up and ready for the day to start. Turns out I was wrong. I could be more exhausted.

3. Dealing with reflux in a baby stinks. 

My daughter had other issues, but reflux wasn’t a problem for her. My son has mild reflux and it stinks. I feel a huge compassion for parents who have babies with more severe reflux.

4. Babies require patience. 

Lots and lots and lots of patience. I try to remind myself of this when I want to scream things like, “Stop crying and nurse already!” Or “Go to sleep!” So instead I do things like make shushing noises and sing lullabies. And when I can’t manage that, I just shut my trap.

5. Going anywhere takes a lot of effort. 

Going anywhere on time feels like a major undertaking. I travel with lots of stuff in tow, even with a second baby. While I’d like to say I’ve downsized from the first time around, the truth is I haven’t. In fact, my diaper bag now includes items for my 3-year-old as well. When she was a baby, I didn’t carry coloring books and portable toilet seats with us. 

Getting all of us ready to get out the door to go anywhere is a major undertaking and major accomplishment. If we get there on time, I’m pretty sure I deserve some sort of award.

6. Not sleeping in your bed for three months can really wear on you. 

While my daughter had her own issues in figuring out how to use her tongue to suck, she was a good sleeper. She slept first in her pack-and-play in our room and then in her crib in her room starting at 3 months. 

My son, thanks first to extra congestion after his delivery and then to his reflux, is not a good sleeper. He just starting sleeping in his crib and he’s not sleeping in there nearly as long as he was sleeping in the Boppy on the couch beside me. We’ll get there, I hope, because sleeping in a recliner is far from as comfortable as my bed.

7. Baby cuddles are sweet and should be enjoyed for no other reason than just to cuddle. 

I had trouble getting cuddle time with my daughter. Like I said she wouldn’t fall asleep in our arms. I also had to put her down quite a bit so I could pump milk for her. 

This time around in life with a newborn, I get lots more cuddles because our little dude is cuddly and because I’m nursing him. I really enjoy the snuggles. I just have to remember to cuddle sometimes just because baby cuddles are good for the soul and not just because I’m trying to get him to sleep or feed him.

8. Babies create lots of laundry. 

This is not different this time around. I had lots of laundry last time; I have lots of laundry this time. Before I had kids I always figured the laundry was for the baby. I’ve since realized that my laundry also increases when I get covered in spit-up and diaper blowouts. Fun stuff… 

(And let’s not pretend that I change my shirt every single time I get a teeny bit of spit-up on me, especially if I’m not leaving the house any time soon!)

9. Showers taken when other responsible adults are around are like mini spa days. 

I love my Saturday morning hot shower when my husband is home and making sure that the kiddos are fine. For 20 glorious minutes, I enjoy warm water cascading over me and nobody talking to me, crying for me or needing me to do something. It’s divine.

10. Trips anywhere alone are like mini vacations. 

This includes grocery shopping and doctor’s visits.  I’ve been disappointed when my doctor or dentist got me in fast enough that I didn’t have time to sit in the waiting room and read my book. Times have changed.

11. Toothless baby smiles make your heart melt — even when it’s 2 a.m. and you’ve not been asleep since 7 a.m. the day before.

It’s hard to stay mad, upset or any other negative emotion when you’re getting a toothless baby smile.

12. You can come up with all sorts of systems for how things work best.

For example, we learned pretty quickly that this little dude needs to be held more to go to sleep. My husband tests when our son is ready to be laid down by lifting his arm and seeing if it stays completely limp when he gently drops it. My test in the middle of the night has sometimes been when the sniffing from my exhausted tear-fest no longer makes him jump. Whatever works.

13. You are desperate to hear from other mothers of newborns. 

I have a small network of moms I enjoy talking with who have kiddos the same age as mine. We talk about shots, exhaustion, bottle size, diaper brands and all the stuff that comes in life with a newborn (and older kiddos). It helps me to know I’m not alone in my worries and frustrations.

14. On the flip side, unwanted advice from non-parents or those who haven’t had a baby for decades does not go over well. 

It’s a great way to annoy a new mom. And, honestly, we get tired of hearing how much we should enjoy these days because they go so fast. Having a 3-1/2-year-old, I’ve already learned this lesson a bit. 

However, there are most definitely parts of life with a newborn that I don’t enjoy and won’t miss. There are way more parts I do enjoy and will miss, but I don’t enjoy every single moment and can get tired of the suggestion that I should.

15. Hormones and exhaustion can combine in negative ways. 

I don’t mean to be grumpy, weepy or irritable. It just happens. And for that I’m sorry.

16. Mommy brain is real. 

We fully intend to remember what we were talking about or supposed to be doing and then we just don’t. This happens from being exhausted by life with a newborn and from being interrupted so frequently.

17. Babies smell good. 

I feel like I knew this before, but I almost forgot it. I think of Frank Barone, the grandpa on the old TV show “Everybody Loves Raymond.” He’d come in and smell his grandchildren’s heads and claim to be taking in their youth. I get that. Sometimes I smell my son’s head and just try to suck in that smell. He won’t smell like a new baby forever. It’s a special smell.

18. Mommy guilt is real. 

This isn’t something I had to learn anew. It’s something I’ve had from the moment I became a mom and I continue to struggle with it. I worry that I’m not doing enough for either child at any given time. I worry that I’m not making the baby do tummy time enough or playing enough games with preschooler. I worry if I leave them with their grandparents for a few hours to do something like see a movie with my husband that I shouldn’t be leaving them at all. I am good at mommy guilt.

19. Diaper changing time is sometimes the highlight of my day. 

Some of my favorite times with my daughter were on the changing table. She’d baby talk to me. She’d smile at me and look into my eyes. My son is the same way. Sometimes, in fact, we’ve been in the middle of really rough nights when his reflux is acting up and I’ll go to change his diaper and he’ll settle down and “talk” to me and smile at me. The changing table is sort of a magical place with my babies.

20. The rewards of life with a newborn are worth it. 

Just when I think I can’t possibly have the energy to go on another moment or just when I am so incredibly ready to give up, I look down at my baby’s precious little face and remember he depends on me so very completely for everything right now. He needs me. I’m irreplaceable to him (and to his big sister). 

And I love them both so completely. That love gives me the extra energy I need to press on and take care of their needs. (Some prayer for strength goes a long way, too!) Getting rewarded with baby smiles and coos makes my heart swoon and re-energizes me enough to keep going. 

It’s motherhood: long hours, crummy pay and tremendous rewards.

Looking for more on life with babies? Don’t miss these posts!

200 Easter basket ideas that aren’t candy

Easter basket ideas your toddlers to tweens will love that aren’t full of sugar!

Affiliate links are used in this post. If you make a qualifying purchase via my link, I receive a small percentage of the sale at no additional cost to you. I only recommend products and services I use and love. It helps support my blog, so thank you for your support! Read my full disclosure here

Hippity, hoppity, Easter’s on its way! And that means we need Easter basket ideas for our kiddos. Our Easter Bunny leaves some candy in our kids’ baskets and some small candy in the eggs he hides for them. But the Bunny also likes to fill their baskets with non-candy items they’ll love.

With that in mind, I’ve put together a list of 200 non-candy Easter basket ideas for toddlers through tweens to help out the Easter Bunny who visits your house. I focused on things kids would like and actually use but that also wouldn’t break the bank.

I’ve organized them based on age, but peruse other age groups than what you’re looking for. Some ideas work for multiple ages!

Easter basket ideas for toddlers and preschoolers

Board books

Check out this list of more than 100 children’s books worth reading for more ideas!
“I Love You Through and Through”
“Brown Bear, Brown Bear, What Do You See?”
“Chicka Chicka Boom Boom”
“Hippos Go Berserk”
“Peek-A Who?”

Bubbles

Of course you can do a standard bottle of bubbles that has a wand, but there are some fun options as well!
Fubbles no-spill tumbler with bubble solution
Automatic bubble blower
T-rex bubble shooter (um, my 8-year-old would totally love this, too!)

Play-Doh

12 cans of Play-Doh (4 ounces each)
Play-Doh Kitchen rolled ice-cream set
Trolls World Tour Rainbow Hair Poppy Play-Doh set

Sidewalk chalk

Yoobi sidewalk chalk paint rollers (3-pack)
24-pack dustless colored chalk
10-piece chalk set with holder

Bath toys

4-piece mold free bath squirters
Wind-up swimming penguin (available in blue or pink)
Caterpillar stacking and straining cups
Basketball hoop with floating balls
Fishing pole with toys

Stuffed animals

Plush brown monkey
12-inch stuffed teddy bear
Unicorn (also comes in a dragon and pegasus)

Slap bracelets

4-pack “Frozen 2” slap bracelets featuring Anna, Elsa, Kristoff and Olaf
5-pack (or 8-pack) of superhero slap bracelets
Plush animal slap bracelets (a wide array of animals, including dinosaurs, are available)

Art supplies

Toddler scissors
Melissa & Doug jumbo triangular crayons (10-pack)
Alphabet coloring book
Melissa & Doug Felt Friends stickers
Paint with water coloring book of puppies
Melissa & Doug Make-a-Face sticker pad
Crayola Color Wonder coloring set (These are amazing because the markers really don’t show up anywhere except on the coloring pages!)

Balls

O-ball with circles for little fingers to easily grip

Knobby balls (pack of 12)

Expandable ball (set of 2)

Lego Duplos

Town pizza stand (ages 2 and up)
First fish (ages 18 months and up)
Construction bulldozer set (ages 2 and up)

Misc.

4-pack of dinosaur vehicles

Easter basket ideas for early elementary

Books

Check out this list of more than 100 children’s books worth reading for more ideas!
The boxed set of books 1-4 in the Junie B. Jones series
“Charlotte’s Web”
“The Big Book of Silly Jokes for Kids”
“Tales of a Fourth Grade Nothing”
“Dog Man: Brawl of the Wild” (or any book from this series)
“Minnie and Moo Go to Paris” (or any Minnie and Moo book)

Silly putty

Original Silly Putty (3-pack)
Heat sensitive lab putty
Glow in the Dark Silly Putty

Legos

Lego Friends Olivia’s flower garden
Lego Creator 3-in-1 propeller plane
Lego City monster truck
Lego Friends heart box

Pool toys

Fish dive sticks
Water guns (2-pack — no pool needed for these!)
Scoop-a-Diving pool toys

Hot Wheels

5-pack of Batman vehicles
5-pack
1:24 scale monster truck

Sunglasses

Classic 1980s-style sunglasses (available in 12 colors)
Polarized sunglasses with straps (available in 17 colors)
Rhinestone cat eye sunglasses (available in 20 colors)

Swim goggles

Anti-fog eye goggles with nose and ear plugs and a case (available in 3 colors)
Anti-fog eye mask with a snorkle (available in 4 colors)
2-pack anti-fog eye goggles with nose and ear plugs (available 9 color combinations)

Watch

Digital Anna and Elsa watch
Digital Spider-man watch
Silicone analog watches (available in dinosaur, firetrucks and butterflies, each in a variety of colors)
Analog watches with the hour and minute hands labeled (available in Batman, Minnie Mouse and Disney Princesses)
Analog sea turtle slap bracelet watch

Arts and crafts

A how to draw animals book
A draw-and-write gratitude journal
A dinosaur or unicorn activity book
WikkiStix (wax sticks for creating)
Melissa & Doug Color by Numbers
A set of crayons, markers and colored pencils

Stickers

8 sheets of cute animal stickers
160 cars and trucks stickers
Paint by sticker zoo animals
Make-a-Face stickers

Dover sticker activity books (At $1.50 to $1.99, these are the cheapest item on the list and super cool! You can find a little sticker book for just about anything your kiddos would like including making ice cream sundaes, Noah’s ark, decorating Easter eggs, baby animals, dinosaurs and so much more!)

Barbies

Dolls
Barbie rhythmic gymnast doll with two batons and a ribbon (also in brunette with darker skin)
Babysitters Inc. baby (with blanket and bottle)
Fashionista Ken
Swimsuit Barbie (The swimsuit is painted on, so it’s ideal for the bathtub, pool or anywhere your kiddo wants to play in water!)
Rockstar Chelsea with guitar, microphone, headphones, VIP tickets and star-shaped glasses

Accessories
Barbie kitten with accessories
Barbie day spa accessories
Barbie barbeque grill with food
Barbie gardening accessories with plants and more
Barbie house cleaning supplies
Barbie breakfast tray with food

Games

Charades
The card game War for kids
Minecraft UNO
Simon micro series

Balls

6-pack of puffer balls
4-pack mesh squishy stress balls
Nee Doh stress ball

Blind bags

Ooey Gooey pickin surprise (slime)
My Little Pony Magical Surprise
Disney Princess Secret Style Surprise princess
Power Rangers Micro Morphers
Dreamsworks’ Trolls World Tour Tiny Dancers (wearable figures)

Polly Pocket sets

Dolphin trainer set
Barbeque set
Playground set
Rock star set

Water snakes

5-inch long water snake with glitter
Long 9.5-inch long water snake
4.75-inch water snake with dolphins inside

Action figures

12-inch superheroes like Spider-man, Superman and Captain America
7-inch Imaginext DC characters like Black Bat & Ninja Batman, Flash & his cycle or Joker & Harley Quinn
Pokemon figures like Pikachu and Grookey
2-pack Fortnite Battle Royale action figures

Misc.

Mighty Beanz
4-pack Hatchimals collectibles with 4 accessories
Magic ring bracelet toy

U.S. map 60-piece puzzle
A metal or plastic neon slinky
Melissa & Doug DIY wooden race car
DIY Scratch art bookmark kit (makes 12 bookmarks)

Easter basket ideas for tweens

Books

Check out this list of more than 100 children’s books worth reading for more ideas!
“Harry Potter and the Sorcerer’s Stone”
“The Girl Who Drank the Moon”
“The Lion, the With and the Wardrobe”
“A Wrinkle in Time”
“The Lightning Thief”
“The Best Kind of Magic”

Arts and crafts

How to draw books like Pokemon, Harry Potter or Unicorns, Mermaids and More
A fashion design sketch portfolio
4,000-piece set of multi-colored Perler beads (separated by color)
Create your own stepping stone: turtle, ladybug, sun and 5 others
Perler bead with patterns: Harry Potter, Spider-man, Zelda, emojis or a dog

Lip balm or gloss

6-count Sweet Tarts lip gloss canister
8-count M&Ms Lip Smackers
8-count Starbrust Lip Smackers
8-count Coca-Cola Lip Smackers
5-count Lip Smacker liquid lip gloss
8-count Sour Patch Kids flavored lip balm
8-count Skittles Lip Smackers

Blind bags

Funko Mystery Minis: Marvel Venom
Lego Unikitty collectibles
Mandalorian foam 3D clips

Jewelry

Necklaces: A cross necklace or an initial necklace
Bracelets: An initial charm bracelet, a leather charm bracelet (available in 36 options) or 6 colorful beaded bracelets
Earrings: ladybug earrings, cross earrings or 9-count earrings in various design options

Games

Monopoly Deal card game
Clue: the card game
Uno: Emoji

Wet Brush

(My daughter and I LOVE this brush for her ultra-thick hair. It works on both wet and dry hair to detangle without pulling and hurting. We have one upstairs and one downstairs!)
Floral design Wet Brush
Disney character Wet Brush

Puzzles

100-piece animal selfies puzzle
100-piece sea turtle puzzle
300-piece Pokemon fan favorites puzzle
350-piece puppies in sneakers puzzle

Water bottle

50 Strong Kids sports squeeze 22-oz. water bottle (available in 14 patterns)
Contigo auto spout straw water bottle (available in 24- and 32-ounce; 24-ounce bottles are under $11)
DIY Color stainless steel water bottle

Legos

Lego Technic toy tractor
Lego Marvel Avengers Ironman mech
Lego Star Wars Millennium Microfighter

Mad Libs

(All under $5)
“Dog Ate My Mad Libs”
“Sleepover Party Mad Libs”
“Camp Daze Mad Libs”
“Goofy Mad Libs”
“Unicorns, Mermaids and Mad Libs”
“Diary of a Wimpy Kid Mad Libs”
“Star Wars” Mad Libs”
“Marvel’s Avengers Mad Libs”

Misc.

Hair chalk
Headphones (multiple colors)
Zoya nail polish (free of harsh chemicals, lasts so long and comes in tons of colors) Some fav pinks for spring: light pink, medium pink and bright pink
Flying disc (multiple colors)
OMG Little Live Pets dogs in ballerina and rainbow pop

Looking for more Easter ideas? Don’t miss these easy DIY Resurrection Eggs with a free printable!

Become a happy family with one small attitude shift

Changing assumptions can lead to a happy family dynamic

One of the things I want most as a mom is to have a happy family. I want us to have a good relationship with each other and get along.

Yet, the truth is that nobody gets along all of the time. We get short with each other. My kids argue sometimes. My husband and I can get cranky with each other.

One of the biggest things that can trip us up in relationships is making assumptions about the other person or people. We’ve found a trick to help make those assumptions positive instead of negative. And it makes a big difference in how we treat each other.

Negative assumptions

We may not even realize it, but we can make negative assumptions about other people quickly and easily. In fact, we are more inclined to make negative assumptions about someone than positive ones.

When someone cuts us off in traffic, we may not consciously think, “That guy is just trying to make my drive more difficult!” But we react that way. We get angry and offended.

We do the same thing within our families and it can result in anything but a happy family. When your husband does the laundry then forgets to get it out of the dryer, we don’t consciously think, “He’s trying to make my life harder. He knows I’m busy!” But we react that way. We get upset with him. Our attitude shifts negatively and soon everyone in the family feels the effect of that negative assumption.

The root of negative assumptions

When it comes down to it, the root of negative assumptions is selfishness. Sometimes we are so caught up in ourselves and what we have going on that we subconsciously think the world revolves around us.

Of course most people would never admit to feeling that way at least sometimes, yet it can be how we act. What we are really feeling with our frustration at the guy who cut us off in traffic or the husband who didn’t complete a chore is that they are personally affecting us. And, gosh darn it, we deserve better treatment!

So many issues in relationships come down to the root of selfishness, because we can struggle to get over ourselves and think of others. God is clear in His Word that we are to think of others before ourselves and not do things out of selfish intent (Philippians 2:3-4). He knows we can’t have happy relationships or have a happy family if we are too focused on only ourselves.

Changing to positive assumptions

Making the shift to positive assumptions isn’t as difficult as you might think. For us, it started in our marriage before we had children. Since then, it has grown and expanded. We’ve put it into practice and gotten better at it so that now it’s our first reaction 90% of the time.

Instead of assuming that the other person is trying to be difficult or intentionally hurt you, assume they aren’t out to get you. What you really do is give them grace.

In the laundry example, instead of assuming my husband is trying to get out of folding the laundry, make my life harder or couldn’t care less about taking care of our family’s needs, I ask nicely. I know that most likely, he just completely forgot. Maybe we can fold the laundry together or he just has a friendly reminder to do so.

It sounds like such a small shift, but it makes a big difference in our relationships. We are able to more easily stay on the same team, so to speak, because we recognize that we’re not battling. We recognize that our loved one isn’t out to make our lives more difficult. We give grace.

Teaching children about positive assumptions

Our kids are still learning about positive assumptions, especially our youngest who just turned 8. He has a strong sense of justice. Sometimes he mistakenly assumes that his sister purposefully went to the bathroom when he needed to brush his teeth. The list could go on.

But we remind him to not assume she is trying to make his life more difficult or that she’s out to get him. She’s not trying to make him angry. It’s OK to talk and find solutions while keeping in mind we all have the same goal.

How positive assumptions make for a happy family

I’m not saying or implying that shifting to positive assumption is going to mean you always have a happy family. I’m also not implying that I always have a happy family — because I don’t!

But, I can tell you that it makes a difference. We don’t criticize others as much. We don’t get as upset and indignant over the small stuff. All of the stuff I’m talking about here is small stuff. Do I want to argue with my husband over laundry or my kids over dishes? Nope. I also don’t want my kids to argue over bathroom time or whatever else they come up with.

So, we do our best to assume that the members of our family only want good for us and not bad. We promote that as much as possible. Because when it comes to people you love, you do (and should) only want good for them. The challenge is living that our in the daily grind of family life.

Easy baked quesadilla recipe

Crispy, delicious quesadillas made in your oven

Affiliate links are used in this post, if you make a qualifying purchase via my link, I receive a small percentage of the sale at no additional cost to you. I only recommend products and services I use and love. It helps support my blog, so thank you for your support! Read my full disclosure here.

I love easy recipes that are customizable for what my family likes. I’ve got a couple of particular eaters in my house. This easy baked quesadilla recipe fits that category.

Before we had kiddos, I came up with this recipe for my husband and me and I continue to make it now. This recipe is pretty straightforward and simple but you can switch it up to include whatever your family likes.

Preheat the oven to 400-degrees (F) and prepare your baking sheets. You can spray them with non-stick cooking spray or line them with sheets parchment paper or silicone baking mats.

I prefer to line my baking sheets for easier clean-up. I also like the parchment paper because then I can use a marker to write the first initial beside the quesadilla of who it belongs to since they are all different in some way.

Once you’re all set up then get out your tortillas. I use two tortillas per quesadilla, but you could also use one quesadilla folded in half.

Tortillas are where the baked quesadilla recipe starts. You could use wheat tortillas. I used flour. And you can pick the size. I made smaller soft taco-sized tortillas for my son’s quesadillas. I used the larger burrito-sized tortillas for my husband, daughter and me.

To help them crisp up nicely in the oven, I spritz one side of each tortilla with margarine spray. You can also use melted butter and your spray bottle to spritz the shells or lightly brush it on. I do around 10 squirts for the large burrito-sized shells. I spray the bottom first and then spray the top shell after I place it on top when the filling is in.

The spray margarine is the easiest for me to use, but you can also work with melted margarine or butter. Non-stick cooking spray works as well, but not quite as great.
Once the tortillas are sprayed, I use my clean hands and smear the margarine around a bit so most of the shell has a light coating.

With the buttered side face down onto the cooking sheet, put the filling in your quesadillas. Get creative with what your family likes. My son’s was just cheese. My husband’s had bacon and onion with a small amount of cheese.

This is my son’s quesadilla filled with only cheese. I use mostly Mexican cheese blend but also add in some Italian cheese blend.
My husband’s quesadillas are filled with precooked bacon cooked until it’s crispy and not too much cheese, because he doesn’t like cheese so much.

My daughter and I opted for a chicken bacon ranch version. It was so incredibly good. To make it easier, I used precooked refrigerated chicken, precooked bacon cooked to a crisp in the microwave, ranch dressing, tomato, onion and roughly chopped baby spinach.

The chicken bacon ranch quesadillas were quite delicious! Mine is on the left, because I like cheese much more than my daughter.

Put the quesadillas into the preheated oven and bake them for 6 minutes. Pull them out and flip them over. Put them back in the oven for another 6 minutes. Check and see if they are golden brown around the edges. If so, they are finished. If not, leave them in there and check again in 2 minutes.

Fresh from the oven!

Use a pizza cutter (or sharp knife) to slice the quesadillas and serve them warm. We always eat sour cream with ours, because our family LOVES sour cream!

Easy baked quesadillas

Ingredients
  

  • Flour or wheat tortilla shells soft taco or burrito size, depending on how big you want your quesadillas to be, 2 per quesadilla
  • Spray margarine can also use melted margarine or butter or, in a pinch, non-stick cooking spray
  • Shredded Mexican blend cheese
  • Shredded Italian blend cheese
  • Quesadilla fillings such as bacon, chicken, ground beef, steak, onions, peppers, tomatoes, etc.

Instructions
 

  • Preheat the oven to 400-degrees.
  • Prepare baking sheets with non-stick cooking spray or line them with parchment paper or silicone baking mats.
  • Get out one tortilla shells per quesadilla. Cover on side of it with the margarine or butter. (For spray margarine, I use 8 to 10 squirts and smear it around with my clean hands.)
  • Please the shells buttered side down onto your prepared baking sheet(s).
  • Put your filling ingredients onto the top of the shells. Top them with cheese. I use 3/4 Mexican blend or colby jack cheese and 1/4 Italian blend or mozzarella cheese. The amount of cheese varies based on the size of your shell and your family's preferences.
  • Then add whatever ingredients your family prefers. I love chicken bacon ranch using precooked, refrigerated chicken, precooked bacon cooked until crispy in the microwave, shredded cheese, ranch dressing, tomato, onion and roughly chopped spinach.
  • Place another tortilla on top. Lightly cover it with margarine or butter, just as you did the bottom shells.
  • Place into your preheated oven for 6 minutes.
  • Pull out the quesadillas and carefully flip them over.
  • Bake for 6 more minutes or until the edges are a nice golden brown.
  • Use a pizza cutter or sharp knife to slice and serve hot. We usually serve ours with sour cream because we love it!

The push and pull of motherhood

We can want to be away from and with our children at the same time!

I originally wrote this piece about motherhood in March of 2014 when my daughter was 4 and my son was 1. While they are now 11 and nearly 8 and some things have changed, the feelings of the push and pull of motherhood remain.

Not that long ago while my daughter was trying to prolong going to sleep by keeping me in her room, she stopped me as I got to the door and said, “But, I’ll miss you while I’m asleep.” I’m a sucker for her. I went back for yet another hug and told her I’d miss her, too.

At the time, it was the end of the day and I was tired. I’m not a night person. And by the time we manage to make it until bedtime, I’m usually quite ready and happy for the kiddos to go down so I can have an hour or two of downtime before I hit the hay, too. I wouldn’t necessarily say that I miss the kids at that point in my day. (I know. What a horrible mother I am!)

But, I’ve realized that in the mornings (now that they are both sleeping through the night more often than not), I really have missed them. When my daughter comes out of her room and comes to find me, I’m mostly happy to see her. (Full disclosure: sometimes I take a couple of minutes to feel this joy when my quiet morning time comes to a close.)

And I love morning snuggles. When my son wakes up and I get him out of his crib, we snuggle for just a moment before I change his diaper. Is he always on board? No. At 13 months, sometimes he’s squirming around in the snuggle to try and get a peek at his sister or dog, but that’s OK. I still live for these morning snuggles.

I feel like this is so much the truth of motherhood. So many times I long for a break from my kids. Like every night at bedtime, I’m happy to see them go to sleep so I can have just a minute to sit down and breathe. But then 12 hours later, I’m happy to see them and feel like I really have missed them somehow.

I love my quiet and alone times. I’m an introvert. These are the times that feed my soul. I wouldn’t be anywhere near a happy mom without some downtime, but I really am finding that I do (gasp!) enjoy my kids!

Motherhood is this constant pushing and pulling. We think about it from the beginning with kids trying to pull away when they can and gain independence, but I think it’s true for us moms, too. We sometimes want to push our kids away to get a break and then just as quickly, we want to pull them right back for a hug. It’s an odd dichotomy. And it happens often.

Earlier this week, I had to wheel the trash can to the curb for pick-up. My husband usually does that job, but he’s been sick for a week, so I did it after dinner. I had made dinner, fed the kids, made an alternative to the alternative for the toddler who threw most everything I gave him on the floor, cleaned the kitchen, fielded a barrage of questions and comments from the preschooler, sorted through some things in the freezer and bagged up the trash. I was tired.  

As I was about to head out the door, I smelled the dirty diaper on my son. I sighed and continued. It might have been the slowest walk to take out the trash anyone has ever done. The weather was nice and it was blissfully quiet outside. I wasn’t sure how much I wanted to go back inside at that moment. I knew what was waiting for me.

So, I took a deep breath and went back in. That minute break was needed. It wasn’t long enough. And then I told my son he needed a new diaper. His latest trick is that when we tell him this then he walks to his changing table. This time, he reached up to grab my hand before he started off to the changing table. My heart melted. I found myself refreshed in the midst of a long evening. Just one minute earlier, I’d been ready to just be alone for a while. But with one little hand reaching up for me, that melted away.

That’s motherhood. We long for breaks; we need breaks. However, we long for our children; we need our children. It’s a constant back and forth.  

Now, you’ll have to excuse me while I go.  While I’ve been writing this, my daughter has finished her breakfast and come over for a snuggle on the couch in our PJs.  I’m not about to miss out on that!

Families With Grace
Privacy Overview

This website uses cookies so that we can provide you with the best user experience possible. Cookie information is stored in your browser and performs functions such as recognising you when you return to our website and helping our team to understand which sections of the website you find most interesting and useful.