These pepperoni pizza pinwheels are short on time but not on flavor!
Affiliate links are used in this post. If you make a qualifying purchase via my link, I receive a small percentage of the sale at no additional cost to you. I only recommend products and services I use and love. It helps support my blog, so thank you for your support! Read my full disclosure here.
I can pretty much guarantee that any recipe that has to do with pizza is going to be something that my family will love and devour. A few years ago, I stumbled across this recipe for pepperoni pizza pinwheels. I don’t even remember where I saw it, but I changed it slightly and it’s now a recurring recipe for our family.
It’s the kind of recipe that works well for an appetizer, carry-in or dinner. Pepperoni pizza pinwheels are ideal party food if you are hosting a get-together as well!
Though I use only pepperoni for our family, you could easily use other pizza toppings your family likes as well as long as you chop them well. (If you are using another meat like hamburger or sausage, be sure to cook it first before adding it into this recipe, just like you would for a pizza.)

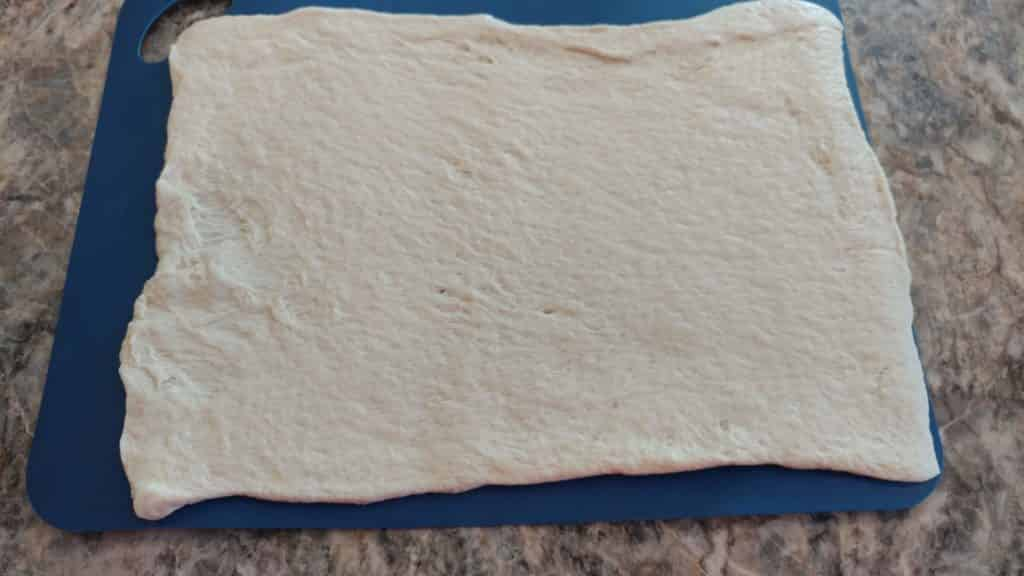
Preheat your oven according to the directions on your canned pizza crust. (Mine said 425-degrees.) Spread your pizza crust out onto a large cutting board to form a large rectangle.
Next, you can add Italian seasoning to the crust for a little extra flavor. You can use Italian seasoning blend, oregano, crushed red pepper or whatever you have on hand. You can also skip this step. I have made the pepperoni pizza pinwheels both with and without the seasoning, and it’s good both ways!
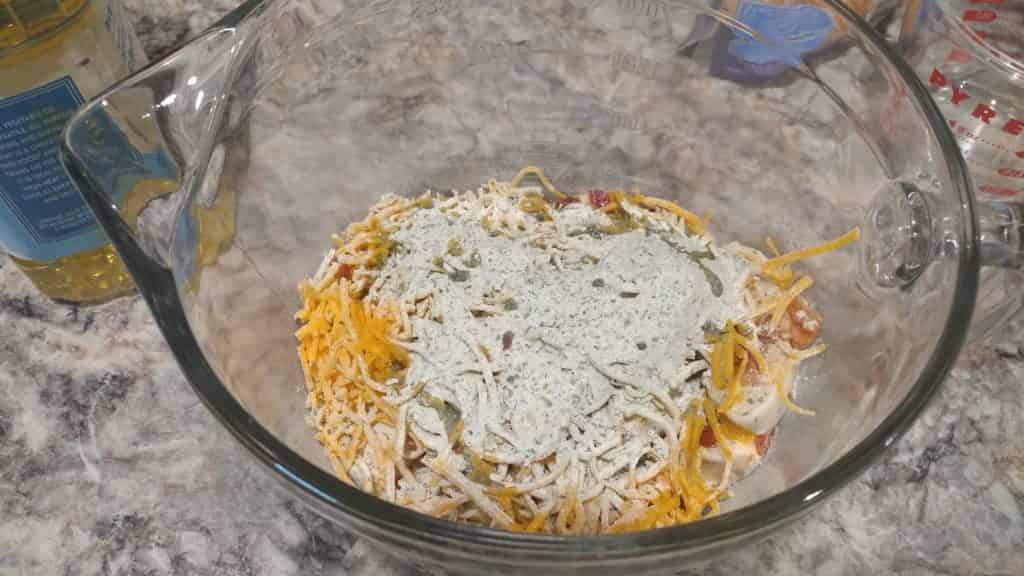
Then you spread shredded cheese over the top of the seasoning. I use either mozzarella or Italian blend. Cover the crust with a layer of cheese. This is how much cheese I put on and my husband and kids don’t like much melted cheese! (My husband prefers pizza ordered with 1/4 the usual amount of cheese from restaurants.)

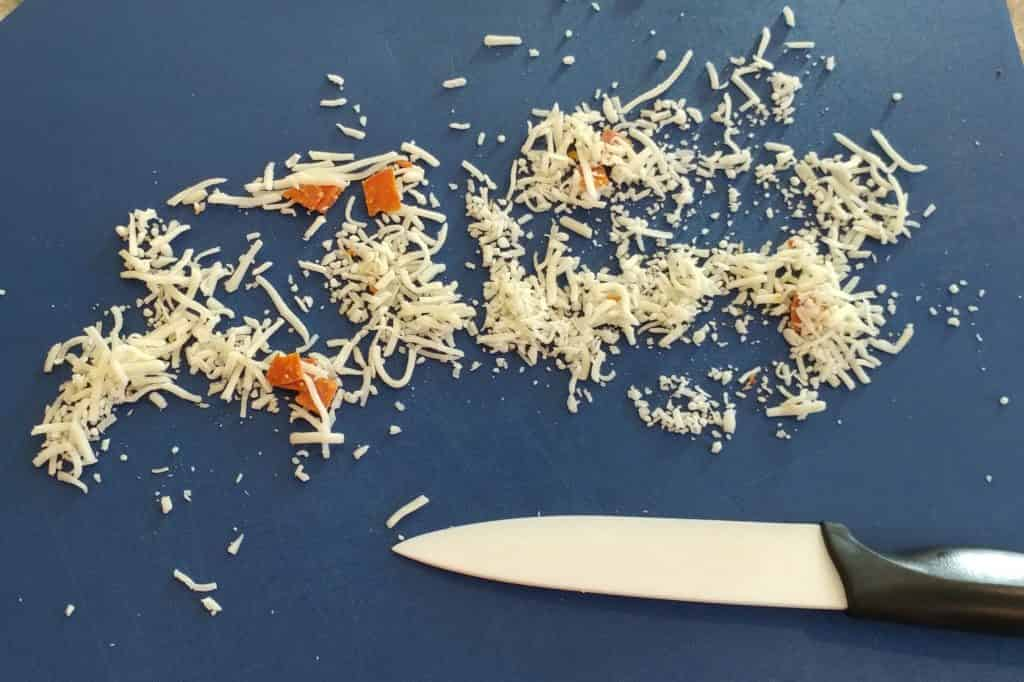
Next, chop your pepperoni (and other pizza toppings if desired) and spread it evenly over the top of the cheese layer. You could buy the pepperoni sticks or diced if you can find it. I usually just have round pepperoni slices on hand, so I use a sharp ceramic knife and cut them into small pieces.

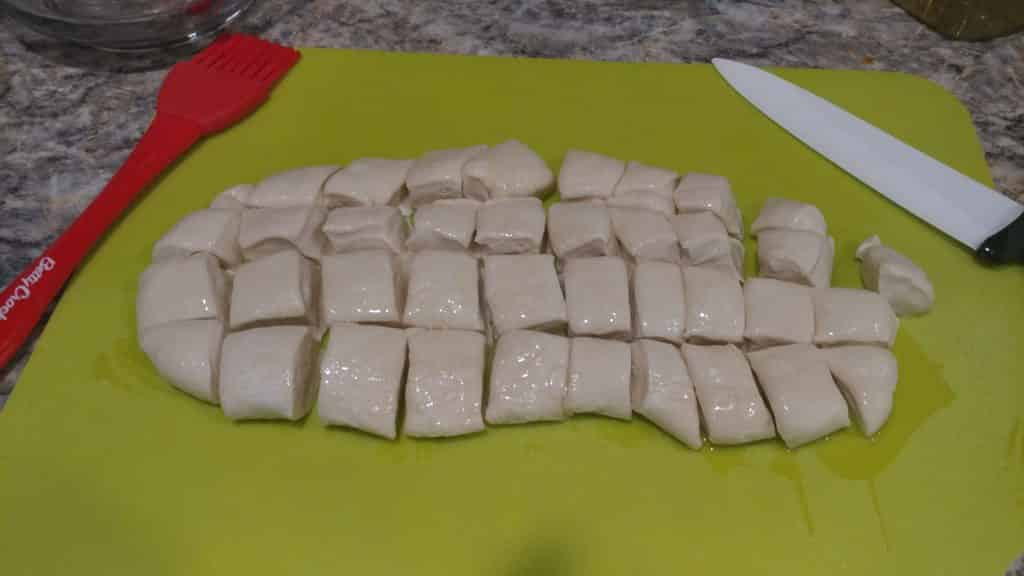
Your pepperoni pizza pinwheel crust is now all ready. Starting from one of the longer ends of the rectangle, roll the dough tightly. If you’ve made cinnamon rolls before, it’s the same sort of roll. It will turn into one long log like this:

Using a very sharp knife (I love ceramic knives for their sharpness and ease to care for), slice the roll into about 1-1/2 inch thick slices. Place the cut slices onto a cookie sheet sprayed with non-stick cooking spray or covered with parchment paper. (I recommend parchment paper for easy clean up.)
Chances are, you’ll have cheese and some pepperoni left on your cutting board when you are finished. I take this and spread it over the pepperoni pizza pinwheels on the baking sheet — no sense in having ingredients go to waste!
Now you’re ready for the oven. Your pepperoni pizza pinwheels should look something like this:

Bake them in your preheated oven for 12 to 15 minutes until they are lightly browned.

You can serve the pepperoni pizza pinwheels with pizza sauce, but my family loves them best served with Ranch dressing to dip them in. (And then that lets me easily add some baby carrots on the side for them to dip as well!)
These pepperoni pizza pinwheels are best served warm.

Quick & easy pepperoni pizza pinwheels
Ingredients
- 1 13.8 oz. refrigerated pizza crust
- Italian seasoning if desired
- 1-1/2 cup shredded mozzarella or Italian blend cheese more or less to taste
- 10 slices of pepperoni diced
- Other diced pizza toppings if desired (all other meat should be cooked ahead of time)
Instructions
- Preheat the oven according to the temperature on the pizza crust (mine said 425-degrees).
- Open the pizza crust and stretch it out into a flat rectangle on a large cutting board.
- Sprinkle Italian seasoning, oregano or crushed red pepper over the crust, if desired.
- Top with shredded cheese. The cheese gets crispy and not gooey on these, so I usually use more cheese than normal for my family, but I also have a family who doesn't like much melted cheese (pray for them!).
- Top with the diced pepperoni. (You can also use other diced pizza toppings if desired. If you are using another meat, like hamburger or sausage, be sure to cook it first.)
- Roll the crust into a tight log starting on one of the short ends of the dough.
- With a sharp knife, slice the roll into about 1-1/2 inch thick rolls and place on a cookie sheet sprayed with non-stick cooking spray or covered in parchment paper. (I recommend the parchment paper route for easier clean up!)
- Bake for about 12 to 15 minutes until lightly browned. Serve with pizza sauce or Ranch dressing for dipping.