Families With Grace

Helping Christian moms create homes filled with grace, love & faith

Bad moments don’t make you a bad mom

Encouragement for moms

Affiliate links are used in this post, if you make a qualifying purchase via my link, I receive a small percentage of the sale at no additional cost to you. I only recommend products and services I use and love. It helps support my blog, so thank you for your support! Read my full disclosure here.

I wrote this post as encouragement for moms back in 2012 before my youngest child was even born. It may be 10 years later, but I still need this reminder just as much!

Encouragement for moms: Bad moments don't make you a bad mom

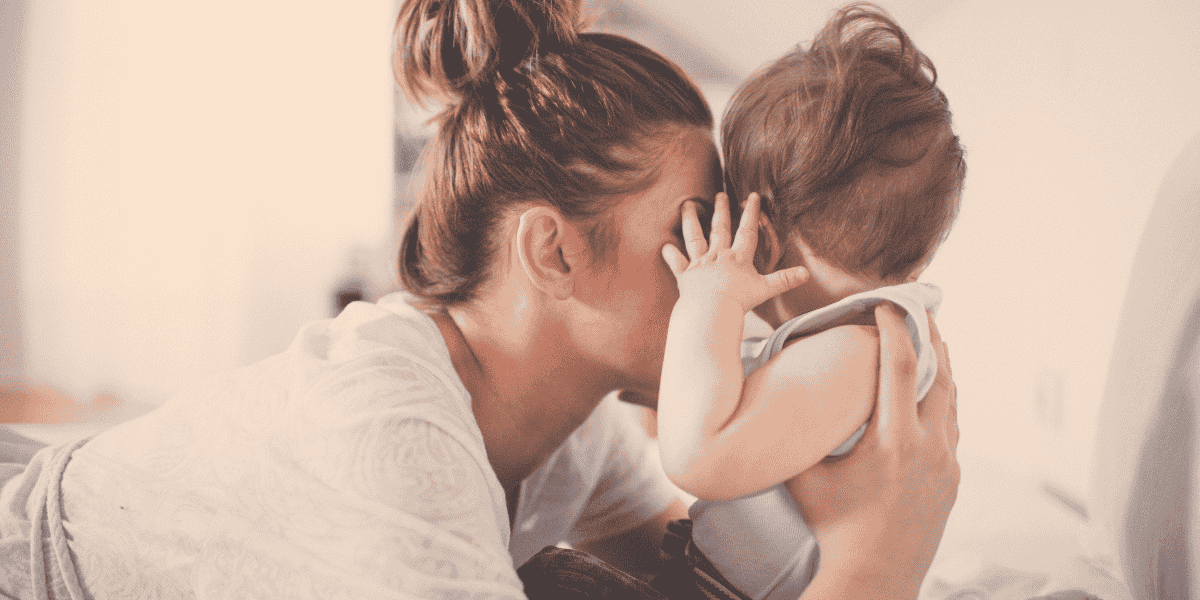
I’d guess that ever since Eve, moms have been questioning themselves and feeling like bad mothers when things go awry. My daughter was less than a couple of days old before I felt like a bad mom. It was so intense that my husband even suggested I talk with my own mother about whether it got better. My baby was crying all the time and nothing I did seemed to help. I cried. She cried. We saw a different pediatrician when ours was out who further laid the blame on me. I climbed into the backseat with my baby on the way home and cried some more. It was awful feeling so much love and so much helplessness. I felt like the world’s worst mom and I had barely even been a mom.

The end of the first week, my husband figured out the problem. The kiddo didn’t know what to do with her tongue to suck milk effectively. She was constantly hungry as a result. Once we knew the problem and were able to work on it by having me exclusively pump and then negotiate the bottle just so in her mouth, things got a lot better. I didn’t immediately feel like a great mom. I did at least feel better that my baby was happier.

Every mom has a different story, but we’ve all had those moments where we feel just awful. I’ve had many more moments since then like when my baby rolled off my bed, found a pair of scissors to play with, skinned her knee to pieces when she fell WHILE I was holding her hand and so much more. I have often said to my husband, “I’m such a bad mom,” and then lurched into a story about why.

Words of encouragement

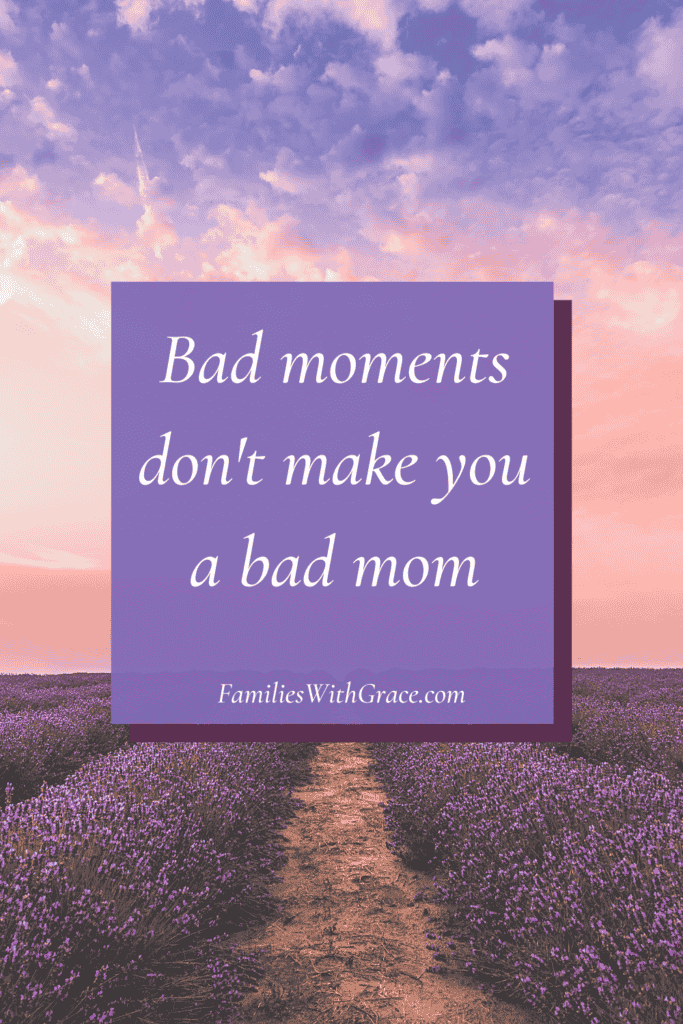
Yesterday, though, a friend shared a quote on Pinterest that stopped me in my tracks a minute and got me thinking. It’s from “Unglued” by Lysa Terkeurst: “Bad moments don’t make bad mamas.” I like that way of thinking. Aside from needing to cut myself some slack (I have a lifetime of practice of being too hard on myself), I also need to change my way of thinking.

Instead of thinking, “I’m such a bad mom for losing my patience with her when she wanted to play,” I need to think, “That was a bad moment.” And then assess how I can fix it the next time that situation arises. We all have bad moments whether it’s in parenthood, at work, at home, wherever. They just happen. Life is far from perfect all the time. Life is far from happy all the time. But, bad moments really don’t make us bad people.

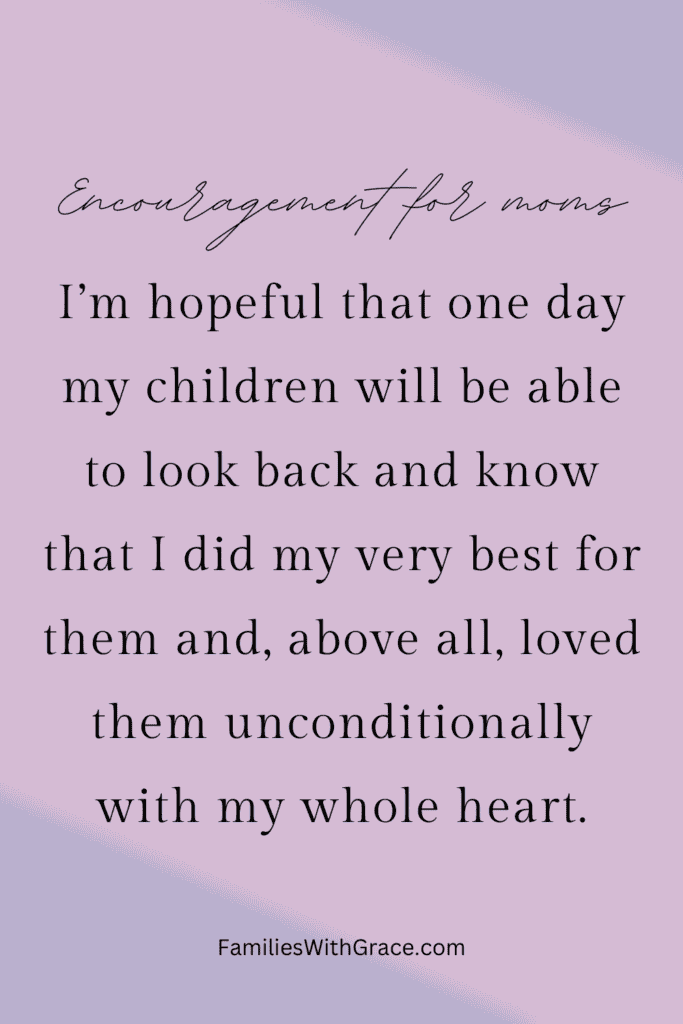
I suppose bad mothers exist, but the majority of us are doing the best with what we have. My own mom wasn’t perfect, but she was perfect for me. I have to believe the same is true for my children. I’m not a perfect person. I’m not a perfect mother. We’re going to have bad moments. But, I’m not a bad mother. Bad mothers don’t try. They don’t care. I try very much and care about being a mom above almost everything else. I’m hopeful that one day my children will be able to look back and know that I did my very best for them and, above all, loved them unconditionally with my whole heart.

I’m hopeful that one day my children will be able to look back and know that I did my very best for them and, above all, loved them unconditionally with my whole heart.

And one of these days, I hope we can sit around together and laugh at some of the bad moments. Sometimes in hindsight things are much more humorous than they feel at the time they happen. I still haven’t been able to always employ a college professor’s theory of, “If you’re going to laugh at it later, you might as well laugh at it now.” But, I do see humor in some things now that weren’t one bit funny at the time they happened.

Maybe one day I’ll sit and joke with my daughter about how she had to figure out eating from the start. Or maybe we’ll joke about the time she rolled off the bed and survived to tell the tale. I’m guessing, though, that there are lots more bad moments that will happen between now and her adulthood that we’ll have to joke about. That’s a part of life, I suppose. And it will be all right. We’ll survive together. As long as I keep trying and keep loving her (and soon her brother), I’m pretty sure I can’t go all that wrong.

5-Minute breakfast ideas for families

16+ Breakfast ideas you can make in 5 minutes or less!

Affiliate links are used in this post, if you make a qualifying purchase via my link, I receive a small percentage of the sale at no additional cost to you. I only recommend products and services I use and love. It helps support my blog, so thank you for your support! Read my full disclosure here.

I love breakfast food. If I had to pick one type of meal that I’d have all day every day, I’d go for breakfast food. There are so many options, and they’re all so yummy! But, making them in the morning is not as much my thing. The typical weekday morning has too much to do for me to want to cook a big breakfast that nobody has time to eat anyway! For more than a decade now, I’ve been making breakfast for my kiddos and have come up with all sorts of yummy, healthy and EASY 5-minute breakfast ideas.

5-Minute breakfast ideas for families

These are things that make it into our lives all the time. They’re not all made from scratch; in fact, most of them aren’t. But they are ideas to get food in bellies to get the day started off on the right foot, and you can’t go wrong with that!

Continental 5-minute breakfast ideas

One of the things I enjoy about staying at hotels (aside from not having to wash the towels we use!) is the continental breakfasts. Most of them are so simple, but getting to choose from a variety of things that are premade is just special to me. (Again, I love all breakfast food, so this may not be too surprising!)

You can imitate continental breakfast at home. I’m not saying set out lots of choices for your family to pick from (though if that works for you, go for it!). But, I like having items on hand that are similar to what I’d find at a continental breakfast. Then I can mix and match them together for a healthy, 5-minute breakfast for the kiddos. Pick two or three choices from this list, and you’re set!

Yogurt

My kids love yogurt. So, we always have at least one kind of yogurt in the fridge. Strawberry, peach, vanilla and strawberry banana are their favorites. I used to buy it in individual cups, but I realized the big 32-ounce container makes way more sense. I love that yogurt adds a healthy, easy way to get some protein in their bellies before heading out the door to school.

We usually keep yogurt tubes as well both in the fridge and in the freezer. While they do eat the tubes at breakfast sometimes, they also work for lunchboxes and after-school snacks.

Nature Valley Sweet and Salty Peanut granola bars

Granola bars

Granola bars are a staple in my pantry. Along with breakfast, they also work for lunchboxes and after-school snacks. There are a few different varieties we have liked through the years, but my kids’ all-time favorite is sweet-and-salty peanut bars.

Recently, my son has been enjoying the same types of granola bars in the cashew variety. My favorite is chocolate chip granola bars. And then we can’t forget fruit and grain bars. Berry flavors are my kids’ favorite.

When I am working ahead of time, we also love homemade oat and honey granola. It’s super easy to make; I often make it for us to snack on throughout the week. And when that happens, I almost always include it for breakfast, too!

Easy oat and honey granola recipe

Fresh fruit

The best fresh fruit for 5-minute breakfast ideas is fruit that doesn’t take much work. Think bananas and apples or precleaned and prepped berries or grapes. We also go for fresh peaches in season that I clean and slice up in just a couple of minutes for the kiddos. I usually pair flavors together. If I have strawberry yogurt, then I serve it with berries.

Dried and canned fruit

Fresh fruit is always good, but don’t overlook dried and canned fruits. My kids love raisins, unsweetened applesauce (Pouches and single-serving cups are super easy!) and fruit packed in its own juice for additional breakfast options. Dried and canned fruits last much longer and are easily accessible year-round no matter where you live.

Honey Nut Cheerios

Cereal

I LOVE cereal. In fact, that’s my personal go-to breakfast. Almost every single morning I enjoy a bowl of Honey Nut Cheerios with a small glass of milk to get my day underway.

However, you can get creative with cereal, too. My kids don’t like milk on their cereal. They eat it dry. So, I will often include a small amount of cereal as a side for them. They can add it into their yogurt as they eat it for an extra crunch or eat it solo. My daughter tends to go for Honey Nut Cheerios like I do, while my son really loves plain Cap’n Crunch.

Another way we get creative with cereal is making peanut butter honey nut cereal clusters. just like with the homemade oat and honey granola, this takes longer than five minutes. But just like with the granola, I make these clusters for us to snack on throughout the week and they end up being a breakfast option, too!

3-ingredient peanut butter honey nut cereal clusters

Muffins

Because they aren’t necessarily the healthiest option, muffins aren’t in rotation all the time at my house. But every couple of months or so, I’ll either make some muffins or buy mini muffins.

Carb-y 5-minute breakfast ideas

Some of these more carb-y breakfast ideas can pair well with some of the continental breakfast options above and some stand well on their own.

Bagels

Bagels are a staple in my freezer. Yep. I buy refrigerated bagels (Lender’s is our favorite brand) and stick them in the freezer. My son will eat bagels for breakfast, lunch or dinner. But they really are a great, filling and fast breakfast food. I wrap the bagel in a paper towel and thaw it in the microwave for 25 to 30 seconds, then put it in the toaster. The go-to bagel for my son is a plain bagel with peanut butter. I prefer cream cheese and sometimes another flavor like cinnamon raisin or blueberry.

Cinnamon toast

This breakfast is a throwback to my own childhood and more in the every couple of months breakfast rotation. All you do is toast bread and spread it with some butter while it’s still hot. Then top it with cinnamon and sugar. If you don’t have a cinnamon sugar blend, just use some sugar, a bit of cinnamon and mix together on the top of the toast. It’s so easy and so yummy!

Peanut butter toast

Toasted bread with peanut butter smeared on it makes another tasty 5-minute breakfast that packs a protein punch. I serve this to my daughter as toast and to my son as a sandwich. Either way, it’s a great breakfast option that pairs well with fruit or a yogurt tube.

Avocado toast

Avocado toast has become one of my daughter’s favorite treats. Sometimes she’ll add some egg with it, but she cuts the avocado and puts it on toast, usually with a drizzle of agave syrup as well.

Hot 5-minute breakfast ideas

Just because you are going for a fast breakfast doesn’t mean it can’t be a hot one. These hot breakfasts really are ready in 5 minutes or less!

Waffles

Frozen waffles have come a long way since I was a kiddo. You can get basic ones or Belgian waffles. Either way, pop them in the toaster and within minutes they’re ready to devour. My son loves his with a bit of butter and some sugar-free syrup. My daughter prefers to dip her waffles into unsweetened applesauce. In fact, I started them both on waffles and pancakes with applesauce as toddlers to be healthier and less messy. They both still eat them that way, though my son ultimately prefers syrup these days.

Pancakes

Confession of sorts: my kids prefer frozen pancakes to homemade most of the time. It sort of flabbergasts me, but then again they have frozen pancakes more often. I stick a stack of three pancakes in the microwave for 1 minute and 11 seconds. (Notice I don’t have to touch any other number besides one!) Then they’re ready to go. Just like with waffles, you can serve them with unsweetened applesauce as a syrup alternative.

Oatmeal

This comes with another confession: I only like instant oatmeal. It’s what I had most often growing up, and I just prefer it! Much to my husband’s disdain, I make instant oatmeal with hot water, not even hot milk. But make it however you like. My mom uses quick cooking oats in the microwave to make hers in minutes nowadays, but I still go for instant oatmeal. I like sugar free maple and brown sugar. My kids both like cinnamon apple (but only the store brand, as I discovered a few months ago when they were out of store brand and we got name brand!).

Scrambled eggs

I can’t talk about 5-minute breakfast ideas without mentioning microwave scrambled eggs. This has been a game changer for me. Game. Changer! Make them plain, buttered, Italian flavored, cheesy or omelette. Add in some toast or fruit on the side and you’ve got a hearty, filling breakfast in less than five minutes!

Microwave egg recipes

Pizza sliders

A pizza sliders recipe for family dinner or any time!

Last week I told you about ham and pineapple sliders my daughter and I love. However, the guys in my house don’t like either ham or pineapple. So when I make ham and pineapple sliders for dinner, I make these pizza sliders for them. They’re just as easy to make and don’t add time to dinner prep.

Pepperoni is the pizza topping of choice for my husband and son, so I use just pepperoni on these pizza sliders, but you could use any favorite pizza toppings, much like with the pizza subs recipe. The sliders are a bit different in size (obviously) and flavor with their sweet roll base and onion garlic butter topping.

Putting together the sliders

]Get started by preheating your oven to 350-degrees and spraying a 9×13-inch baking dish with non-stick cooking spray.

Next up, you need to prepare your slider buns. You can totally buy slider buns, but I prefer Hawaiian dinner rolls since they are a bit sweeter. I just slice them in half to make them into buns. Place the bottom half of the buns into the baking pan. I used one package of 12 rolls and divided them into two sides when I was making this recipe this time because I was using half of the rolls for these pizza sliders and the other half for the ham and pineapple sliders.

Once your bun bottoms on in the pan, you want to cover them with pizza sauce. I don’t usually measure it out and just dollop it on. It’s about 1 tablespoon per bun.

Use a spoon or butter knife to spread the pizza sauce evenly over the bun bottoms.

Next, top the sauced buns with about 1/2 cup of shredded mozzarella or Italian blend cheese to cover the buns. You can add more or less depending on your family’s preference.

Top the cheese with the pizza toppings your family most likes. My guys love pepperoni, so I used pepperoni. I ended up using a bit of extra pepperoni this time around because I was at the end of a package and wanted to use it up. For pepperoni, go for one to two slices per bun.

Add the top bun and then melt 3 tablespoons of butter in the microwave. Mix in 1/4 teaspoon of garlic powder and 1/2 tablespoon of onion salt. Stir until combined. (Mine usually ends up kind of like wet sand.)

This image has an empty alt attribute; its file name is Ham-and-pineapple-sliders-07-1024x880.jpg
This image has an empty alt attribute; its file name is Ham-and-pineapple-sliders-08-1024x873.jpg

Brush the garlic butter over the top of the buns.

Bake at 350-degrees for 20 minutes until the tops are golden brown and the cheese is melted.

Cut them apart and serve warm. Store leftovers in the refrigerator.

Pizza sliders

These easy pizza sliders are great for family dinners or carry-ins and can easily feed a crowd!
Prep Time 15 minutes
Cook Time 20 minutes
Total Time 35 minutes
Course Main Course
Cuisine American

Ingredients
  

  • 12 Hawaiian rolls
  • 3/4 cup pizza sauce
  • 1/2 cup shredded mozzarella or Italian blend cheese
  • 1.5 ounces sliced pepperoni
  • 3 tablespoons butter melted
  • 1/4 garlic powder
  • 1/2 tablespoon onion salt dried, minced onion also works

Instructions
 

  • Preheat the oven to 350-degrees. Spray a 9×13 baking dish with non-stick cooking spray.
  • Cut the Hawaiian rolls in half through the middle to turn them into slider buns. Put the bottom half of the rolls into the baking dish; set aside the tops for now.
  • Spread the pizza sauce evenly over the bun bottoms in the pan. Top with shredded cheese and pepperoni. (Add other pizza toppings as desired.)
  • Put on the tops of the rolls.
  • Melt the butter and then add in the garlic powder and onion salt. Mix it well and then brush the butter mixture over the top of the sliders.
  • Bake the sliders for 20 minutes until the tops are browned and the cheese is melted.

Ham and pineapple sliders

A ham and pineapple sliders recipe for family dinner

Easy-peasy recipes are my favorite and this ham and pineapple sliders recipe is definitely one of them. These work well for family dinner or a carry-in. You can easily double (or triple) the recipe to feed a crowd. And it’s a great way to put leftover ham to use after holidays. Basically, it’s super versatile!

Another great thing about these ham and pineapple sliders is that because of the way they’re made, you can also easily make a second type of slider if you have family members who don’t eat ham. Stay tuned to next week’s blog post for the pizza sliders I make for my guys whenever I make this recipe.

Putting together the sliders

Get started by preheating your oven to 350-degrees and spraying a 9×13-inch baking dish with non-stick cooking spray.

Next up, you need to prepare your slider buns. You can totally buy slider buns, but I prefer Hawaiian dinner rolls since they are a bit sweeter. I just slice them in half to make them into buns. Place the bottom half of the buns into the baking pan. I used one package of 12 rolls and divided them into two sides when I was making this recipe this time because I was using half of the rolls for the pizza sliders that will be up next week.

Once your bun bottoms are in the pan, dollop mayonnaise onto the buns and then a bit of honey mustard as well. Technically use about 1/2 tablespoon of mayonnaise and 1 teaspoon of honey mustard per slider square. I really just plop it on without measuring! (If you love honey mustard and ham like I do, don’t miss these hot ham and cheese subs with honey mustard.)

Smear the mayo and honey mustard into the buns. Top the buns with slices of mild cheddar cheese. You can use shredded cheese or another flavor if you prefer. Swiss cheese would also be pretty good with this recipe, but I like the stronger flavor of the cheddar most.

Top the cheese with slices of ham. I bought pre-sliced packaged ham. You could totally use deli ham or leftover ham for this recipe.

Now it’s time for the pineapple. I have used pineapple slices for this recipe, but I actually like pineapple tidbits for these ham and pineapple sliders more because it is easier to eat and spread the pineapple out more over the sliders. For 6 sliders, I used one 4-ounce snack cup of pineapple tidbits, drained.

Add the top bun and then melt 3 tablespoons of butter in the microwave. Mix in 1/4 teaspoon of garlic powder and 1/2 teaspoon of onion powder. Stir until combined. (Mine usually ends up kind of like wet sand.)

Brush the garlic butter over the top of the buns.

Bake at 350-degrees for 20 minutes until the tops are golden brown and the cheese is melted.

Cut them apart and serve warm. Store leftovers in the refrigerator.

Ham and pineapple sliders

Stacey A. Shannon
These easy ham and pineapple sliders are great for family dinners or carry-ins and can easily feed a crowd!
Prep Time 15 minutes
Cook Time 20 minutes
Total Time 35 minutes
Course Main Course
Cuisine American

Ingredients
  

  • 1 pound ham
  • 12 Hawaiian rolls
  • 1 8.25 oz. canned pineapple drained
  • 8 oz. mild cheddar cheese slices
  • 6 tablespoons mayonnaise (or Miracle Whip)
  • 6 teaspoons honey mustard
  • 3 tablespoons butter melted
  • 1/4 teaspoon garlic powder
  • 1/2 teaspoon onion powder (dried minced onion also works)

Instructions
 

  • Preheat the oven to 350-degrees. Spray a 9×13 baking dish with non-stick cooking spray.
  • Cut the Hawaiian rolls in half through the middle to turn them into slider buns. Put the bottom half of the rolls into the baking dish; set aside the tops for now.
  • Dollop the mayonnaise and honey mustard onto the buns in the baking dish. Smear the mayo and honey mustard evenly over the buns.
  • Layer the cheese, ham and pineapple on top of the prepared bottoms.
  • Put the top of the rolls on.
  • Melt the butter and then add in the garlic powder and onion salt. Mix it well and then brush the butter mixture over the top of the sliders.
  • Bake the sliders for 20 minutes until the tops are browned and the cheese is melted.
Keyword carry-in recipe, crowd pleaser, ham and pineapple, leftover ham, leftovers recipe, pineapple recipe, pitch-in, slider recipe, sliders

Taco ranch meatball soup

Even picky eaters will love the delicious ranch meatballs in this soup!

Taco ranch meatball soup recipe

My family isn’t big on eating meat. My husband and son eat very little meat while my daughter and I eat some. So, when I tell you I’ve found a ranch meatball recipe our family really likes, then you know it has to be good! Paired with taco flavors and a slightly cheesy soup, this taco ranch meatball soup recipe is a great family dinner option.

I have served this with tortilla chips and with cornbread. Since the cornbread pairs so well with taco flavors in the taco cornbread bake, I figured it was worth a try with this soup. Turns out I was right! We’ve decided that cornbread is our favorite. In fact, we put the cornbread in the bowl and then put the soup and meatballs on top. It’s a filling dinner with a bit of Mexican flavor.

Make the ranch meatballs

The taco ranch meatball soup starts with making the meatballs. The soup comes together and simmers for a few minutes while the meatballs cook. When I first made this recipe, I used half the amount of ground beef called for because we aren’t big on eating meat. But since then I’ve used the full 1-1/2 pound of ground beef. Our family of four ends up with a few extra ranch meatballs, but not too many! (And they make a good meatball sub topped with a bit of ranch dressing!)

Preheat the oven to 400-degrees (F). If you are making cornbread to go along with this, mix it and set it aside. I use a JIF cornbread mix and pour it into my loaf pan to bake a loaf. It bakes in the same amount of time as the meatballs, so it works quite well! This is how my finished loaf turns out:

Cornbread loaf

Put 1-1/2 pounds of ground beef in a mixing bowl. Add in 1/2 cup of crushed tortilla chips. I fill a sandwich bag about 3/4 full and then crush the chips with a glass. While I use corn tortilla chips, I think these ranch meatballs would also be good with flavored cheddar or ranch tortilla chips.

Tortilla crushing

Add the tortillas to the meat.

Meatball mixing

Next beat one egg in a small glass (I use the same one that I use for crushing my chips). Add the beaten egg to the meat mixture.

Adding the egg

Next, add 1 tablespoon of ranch dressing mix and 1 tablespoon of taco seasoning to the meat mixture. (There is also something called rancho taco seasoning. If you buy that, then put in one 1-ounce packet. Save an additional packet for the soup.)

Adding the seasoning to the meatball mixture

Use a spoon to combine the meat mixture together well. You can use your hands if you really want to, but I find this stirs together well with a spoon. Do what works for you!

Combining the meatballs

Once the meat is combined, then form it into 1-inch balls and place them on a rimmed baking sheet lined with non-stick aluminum foil or parchment paper. I use the non-stick aluminum foil to make for even easier clean up!

Ranch meatballs ready to bake

Put the meatballs (and cornbread if you’re making it) into the preheated oven and baked for 15 minutes.

Make the soup

While the ranch meatballs are baking, put 32-ounce of chicken broth into a large pot over medium-high heat on your stove. Add in one 15-ounce can of crushed tomatoes, 1 tablespoon of taco seasoning and 1 tablespoon of ranch seasoning. Cover it and cook for about 15 minutes.

Making the soup

Turn the heat down, leave the lid off and add in one 12-ounce package of thawed frozen corn and 1 cup of shredded cheddar cheese. It’s best to add the cheese in slowly. I usually do it in thirds. Let the cheese melt. Simmer, uncovered for about 10 minutes.

Adding corn and cheese to the soup
Finished soup

Putting it all together

By the time your soup is ready, your ranch meatballs should be as well.

Baked ranch meatballs

You have two options with this taco ranch meatball soup recipe: you can mix the meatballs right into the soup or you can leave them on their own and let everyone mix them in themselves. Our family prefers to leave the ranch meatballs separate. That also works better if you end up with leftover meatballs that you want to turn into a meatball sandwich! So, I move the meatballs to a plate covered with a paper towel to remove some grease. If you prefer, pat them off and put them right into the soup.

Ranch meatballs

You’re ready to build your bowls of taco ranch meatball soup. You can put cornbread on the bottom, then top with soup and meatballs or skip the cornbread and just do the soup and meatballs.

Taco ranch meatball soup recipe

Either way, it’s yummy to sprinkle some extra cheddar cheese on top.

Taco ranch meatball soup recipe

And if you’re a big fan of sour cream like my family is, plop a dollop of sour cream on there as well!

Taco ranch meatball soup recipe

Taco ranch meatball soup

Even my pickiest eaters like this taco ranch meatball soup recipe. It's a simple, yet filling family dinner idea!
Prep Time 20 minutes
Cook Time 25 minutes
Total Time 45 minutes
Course Main Course
Cuisine American, Mexican

Ingredients
  

  • 1-1/2 pound ground beef
  • 1/2 cup crushed tortilla chips
  • 1 egg beaten
  • 2 tablespoons ranch seasoning
  • 2 tablespoons taco seasoning
  • 1 32-ounce carton chicken broth
  • 1 15-ounce can crushed tomatoes
  • 1 12-ounce bag frozen corn thawed
  • 1 cup shredded cheddar cheese plus extra for topping if desired

Instructions
 

  • Preheat the oven to 400-degrees (F).
  • In a mixing bowl, combine the ground beef, crushed tortilla chips, beaten egg, 1 tablespoon of ranch seasoning and 1 tablespoon of taco seasoning.
  • Form the meat mixture into 1-inch balls and place them on a rimmed baking sheet lined with non-stick aluminum foil or parchment paper.
  • Bake the meatballs for 15 minutes.
  • While the meatballs bake, put the chicken broth, tomatoes, 1 tablespoon of ranch seasoning and 1 tablespoon of taco seasoning into a pot over medium-high heat. Cover and cook for 10 to 15 minutes.
  • Reduce the heat on the stove and add in the corn. Gradually add shredded cheese. Simmer, uncovered for 10 minutes.
  • When the meatballs are finished, you can pat them dry and place them in the soup or move them to a plate covered with a paper towel to dry and serve separately. (One benefit of serving separately is it makes leftover meatballs easier to use for sandwiches!)
  • Serve the soup with the meatballs and top with additional shredded cheese, if desired. Sour cream is also good with this soup. It pairs very well with cornbread.
Keyword family dinner, meatball soup, picky eaters, ranch meatballs, taco, taco soup, weeknight dinner

Party potatoes recipe

An easy cheesy hash brown casserole recipe your family will love!

Affiliate links are used in this post; if you make a qualifying purchase via my link, I receive a small percentage of the sale at no additional cost to you. I only recommend products and services I use and love. It helps support my blog, so thank you for your support! Read my full disclosure here.

I love potatoes. I can’t think of a way to prepare a potato that I wouldn’t eat from fried to boiled to mashed to baked! But this party potatoes recipe is hands-down my most favorite potato recipe of all time. While this recipe is almost the same as the one my mom has made for years, it has a couple of slight differences to make it even creamier and oh-so-delicious!

Another bonus of this party potatoes recipe is it uses frozen hashbrowns, just like my slow cooker potato soup. You get to enjoy the potato-y goodness without having to scrub, peel or cut potatoes. And that makes this recipe even easier to come together. You basically mix together the ingredients and then bake them. Easy-peasy!

I will eat these potatoes fresh from the oven and reheat them for leftovers. I’d guess that you could freeze and reheat them later, but they never make it that long around my house.

When it comes to a cheesy hashbrown casserole like these party potatoes are, I think there’s never a wrong time to make them. I’ve made them for Thanksgiving and for cookouts. In my opinion, they go with just about anything and everything! (I told you I love them!)

Let’s get this party potatoes recipe started!

Like any oven recipe, start with preheating your oven to 350-degrees (F). Next, find the biggest bowl you have. I use a giant glass bowl I got at IKEA a few years ago, but any extra-large bowl will work. Pour in the whole 30-ounce bag of frozen shredded hash brown potatoes.

Plop two cans of either cream of potato or cream of chicken soup on top of the hash browns. I have made it with both types of soup and love it both ways. It really is up to you on that one. Maybe go with whatever you have on hand, is easiest to find or is cheapest. Either kind of soup works well in this party potatoes recipe.

Next, add in 2 cups of sour cream. I just plop it right on top of the hash browns and soup. (One of my favorite kitchen tools to make mealtime prep easier is this kind of measuring cup with a push-up bottom. It makes measuring out ingredients like sour cream so much easier!)

While other party potatoes recipes put the shredded cheese on top, this one mixes some right in with the hash browns for cheesy-ness all throughout. Add in 1-3/4 cup of shredded cheddar cheese.

And then, finally, add in 1 cup of grated Parmesan cheese. Shredded Parmesan cheese might work, but the grated works best for giving it more cheesiness flavor but without getting stringy. Combine all of the ingredients together in the bowl.

Get ready to bake!

Once the hash browns, soup, sour cream and cheeses are well combined, pour the mixture into a 3-quart baking dish that has been coated with non-stick cooking spray. Pat the mixture with a spoon so that it is even throughout the pan.

Sprinkle the hash brown potato mixture with 1/4 cup of shredded cheddar cheese — or whatever amount looks good to you. Honestly, I don’t measure out this part. I just keep sprinkling cheddar cheese until it’s well-coated, but I am totally a cheese lover!

Bake the party potatoes in your preheated 350-degree oven for 40-45 minutes until the cheese is melted. If you want, turn your broiler on low for 2 minutes to get the top slightly browned and bubbly. And then enjoy the delectable cheesy goodness!

Party Potatoes Recipe

With just a couple of easy steps, this cheesy party potatoes recipe is great for a side dish any time and ideal for carry-in dinners!
Prep Time 15 minutes
Cook Time 45 minutes
Total Time 1 hour
Course Side Dish
Cuisine American

Ingredients
  

  • 1 30-oz. package frozen, shredded hash brown potatoes
  • 2 10-3/4 oz. cans condensed cream of potato or cream of chicken soup, undiluted
  • 2 cups sour cream
  • 2 cups shredded cheddar cheese, divided
  • 1 cup grated Parmesan cheese

Instructions
 

  • Preheat your oven to 350-degrees (F) and spray a 3-quart baking dish with non-stick cooking spray. Set it aside.
  • In a very large bowl, combine the hash brown potatoes, soup, sour cream, 1-3/4 cups shredded cheddar cheese and grated Parmesan. Mix well.
  • Pat the hash brown mixture evenly into the prepared baking dish. Sprinkle with the remaining shredded cheddar cheese (or however much your family would like!).
  • Bake, uncovered, for 40 to 45 minutes until the cheese is completely melted and bubbly. If desired, turn your broiler on low for 2 minutes to get the top even more browned.
  • Let it stand a few minutes before serving. Store any leftovers in the refrigerator.
Keyword carry-in, cheesy potatoes, Christmas, cookout, hashbrown casserole, pitch-in, potato casserole, Thanksgiving

First day of school traditions to start this year

7 Simple first day of school traditions to kick off the school year

Back-to-school season can be exciting, stressful and downright overwhelming — all at once! In fact, I recently shared a short video about how overwhelmed I felt with the back-to-school to-do list for my kiddos! There are so many things for us moms to do to get ready for the first day of school. But one of the things I don’t want to miss each year is making it a good day for my kiddos. So, we have a few simple first day of school traditions we do each year.

I’m emphasizing the word “simple” here, because not only are simple traditions easier to keep, but the first day of school is exhausting. Nobody wants added stress and pressure — kids or parents! Plus the first day of school tends to bring along a lot of emotions as well, so it’s easy to get overwhelmed. Honestly, I get back-to-school blues each year as my kids return to school.1. Interview your kids.

OK. I know this sounds a bit weird. But, listen, I’m a journalist by trade and I love interviewing my kids each year a day or two before they start school. I ask them about their favorites (food, books, movies, etc.), what they want to be when they grow up and what they’re most excited about for the new school year. Later on, it’s so fun to go back and see their answers. I video these interviews as well. I also do a little something else with them that you’ll find in tip number four!

And you can make the interview a keepsake as well with a decorative interview page like these I have in the Families with Grace Etsy store.

2. Prayer together for the new year.

Another first day of school tradition just before the first day is praying together about the school year. Our family has prayer time each evening as part of our bedtime routine. So, on the night before the first day of school I pray for the kids and their new school year. I also start praying weeks before on my own that God is with them throughout the school year and for specific concerns I have about the upcoming year for each of them.

3. Let them wear something new.

I always felt special getting to wear new clothes on the first day of school when I was a kid, so I’ve continued the tradition with my own kiddos. It doesn’t have to be an entirely new outfit, but just something new. For example, our school year starts mid-August which is still hot here in the Midwest. So my kids usually wear the shorts or pants they’ve been wearing all summer, but we pair it with a new shirt and new sneakers. (By the time their sneakers have survived summer, they are worn out and need to be replaced anyway!)

4. Turn first day of school photos into a cool “magazine” cover.

Every year I love making a “magazine” cover for my kiddos. I have done this since the year my daughter first started nursery school and have one for each of them for each year. It’s our version of a first day of school sign. I usually share the cover digitally with friends on social media and then print out a copy of it to go in their folder for the school year that I use to organize their school papers.

Along with a photo of the kids that I take in the morning before we leave, I include a lot of the information from their interview in tip one as well as other things like their shoe size and teacher’s name. (Seasoned mom tip: Get everyone up 10 minutes earlier than necessary on the first day of school so you aren’t super rushed through photos!)

I’ve got a template for sale in the Families with Grace store on Etsy if you want to make magazine covers part of your family’s first day of school traditions. Check it out:

5. Send a sweet lunchbox note.

If your kids take their lunch to school, send along a sweet lunchbox note. Honestly, I send notes daily because I really enjoy it. But I know that’s not everyone’s thing. However, I encourage you to send one on the first day to help your kids feel special and have a sweet token from home on their first day back to school.

(Check out these printable Bible verse lunchbox notes for kids and these Scripture cards that would work well for tweens and teens.)

6. Have a special dinner or treat.

When it comes to first day of school traditions, this is not too hard to pull off. Our tradition has been to pick the kids up from school and take them for an early dinner at Fazoli’s, because it is their favorite restaurant. Fazoli’s is pretty quick, which is what we’re looking for. If you’d rather, though, plan to make their favorite dinner at home. Or have a special treat to commemorate the day. I have a cousin whose first day of school tradition involved a cookie cake each year. Go with what your kids will like, but keep it low-key. They’ll be hungry and tired. The biggest goal is to have time together to hear all about their days. For our family, letting someone else do the cooking means we get to have those conversations all together easier. And going out for dinner on a school night is a treat!

(Looking for a super simple homemade treat? Try this easy hack to make a boxed brownie mix so fudgy good or these easy baked sopapillas using flour tortillas!)

7. Plan for a quiet evening.

Everyone is tired on the first day of school, no matter how much you’ve been preparing for it. When my kids were little and just getting into the school groove, we’d start a week ahead of the first day and practice getting up earlier each day and making sure we were ready on time. Now they are older, and we’ve been at this longer. So, we have our school morning system down pretty well. (It also helps that they go to a K-12 school and always have the same start time!)

But no matter what, the first day back is exciting and exhausting. Planning some big celebration that night is just not going to go well. Let them be low-key on their first day back to school. Maybe even plan to watch a movie together!

What are your family’s first day of school traditions?

Biscuit muffin recipe

An easy biscuit recipe with only 3 ingredients!

Affiliate links are used in this post; if you make a qualifying purchase via my link, I receive a small percentage of the sale at no additional cost to you. I only recommend products and services I use and love. It helps support my blog, so thank you for your support! Read my full disclosure here.

Considering I’ve shared recipes for pumpkin bread, protein-packed banana bread, bacon ranch cheese bread and the perfect yeast rolls, it’s pretty obvious I love bread. So when my daughter came home from spending time with my in-laws raving about a new biscuit muffin recipe, I knew I would be on board!

I had trouble believing that three ingredients could turn into biscuits, but they did. Even better is they are ingredients we have at home. And since they take about 20 minutes from start to finish, they are great for weeknight dinners. This biscuit muffin recipe is definitely entering into our recipe rotation!

Making the dough

This recipe calls for self-rising flour. If you usually like all-purpose flour like I do, you can easily make it self-rising by adding 1-1/2 teaspoon baking powder and 1/4 teaspoon salt for each cup of flour. My daughter made it with self-rising flour with her Nana. With me she made it with all-purpose that we turned into self-rising. The biscuits turned out well both times. If you have all-purpose flour only, then your recipe will change to 5 ingredients with the salt and baking powder. But still not so bad, right?!

Get your oven preheating to 375-degrees, and then start by putting 2 cups of self-rising (or “doctored” all-purpose) flour into a large mixing bowl.

Next, pour in 1 cup of milk.

Finally, add 3 heaping tablespoons of mayonnaise. My daughter made these quite “heaping” when we made them. So good!

And then you want to make sure you stir the dough ingredients for this biscuit muffin recipe well together to combine them. Depending on the humidity or lack thereof, your dough may seem a bit dry. You can add up 1/4 cup additional milk if needed. You want the dough to be thick and a bit sticky, like this:

Baking the biscuit muffins

You’re ready to bake! Distribute your biscuit dough evenly into a muffin pan. Although my Rachael Ray muffin pan is non-stick, I still do a light spritz of non-stick cooking spray into the pan before adding the dough. We filled our muffin cups about 3/4 full, but they probably ought to be 2/3 full. I think this biscuit muffin recipe could certainly make 12 biscuit muffins; however, we ended up with only nine.

Bake the biscuit muffins at 375-degrees for 14 to 16 minutes until they are starting to get golden around the edges. They will still be pretty white like biscuits rather than golden like yeast rolls.

If you want, melt about 3 tablespoons of butter just before removing the biscuit muffins from the oven and brush butter over the tops. So delicious!

You can serve them however you’d like. Use them as a side along your meal.

Or make them into their own entree. The night we made them, I turned a couple into breakfast sandwiches for myself. One had precooked bacon with grape jelly and the other had a scrambled egg made in the microwave.

Serve them up warm or at room temperature. Put leftovers into a zip-top bag and store for up to 3 to 5 days.

Biscuit muffins

With just three ingredients, this biscuit muffin recipe is such an easy biscuit recipe you'll make it regularly!
Prep Time 5 minutes
Course Bread, Side Dish
Cuisine American

Ingredients
  

  • 2 cups self-rising flour (Or add 3 teaspoon baking powder and 1/2 teaspoon salt to all-purpose flour)
  • 1 cup milk
  • 3 heaping tablespoons mayonnaise
  • 3 tablespoons butter optional

Instructions
 

  • Preheat your oven to 375-degrees.
  • Place the flour in a large mixing bowl.
  • Pour in 1 cup of milk and then add 3 heaping tablespoons of mayonnaise.
  • Whisk together well. If the mixture is too dry, add up to 1/4 cup of additional milk until the dough is thick and sticky.
  • Distribute the dough into a muffin pan that has been coated with non-stick cooking spray. Fill the cups 2/3 full to get 12 biscuit muffins or 3/4 full to get 9 biscuit muffins.
  • Bake at 375-degree for 14 to 16 minutes until the edges are just slightly browned. Because they are biscuits, they will be more white than golden like yeast rolls.
  • If desired, melt 3 tablespoons of butter and immediately spread over the biscuits. Serve them warm or at room temperature.
Keyword 3 ingredients, biscuit muffins, biscuits, bread, easy recipe, weeknight biscuit

Sugar cream squares recipe

A 5-ingredient, family-favorite sugar cream squares recipe

As a lifelong Hoosier, I’m quite familiar with sugar cream pie. It’s certainly popular here. But I don’t enjoy many pies and, honestly, I don’t really like sugar cream pie. (I know. My Hoosier “card” may be revoked for saying so!) However, growing up, my aunt often made this sugar cream squares recipe. And those I love.

When we went to St. Louis last year, I was excited to try its gooey cake. When I did, I found that it tasted a lot like this sugar cream squares recipe, but it wasn’t quite the same. Ever since then, I’ve had a hankering for these delectable squares, so I had to pull out the old family recipe and make some for us.

I’ve eaten this recipe many times, but I hadn’t yet made it myself. I was surprised to find it only takes five ingredients and is so incredibly easy. Sometimes when we have something nostalgic, it almost takes away the magic of it when we make it ourselves (or maybe that’s just me!). But this was just as good. It tastes like childhood in a creamy, sugary, sweet way. My family devoured it.

One other item of note is that this recipe uses cream cheese. I’m a longtime proponent of not using cream cheese in most dessert recipes. I feel like it almost always belongs solely in the savory foods category. But, I’m totally on board with it in this sugar cream squares recipe. Probably mixing in all the powdered sugar helps!

Affiliate links are used in this post; if you make a qualifying purchase via my link, I receive a small percentage of the sale at no additional cost to you. Read my full disclosure here.

The first layer

First, get your oven preheating to 350-degrees and then start with making the crust or bottom layer. Melt one stick of butter or margarine. I do this in the microwave, usually at about 60 or 70% power. Then stir in 1 yellow cake mix and one egg. It will come together as a thick mixture/dough like this:

Next, put your crust mixture in the bottom of a 9×12 cake pan. My Rachael Ray cake pan is great for not sticking, but if you’re unsure, spray yours with a bit of non-stick cooking spray.

Spread the mixture as evenly as possible over the bottom of the pan to form the crust in this sugar cream squares recipe.

Set the pan aside and make the second layer next.

The second layer

Next up in this sugar cream squares recipe is the second or top layer. Soften your cream cheese if it isn’t already, and place it in a large mixing bowl. I made the top layer in my stand mixer to save my arm some work, but you could definitely do this by hand as well. Add 3-1/2 cups of powdered sugar to the bowl with the softened cream cheese.

Stir or beat them together well until they are combined.

Once they are combined well, add in two eggs and keep mixing until the eggs are totally incorporated. The mixture will should have the consistency of cake batter or a runny pudding.

Pour the cream cheese mixture over the top of the crust layer and spread it evenly in your pan.

Time to bake

Put the sugar cream squares into your preheated oven at 350-degrees and bake for 35 to 40 minutes until it’s golden brown. I baked mine for 38 minutes and until it looked like this:

Let the sugar cream squares cool in the pan for at least 10 minutes before cutting them. The great thing about this sugar cream squares recipe is that they are delicious warm and delicious at room temperature. Either way, I know your family will love them as much as mine does!

(Keep scrolling past the printed recipe to find a video of the recipe!)

Sugar cream squares

With only five ingredients, this sugar cream squares recipe is as easy to make as it is delicious to eat. It'll become a family favorite!
Prep Time 3 minutes
Total Time 50 minutes
Course Dessert
Cuisine American

Ingredients
  

  • 1 stick butter (or margarine) melted
  • 3 eggs
  • 1 15.25-oz. yellow cake mix
  • 8 oz. cream cheese softened
  • 3-1/2 cups powdered sugar

Instructions
 

  • Preheat your oven to 350-degrees.
  • Melt the butter and mix it with the yellow cake mix and one egg. The mixture will be thick.
  • Spread the mixture evenly in the bottom of a 9×12 cake pan. If the pan is not non-stick, then apply some non-stick cooking spray to the bottom of the pan first.
  • In a large mixing bowl, soften the cream cheese. Add 3-1/2 cups of powdered sugar and mix it thoroughly by hand or with a mixer.
  • Add two eggs into the cream cheese mixture and continue mixing until it is well combined.
  • Pour the cream cheese mixture over the top of the cake mixture already in the pan. Spread it evenly over the top.
  • Bake at 350-degrees for 35 to 40 minutes until golden brown on top. Cool for at least 10 minutes before cutting. Serve either warm or at room temperature.
Keyword 5 ingredient dessert, easy dessert, family recipe, Hoosier pie, sugar cream, sugar cream pie, sugar cream squares

Dealing with addiction in marriage

How your marriage can survive addiction

I’m excited to share this blog post about dealing with addiction in marriage with you. This isn’t something I’ve dealt with personally and appreciate Charlotte Walker of HomeSafetyHub.com taking on this difficult topic for Families with Grace. She has some helpful ideas for guiding your marriage through a struggle with addiction. Charlotte herself has been passionate about safety her whole life and enjoys writing about topics related to homes and home life. (Don’t miss her other guest post about house hunting with your family!)

While any relationship worth having takes effort, if you are dealing with addiction in marriage, then it’s going to take even more effort from you and your spouse to survive. Addiction is responsible for tearing many families apart, but that does not mean your marriage is destined for failure.

Discuss the problem

Having a conversation with your spouse about facing their addiction can be overwhelmingly scary; however, it is necessary in order to move forward. While the discussion may be uncomfortable for you both, some measure of discomfort is inevitable when seeking change. If you continue to choose not to speak up about the issue, your spouse may take your silence as condoning their behavior, which makes you an enabler. 

Whether you decide to talk to your spouse alone or through a family and friend-assisted intervention, it’s best to do it when they are not under the influence, tired or upset. Keep in mind that your spouse may not be open to admitting they have a problem, and you can almost count on some type of denial or minimization at first. However, you must be persistent in your efforts to break down the walls and discuss how their substance abuse is hurting you and what needs to be done as far as recovery. 

Once your spouse opens up and admits to having a problem, begin discussing their options for treatment. There are outpatient and inpatient treatment options available, but if this is their first time being treated for addiction, encourage them to stay at a residential drug rehab facility for a minimum of 30 days. An inpatient facility will give them time away from distractions and bad habits while providing a safe space for them to detox and begin the recovery process. 

Forgive them

Undoubtedly, your spouse’s addiction has caused you a lot of pain and turmoil, which doesn’t make it easy to forgive. However, if you really want to save your marriage, then it’s necessary to get to the root of the issue, let it go and move forward. Even if you and your spouse decide to temporarily separate to sort through the issues, forgiveness is imperative to repair and reestablish the relationship. 

Your first step to forgiveness is to gain an understanding of the addiction and start looking at it as a disease that is separate from the actual addict themselves. It may be necessary for this breakthrough to come in marriage therapy. Even though your spouse may have hurt you or made poor decisions while under the influence, remember it was the addiction that caused them to lose control of their actions. You may be hurting, but keep in mind that your partner is plagued by guilt as they realize their mind and body has been consumed by addiction.

Understanding the process of addiction will help you gain clarity and compassion for your spouse, which will make it easier for you to forgive them. While being empathetic toward your spouse does not minimize what you have been through, remember that forgiveness also benefits you by giving you a mental sense of wellbeing. 

Be supportive

In order for your spouse to have a fighting chance at beating their addiction, they will need your full support. Having your support will give them the confidence needed to trust themselves and regain control of their lives. You can offer support by attending group meetings with them, which will also give you a deeper look into the reasons behind their addiction and ways you can help them cope in the future.

Also support them making healthy decisions, like creating a healthy work-life balance. By learning to say “no,” delegating tasks at work and prioritizing your tasks, you can develop a routine that allows you to devote more time to personal matters. 

A workout routine can really help battle addiction. It’s not easy to do physical activity in an altered state, and working out will help with sleep as well as help them feel good about being sober. It can also help manage stress, which is a big part of recovery.

Battling an addiction is never easy, and a substance abuse disorder can have detrimental effects on a marriage. You and your spouse will have to go through a painful healing process, but with patience, support and love, your relationship can survive this difficult time.

Find more help

Don’t be afraid to seek help for your struggle with in addiction in marriage. Find a wide array of resources from the Substance Abuse and Mental Health Services Administration’s National Helpline. Connecting locally with a Celebrate Recovery Group, a Christian program for all kinds of addictions, can also be helpful.

Families With Grace
Privacy Overview

This website uses cookies so that we can provide you with the best user experience possible. Cookie information is stored in your browser and performs functions such as recognising you when you return to our website and helping our team to understand which sections of the website you find most interesting and useful.