Stacey A. Shannon is a freelance journalist and blogger who has been published internationally. She's also a Christian, a wife and a mom of two school-aged children. She started Families with Grace in 2019 to encourage Christian moms as they create homes filled with grace, love and faith.
Be sure to get the FREE family devotion book, "Finding Grace at Home: 7 Days of 5 Minute Devotions for Families." It's a great way to help your family draw closer to each other and to God.
Motherhood can be lonely. You weren't meant to go on your motherhood journey alone. Connect with Stacey and other Christian moms like you in the private Facebook group, Moms with Grace!
And check out the books from Stacey A. Shannon as well!
A few months back, I shared this on Facebook. I decided to share it on the blog as well thanks to the overwhelming response I got from it.
Last night, my 8-year-old daughter came into my room at 2 a.m. I knew something was afoot, because she is my good sleeper. She had had a bad dream and needed some comfort. Of course, I obliged. We chatted and snuggled a bit. I prayed for her silently and eventually sent her back to bed.
Within 10 minutes, she was back and needed me to be in her room with her. Previously I’ve sat on her bed and put my hand on her back to soothe her, but now she has a loft bed and that’s not possible. So instead, I pulled her desk chair to the middle of the room and took a seat. I prayed for her again and told her about it this time. We talked very briefly about how to stop thinking about her dream. Within 15 minutes, she was settled in enough to fall back asleep. My presence in her room made her relax and let her worry go.
As I sat there quietly, trying to stay awake, I thought about what a demonstration it was. What she didn’t know was that in between her visits to my room, my prayers continued for her and for her 5-year-old brother. Earlier that day, her brother got into water over his head and was unable to keep his head above water. Thanks to some quick action from my dad and husband, he was saved, but I’ve read about secondary drowning. And I was anxious. He had absolutely no sign of it. And he was totally fine for hours. This had happened before lunchtime even. But still, I worried. It’s what we moms do. However, as I prayed I gave my worry to God. I felt peace that He was in charge, so I could rest.
That’s exactly what my daughter needed. She needed to know someone was in charge, someone was right there for her so that she could rest. Oh how many times I need that! And my Heavenly Father is always there if I only think to talk to Him. Because sometimes I just worry on my own. Sometimes I don’t think to talk to Him about it. Sometimes I battle my anxiety on my own. It never goes well.
I headed back to bed (after double-checking that both kids were sound asleep — and my son was breathing) and fell fast asleep after once again giving my worry to God. The thing is with the way my daughter’s bed is raised and where I was able to sit, there was no way she could see me, but she knew I was there and just my presence was enough. I can’t see God, but I can feel Him. And His presence is always enough if I just open myself up to Him.
Whatever you have going on right now, know that God is there. He will sit up all night in your bedroom in a small desk chair because He loves you so completely and fully. He will take your worries and fears and give you His peace. He may not fix everything the way you want, but He will be there through it all and is willing to hold you close if only you cling to Him. I can think of no greater love and no greater reassurance.
The words we say and attitudes we hold influence our children so much!
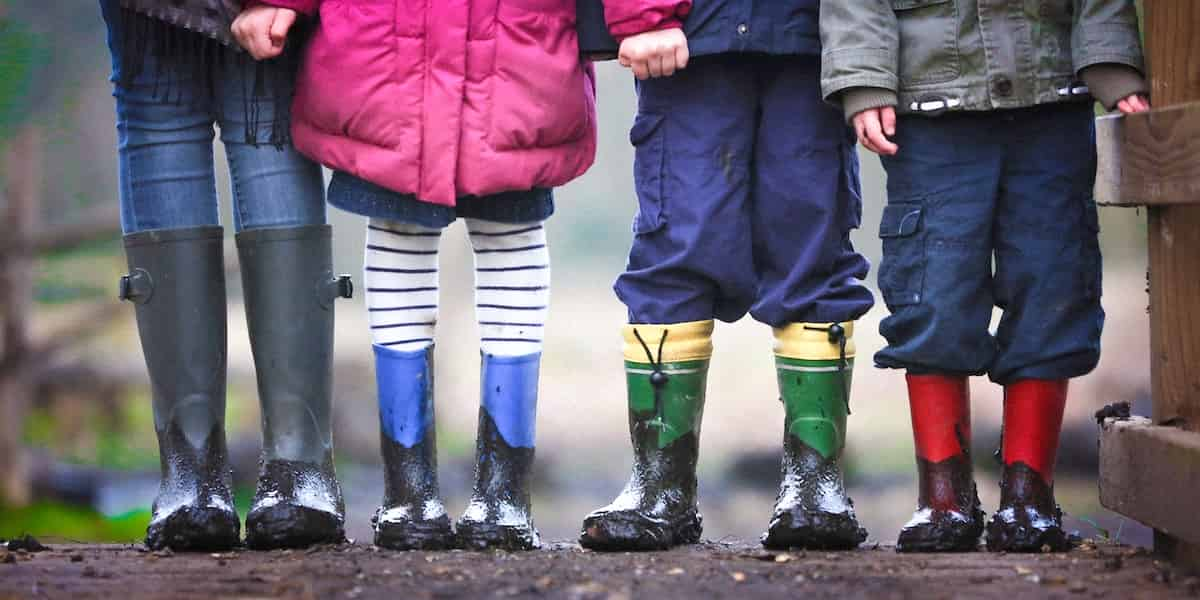
Each week my son goes to a ninja class where he learns tumbling and parkour (think “American Ninja Warrior” for little ones). He loves it! Last week, his class with filled with all boys who were age 5 to 7. They jumped and tumbled and ran. During one of their water breaks, I heard another little boy talking with his family. He said he was tired.
The kids had just finished jumping and running over and over, so it was tiring. He wasn’t whining. The grandpa leaned over to the child, pointed to the all-female competitive cheerleading team practicing on the next mat over and asked his grandson if he wanted to go to the girls. When he said no, then the grandpa advised him to stop complaining or he’d have to.
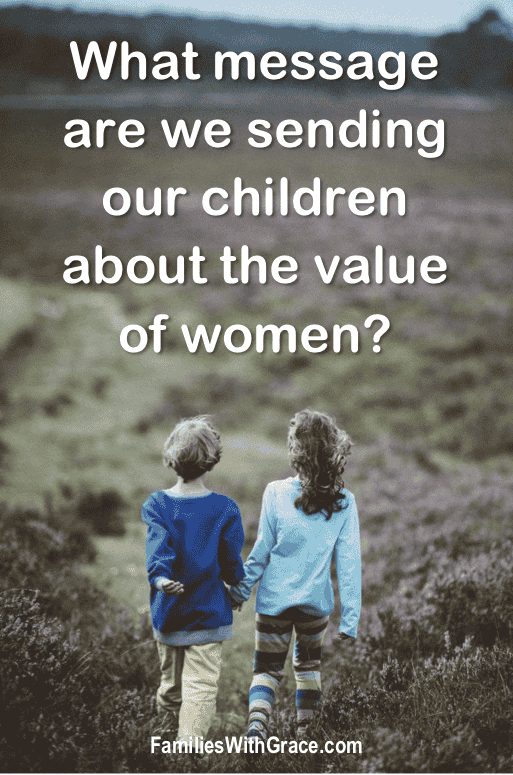
Undermining the value of women
I bristled. It bothered me. The message he just sent his grandson is that those girls aren’t as valuable. He told his grandson that going to a group of girls is a punishment. He told his granddaughter, who was sitting right beside him, that boys only do something girls do as punishment. Boys are better. Even crazier to me is those girls were older than his grandson and a heck of a lot better at their skills of tumbling. The grandpa was undermining the value of women.
OK. So it might sound like I’m over-reacting. I don’t want to rant and rave. But, as the mother of a boy, I want to be conscious of what I’m teaching him through my attitudes and words. As the mother of a girl, I want to be conscious of what I’m teaching her through my attitudes and words.
I don’t appreciate the idea that for a boy to go into a girls’ class is punishment. And I wouldn’t appreciate it in reverse either. I am aware there are differences between boys and girls and men and women. We tend to have different strengths and such, but that doesn’t make either gender less than the other. I never want my daughter to feel she is less than a boy just because she’s a girl. I never want my son to feel superior to a girl just because he’s a boy.
What was very interesting to me is that very evening on the way home from his ninja class, my son and I had a discussion right along these lines. He wanted to know if Adam and Eve had only sons, because he’s didn’t hear about their daughters.
I explained to him that through the years, as men wrote down history, including the Bible, they didn’t take women and children into account because they didn’t think they were important. We talked about how Jesus fed the 5,000, but that 5,000 was only the number of men. He actually fed way more than 5,000. My son was incredulous that they didn’t care about women and children. How could they not, he wondered.
God’s plan for the value of women
My best answer was unfortunately that’s just how it was. I did tell him God didn’t plan it that way from the beginning. Yes, He made Adam first, but that doesn’t mean that Eve wasn’t just as important. I reminded my son that God loves all of us the same, and seeing any one of His children being treated poorly based on gender or skin color must make Him sad.
I didn’t bring up this topic. But, I did find it quite timely that my son did. He didn’t hear the grandfather’s words. I didn’t say a word about it to him. In fact, I didn’t even share it with anyone aside from a friend I met for breakfast the next morning. However, the two conversations go side-by-side.
The power of our attitudes
The grandfather didn’t tell his grandson that he was superior and girls don’t matter or aren’t as important in those exact words. Not many people would say that, especially these days.
But his attitude showed a different picture. His attitude showed that he clearly thinks women are less-than, weaker, whinier and wimpier than boys. And THAT message offends me for myself, my daughter and my son. I don’t want to raise a boy to be a man with that attitude. His father doesn’t have that attitude. His Heavenly Father certainly doesn’t have that attitude.
The words we say hold so very much power. We live in a world of political correctness where people are often chastised for the words they use, sometimes to the point of what seems ridiculous. I understand that maybe we get tired of posts just like this one. Tirades exhaust us, and we roll our eyes at what seems an over-reaction.
But until these kinds of attitudes stop and aren’t accepted, they must continue. I will stop myself from getting off on a tangent about how women are treated and perceived inside the church. In fact, I’d daresay many churches are the greatest offenders of gender equality. I want to focus instead on thinking about the hidden messages in the words we say to our children. They are soaking every last one of them up.
That little boy didn’t go home last week thinking he was better than girls directly. He did go home having absorbed some of his grandpa’s attitude about the value of women. If he is given that attitude enough times, it will fully soak in and shape his views. That is what we must do our best to change and do better than generations before us. We’ve made progress, but so much more progress needs to be made. The message we are giving our sons (and daughters!) shouldn’t be one of superiority over any one for any reason.
A growing collection of Bible verses great for children
When my daughter was in kindergarten, I started sending her a note in her lunchbox every day. Now she is in third grade and her brother is in kindergarten and I am writing two lunchbox notes a day. I keep the notes simple and add on a couple of stickers and they both love them.
To help me continue to come up with content, I have gotten creative sometimes. For example, a few times I’ve sent in a serial story for my daughter that builds on itself each day of the week. Since I’ve been doing hers for longer and she can read so well, I can get more creative with her.
One of the things I started was Wacky Wednesday. Each Wednesday I send in a joke or something funny. For my daughter, I can write the joke out more now and she understands them. For our son, I keep it simple or send a funny drawing or something like that.
After my daughter spied some pre-printed Bible verse notes I’d printed out a few months ago in my lunchbox note folder, she thought having a Bible verse on her notes was a great idea. So I began Truth Tuesday. Each Tuesday now I send in a Bible verse for her. For my son, I keep it simple to say things like “God loves you and so do I” or “God is good.”
I’ve really been loving the International Children’s Bible for finding verses for the kiddos. And so with all of that said, here are some verses that I’ve done recently. I’ve found that finding verses for my daughter encourages me just as much as it does her! (These are all from the International Children’s Bible unless otherwise noted.)
1.”The Lord loves us very much, His truth is everlasting. Praise the Lord!” — Psalms 117:26
2. “This is how we know what real love is: Jesus gave his life for us. So we should give our lives for our brothers.” — 1 John 3:16
3. “Give thanks to the God of heaven. His love continues forever.” — Psalms 136:26
4. “I can do all things through Christ because he gives me strength.” — Philippians 4:13
5. “Every good action and every perfect gift is from God. These good gifts come down from the Creator of the sun, moon, and stars. God does not change like their shifting shadows.” — James 1:7
6. “Be kind and loving to each other. Forgive each other just as God forgave you in Christ.” — Ephesians 4:32
7. “The angel said to the women, “Don’t be afraid. I know that you are looking for Jesus, the one who was killed on the cross. But he is not here. He has risen from death as he said he would. Come and see the place where his body was.” — Matthew 28:5-6
8. “I say this because I know what I have planned for you,” says the Lord. “I have good plans for you. I don’t plan to hurt you. I plan to give you hope and a good future.” — Jeremiah 29:11
9. “But Lord, you are a God who shows mercy and is kind. You don’t become angry quickly. You have great love and faithfulness.” — Psalms 86:15
10. “We will speak the truth with love. We will grow up in every way to be like Christ, who is the head.” — Ephesians 4:15
11. “So these three things continue forever: faith, hope and love. And the greatest of these is love.” — 1 Corinthians 13:13
12. “Do for other people what you want them to do for you.” — Luke 6:31
13. “The Lord himself will go before you. He will be with you. He will not leave you or forget you. Don’t be afraid. Don’t worry.” — Deuteronomy 31:8
14. “This is my command: Love each other as I have loved you.” — John 15:12
15. “This is the day that the Lord has made. Let us rejoice and be glad today!” — Psalms 118:24
16. “It is good and pleasant when God’s people live together in peace!” — Psalms 133:1
17. “God’s word is true. Everything he does is right. He loves what is right and fair. The Lord’s love fills the earth.” — Psalms 133:4-5
18. “May the Lord bless you and keep you. May the Lord show you his kindness. May he have mercy on you. May the Lord watch over you and give you peace.” – Numbers 6:24-26
19. “Every word of God can be trusted. He protects those who come to Him for safety.” — Proverbs 30:5
20. “The Lord your God is with you. The mighty One will save you. The Lord will be happy with you. You will rest in His love. He will sing and be joyful about you.” — Zephaniah 3:17
21. “A friend loves you all the time. A brother is always there to help you.” — Proverbs 17:17
22. “The Lord gives me strength and makes me sing. He has saved me. He is my God, and I will praise Him. He is the God of my ancestors, and I will honor Him.” — Exodus 15:2
23. “God began doing a good work in you. And He will continue it until it is finished when Jesus Christ comes again.” — Philippians 1:6a
24. “I praise the Lord because He guides me. Even at night, I feel His leading. I keep the Lord before me always. Because He is close by my side I will not be hurt.” — Psalm 16:7-8
25. “Thank the Lord because He is good. His love continues forever.” — 1 Chronicles 16:34
26. “A child will be born to us. God will give a son to us. He will be responsible for leading the people. His name will be Wonderful Counselor, Powerful God, Father Who Lives Forever, Prince of Peace.” – Isaiah 9:6
27. “Remember that I commanded you to be strong and brave. So don’t be afraid. The Lord your God will be with you everywhere you go.” — Joshua 1:9
28. “The Lord is good. He gives protection in times of trouble. He knows who trusts in Him.” — Nahum 1:7
29. “Blessed are the pure in heart, for they will see God.” — Matthew 5:8 (NIV)
30. “Do not worry about anything. But pray and ask God for everything you need. And when you pray, always give thanks.” — Philippians 4:6
31. “I was very worried. But you comforted me and made me happy.” – Psalm 94:19
32. “Give your worries to the Lord. He will take care of you. He will never let good people down.” — Psalm 55:22
33. “The proof of my teaching was the power that the Spirit gives. I did this so that your faith would be in God’s power, not in the wisdom of a man.” — 1 Corinthians 2:4b-5
34. “In the same way, you should be a light for other people. Live so that they will see the good things you do. Live so that they will praise your Father in heaven.” — Matthew 5:16
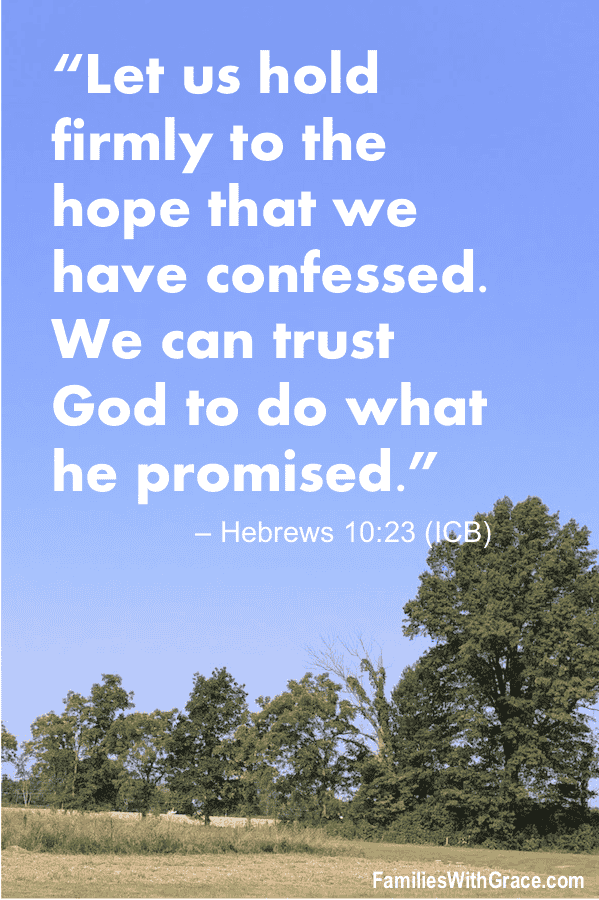
35. “Let us hold firmly to the hope that we have confessed. We can trust God to do what he promised.” – Hebrews 10:23
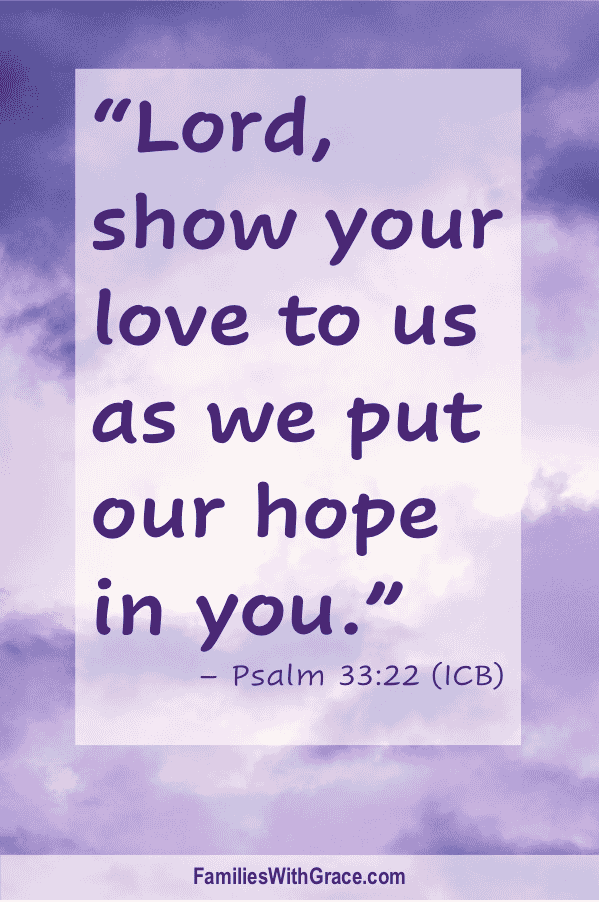
36. “Lord, show your love to us as we put our hope in you.” — Psalm 33:22
37. “God sent his Son to die in our place to take away our sins. That is how much God loved us, dear friends! So we also must love each other.” — 1 John 4:10b-11
38. “You are my hiding place and my shield. I trust your word.” — Psalm 119:114
39. “Yes, I am sure that nothing can separate us from the love God has for us.” — Romans 8:38a
An easy recipe your family will love any time of the day!
My son is obsessed with peanut butter. I send it in his lunch in some form almost daily: on bread, on flatbread, on bagel thins or with crackers to spread it on. Sometimes he likes some honey mixed in with the peanut butter for variety, because he also doesn’t like jelly.
The flavor of peanut butter and honey is so good and seems like such a treat! Those flavors combine for this super easy, super yummy, not-too-bad-for-you treat. I’ve been making these peanut butter honey nut cereal clusters for a couple of years. Every time I make them, my family gobbles them up. The last time I made them, I doubled the recipe so they would last more than a day.
I have served them for breakfast, lunch, snacks and dessert. They’re the kind of treat that I don’t feel bad about giving my kids because there isn’t a refined sugar and other bad stuff for them. It includes whole grains and protein. You can’t get much better than that — except if you can make it easily.
I would daresay this is one of the easiest recipes in my repertoire. It takes only about five minutes and doesn’t even require the oven or stovetop. I know it sounds too good to be true, but it isn’t!
Start with 1/4 cup of honey and 1 cup of peanut butter in a microwave-safe bowl. I use my large glass mixing bowl.
Put the bowl in the microwave and heat on high for 30 seconds. Stir and heat again for 30 seconds until the peanut and honey are melted together. (If you’re making a double batch like I did with this one, you may have to heat for another 30 seconds.) It should look like this:
Gently stir in 2 cups of honey nut Os cereal. (Clearly the name brand here is Honey Nut Cheerios, which I have found really does tend to work better than store brand just because they have less of a stale taste to them.)
Once it’s all stirred together, drop immediately in clusters of about 1 tablespoon each onto parchment paper. I used two spoons. I scooped the cereal out of the bowl with one and then used the other to help plop it onto the paper. While I use parchment paper for this, I think that wax paper or even aluminum foil would work just fine as well.
A single batch makes approximately 24, depending on how big you make your clusters them. Let the peanut butter honey nut cereal clusters cool for 30 minutes or so and they are ready to enjoy! Store them in a ziptop bag or plastic container with a lid to keep them fresh. They don’t have to be refrigerated.
Put the honey and peanut butter in a microwave-safe mixing bowl.
Heat on high for 30 seconds. Shake around or stir a bit. Heat for another 30 seconds.
Stir well and then add the cereal and stir gently to coat.
Put small clusters out on parchment paper. Let them cool about 30 minutes and then enjoy.
Join the Families with Grace Acts of Grace challenge and receive a FREE devotion book today! In just a few minutes each day for seven days, you can focus on what giving grace looks like and how to put that grace into action.
A recent spring break trip sent me home with a souvenir of lessons about my anxiety and depression
A few months ago, I made my first video for my Facebook page about my struggle with anxiety and depression. I recorded it multiple times because making a video gave me anxiety (it still does!). The irony wasn’t lost on me. But that video got a decent response from folks who were glad I shared. That was my first indication that I’m not alone and sharing about my anxiety and depression may make me anxious and vulnerable, but it can help other people.
Since then, I’ve shared a few posts about anxiety and fear here on the blog like what a dog taught me about anxiety. I have a guest post about anxiety coming soon on The Mindful Mom Blographer. The proverbial cat is clearly out of the bag about my struggles with anxiety and depression.
Honestly, for years I just thought this is how I’m wired. I figured it was normal to have these thoughts and concerns or, at the very least, normal for me. I didn’t realize until more recently that the stuff going on in my head has a name: anxiety disorder. Knowing it’s an actual issue doesn’t really change anything, but does give me perspective. I can stop beating myself up so much for struggling with these thoughts. I can stop feeling like a huge failure when they win.
And all of this struck me yet again during our spring break trip last week to Florida for a visit to Disney World and Universal Florida. But it didn’t strike me in the way you might expect. Yes, I had some worries about the trip. That was to be expected. Yes, I thought a few times about how sad the story would be if on my kids’ first flight on the way to Disney World of all places our plane crashed and we all died. I pushed that from my head and didn’t voice those concerns to anyone else. Yes, I worried about losing track of the kids in the crowd just like any other parent. But, I probably focused on it a bit more than I needed to. Yes, I fretted about my son falling down the long staircase we were waiting on to board the Hogwarts Express, even though I was right behind him to catch him — or at least break his fall.
However, those things weren’t what I learned most about my anxiety. Those were normal-for-me things that I expected. And I’ve told you before how I don’t want to live life in fear of getting more hurt while doing something out of my comfort zone. My health issues of fibromyalgia and interstitial cystitis have caused me to be paranoid to do anything out of the ordinary and make my pain worse. But I knew that going into the trip. I did my best to be practical and realistic yet also not miss out on making memories with my kids.
What I learned, though, was how much anxiety’s good friend, depression, was hanging out with me. This past year or so, I would have told you that my struggle with depression was in a good place and I’m doing well. It turns out that may not be completely true. And this is where I’m going to get incredibly honest and vulnerable. I learned on my trip that I’ve been living life like I don’t have hope of the future. I’ve been living like maybe I’ll live another 10 years or so at most.
I don’t consciously think that way. In fact, having children who are 6 and 9, I am terrified I won’t live long enough to see them grown, which I desperately want. But, I haven’t necessarily been living like that is my desire. I’ve been beaten down and focusing more on getting through the present than thinking about what I want for my future.
Maybe it was the timing of the trip combined with a visit the week before to a new fibromyalgia doctor who has given me a sliver of hope that maybe I don’t have to feel like this all the time and can be proactive. (I literally got choked up in her office when she told me she thinks she can get me feeling better with tweaking my medicine and having me start physical therapy.) Maybe it was combined also with her talking to me about my weight. Maybe it was combined with realizing that my current weight is the highest it’s ever been aside from when I was pregnant. And maybe it was seeing myself — ALL of myself — in so many photos and reflections throughout the theme parks.
But for the first time in a few years, I felt like I got a good look at myself. I saw a woman about to turn 40 who stopped caring about herself. You might not know it from looking at me and seeing my face with makeup, my hair styled and my clothes halfway decent. But if you looked on the inside, you’d see a woman who didn’t think it mattered what she ate or whether she exercised, because everything was always going to hurt and there was no hope of it feeling better. On my inside, you’d see someone who had not pushed herself or tried to do better for herself because she really didn’t think she was worth it. You’d see someone who was so mad at her body and the multiple ways it has betrayed her these past few years that she didn’t really care what happened to it.
By the end of the trip, all of these things were churning through my head. When I put on my swimsuit to go swimming with the kids on our final full day in Florida, I knew it was time to live differently. My kids are now old enough that we can go and do things like theme parks and travel. I don’t have a grand desire to travel all the time; I’m a homebody. But this trip gave me hope that we can travel sometimes. It gave me hope and joy to watch my kids as they saw and experienced new things. I want to offer that to them. I want to find a way for us to take a big trip every couple of years.
I can’t guarantee that I will always be physically up to walking around in a theme park all day. I managed it this time, but barely. By the end of each day, I was hobbling out to the car with aching hips. But, I’ve realized I can actually do my best to feel well. I can try. And that is how I know that my good friend depression is being pushed away. Because now I feel more hopeful and purposeful moving forward. I’ve realize that turning 40 in May isn’t all that old. I realize that maybe I don’t have to just accept that I’m old and everything hurts. Maybe there is something I can do.
Don’t get me wrong. I am also realistic. I know that I have these chronic pain issues, and they aren’t going to go away. My body will never be pain free. But, maybe it can be better. At the very least, I can make an effort to be in the best health I can be in so that I can have adventures with my kids. I want to be able to do more than just take care of them, which was my goal and desire for a few years when that was a struggle. Now that I’ve attained that goal, it’s time to get to work. It’s time to stop listening to the voice in my head that tells me I’m not worth it and I will never get better no matter what I do. It’s time to try. Just try. Maybe my quality of life can be even better. And maybe it won’t get better, but I’ll at least know I’ve done everything I can.
That hope of maybe feeling better is what gets to me most. It’s why I choked up in my new doctor’s office. The doctor viewed me as a woman who was struggling with pain and being out of shape. I viewed me as a woman who is feeling the best she has in a couple of years. Both pictures are accurate, though. While I am feeling the best I have in a couple of years, I am now seeing there is hope that it could be better.
I wish I could say that having hope and joy always win over anxiety and depression. They don’t. I trust God. I cling to Him. I fall at His feet. And I have to do it over and over again, because the struggle is very real. I take medicine to help me manage. I’ve learned tricks and techniques to help myself with my anxiety and depression. But they are always lurking in the background. They are waiting to get me down. Many times I let them. But after last week, I feel a renewed desire to fight back. I feel a renewed desire to be proactive and not settle.
I want to do it for myself, but I want to do it for my children even more. They deserve a mom who can fearlessly adventure with them. I won’t always be that mom, but for their sake and mine, I need to move forward and really try.
One simple tweak to a brownie box mix makes all the difference!
About 20 years ago, I discovered a hack to make box mix brownies so good and fudgy that it doesn’t even matter what brand of box mix you buy. My brownies are one of my most requested desserts to bring places. I am almost ashamed at how easy they are to make!
Affiliate links are used in this post, if you make a qualifying purchase via my link, I receive a small percentage of the sale at no additional cost to you. It helps support my blog, so thank you for your support! Read my full disclosure here.
I start with a brownie box mix and make it up according to the directions on the box. Any size works for this recipe, but I will say if the box says it will fit in a 9×11 pan, go with that size.
If you use a smaller pan, the brownies wouldn’t be as fudgy since they would be thicker. Having a bit thinner brownie gives you more fudginess!
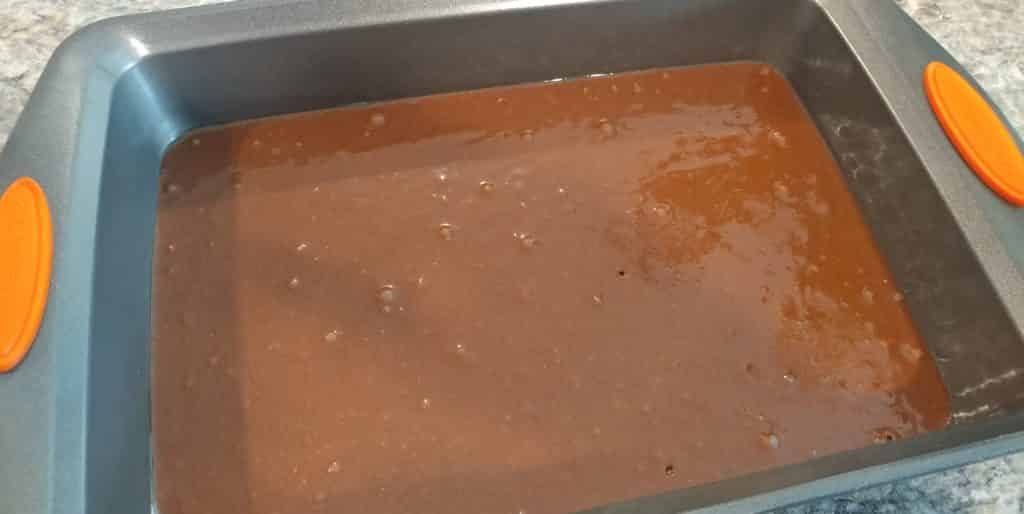
Then follow the directions on the brownie mix to. Stir the batter, and put it in your pan.
I highly recommend the Rachael Ray bakeware. It is nonstick and my absolute favorite bakeware I’ve ever used.
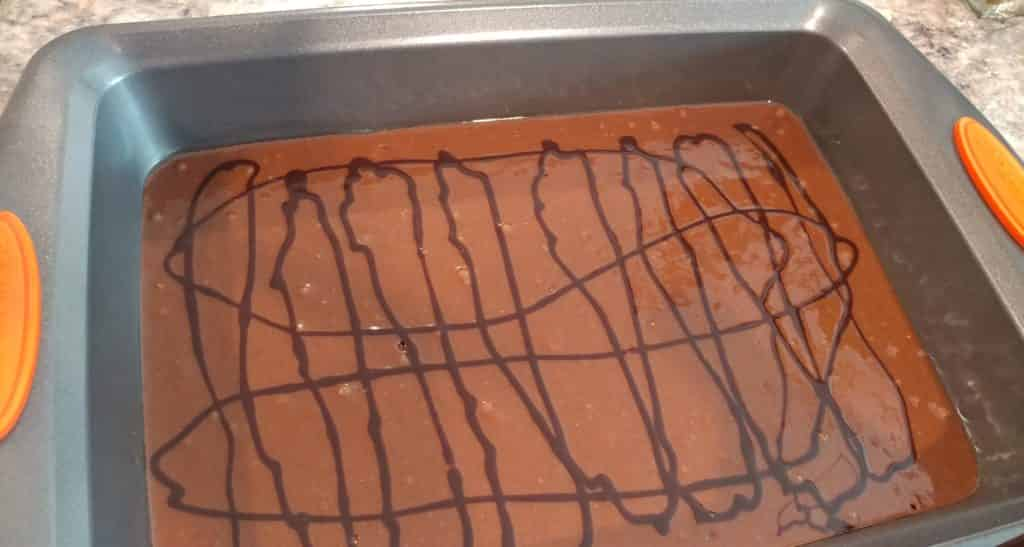
This is where the brownie hack happens. Are you ready for it? Grab your bottle of chocolate syrup out of the fridge — the kind you put on ice cream or use to make chocolate milk — and swirl it over the top of the brownie batter in the pan.
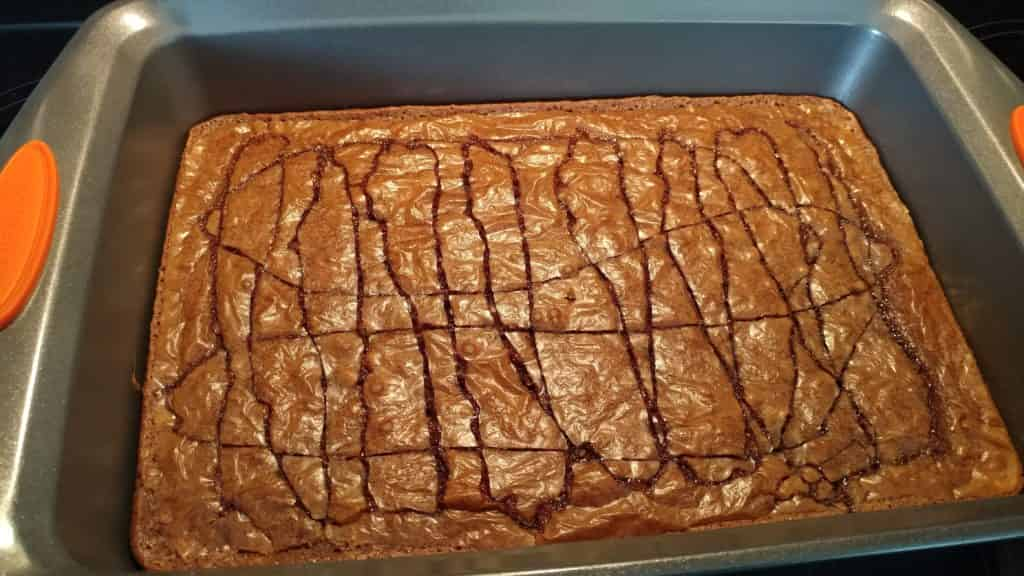
Check out the baking time on the brownie box mix. Set your oven timer for 3-5 minutes prior to the shortest time given. Check your brownies then to see if they are done.
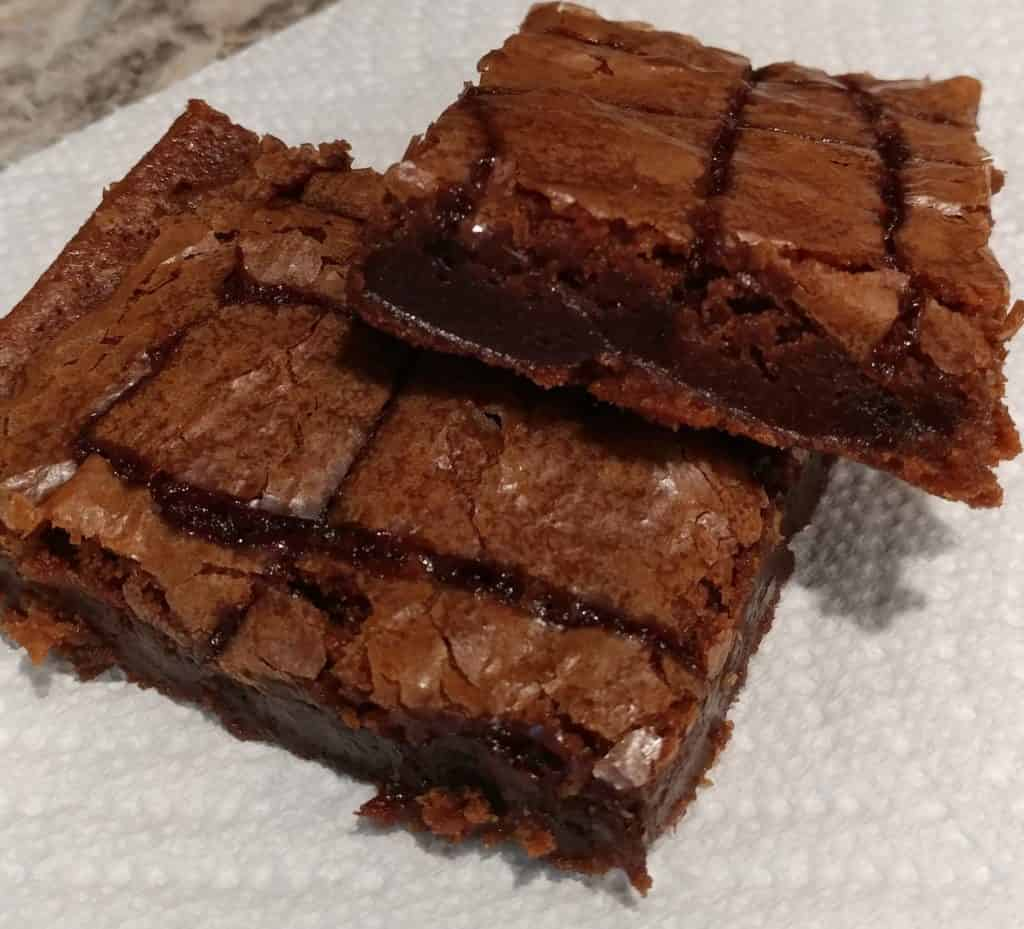
I always test my brownies by sticking a toothpick into the center and seeing if it comes out clean. If so, they’re done. If it is still goopy, bake the brownies a few minutes longer and check again. Feast your eyes on this gorgeous fudgy-ness! (Is that a word? I don’t even care!)
And that’s it. Once the brownies have cooled, they are ready to cut. If you are going to stack them on a plate, give them PLENTY of time to cool. Otherwise, they meld into one giant fudgy uni-brownie. Trust me, I speak from experience!
Look at those lines of fudgy goodness!
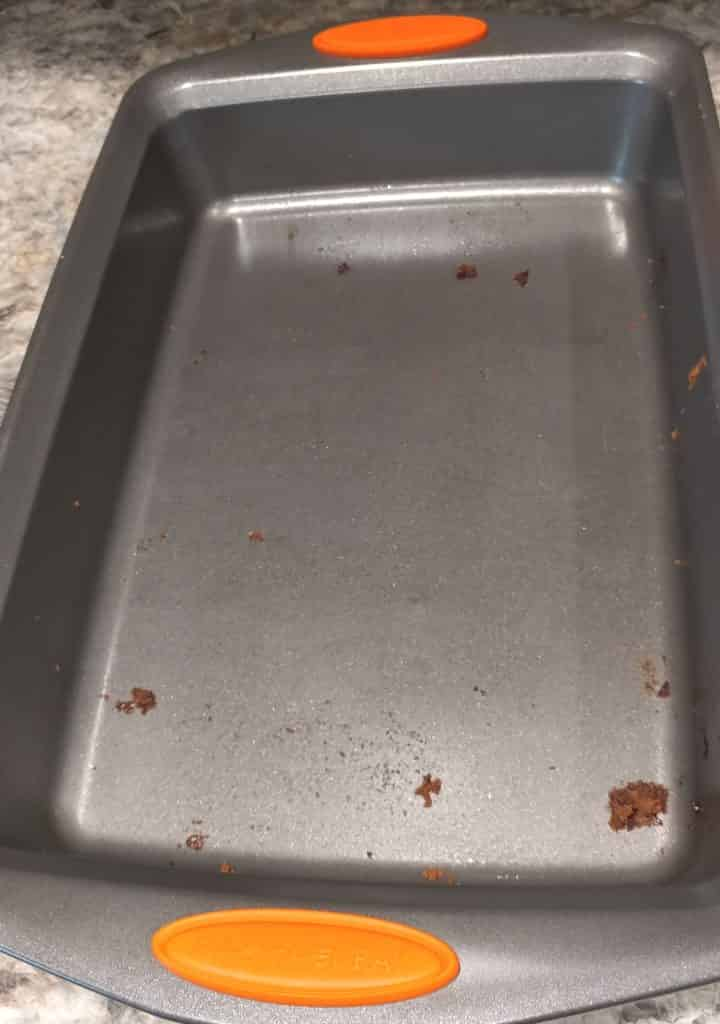
Also, check out this pan. Nothing sticks to the Rachael Ray bakeware! I did spray it with a light spritz of non-stick cooking spray, because I’ve used mine so much they need a bit of help, but this Rachael Ray cake pan is my all-time favorite. I LOVE it!
Because these brownies are so fudgy, they don’t need to be frosted. And they are usually best eaten with a fork or spoon!
I promise you people will ask for your brownie recipe. I’ll leave it up to you if you want to share this hack with them!
Join the Families with Grace Acts of Grace challenge and receive a FREE devotion book today! In just a few minutes each day for seven days, you can focus on what giving grace looks like and how to put that grace into action.
A study in March 2015 showed that parents are spending more time with their children now than ever before. In fact, the amount of time we’re spending with our kids keeps increasing. But, if you talk to most parents they don’t feel like they are actually spending enough one-on-one time with their kids. I’d guess that’s because the research is looking at quantity of time more than quality of time.
It’s a struggle that my family faces. Both of our kids are in school now. With a third grader and kindergartener, we are careful of monitoring their after-school activities so we don’t get too busy. Each of them are allowed to pick one extracurricular activity that goes for the entire school year. We recently agreed to let them both participate in a school play knowing that it would increase their activities for a couple of months, especially for our daughter who, as a third grader, has a larger part than her kindergarten brother.
Once you add in things like homework, making dinner, making lunches and cleaning up from everything, our evenings are pretty full even when the kids don’t have any activities. We are together and have family dinner almost every night. We chat around the dinner table, which is something my husband and I set as a priority when we first became parents. But when it comes to actually having one-on-one time with our children, we have to be more intentional.
One-on-one time is so important for our kiddos. I can literally see the difference in my children’s attitudes and mannerisms when they learn that they get one-on-one time. They perk up. It doesn’t take a long time or something complicated to make a difference. It just takes a bit of planning and undivided attention (no cell phone!).
1. Share a meal.
I can almost bond over food with anyone. I love food! But, this is true with my kiddos. I love getting a chance to eat with just one kiddo at a time. We’ve done this both as one-on-one time with each other individually and also as one-on-two time with both my husband and me but only one kiddo.
Right now in being busier, we actually are able to accomplish this one more. One night this week, for example, my daughter had play practice until 6 and had to be at gymnastics at 7. My son had to be at his Ninja Zone class at 6:30. My husband and I divided and conquered. He took my daughter and had dinner at Subway in between activities. I had my son who wanted frozen pizza at home before his class. It was a great opportunity to connect with our kids individually.
Another way I’ve found this works well is going into have lunch with them at school. My kids’ school is open to having parents come in for lunch whenever they’d like to as long as we sign in. My son’s lunch ends right as my daughter’s is beginning. And there are special tables just outside the cafeteria we can sit at, which really does give us a chance to connect one-on-one. I also really enjoy seeing them in their element at school and interacting with their friends. I also keep it simple and usually just have them eat their lunch that I packed for them.
For the one-on-two dates, we have even left one kiddo with a babysitter and gone out. A babysitter for us means grandparents because we are fortunate to have both my parents and my in-laws living within 10 minutes of us. But, even with grandparent time, our kids still make us promise that they’ll each get a turn to go out with us one-on-two. They enjoy having our undivided attention.
2. Take advantage of time in the car.
That scenario above where the kids have classes within a half hour of each other happens every week. My son’s Ninja Zone class is 6:30 to 7:30 p.m. and my daughter’s gymnastics class is 7 to 8 p.m. Both classes are in different buildings about 10 minutes away from each other. So my husband and I split up to take them. We alternate who goes with whom so we have a chance to see each of them do their thing.
I’ve had some great conversations with both of them on the way to and from classes. Sometimes they share more about what’s going on with them at school. Sometimes they tell me something they’ve been worried about. And sometimes, especially with my son, they tell me about all the plans they’re making. (I call my 6-year-old son “my little man with a plan,” because has a plan and explanation for everything, even if he’s taking creative license with it!)
3. Go on dates.
We get to have dates every so often around here with our kiddos. For the past two years, a local community organization hosts a daddy/daughter dance in the fall. My husband takes my daughter and they always have a great time together. My son and I plan our own date during that time. In fact, I wrote about our most recent back in October. We don’t have to do something extravagant. My son really just wanted to go to the playground and out for ice-cream. But we have fun and get to connect in a different way. We get to chat about what’s going on with them and we try to make sure that we are doing something they are interested in and want to do, which is also incredibly important.
4. Take turns playing.
Our kiddos love for my husband and I to play with them. Now that they are both in school and have more going on, we don’t get to play nearly as often as we once did back when they were itty-bitties. But something we started back then has continued until now and is still one of their favorite things: one-on-one play time. We set a timer and spend time with each kid playing whatever they want to play and then switch.
My kids love this so much that it was their only requested activity over winter break when I asked them what they wanted to do during their time off from school. Even just a half hour each is enough and they love it. My husband and I do, too.
5. Go shopping together.
You don’t have to love shopping for this one to work, because I certainly don’t love shopping! I’ve enjoyed numerous shopping trips with one kiddo at a time picking out presents for the other or even just shopping for clothes. There’s something special about being out with just one kiddo at a time for both them and me. A couple of weeks ago, my son and I went to Target to have him try on jeans. It was sort of laborious and shouldn’t have been fun, yet we had a good time together anyway.
An easy twist on taco night your family will love!
I have a couple of particular eaters in my family, but we all agree on Mexican flavors. Taco anything tends to go over well. I first tried this recipe on them a couple of months ago. Since then I’ve made it a few times because we all liked it so much and it’s easy.
While my family would be happy eating tacos a couple of times a week, I like to change things up. This recipe still gives that taco flavor but in a different way. Who can complain about combining tacos and cornbread? We love both around here!
It starts with a basic Jiffy cornbread mix. You know, the one you buy that is less than $1, which is super nice! Mix it together with an egg and 1/3-cup milk into a batter then spread into a greased 8×8 pan. I use a glass baking dish sprayed with non-stick cooking spray.
The prepared batter spread into the baking dish.
Stick that in the oven at 350-degrees for 15 minutes. While that is baking, prepare your meat that will go on top of it. While you could use more meat or add in some black beans, my family isn’t big on meat or beans. I use with 1/2-pound of seasoned ground chuck and find it’s the right amount. That said, we also use about 1/2-pound of seasoned ground chuck for the four of us when we eat tacos. We really aren’t meat-heavy around here.
HOWEVER, that works in my favor. I usually fresh ground chuck when making tacos, which is usually packed in 1-pound packages at my local grocery store. So, I cook the full pound, season it and then freeze the 1/2-pound we don’t eat in a Ziploc bag. When it’s time to make this (or nachos!), I pull it out of the freezer, thaw it (usually in the microwave because it’s easiest for me) and it’s ready to use. I freeze it flat to take up less space.
Whenever I freeze cooked hamburger, I mark it clearly along with the date.
So, for this recipe, preparing the meat for me means thawing it out. While the meat thaws, I mix together sour cream, shredded cheese and onion for the top layer.
The cornbread layer will be finished after 15 minutes as being soft-set. It looks like this:
Once you have the cornbread layer out, spread the meat gently over the top. If you are using more than 1/2-pound, it will cover the cornbread more densely. Below you can see below that 1/2 pound covers it completely.
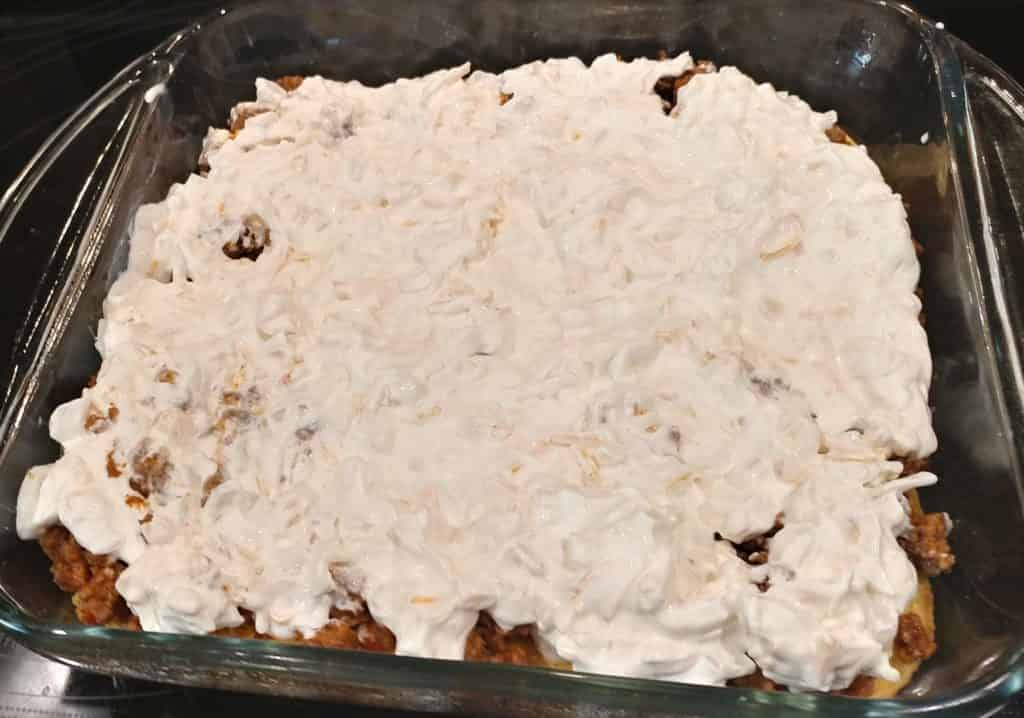
Top the meat layer with the sour cream/cheese/onion mixture and spread evenly over the top. I usually dollop the mixture out in blobs over the top and spread each just a bit. Minimal spreading for this works best!
Once the sour cream layer is on, it goes back in the oven at 350-degrees for 20-25 minutes until it’s warm and the cheese is melted. It comes out looking like this:
All that’s left is to cut and serve! I usually let it set for about 5 minutes before cutting into it. It doesn’t come out in slices and looks a bit messy but it’s so good! You can easily top the bake with diced tomatoes or lettuce or whatever other taco toppings you like. We don’t do that in our house. We serve it alongside tortilla or corn chips and dip the chips right into it for some added crunch.
It’s so yummy that even my most particular eaters will eat it and get seconds, which is great! This recipe can be doubled and baked in a 9×13 dish to feed a crowd.
In a large bowl, combine the cornbread mix, egg and milk until well blended.
Spread it into an 8x8 baking dish sprayed with nonstick cooking spray and bake for 15 minutes.
While the cornbread is baking, prepare the ground chuck. You can either cook 1/2-pound ground chuck (or more if your family desires) with 1/2-packet taco seasoning or used taco meat is frozen and thawed.
Mix the sour cream, cheese and onion together in a bowl. (I usually rinse and dry the one I used for the cornbread mix and use it again to save on the number of dishes.)
Carefully spread the meat over the baked cornbread.
Dollop and spread the sour cream mixture over the meat.
Put it back in the oven for 20 to 25 minutes, until it's heated through and the cheese is melted.
Top with shredded lettuce and diced tomato, if desired, or eat as is (which is what we do around here!).
Most of my life, I’ve struggled with feeling left out. Sometimes I was intentionally left out or excluded. Other times I was just overlooked. And sometimes I just perceived it that way. It’s happened a lot.
When you’re a quiet person, it’s easy to be overlooked. You’d think that would make me more talkative or strive to include myself in things. It works almost exactly the opposite. Once I start feeling the pinprick of being left out, I tend to shut down even more. It’s a vicious cycle that continues over and over.
Growing up
As a kid, I was the youngest and quietest. My older brother was (and still is!) more vocal than I was and my older cousin, who we spent a lot of time with, was the same. The two of them were boys and closer in age than I was to them. They paired off many times while I flew solo. I didn’t always mind, but sometimes I did. I felt unheard many times, because it’s very easy for my voice to get lost in boisterous conversations.
It was outside of family that I struggled the most. Again, being quiet worked against me in being included. I also seemed to have a knack for picking friends who wouldn’t stay friends with me. There was the girl in fifth grade who told me in a catty tone about how she was having a Halloween party and inviting everyone in the class except me. (Later she was working at a retail store with which I had an issue and she had to treat me with respect and kindness. The adult me high-fived the fifth grade me over that!)
We will just skip over middle school because middle school stinks all around. I think that’s true for everyone! High school brought its own challenges. I had three really close friends turn their backs on me at different times throughout those four years of high school. It smarted a lot.
One of them went to my church and not only turned her back on me but took the rest of the youth group with her. That was hard. Fortunately, I was dating my husband by then and he was able to come to some of our youth group outings, which made them much easier. But it was difficult. I’m not a person who looks back fondly at memories of church youth group.
As an adult
As an adult, I’ve continued to struggle with this feeling for all those same reasons yet again. I am almost 40 years old, and I STILL struggle. I’ve learned to talk about it with my husband; he’s a great gauge to see if I’m really being left out or if I’m just being oversensitive. I’m thankful to have him around to help me out, because I truly need it.
And all of this is why God embracing me means so very much to me. He never leaves me out. He is never snarky. God doesn’t get his friends to all stop talking to me. He doesn’t overlook me because I’m quiet. My Father doesn’t talk over me. He opens His arms, invites me in and holds me close as we chat.
I cannot think of anything greater than that. There are innumerable songs about this very thing, but lately I have been loving Hillsong’s “Who you say I am.” I love the following part in particular:
“In my Father’s house There’s a place for me I’m a child of God Yes I am I am chosen Not forsaken”
Finding a place with God
I cling to that promise on the days and times when I’m feeling out of sorts. My Father has a place for me. He hasn’t forgotten me or excluded me. He’s got a place for me in His house — both on earth and in heaven. And His house on earth doesn’t mean just the church. Like most Christians, I have been hurt by the church. I have been left out by the church at all ages of my life and different churches, because churches are filled with people. People aren’t perfect.
But, God is. I can fellowship with Him on earth any time I want. He is my friend when I feel friendless. He never leaves me out when I feel forgotten. I am chosen and have never been forsaken by Him. And neither have you!
Whether you’ve struggled with feeling left out your whole life like I have or whether you’ve struggled with something else, God loves you, has a place for you and calls you His child. He hasn’t forsaken you, no matter how far you’ve fallen or how hard life has smacked you. He is right there, holding on to you and longing to fellowship with you.
I’ve got to say that as someone who continues to fight this battle of feeling left out, there is no greater reassurance than knowing that my Heavenly Father always has a place for me. Always. Not just when it’s convenient. Not just when I remind Him. And not just when He happens to look my way and notice me. Always. Always! Praise God that He loves us so very much!
Valentine’s gifts kids will love that don’t include candy or toys!
I really enjoy Valentine’s Day. I love celebrating love with my family. I tend to be a sentimental person anyway, and Valentine’s Day gives me an excuse to do so!
I start on Feb. 1 with putting hearts on my kids’ bedroom doors each evening of the things I love about them. I do that through Feb. 14. This year I even added in doing hearts for my husband on the back of our closet door of the things I love about him.
While I love loving on my family, I kinda don’t want to break the bank to express that to them. I promise I’m not cheap, but by the time Feb. 14 rolls around, we’ve had Christmas and then my son’s birthday at the end of January. I’m not inclined to buy my kids big gifts or toys.
I’m not all that included to buy them candy either, though, I usually get some small candy for them. I do like to get them each a gift or two I know they will like and will make them feel special but won’t break the bank.
With that in mind, I went in search of good Valentine’s gifts for kids under $20 and figured I’m not alone in my quest to avoid toys, candy and cheap trinkets that will get thrown away, broken or forgotten within hours. I’ve found some good stuff!
Affiliate links are used in this post, if you make a qualifying purchase via my link, I receive a small percentage of the sale at no additional cost to you. It helps support my blog, so thank you for your support! Read my full disclosure here.
And everything is Amazon Prime eligible, so if you are an Amazon Prime member, you can get it within two days with free shipping. If you aren’t an Amazon Prime member, no worries! You can sign up for a free 30-day trial and take advantage of the free, two-day shipping for any of these items. Nice!
For Girls
These Melissa and Doug butterfly and heart stamps are super cute. My daughter loves anything related to crafts like stamps, markers, paints and stickers. We’ve always had great luck with Melissa and Doug products. Even better these stamps are a great price at only $6.99 as an add-on item, but spending $25 at Amazon is pretty easy to do!
I love this grow your own crystals jewelry set from Alex. Combining a science activity of growing crystals with creating pretty jewelry is hitting it out of the park! Educational? Check. Cute and fun? Check. All of that on top of only being $9.99, and I’m pretty sure this is going in my daughter’s Valentine’s Day gift bag this year!
Another great option is hair accessories. Right now my daughter is into scrunchies. We discovered that you can get huge packs of them on Amazon for great prices. My daughter has loved this pack of 52 scrunchies in various textures and colors that are only $5.99 right now on Amazon. They are good quality with elastic that is stretchy but not loose.
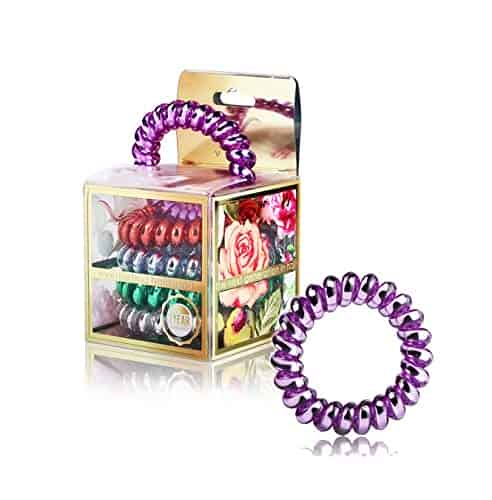
If scrunchies aren’t her thing, these coil hair ties work for even my daughter’s incredibly thick hair without getting caught. They are ideal for ponytails and come in all sorts of different colors.
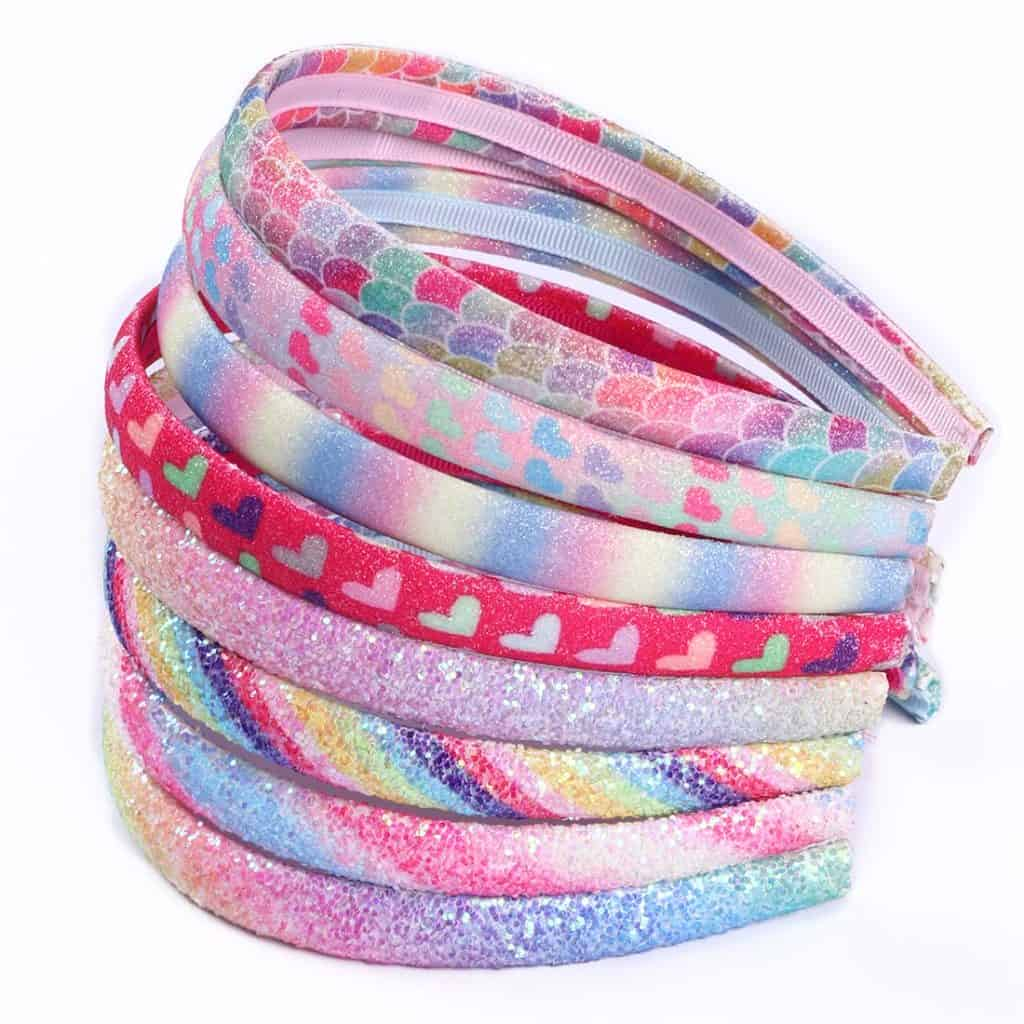
Headbands are another great option for pretty much any girl with any length of hair. My daughter is a big fan of anything with glitter and sparkle and always has been. (She totally gets that from me!) That’s why this 8-piece set of glitter headbands called to me. You can also opt to get them with glitter bows or plain bows if that is more your daughter’s style.
If your daughter likes to draw or write or both, this sketch book is an awesome find for Valentine’s Day! It says “Best Daughter Ever” on the front, which is sweet and I’m sure true. (Though, I will debate that mine is the best daughter ever, but we’ll let that go for now! Hee, hee, hee!) It would also pair well with the Melissa and Doug butterfly and heart stamps above. And for $6.99, it’s a great deal!
Another combo that works well for girls is this Klutz Bath and Body Activity Kit. You get to make your own bath bombs and products to use in the bath, which is great for science skills, and is also fun to use! At 9, my daughter is getting more and more into beauty type products and this fits right in with that while also still being age appropriate. Its price tag of $8.62 makes it that much better!
We really are fans of Melissa and Doug products, which is why I’ve got another one on the list for you! This Decorate-Your-Own Wooden Heart Box craft kit is not only cute and priced well at $6.99, but it’s something that’s can stick around for years. My daughter did this kit when she was 5. Now, four years later, she is still using her wooden heart box. I love stuff that has longevity like that!
If your daughter has her ears pierced, earrings are also a great option for a Valentine’s Day gift she will love but won’t add extra clutter to your house. Stainless steel heart studs are a good option for Valentine’s Day. For $7.99 to $10.99, you can get one, three or five pairs of different metal colors. They are so incredibly cute!
My daughter loves earrings, but we discovered after getting her ears pierced that she is allergic to all metals except gold. So if you want/need gold-plated earrings that are dangly and sparkly (which my kiddo loves!), check out these 18-K gold plated dangling heart earrings for $14.99. They come in four different colors, including a gorgeous purple. (Of course, I love anything purple!)
For Boys
I’ve got to say the first item on my list for my son is an unexpected one. But we were out shopping last evening for new jeans for him and he spied rain boots. His level of excitement over them surprised me. He gave me a whole spiel about how he’s never had rain boots before. So now I’m thinking I need to make this happen for him. Living at the dead end of a street now, we are in a great spot for him to splash in puddles. I found some rain boots that came in all sorts of cute colors and patterns. They average $20 in price. Some are just under and some are a dollar over based on the pattern and size. My son wears a size 3 and would love the dino print, which is $19.90.
We love coloring and crafting at our house. Well, my kids do. I like to color, but crafts aren’t my thing. That comes from their dad. However, my son is hard on markers. Being 6, he likes to color full force with whatever he is using. So new markers are always a good idea and these Crayola Washable Super Tip markers are our favorite. They come in a pack of 50 colors and can both be used for fine line and thick line, which is a great idea! And I love that they are truly washable, because we’ve gotten marker all sorts of places. Add in that they’re only $13.11, and I’m one happy mama!
And if you’re getting markers, you might as well add in a cool coloring book to use them in. I love this Lego Marvel Avengers and Batman super heroes coloring book. First, my son loves anything Lego, including super heroes, yet we don’t have any Lego coloring books, so it’s a total win. Second, he likes super heroes from both comic universes, and this includes both DC (Batman) and Marvel (Spider-man, Ironman, Captain America, etc.). For just $6.99, it would work well with the markers to make a nice gift. Of course, it would also be great solo or with crayons if you prefer.
Another great idea for boys is a sticker mosaic art kit. My son grabbed a couple from our craft drawer recently and had such a great time with them. Stickers are always fun and the fine motor skills practice to remove the small stickers and get them in the squares is terrific. If your kiddo is still learning colors or numbers, these are great for that, too. Amazon has a pack of eight sticker mosaic sheets for $12.99 that have dino, animal and space themes. These really come in handy for bad weather days or traveling.
Dinosaurs tend to be a favorite for almost all boys I know in elementary school and younger — my 6-year-old son included. This National Geographic Fossil Dig Kit includes three real fossils (both bones and teeth). It comes with an educational book to help kids learn as they play. And even better to kiddos, it means they get to play in the dirt! We really like the National Geographic sets. They’re made well and priced well. This one is only $9.99.
Depending on who you are, you might consider Legos toys. I guess technically they are, but they are so great for building and engineering skills that I’m on board with them even for Valentine’s Day. My son is super in to Legos right now and can now follow the manuals on his own to put sets together. He got one of these Lego Creator Might Dinosaur 3-in-1 sets for Christmas and loved it. What’s cool about this set is that you can build three different dinosaurs, a T-rex, triceratops and pterodactyl. However, be aware that you can only build one of them at a time. Amazon has the set for $11.99, which is a good deal for Legos.
If your kiddo isn’t so into dinosaurs, the Lego Creator 3-in-1 kits come in other versions as well. There is a Lego Creator 3-in-1 Mythical Creature set, also for $11.99. It builds a dragon, troll and giant spider. If neither of those would be a good fit, there is also a Lego Creator 3-in-1 Deep Sea Creatures set for $12,93 that builds a shark, crab and squid.
Stickers are such a huge hit with kiddos. I love when they come with a book that you need to place the stickers in. Then I don’t have to worry about them getting stuck places they shouldn’t or being left on clothes that go into the washing machine! This Ultimate Sticker Book for the Marvel Spider-man: Into the Spider-Verse is a great deal with 100 stickers for only $5.82. The sticker book includes information about Miles Morales, the main character in the Spider-verse movie who my son fell in love with, as well as some villains and Spider-man allies.
Books
One of my other favorite gifts for Valentine’s Day for the kids is books. Sometimes I go with holiday themed books and other times just with books they’ll be interested in.
Picture Books
We love Pinkalicious! While my daughter has almost outgrown picture books in general, she still loves Pinkalicious. And a Pinkalicious Valentine’s Day book, “Pinkalicous: Pink of Hearts,” for $6.29 is hard to pass up. Our son enjoys Pinkalicious, too, since most of the books include her little brother, Peter, who has gotten so popular he even has his own series now.
I grew up enjoying the Berenstain Bears books and my kiddos have enjoyed them just as much. I am constantly surprised by how many different ones I find about all sorts of topics. So it makes sense that “The Berenstain Bears’ Funny Valentine” exists. Even better, the book only costs $3.99. It would be a great addition to your kids’ Valentine’s Day gifts without putting much of a dent in your wallet.
If you’re looking for something that isn’t holiday themed, consider “Dinotrux” from Chris Gall. This is the book that inspired the series on Netflix with the same name. My son is in love with this book. While he is generally past the age where he wants to read the same book over and over and over, this is one exception to that. Amazon has it for $6.99.
One of my all-time favorite books we read with our kids is “God Gave us You” from Lisa Tawn Bergren. It is such a sweet story of a mama bear and her cub as the mama recounts the cub being born and what a gift the cub is from God. I totally get choked up when I’m reading it sometimes. It is precious! We have a few other books that are part of this series as well, but “God Gave us You” is our favorite!
Chapter Books
Valentine’s Day can also be a great time to give your kiddo(s) the gift of a new book series to fall in love with. Right now we are currently reading “Harry Potter and the Sorcerer’s Stone” together as a family. Both my 6- and 9-year-old are enjoying it. My oldest wasn’t sure that she’d like the series. She resisted it for a while, but now that we’re into it, she’s loving it. And I’m enjoying reading the book again for the second time and finding little clues of things yet to come that I missed the first time around. You can buy the paperback versions for $8.87. (If you are a Kindle Unlimited member, you can read this book for free on your Kindle. As an avid reader, I love Kindle Unlimited. I’ve been a member for two years now. I got it as a gift from my husband and am so glad he had me try it. I LOVE it!)
Another favorite series of ours is Geronimo Stilton. This newspaper-writing mouse has all sorts of adventures. The series has even branched into prehistoric times and space! Of course Geronimo Stilton has a Valentine’s Day book. “Geronimo’s Valentine” would be a great way to get into the series. These chapter books are a little bit lighter and work well for kids just starting to read chapter books or younger kids who are beginning to enjoy chapter books being read to them. They have illustrations throughout to break up the text.
The Owl Diaries is another great series for early chapter book readers or listeners. Just like with Geronimo Stilton, the books have some illustrations throughout to break up the text. They follow an owl named Eva and the adventures she has going to school every night. They don’t have to be read in order, but the best place to start really is with the first one, “Eva’s Treetop Festival.” And don’t let the pink on the cover fool you; these books are just as much for boys as for girls. My son has enjoyed them as well as many of my daughter’s male classmates. There was one point in first grade where she and some of her classmates were trading these library books around as they devoured them!
Going a little more advanced, the Goddess Girls series has captured my daughter’s heart. The series starts with “Athena the Brain.” The characters are based on Greek gods, but written from the perspective of them being in school together as they are growing and learning. My daughter loves these books so much. She has enjoyed many passages so much that she comes running to me to read them out loud.