Stacey A. Shannon is a freelance journalist and blogger who has been published internationally. She's also a Christian, a wife and a mom of two school-aged children. She started Families with Grace in 2019 to encourage Christian moms as they create homes filled with grace, love and faith.
Be sure to get the FREE family devotion book, "Finding Grace at Home: 7 Days of 5 Minute Devotions for Families." It's a great way to help your family draw closer to each other and to God.
Motherhood can be lonely. You weren't meant to go on your motherhood journey alone. Connect with Stacey and other Christian moms like you in the private Facebook group, Moms with Grace!
And check out the books from Stacey A. Shannon as well!
Take your family on a fun, food truck adventure with God!
Affiliate links are used in this post, if you make a qualifying purchase via my link, I receive a small percentage of the sale at no additional cost to you. I only recommend products and services I use and love. It helps support my blog, so thank you for your support! Read my full disclosure here.I was given a free copy of the book “The Bible Food Truck” to review; all opinions are my own.
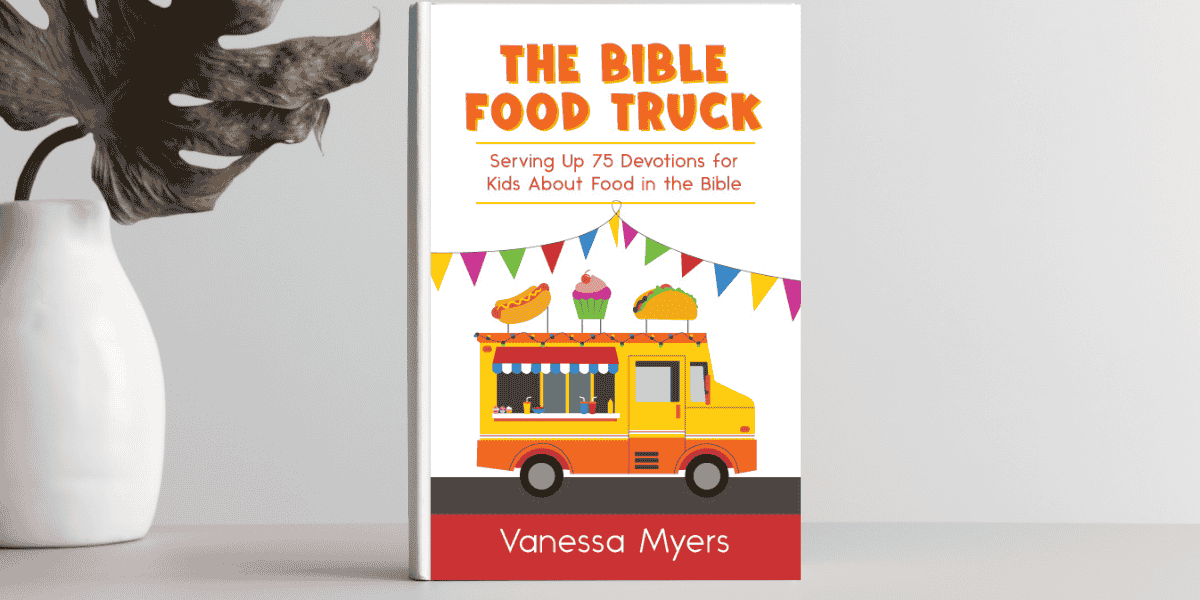
I love food, God and books. Something that combines all three makes this mama happy! “The Bible Food Truck” by Vanessa Myers does just that. I’m excited to not only be part of the blog tour promoting this, but to also review the book and give away a copy! Super exciting stuff!
I first connected with Vanessa through a Christian blogger group back in 2019 when I shared about her family devotion book, “Breakfast with Jesus.” This time I am partnering with her again to tell you about her latest family devotion book, “The Bible Food Truck.” She sent me a copy of the book for me to peruse ahead of time and it’s pretty great.
The theme
“The Bible Food Truck” serves up 75 food-themed devotions for kids. Myers said when she started putting the book together, she had no idea how many Bible verses talked about food! While she didn’t cover them all, the book works its way from the Old Testament to the New Testament. Each devotion has a focus verse, called “God’s Daily Special,” that talks about food.
The devotions are done well for families. Food might be the underlying theme, but God is the overall focus. And that’s just what a family devotion book should be.
Devotion details
Each devotion has a focus verse and also suggested further reading in the Bible. Then “The Bible Food Truck” talks about the passage in a fun, child-centered way. Myers gives facts and information kids will love while also bringing the focus always around to God. The devotions are a good length — neither too short nor too long.
A “Faith To-Go” section is part of each devotion as well. I love these practical suggestions for ways kids can serve God, tell others about Him and grow in their faith.
As a mom of two and long-time children’s ministry director, Myers knows children learn well being hands-on. So throughout “The Bible Food Truck,” children complete various tasks to create their own food truck idea by the time they make it to the end. They think about what they’d serve, to whom, the name of their food truck, the Bible verse to represent their food truck, what their logo would be and much more. It’s a fun and creative way to get kids involved and excited.
Get your own copy
Whether you want to go through “The Bible Food Truck” as a family or let an older child go through it solo, you’ll want to pick up your own copy. The book is for sale exclusively on Amazon in both Kindle and paperback formats. Bulk pricing options are also available for children’s ministry groups.
You can also enter for a chance to win your own copy of “The Bible Food Truck” now through 12 a.m. EST on April 5, 2022. I know! It’s exciting!
To enter, you MUST “like and follow” Families with Grace on Facebook. You can earn up to two extra entries by following Families with Grace on Pinterest and signing up for the Families with Grace email list. You don’t have to be new to Families with Grace to qualify. Just complete the form.
I will announce the winner on Facebook and Instagram on April 5, 2022 at 2 p.m. EST. The winner will receive the book through postal mail. It is open to residents of the United States only. Enter here or scroll down and click the button to enter through the Rafflecopter website.
Vanessa Myers is passionate about teaching God’s Word to children. She loves writing books for kids as well as blogging about children’s ministry. Her website has more information about her, including links to other resources from her, that are designed to equip families on their faith journeys.
Tried and true nail wrap tips to keep your nails looking good longer!
Affiliate links are used in this post, if you make a qualifying purchase via my link, I receive a small percentage of the sale at no additional cost to you. I only recommend products and services I use and love. It helps support my blog, so thank you for your support! Read my full disclosure here.
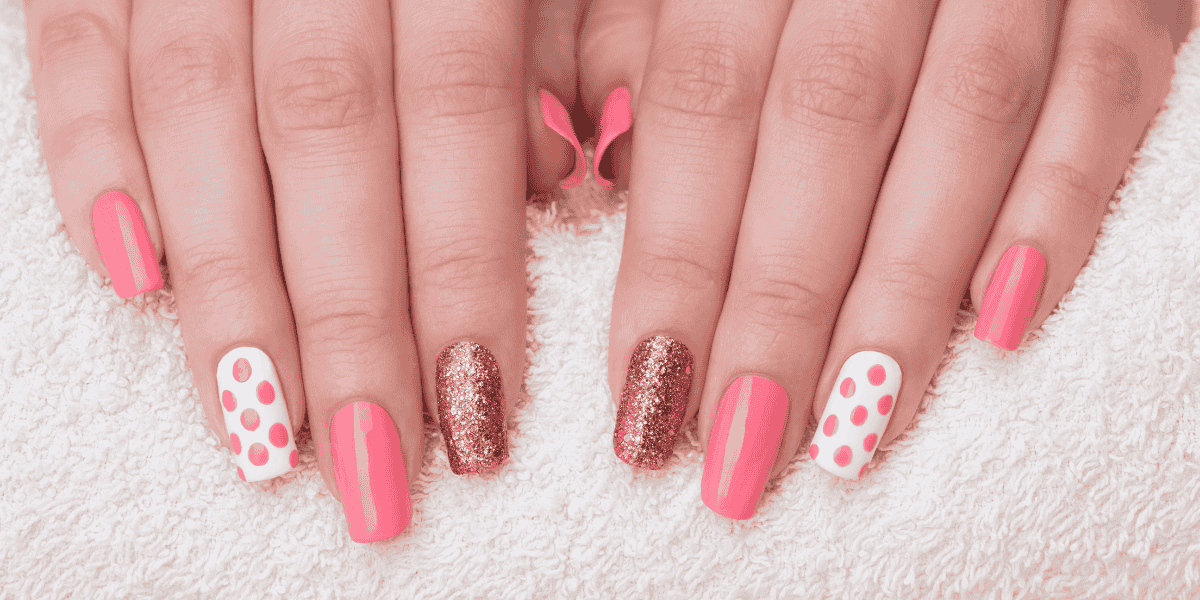
A couple of years ago, I tried nail wraps for the first time. While I really liked them, I also found them too pricey to be a regular thing. But a few months later, I found all sorts of all nail wrap brands that were much more affordable. Thus began my nail wrap journey. Now nail wraps are all that I wear. I LOVE them! I have also learned some nail wrap tips and tricks along the way I’m excited to share with you.
(Also,I have zero affiliation with any of the nail wrap companies or brands. Nada. My only affiliate links are for related products on Amazon. )
Nail wraps 101
Nail wraps are like stickers made of nail polish that you put on your fingernails and/or toenails in place of wet nail polish. They come in all sorts of colors, designs and themes. While I have used nail wraps that sell through representatives, I don’t like them as much. They’re too expensive, and they are flimsier than the other nails I find for MUCH cheaper.
I’ve got a few favorite nail wrap vendors that I love. The nails average around $3 per set, but there are some cheaper and a few more expensive. None are more than $6, though! Here are links to a few of my favorites that I highly recommend (none of these are affiliate links):
The Flamingo Lady Nails offers free shipping on orders over $20. Shipping otherwise is usually just a couple of dollars. The Flamingo Lady Nails usually sends an extra set or two of nails along with some other little treats like a plastic flamingo and stickers.
Lily and Fox Nails has free shipping to the United States and Canada regardless of order size. Lily and Fox also usually sends along an extra set of nails as well. Each order comes with a personalized note and origami fox.
Lovely Hello Nails includes free shipping for orders of $15 or more. They have colorful envelopes that are personalized and has a weekly wrap for $2.
Nails Mailed offers free shipping on all orders. Its nails are a bit pricier at usually $5.49 a set, but each week has three nails of the week on sale for $2.74. Since they do all free shipping, I have literally just ordered one set for $2.74 and had them sent.
Pink Raindrop Nails has free shipping for orders $25 or more. This site is a blend of prices. You can get sets for 99-cents. These sets don’t stay on quite as well, but with the right base coat, they last at least a few days. (More about that to come!) My favorites from this shop, though, are the pricier $3.49 to $4.99 sets that include pop culture themes such as superheroes, movies and video games!
Tip 1: Use nail polish remover on your nails before applying your nail wraps.
This nail wrap tip is one I discovered more recently. Even if you don’t have nail polish on your fingernails, swiping over your nails with nail polish remover takes off some of the natural oils. Honestly, I use an acetone nail polish remover. If you take your wraps off with nail polish remover, the acetone will work best. Either way, a swipe over your nails with nail polish remover helps prep them for the nail wraps. But you MUST wash your hands afterward.
Tip 2: Wash your hands with dish soap.
After you have cleaned your nails off with nail polish remover, try washing your hands with dish soap, especially Dawn dish soap. It’s good for everything from laundry to nails! My nails do fine washing them with regular hand soap, but my daughter’s nails have more natural oils on them. Washing with Dawn dish soap helps wraps stay on better for her. If you aren’t sure, give it a try. The worst that happens is you end up with extra Dawn for cleaning!
Tip 3: Buff your nails.
While I’ve loved doing my nails for years, I never buffed them. Then my husband ended up with extra buffing blocks from a project he was working on and gave me one. I gave it a try and now I use it often before putting on nail wraps. Gently buffing your nails is a good way to prep them for the wraps and helps remove some of the oils. I do a light buffing before applying the basecoat.
Tip 4: Use a basecoat.
When I first started using nail wraps, I didn’t think about combining wet polish with the wraps. Then I learned that a basecoat can not only help the wraps stay on longer but also protect your nails. I love the Orly Bonder Rubberized base coat. I apply it to my nails after they are cleaned and buffed then wait a couple of minutes before putting on the wraps.
Another bonus I’ve found with the basecoat is that they protect my nails well enough that I can peel off my wraps slowly and carefully when I’m ready to change them without them hurting my nails.
Tip 5: Use a topcoat.
If one of my nail wrap tips is to use a basecoat, you probably aren’t surprised that another one is to use a topcoat! Once your wraps are applied and filed, swipe over them with a topcoat. I love Zoya Armor topcoat, but pretty much any topcoat will work. Basically the topcoat just helps seal the wraps and they stay on longer.
Tip 6: Buy a glass nail file.
For years, I heard about how great glass nail files were. But I didn’t try one until a couple of months ago. It was worth the hype, you guys. I ordered a pack of three glass nail files on Amazon. They are different than cardboard or metal nail files in that they file more gently. (I know that sounds weird!) What’s nice is that the gentler file edge works to help you get rid of the excess nail wraps without tearing the nail wrap. I’d definitely recommend giving them a try!
Tip 7: Place the nail wrap above your cuticle.
When you’re placing your nail wraps, place them slightly above your cuticle. You want the wrap to adhere directly to your nail itself. To help with this, I push back and remove excess cuticles before doing my wraps. I do this just before applying the basecoat.
You also want to make sure the wrap isn’t hanging over onto your skin. If it is, trim it with nail scissors. A tiny bit hanging over isn’t such a big deal, but I still make sure to push it down as much as I can so that it isn’t on my skin. This also gets easier the more you use nail wraps and figure out what size works best for each of your nails.
Tip 8: Use nail scissors or clippers for trimming the wraps.
After I put the nail wraps on my nails, I trim them with nail scissors or nail clippers before filing them down. I don’t try to trim them right to the end of my nail. I don’t think that would work. But I trim them down so I have just a small amount to file off. I prefer nail scissors for my fingers and nail clippers for my toes.
Tip 9: Apply your wraps at night.
This is one of my very top nail wrap tips. Nail wraps do best when they have time to “cure.” If you apply them at night before going to bed, then you’re going to go hours without getting them wet or doing anything else to do them. They have more time to set and adhere. I promise this works!
I do my nail wraps after the kids are in their rooms for bedtime and before I go to bed. Usually I sit on the couch with my lap desk and do them while my husband and I watch something on TV. Then I only need to wash my hands once after I use the restroom before bed. They have all night to set.
Tip 10: Don’t put lotion on your hands afterward.
While I would wait and do my nails before bed, I noticed that if I put lotion on my hands before going to bed, as I often so, it affects my wraps. So I wait about putting lotion on my hands until at least 12 hours after putting on new nail wraps.
5 Easy egg recipes you can make in your microwave!
Since the pandemic, my daughter and I have been experimenting with microwave egg recipes. We both have our own versions we prefer and we have some that are basic as well. Years ago, I knew you could cook an egg in the microwave and then I forgot. But now it’s something I do regularly.
It’s so easy and takes only a couple of minutes that it makes for a good breakfast, lunch or dinner. Eggs can be cooked so many ways that you really can do almost anything with them. Aside from eating them how I prepare them with a side of toast, I also love egg sandwiches. I use one or two plain scrambled eggs on bread (toasted or plain) with some mayo. Delish!
Basic microwave scrambled eggs
The most basic of all microwave egg recipes is the scrambled eggs. It’s straightforward and a great place to start before you start experimenting with other flavors. (Find a printable version of this recipe below, because almost all the other microwave egg recipes use these same steps.)
For scrambled microwave eggs, you need two bowls to start with. Make sure that one is microwave safe. You’ll also need non-stick cooking spray, cooking oil or a small bit butter and, of course, eggs! You can use a whisk or a fork. I’m a fork fan, but my daughter loves the whisk.
Next, spray your microwave-safe bowl with non-stick cooking spray, spread a small amount of cooking oil in the bowl or rub butter on its inside surface. I use non-stick cooking spray and am generous with it so I don’t get any egg sticking to my bowl.
In your clean bowl, crack one or two eggs. (You can do more at a time, but you’ll need a larger bowl and more microwave time.) Discard the shells and start stirring to get the egg yolk broken up and incorporated. If you like to add a splash of milk into your eggs, you can do so. Just know that you might have to cook it a tad longer.
Once your egg is thoroughly mixed up, pour it into the prepared microwave-safe bowl. Place it in your microwave and cook on high for 50 seconds for 1 egg or 1 minute, 5 seconds for 2 eggs. Be aware that when you cook eggs like this in the microwave, they will rise outside the bowl. It looks kind of crazy and even scary, but it works!
Remove your eggs from the microwave, being careful if the bowl is hot. Immediately transfer onto a serving plate. Give them a couple of minutes to cool, so you don’t burn your mouth, and enjoy!
Microwave cheesy scrambled eggs
Microwave cheesy scrambled eggs are the one I make most often and is frequently my lunch alongside a couple slices of toast. I love eggs for the protein that really does fill me up! The other thing I like about this is I can easily add the cheese on top if I want or leave it plain. The cheese melts on its own if you put it on right out of the microwave, which is nice.
For cheesy eggs, I make the scrambled eggs exactly as described in the basic microwave scrambled eggs direction, but after I put the eggs on my plate, I sprinkle with a small amount of cheese. Since the eggs are so hot out of the microwave, the cheese melts on its own. So incredibly yummy!
Microwave Italian flavored scrambled eggs
My daughter likes to experiment with a variety of flavors. So it wasn’t a shock that she decided to play around with the microwave egg recipe. She has been on a big garlic kick, so she added some garlic and a dash of Italian seasoning into her eggs as she whisked them up, before pouring them into the microwave-safe bowl. She then continued on with the basic microwave scrambled eggs.
Microwave buttery scrambled eggs
If you cook your basic scrambled eggs with some butter lining the bowl, you’ll get some butter flavor. But to kick it up a notch, try adding some butter popcorn seasoning. We have butter seasoning for popcorn. Just a sprinkle of it into the egg before or after it’s cooked adds some yummy flavor!
Microwave mini omelette scrambled eggs
Of all the microwave egg recipes, I like this one probably the most. I see it as a treat. I love omelettes. Though I make the cheesy scrambled eggs most often, the added flavor of bacon or sausage in this version is decadent!
I like using pre-cooked bacon or sausage because it’s way easier. If I’m pulling sausage from the fridge, I stir it into the egg mixture cold and then cook it. Because I like my bacon crispy, I cook it first in the microwave and then stir it into the egg mixture to heat in the microwave.
I also stir cheese into the mixture as well before cooking and, sometimes, I still top it with some shredded cheese as well for extra cheesy goodness!
Get out two bowls, one of which is microwave-safe.
Crack your 1 or 2 eggs into the bowl that doesn't have to be microwave-safe.
Stir vigorously with a fork or wire whisk until scrambled.
Spray the microwave-safe bowl with non-stick cooking spray.
Pour the egg into the prepared microwave-safe bowl.
Place it in your microwave and cook on high for 50 seconds for 1 egg or 1 minute, 5 seconds for 2 eggs. (Be aware that when you cook eggs like this in the microwave, they will rise outside the bowl unless you use a large bowl. It looks kind of crazy and even scary, but it works!)
Remove your eggs from the microwave, being careful if the bowl is hot. Immediately transfer onto a serving plate. Give them a couple of minutes to cool, so you don't burn your mouth, and enjoy!
Looking for more easy, microwave foods? Check out these:
An extra ingredient kicks this puppy chow recipe up a notch!
Whether you call this a puppy chow recipe or a muddy buddy recipe, I can tell you that you’ll call it addictively delicious!
Here in the Midwest, I hear it called puppy chow most often, so that’s what I’m going with. It’s one of the easiest and scrumptious recipes I make.
You can’t go wrong combining peanut butter and chocolate in any capacity, but not every puppy chow recipe is created equal. I’ve tried multiple ones through the years and have finally found the best recipe.
When I made puppy chow for this post, I made a half batch since my husband doesn’t like it. (I know. He’s crazy! But he doesn’t like semi-sweet chocolate.)
The very next day, I made a second half batch because we ran out. It’s just so good and hard to resist.
I’ve always liked puppy chow, but for whatever reason, it is what I’ve craved most throughout quarantine time with COVID. The good news is I’ve made it enough now to know how to best tweak it and make it yummy.
The bad news is that I can’t make it too often or I’d be in a sugar coma. 🙂
The ingredients
The ingredients are important because the wrong thing changes the taste. First, use smooth peanut butter for this puppy chow recipe. Second, use rice squares instead of corn squares. I’ve used both and the rice squares taste better for this!
Not all puppy chow recipes use butter but I find it coats better and tastes better by using a bit of it. I use salted butter, but if you have unsalted, I think it’d be just fine, too, since you get some saltiness from the peanut butter as well.
Finally, my extra ingredient that doesn’t show up too often in muddy buddy recipes is vanilla extract. Trust me on this. You use just a bit and it will kick your flavors up a notch!
Preparing the puppy chow
One of the things I love most about this puppy chow recipe is that it’s quick to make and you can use the microwave. This means even my kids can make it or help me make it. I love that!
Start with putting your butter, peanut butter and chocolate chips in a large microwave-safe bowl. I use a big glass bowl so I can rinse it and put it in the dishwasher when I’m finished.
Put the bowl in the microwave and heat for 45 second and then stir. Remember that chocolate holds its shape as it melts, so you have to stir to tell how melted it is.
Continue heating in your microwave in 30 second increments, stirring after each time until it’s completed melted and runny like the photo below. Usually mine is ready after the first 30-second round.
When it’s nice and runny, stir in the vanilla extract. Once it’s all combined, it’s time to gently fold in the rice cereal squares. For a half batch, I use about 5-1/2 cups of cereal. You want the cereal to be well coated but not too thickly covered.
Getting there!
Nicely coated!
Once the cereal has a nice coating of the chocolate and peanut butter mixture, it’s time to covered it in powdered sugar. I place powdered sugar in a gallon-sized zip-top bag and then pour the prepared mix on top of it.
However, I do this in batches as well using about 1/2 cup per three cups of cereal mix. So for a half batch, I do this twice. For a full batch, it takes four times.
The zip-top bag works great for this puppy chow recipe shakedown. Once it gets too messy, it may not re-zip, but just fold the top over tightly and you’re good to go.
Shake it to cover the cereal in powdered sugar. Carefully break apart clumps from the outside and make sure all the pieces are coated in powdered sugar.
Get your snack on!
That’s it! Your puppy chow is ready to munch on. Place it in an airtight container and keep it covered, but it doesn’t have to be refrigerated.
For us, containers with lids work better than using a zip-top bag which can be harder to seal well once it gets powdered sugar in the track.
Stored well, it should last for up to a week. Well, it should stay fresh for up to a week, but I’m not sure it will ever last that long. It’s too yummy.
Puppy chow also makes a great gift for friends and family. I have often included it in my holiday goodies.
Place the butter, chocolate chips and peanut butter in a large microwave-safe bowl.
Heat for 45 seconds in the microwave and then stir. Return to the microwave and heat in 30 second increments until it is fully melted and runny. (Usually a total of 75 seconds works for me.)
Stir in the vanilla.
Gently fold in the cereal until all the squares are well covered with the chocolate and peanut butter mixture.
Put 1/2 cup powdered sugar in a gallon-sized zip-top bag.
Add 3 cups of covered cereal into the bag with the powdered sugar and shake. Break up clumps of cereal from the outside and make sure all the pieces are well coated. (You can add more powdered sugar if needed.)
Transfer to an airtight container and enjoy!
Looking for more easy, microwave desserts? Check out these:
Low-key toddler activities for when you need a break
Affiliate links are used in this post, if you make a qualifying purchase via my link, I receive a small percentage of the sale at no additional cost to you. I only recommend products and services I use and love. It helps support my blog, so thank you for your support! Read my full disclosure here.
I wrote this post about toddler activities at home back in 2012 when I was pregnant with my second child, feeling miserable and figuring out how to best entertain my toddler. Some of these activities we still enjoy and use even now! These low-key toddler activities will help you stay sane and maybe even allow you a bit of downtime.
My kiddo has lots of energy. She has a lot more energy than I do. This is especially true when I’m not feeling well or didn’t get enough sleep or whatever. I totally admit there are times when letting her watch an extra episode of Doc McStuffins, Mickey Mouse Clubhouse or Jake and the Neverland Pirates is easier because I’m tired or have things to do.
I’m not a fan of that. I don’t have a problem with her watching some age-appropriate television. She’s learned many things, in fact, but I certainly don’t want to just park her in front of the television on days I’m not feeling well.
Combining that thought with my love for lists and I decided to make a list for myself of low-key activities that don’t require much energy from me, would be fun for her, would maybe be educational for her and would be a great way to spend time together. I had a few ideas. Then I turned to some mom friends online and got some even better ideas. These ladies are seriously creative and smart.
These low-key toddler activities at home are perfect for times when you’re exhausted or sick or you can’t go outside and play. The best part is most are cheap or free and none of them require much more from mom than to sit or lie down. (I’ve included links for products to show you some of our favorites, but you can easily work with what you have!)
Low-key toddler activities at home
1. Coloring with crayons and coloring book pages. Check out this 13-piece set from Crayola that has crayons and 12 toddler coloring books. Or you can print free coloring pages from a variety of web sites.
2. Coloring with Color Wonder markers. I love these because your kiddos get to use markers without possibly making a mess. The markers only mark on the special Color Wonder paper. Clearly this was invented by the parent of a toddler! This Nursery Rhyme Color Wonder set is a great starting place.
3. Blowing bubbles. We do bubbles outside together with a bubble machine, but I also blow bubbles inside for her.
4. Playing dollhouse. If you don’t have a dollhouse, then find another kind of pretend play with toys like Fisher-Price Little People, stuffed animals or whatever you have around.
5. Playing with busy bags. If you aren’t familiar with busy bags and you have a toddler, you need to be! These are awesome and portable ideas to keeps toddlers entertained and learning. I’ve done two exchanges of busy bags with other moms and they are some of my kiddo’s favorite things to play with. Go to Pinterest and search for “toddler busy bags” for all sorts of great ideas. Even as a non-crafty mom, I found quite a few that would work!
6. Doing puzzles. We’ve found our favorite puzzles at the Dollar Tree. Right now 24-piece puzzles work best for my kiddo.
7. Having a pretend picnic. Spread out a blanket, invite stuffed animals and chow down on pretend food (plastic or imaginary).
8. Playing with a baking sheet and magnets. Before vacation, I read that a baking sheet with magnets is good car entertainment. My kiddo loved playing with it more once we got there. I have magnets saved back specifically for the baking sheet. An added bonus of using alphabet and number magnets is it’s teaching her as well. Animal magnets are also fun for her. (Look for magnets with a full magnetic backing instead of small magnetics attached to avoid a potential choking hazard.)
9. Reading books. We love reading books together. Not only is reading to my daughter good for her brain and language development, it’s also great snuggle time! (Don’t miss this list of more than 100 children’s books worth reading!)
10. Playing with Princess Dominoes. Any dominoes work. We happen to have the Disney Princess ones. Sometimes we match up the princesses in a row like a domino game and every so often, we use them like building blocks.
Available in wildlife (shown), dinosaur, outer space and unicorn
11. Playing with Play-Doh.Play-Doh can be a bit messy, but if you are sitting with your kiddo and playing that helps keep the mess down. I also use Glad Press-n-Seal on the table (tape it down if it doesn’t stick well) for my kiddo to play on. It makes for easier clean up. Whether you use a Play-Doh set or just dough, it’s a fun activity that lets you sit down.
12. Building things with Legos or other building blocks. Right now this means making towers or rudimentary shapes; we’re not building fancy Lego models of any sort.
13. Drawing on her magnetic drawing board. Surprisingly, my daughter is impressed with my stick figures when she asks me to draw things like our family. I also use the magnetic drawing board to show her what her name looks like. She’ll often ask me to write other names. She now knows the first two letters of her name as a result. Of course, she also draws on it herself.
14. Cutting paper with safety scissors. I just bought some safety scissors for the kiddo along with a pad of construction paper. She’s not super great at cutting just yet, but she loved the idea of it. We laid on the living room floor for a good 45 minutes alternating between cutting the construction paper and drawing on it.
15. Playing under a blanket. Sometimes I sit on the floor and put a blanket over our heads. This tickles my toddler. It’s like we have our own clubhouse. Sometimes it turns into peek-a-boo, and sometimes we just play under there. She loves it. It tickles her even more when the dog joins us under the blanket.
Even more low-key toddler activities at home
16. Fill a dishpan with dry beans and give the kiddo cupcake pans, spoons, measuring cups, plastic Easter eggs, etc., to move the beans around. It’s not totally clean (you will have some beans on the floor), but it’s not bad and will keep the kiddo entertained for a while.
17. Playing with stickers. Buy some stickers, peel off the sticky part that surrounds the stickers (to make them easier for little fingers to remove) and give the kiddo a sheet of paper. Just keep an eye on your toddler to make sure the stickers go on the paper and not themselves, their baby brother or all over your house!
18. Playing with baby dolls. Pretend play is always a good thing. If you don’t have baby dolls or if you have a boy, then find something else similar to play with that you can take care of together. Playing house/real life is a great toddler activity!
19. Having a tea party. You don’t even have to serve real beverages or snacks (though you totally can). Just sit together and pretend to have a tea party or snack time.
20. Brushing the dog. The kiddo does like to help with this. The dog isn’t quite as sure, but he loves the treat she gives him afterward!
21. Painting finger or toenails. My kiddo isn’t allowed to have paint on her fingernails until she totally stops putting her thumb in her mouth (feel free to judge me), but I’m thinking of trying her toenails this summer.
22. Playing “beauty parlor.” Let the kiddo brush your hair, put clips in it, etc. You can do funny hairstyles for her, put makeup on her, etc. (My curly hair is a bit nervous about the potential tangles on this one, but I already do this a bit.)
23. Make sun prints. Use sunscreen to paint on a piece of dark colored construction paper, then put in the sun to dry for a few hours. The sunscreen will keep the paper from fading, but the areas without sunscreen will fade.
24. Playing nap for mommy. The kiddo came up with this game on her own a month or so ago. Now a couple of times a week she will pretend to tuck me in, give me a doll or stuffed animal to sleep with and want me to be quiet. She tells me to let her know if I need anything, so I have to pretend to need drinks of water every so often. It’s a pretty nice gig that she actually enjoys!
25. Playing doctor with a doctor’s kit. This happens all the time around here. If your toddler isn’t into doctor’s kits, you might let him/her watch an episode or two of Doc McStuffins. Sitting for a checkup is pretty easy, even when you’re not feeling well. My daughter also loves for us to hold her toys while she examines them.
26. Playing with tools. A friend lets her kids bring in a ride-on toy then they turn it upside down and sit on the floor with their play tools pretending to fix it. Pretty much any relatively large toy could use some sort of repair with a play toolkit! Plus many toddler toolkits come with things to work on as well.
27. Playing with paper or magnet dress-up dolls. Paper dolls can be a bit more fragile, so use your best judgment for them. We love magnetic dress-up dolls!
28. Playing with Mr. Potato Head. Sometimes a classic is a classic for a reason. Mr. and/or Mrs. Potato Head are fun toddler activities!
29. Playing with puppets. Whether you have hand puppets or finger puppets, you can have fun with them. We don’t get fancy or carried away with puppets. We just sit together and have our puppets interact with each other. Easy and fun!
30. Playing with a reusable sticker pad. The great thing about reusable sticker pads is that sticker fun continues for more than a few minutes. And you don’t have to worry about stickers getting put other places that are hard to remove.
Bonus tips for playing at home with toddlers
Consider heading to a local teacher supply store or learning tools store for great ideas. For example, a friend of mine found some awesome wipe-off boards and books with dry-erase crayons
And, finally, just change the scenery and play in different rooms in the house. One of my kiddo’s favorite places to play is our long bedroom hallway. Sometimes we go there to play and shake up our routine so we aren’t always playing in the living room.
How casting blame damages your relationship and you may not even realize you’re doing it!
I wrote these words about casting blame about a decade ago. While I’m not dealing with babies any more, I most definitely needed this reminder for myself. I’ve gotten better about it, but lately I’ve been struggling a bit again with feeling like I work harder than everyone else in my family. I start having a pity party, casting blame and being miserable.
But, I have it worse than you. No, I have it worse than you. Seriously, though, I have it worse than you. We all know people who are experts at casting blame. No matter what you say, they always have it worse. It’s a comparison game. It can drive you batty.
I have a person in my life who is an overachiever at this game. The problem is what she is comparing to whatever I’m saying isn’t even remotely close to being the same thing. It gets very frustrating to say the least. Most times I just laugh it off knowing that’s just her. Other times I want to pull my hair out.
I’m not sure why there is a competition over who’s life is the worst some times, but I’ve seen it so many times and it so many ways. Of course, I’m perfect and have never engaged in such a competition. Yeah, right. I’d love for that to be true. I’ve most definitely had my moments. It’s super easy when things get hard to look around and moan and groan about how easy everyone else has it. And if they only knew how hard things are for me. Yadda, yadda, yadda. I’ve so been there done that.
The blame game as a new parent
As a new parent, I really struggled with that. The only problem was that I was competing with my husband more than anyone else. I was frustrated that he didn’t know how hard I had it. I had a newborn. I was up with her throughout the night. I had mastitis. I had to stay up past her and pump. I had another bladder infection. I had to get up before her and pump. I had to try to squeeze in work at some point. I had to change diapers. I had to wash pump parts. I had to wash bottles. I had so much to do. It was so hard on me. Me, me, me! (I’m sure hormones were in this mix somewhere, too.)
What I eventually realized is — even though I wanted to smack him upside the head when I’d fall back into bed in the middle of the night because he was sleeping — he had it hard, too. He was waking up throughout the night, driving three hours to work and back each day, figuring out how to be productive while there and then coming home and taking over baby duty for a few hours so I could snooze. And I never even thought to offer the poor man dinner. He had his own struggles and challenges.
How to stop casting blame
I still have issues with this from time to time. But, I’m learning to remind myself when I do to think of things I appreciate about my husband and what he’s dealing with. Instead of being jealous of the guaranteed three hours of alone, quiet time he gets during his daily commute, I think about the crazy traffic he has to deal with. And how tired I know he is after long days. It seems so less glorious then.
At the same time, he’s got to appreciate me and help me for me to be OK doing that. It’s a give-and-take. While I thought after five years of dating and 12-1/2 years of marriage that we have all the kinks worked out, I’m learning that we don’t. There are always new kinks. They especially spring up with parenthood. We are learning some new ways to communicate.
While before we had leisure time to talk without interruption, we now have limited time to talk without interruption and added stress of taking care of a little person on top of that. Our communication has sped up and gotten clearer. I’ve never been a person to play games or beat around the bush, but I do have times where I tend to lean to passive aggressiveness. And nothing pushes my husband’s buttons more than passive aggressiveness.
Don’t be a martyr
I’m remembering that I don’t have to be a martyr. (Poor Stacey. Look at how hard she has it.) When he’s taking the kiddo’s weekend nap time to play a video game and I’m taking the same time to fold laundry, straighten up the dining room and start on dinner, I have a couple of options. I can ask him to help. Or I can do it on my own and be thankful he’s getting a chance to relax after a hard week, especially when I might remember how he snuggled and played with the kiddo just a couple of hours earlier so I could take a long shower or read a magazine. It’s much better than shooting him glares he’ll never notice while folding laundry or slamming kitchen cabinets to make a point he won’t notice while making dinner.
The problem is if I’m feeling like I need help and not asking for it (and to my husband’s major credit, when I ask, he almost always complies without a fuss) then later in that day, I usually get incredibly angry at him. And it blows into this whole big thing and I get wrapped up in how much I have to do and how hard I have it that it becomes so much a bigger issue than it should have been.
It goes back to communication. Heck, I have two degrees in communication (journalism), so you’d think I would never struggle with it. And it also goes back to being so focused on myself and how hard I have in in comparison that I don’t even see his side of things. Of course he can’t read my mind.
Casting blame keeps our focus inward
In the end, many problems in life and many disagreements really come down to who has it worse. In our human nature we get into that comparison game. I think I have it worse than my husband when I’m doing household chores and he’s playing a video game. One mom thinks she has it worse than another because her kids are younger. Or whatever. The thing is somebody does always have it worse than somebody else. Life works that way.
We aren’t all dealt the same hand at the same time. But, we are all dealt struggles. Unless you know someone’s story — and really KNOW their story — you don’t know how hard their life is. You think they have it easy. You think they are better off than you. But, they’re dealing with their own worries, doubts and fears. They’ve got their own stuff going on.
The best thing we can all do is get outside of ourselves and listen — really listen — to what those around us are saying. What are our spouses dealing with right now that is weighing on them more than we had thought? What are our friends going through that is breaking their heart when they are home alone? It’s not a comparison game. It’s a fight and struggle to get through this life. And we’re not the only ones in the fray. Everybody is backed into a corner in some way throughout their week.
My challenge to myself and to you is to stop our comparisons when they creep in and start looking around us. Start looking outside of our own struggles and realizing the people we’re dealing with (who may be driving us insane) are struggling, too. Maybe they deserve to be cut some slack. Maybe they don’t. Or maybe they really just need someone to listen and validate what they’re dealing with. And maybe that can be us.
It’s not about who has the most battle scars. It’s about who helped the most soldiers survive the battle.
20+ Bible verses about grace to encourage your soul
I’ve heard grace described as not getting what we deserve. In other words, we deserve punishment, but instead find love and understanding. God’s grace is beyond my complete comprehension. How He continues to love me in spite of my failures amazes me. I want to model that same grace to my family, so I went searching for Bible verses about grace to uplift and encourage me along the journey.
God still disciplines me, but He also blessed me and extends limitless grace. I desire to do that with my children. I want to extend grace to my husband when he’s having a hard time rather than make it worse. These Bible verses about grace will help you dwell on God’s grace in your own life and inspire you to share grace with those around you.
I’ve pulled out verses specifically relating to grace. I encourage you to read also the verses around these for a fuller picture of God’s grace and goodness.
God’s grace to us
“He has saved us and called us to a holy life—not because of anything we have done but because of his own purpose and grace. This grace was given us in Christ Jesus before the beginning of time.” — 2 Timothy 1:9 (NIV)
“He said to me, ‘My grace is sufficient for you, for my power is made perfect in weakness.’ Therefore I will boast all the more gladly about my weaknesses, so that Christ’s power may rest on me.” — 2 Corinthians 12:9 (NIV)
“For all have sinned and fall short of the glory of God, and all are justified freely by his grace through the redemption that came by Christ Jesus.” — Romans 3:23-24 (NIV)
“For it is by grace you have been saved, through faith—and this is not from yourselves, it is the gift of God—not by works, so that no one can boast.” — Ephesians 2:8-9 (NIV)
“But he gives us more grace. That is why Scripture says: ‘God opposes the proud but shows favor to the humble.'” — James 4:6 (NIV)
“For sin shall no longer be your master, because you are not under the law, but under grace.” — Romans 6:14 (NIV)
“And if by grace, then it cannot be based on works; if it were, grace would no longer be grace.” — Romans 11:6 (NIV)
“We believe it is through the grace of our Lord Jesus that we are saved, just as they are.” — Acts 15:11 (NIV)
“The Lord bless you and keep you; the Lord make his face shine on you and be gracious to you;the Lord turn his face toward you and give you peace.” — Numbers 6:24-26 (NIV)
“Yet the Lord longs to be gracious to you; therefore he will rise up to show you compassion. For the Lord is a God of justice. Blessed are all who wait for him!” — Isaiah 30:18 (NIV)
“For the Lord your God is gracious and compassionate. He will not turn his face from you if you return to him.” — 2 Chronicles 30:9b (NIV)
“So that, just as sin reigned in death, so also grace might reign through righteousness to bring eternal life through Jesus Christ our Lord.” — Romans 5:21 (NIV)
“The Lord is compassionate and gracious, slow to anger, abounding in love.” — Psalm 103:8 (NIV)
“For the law was given through Moses; grace and truth came through Jesus Christ.” — John 1:17 (NIV)
God’s grace through us
“For the grace of God has appeared that offers salvation to all people. It teaches us to say ‘No’ to ungodliness and worldly passions, and to live self-controlled, upright and godly lives in this present age.” — Titus 2:11-12 (NIV)
“Grace and peace be yours in abundance through the knowledge of God and of Jesus our Lord.” — 2 Peter 1:2 (NIV)
“Each of you should use whatever gift you have received to serve others, as faithful stewards of God’s grace in its various forms.” — 1 Peter 4:10 (NIV)
“Let us then approach God’s throne of grace with confidence, so that we may receive mercy and find grace to help us in our time of need.” — Hebrews 4:16 (NIV)
“But since you excel in everything—in faith, in speech, in knowledge, in complete earnestness and in the love we have kindled in you—see that you also excel in this grace of giving.” — 2 Corinthians 8:7 (NIV)
“The grace of the Lord Jesus Christ be with your spirit.” — Philemon 1:25 (NIV)
“One who loves a pure heart and who speaks with grace will have the king for a friend.” — Proverbs 22:11 (NIV)
“Therefore, with minds that are alert and fully sober, set your hope on the grace to be brought to you when Jesus Christ is revealed at his coming.” — 1 Peter 1:13 (NIV)
“However, I consider my life worth nothing to me; my only aim is to finish the race and complete the task the Lord Jesus has given me—the task of testifying to the good news of God’s grace.” — Acts 20:24 (NIV)
Looking for more inspiring quotes and verses? Check out these posts!
Affiliate links are used in this post, if you make a qualifying purchase via my link, I receive a small percentage of the sale at no additional cost to you. I only recommend products and services I use and love. It helps support my blog, so thank you for your support! Read my full disclosure here.
Of all the people on my list, men are the trickiest for me to find the perfect gift for. I’ve looked at various Christmas gifts for men lists and often they include gift ideas none of the guys in my life would really like. Not all men are sports fanatics, meat loving, beer drinkers. In fact, none of the guys in my life are into any of those things.
So, as I was coming up with gift ideas for men this year, I figured I’d put them together in a list. That way I can remember them in the future — and I’m pretty positive other people need this kind of list, too!
These are all great ideas individually, combined together or in addition to other gifts you’re purchasing. No matter what, I’m sure you’ll find at least one thing on this list your guy will absolutely love!
Food gift ideas
Edible gifts are always a great gift idea for both men and women. Check out these tasty treats that will tickle his tastebuds!
Quirky gift ideas
If you can find a Christmas gift for men that’s both quirky and useful, then you know it’s going to be a hit. Even if your guy has nearly everything, I’ll bet he doesn’t have these things!
Handy gift ideas
When it comes to gifts for men, you can’t overlook handy gifts. Check out these ideas that he’ll love even if he isn’t a big handyman!
Fun (and funny) gift ideas for him
If your guy likes a good chuckle (and who doesn’t?!), these gifts will tickle his funny bone!
Looking for more Christmas gifts for men or other people on your list? Don’t miss these posts!
How we prioritize the birth of Jesus and celebrate with Santa Claus
I originally wrote these words in December of 2013. My kids were 4 and almost 1 that Christmas. Now they are 12 and almost 9. We have had a conversation about Santa with our oldest who now enjoys sharing Santa with her little brother. Our Santa holidays are winding down, but I don’t regret them one bit. This post explains why.
Santa Claus. The jolly figure incites a variety of feelings in various folks. Some insist that they won’t let their kids believe in Santa. They contend that they won’t lie to their children or that Santa isn’t the reason for the season. Others insist that Santa is a huge part of their Christmas celebration and even as adults they believe in him to some degree.
Affiliate links are used in this post, if you make a qualifying purchase via my link, I receive a small percentage of the sale at no additional cost to you. It helps support my blog, so thank you for your support! Read my full disclosure here.
What Santa is like at our house
Around my house, my kids believe in Santa Claus. However, they also know the full truth of the Christmas season. Well, at least the 4-year-old does, but the baby will learn about Jesus’ birthday one of these days, too. The Santa that exists around here is one who brings some gifts on Christmas morning. He is one we go to visit at the mall and smile for a photo. He is one for whom we leave out cookies and milk. Our Santa is one who leaves a letter for the kiddos and sometimes sends a video message. And that’s pretty much our extent of celebrating with Santa.
We don’t threaten that if behavior isn’t good then he won’t bring gifts. We expect good behavior year-round just because that’s what is expected. Our children must learn obedience as simply the right thing to do. We have a trust relationship in that way. We won’t lead them astray if they follow our instructions. (That’s the theory, anyway. The practice is just that — practice!)
My history with Santa
My husband and I both grew up believing in Santa. I very distinctly remember finding out that he wasn’t real. My mom was drying my hair. I asked her if Santa really existed. I think she tried to change the subject, but I was as persistent with my questions then as a child as I am now as a journalist. She told me gently that he was pretend. It didn’t traumatize me at all. I just understood that I was old enough to know and be in on the other side of the fun secret. I understood the tradition of Santa as well. In fact, I continued to leave out milk and cookies for him into my teen years and quite enjoyed doing so.
One of my family’s traditions of Santa included a letter from him. I do remember noticing that his handwriting looked a lot like my mom’s the year before I found out the truth. (Thank goodness for computers! I now type the letters for my kiddos.) My mom was creative and I looked forward to those letters, even after I knew the truth.
The real meaning of Christmas
So, I will let my children continue to believe in Santa Claus as long as they can. While we didn’t really introduce Santa to my daughter from the start in a very tangible way, she learned about him and fell in love with him. But she also learned about Jesus’ birth and fell in love with Him. That’s the most important part. In our slew of Christmas books, the vast majority focus on the birth of Jesus. My daughter can tell you all about how Jesus was born in a manger because there was no room in the inn and that a bright star lead shepherds to find Him. For example, last week we were outside after dark and she saw a bright star. She thought that was the Star of David.
Even better to me, my child fully understands why the birth of Jesus is so great. We read the story of Jesus’ birth the other day. Then she turned to me and said, “Now let’s read the other story of when Jesus grows up and goes back up into heaven.” She gets it as much as a 4-year-old can get it. Believing in Santa and the fun that comes with that belief hasn’t impeded on her understanding the true meaning of Christmas.
We also very much enjoy the VeggieTales story of St. Nicholas. St. Nicholas, in whom Santa is rooted, is a testament to giving to those in need. That gives us a chance to talk about giving gifts as a celebration of Jesus’ birth. We talk about how Santa is good. After all, what I like most about Santa is his spirit. He has a spirit of kindness and generosity. He has a touch of magic with flying reindeer, laying his finger beside his nose and disappearing. And he has a spirit of fun and laughter with his jolly “Ho, ho, hos!” Santa offers a wonderment that enhances a Christmas season with little ones.
The future
One of these days, my children will learn the truth. We’ll talk about it. I’ll answer any questions they have and I will tell them some of these very things. I will tell them that the spirit of Santa is very real in spite of his lack of corporeal form. I’ll tell them that they are now old enough to be in on the secret and help share in the wonderment of the little ones that come after them. And we’ll continue any holiday traditions they enjoy. At the end of the conversation, they will still trust me. I am their mother. A trusting relationship is of the utmost importance to me.
Even by now, my almost 11-month-old knows he can trust me to take care of his needs. If he’s crying in his crib, he stops as soon as I enter the room. He’s learned I’m on it and will take care of him. Believing in Santa and later learning the truth isn’t going to change the innate trust and relationship we’ve built.
And so this year, my kiddos will believe in Santa Claus. I make no apologies for that and am not ashamed of that. I look forward to the excitement that will come in picking cookies to leave out for him and see what he’s brought come Christmas morning.
An update from the present (2021)
In the years since I first wrote this post, some things have changed. My kids have gotten older. When she was 10, my oldest had a few experiences that led her to believe maybe Santa wasn’t real. My husband and I took her out to dinner to her favorite restaurant and we chatted one-on-one.
She wasn’t devastated. Of course she had some questions, but she was fine about it. And she was super excited to help continue the spirit of Santa with her younger brother.
My youngest will be 9 in a couple of months. I know it won’t be much longer until we’ll have a similar conversation with him. We have had some great family memories made over these past few Christmases that I am thankful for.
A few years ago, we also introduced our version of Elf on the Shelf. Much like Santa, the elf isn’t about monitoring behavior in our family. He is about having some clean fun. (Check out “14 Ways we made Elf on the Shelf work for our family” for more info. You can also find some elf pose ideas and a free Santa letter printable.)
How we’ve kept Jesus the focus of Christmas
We have also worked to make sure that from the beginning our kids knew Christmas was more about celebrating the birth of Jesus. One of the first ways we did this was by reading a Bible verse or two a day from Dec. 1 through 25 that led through the birth of Jesus. Each night, we’d review what had happened in the story so far. (Check out “8 Simple Christmas traditions to bring your family closer” for more info on how we did the verses as well as free printable verses your family can use.)
The verse tradition has grown into a devotion time each evening in December. We started with “A Family Christmas, Volume 1” and are now moving on to “A Family Christmas, Volume 2.” Both books have 5-minutes daily devotions for Dec. 1 through 25 to go through the Christmas story.
An appetizer, side or snack you can make in minutes!
My daughter is more adventurous in the kitchen than I am. I tend to go by recipes. She tends to use recipes and get creative as well. I love her creations and willingness to try things. (She’s made some delicious microwave fudge recipes this way!) Over the summer, she found a picture of meatball pockets that didn’t have a recipe with it. So, she came up with it on her own. The results were this super easy, yummy meatball pocket recipe you can make in minutes!
These meatball pockets can be a snack, appetizer or side. We used it as a side dish to go along with Spaghetti-Os. (I know. We are super fancy like that!) I also like that even my 8-year-old could easily help us with this recipe.
I also love that this meatball pocket recipe is only two ingredients: canned crescent rolls and frozen meatballs. You can serve them with pizza or marinara sauce. (But I can also tell you that they taste good dipped in Spaghetti-Os!)
How to make the meatball pockets
I chose homestyle meatballs for this recipe. My family isn’t big on anything spicy, so these were great for us. They were flavorful without being spicy or peppery. You can pick meatballs based on your family’s tastes. You can also use homemade meatballs if you would rather.
No matter what kind of meatball you use, they need to be thawed. If you are using fresh, homemade ones, you’re good to go. If you are using frozen ones, pop 16 of them in the microwave on thaw or 50% power to get them to about room temperature.
Preheat your oven according to the directions on the crescent roll package.
While the meatballs are thawing and oven is preheating, open the crescent rolls. (I cannot open canned crescent rolls. It scares me way too much, so my husband or 8-year-old son open them!) Unroll the sheets and gently break the rolls apart at the perforation into their triangle shape.
Then use a sharp knife to cut the triangles in half, so you have halves of the usual crescent roll size. (NOTE: You can make these with whole crescent rolls if you want them to be bigger or more bread-y. We tried both ways and like them either way.)
Next, plop a meatball in the center of the halved crescent triangle and fold the crescent roll dough around the meatball. Pinch it closed as much as possible.
When they are enclosed in dough, place the meatball pockets a baking sheet. I put parchment paper on my baking sheets to make for easier clean-up. If you don’t use parchment paper, follow the directions on the crescent rolls. The crescent rolls I used said they should be baked on ungreased baking sheets. Space the meatball pockets a couple of inches apart.
Place them in your preheated oven and bake them for 9 to 12 minutes until the crescent roll dough has become golden brown and they are heated through.
Serve the meatball pockets warm with marinara or pizza sauce for dipping, if desired. You end up with 16 meatball pockets per can of crescent rolls. Refrigerate any leftovers and reheat in the microwave.