Stacey A. Shannon is a freelance journalist and blogger who has been published internationally. She's also a Christian, a wife and a mom of two school-aged children. She started Families with Grace in 2019 to encourage Christian moms as they create homes filled with grace, love and faith.
Be sure to get the FREE family devotion book, "Finding Grace at Home: 7 Days of 5 Minute Devotions for Families." It's a great way to help your family draw closer to each other and to God.
Motherhood can be lonely. You weren't meant to go on your motherhood journey alone. Connect with Stacey and other Christian moms like you in the private Facebook group, Moms with Grace!
And check out the books from Stacey A. Shannon as well!
When it comes to “salads” for sandwiches, egg salad is one of my favorites. I love a good chicken salad, too. I’m more than glad to pass on tuna salad. But, a good egg salad sandwich can’t be beat.
However, like so many good foods, egg salad isn’t necessarily the healthiest food. Then I learned about using plain Greek yogurt as the base for the egg salad and knew I had to give it a try. Now I’m hooked on not only how healthy this Greek yogurt egg salad recipe is but also on how easy it is to make!
For those tracking points for WW, this egg salad recipe is only 1 point per serving (as of May 2023). Not too shabby!
How to boil eggs
One of the first things I had to learn in making good deviled eggs was to boil them correctly. I didn’t want them to be over-boiled and get that dark tint to the yolk. Having them be soft boiled also wouldn’t work. Like Goldilocks, I want boiled eggs that are just right. So, here’s what I’ve found that works best.
First, start with older eggs. I’m not saying expired eggs, but the fresher your eggs are, the more difficult they are to peel so they’re smooth. Next, fill a pot about 2/3 full with warm water and add a dash or two of salt. (The salt will help the shells come off a bit easier.)
Put the pot on your cold stovetop. Carefully place four eggs into the pot. Put a lid on the pot, and turn the stove on high heat. Leave them be. When the water begins boiling, turn off the heat. Leave the eggs on the warm stovetop for 10 to 12 minutes. Transfer the eggs to a bowl and fill it with cool water. Add in ice cubes and let the eggs sit until they are completely cool.
Prep the eggs
Once your eggs are cooled, you’re ready to start prepping them. I usually tap them on the countertop to crack the shells and then peel them over a paper towel. When I’m finished, I rinse the egg to be sure I have gotten off all bits of shell, and then I place them onto a clean paper towel to dry.
Next you can either chop the eggs into small pieces or put them in your bowl to mash. I’ve done it both ways. I like it better chopping them first just because then the egg pieces are a bit smaller in the egg salad, but either way works.
Make the egg salad
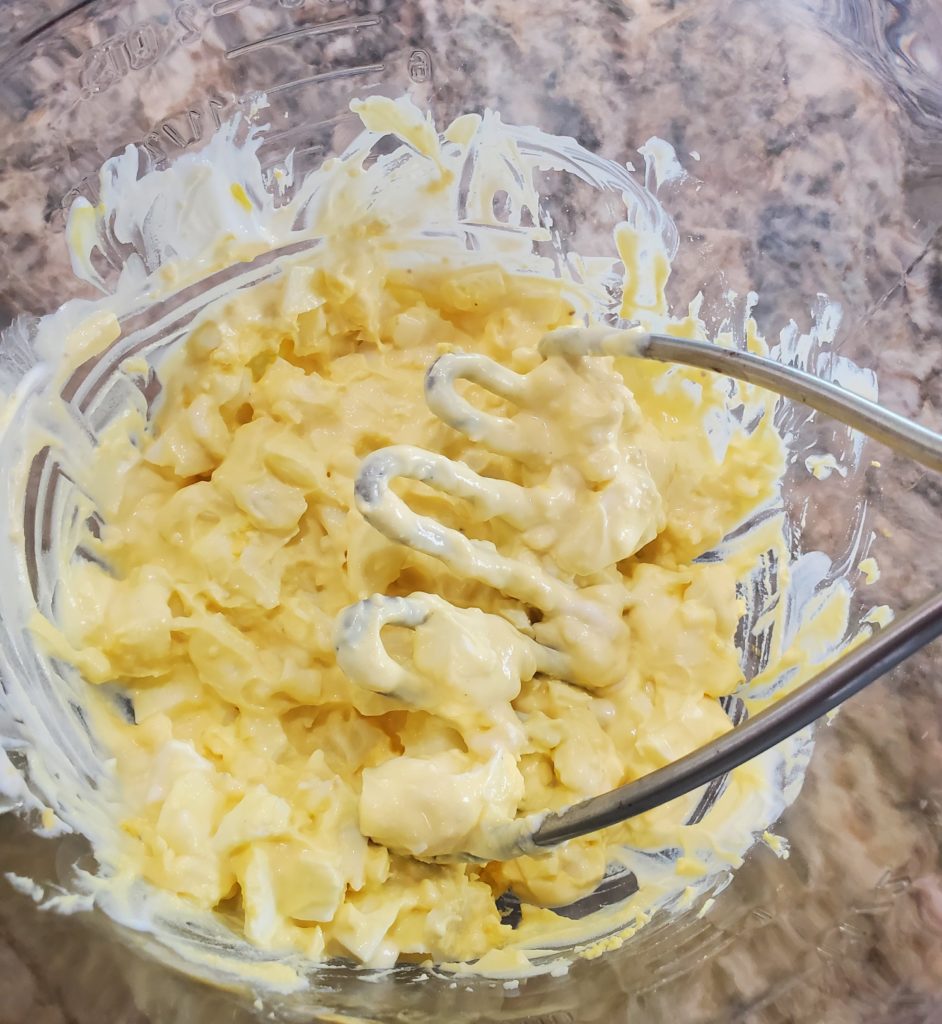
Place the boiled eggs — chopped or whole — into a mixing bowl. Add 1/3 cup plain Greek yogurt, 1/2 tablespoon mayonnaise, 1 teaspoon yellow mustard, 1 teaspoon Ranch dressing and 1/2 teaspoon honey mustard. (If you don’t have honey mustard, add some extra yellow mustard.) Sprinkle in salt and pepper to taste.
Using a fork or your potato masher, mash all the ingredients together.
Once everything is mashed to the size you like, use a spoon to stir a few times and make sure all the ingredients are well combined. Serve it immediately or store the egg salad in an airtight container in your refrigerator for five to seven days.
Greek Yogurt Egg Salad
This Greek yogurt egg salad recipe is tasty, low calorie and packed with protein. Plus it's only 1 point using the 2023 WW point system!
Fill a pot about 2/3 full with warm water and add a dash or two of salt. Put the pot on your cold stovetop. Carefully place 4 eggs into the pot. Put a lid on the pot, and turn the stove on high heat. Leave them be.
When the water begins boiling, turn off the heat. Leave the eggs on the warm stovetop for 10 to 12 minutes. Transfer the eggs to a bowl and fill it with cool water. Add in ice cubes and let the eggs sit until they are completely cool.
Once the eggs are completely cool, you can either chop them into pieces or leave them whole. (I prefer chopping for smaller egg pieces.) Place them into a mixing bowl.
Add the Greek yogurt, mayonnaise, yellow mustard, Ranch salad dressing and honey mustard. Add a bit of salt and pepper to taste.
Use a potato masher and mash the ingredients together well. Once the egg salad is the desired consistency, use a spoon to stir a couple of times.
Serve immediately or store in an airtight container in the refrigerator for five to seven days.
How Christian families can grow closer family relationships
Since before we had children, my husband and I had a team mentality. It was us against the world. Once we had our children, we incorporated them into our team and have developed an attitude of family teamwork. Along with that, though, we also try to be intentional about family bonding and finding ways to make that happen — even when life is busy.
When it comes to family bonding, quality trumps quantity. Even during the pandemic and a year and a half of virtual school, my family had to be intentional about spending quality time together. We were together all the time, but we weren’t always growing closer as a result.
Of the various ways we spend quality time together, these are 10 of our favorite ways for family bonding.
Affiliate links are used in this post. If you make a qualifying purchase via my link, I receive a small commission at no additional cost to you. This helps support my blog. Thank you for your support! Read my full disclosure here.
1. Play games.
Gaming is one of my family’s favorite past-times. My husband and I enjoyed games before had children and then were happy to play games with them once they were old enough. (Be sure to check out five of our favorite family games for small children.) Playing games together can be a great way to bond with the right attitude.
Another bonus to playing games together is it gives you a chance to teach lessons about how you can’t always win, and how to be happy for someone else we love when things go well for them. We’ve worked our way through some of these challenges and still do with one of our kiddos from time to time.
To keep competitiveness at bay, we also really enjoy playing cooperative games where the whole family works together toward one common goal. Role-playing games are often this way. One of our favorites with our kids now that they’re a bit older is HeroQuest.
A neat board game option to keep your family working together and strengthen family bonds is a mystery jigsaw puzzle.
2. Try new things.
Experiencing something new together can be great for family bonding. Whether you’re eating something new, doing a new activity or going somewhere new, doing something brand-new draws you closer as a family.
Recently, for instance, my daughter and I were alone for dinner while my husband and son went to a movie. We decided to try an Indian restaurant in our city that we had never been to. Neither of us had eaten Indian food before, so along with it being a new restaurant, it was also new cuisine. We learned together, which is a really neat thing to be able to do as a parent and child.
Our whole family tried geocaching together for the first time a couple of years ago. It was a fun way to connect as we searched for the hidden items in sometimes very common areas.
3. Travel.
Any adventure you can go on together is going to draw you closer. You can do this by traveling far from home or just going a city over. It doesn’t have to be complicated or pricey. This year, we spent spring break spelunking in various caves in Kentucky. We also got to feed kangaroos and eat good food. Our trip resulted in good memories and a chance to draw closer.
Traveling together as a family helps you stay focused on each other because there are not nearly as many distractions as daily life. And it also helps your family learn to be more flexible. We’ve navigated feeding a picky eater, finding our way around a new city and surviving tent camping failures as a family.
4. Eat meals.
While some family bonding activities are more out of the ordinary, others are more commonplace. Eating dinner (or whatever mealtime works best for your family) together is great for bonding. Family mealtime allows us to talk about what’s going on in our lives. We talk with the kids about what happened at school. Sometimes we make plans for the week. Other times we have random conversations that spring up like what our most embarrassing moments are. We’ve even had deeper discussions about religion and politics at the dinner table.
If you can’t have dinner together every night, set a goal of however many nights are feasible for your family and do what it takes to make it happen. If dinnertime doesn’t work, then have breakfast or lunch together a couple of times a week. And don’t think it has to be fancy or elaborate. Serve up cold cereal for any of those meals and enjoy the time together!
There’s something special about being at church together as a family. These days, my 10-year-old prefers to stay in service with us instead of going with the kids. Sitting together with my husband and children listening to them praising God together is awesome. It makes my heart swell with gratitude for my blessings.
If your children go to children’s church, then be sure to talk together about what they did and what they learned. We usually talk about the sermon together after church now that we are all hearing the same one. In fact, Sunday after church is our one regular time to eat out. So we both have a meal together and talk about church. It works well!
6. Have devotion time.
Growing in our relationships with God together as a family brings us closer. Whether you’re doing family devotions at Christmas or throughout the year, make time in your schedule to do some sort of devotional as a family. It doesn’t have to be every day. If once a week is what works for your family, then do that!
Right now, we are reading through “The Action Bible” a couple of nights of the week. After we finish reading a section (or two or three!), we just a bit about what happened and how to apply that to our own lives. For instance, my children were scoffing at how quickly the Israelites turned to worship idols and forgot what God did by getting them out of Egypt. Then we talked about how easy it is for us to get distracted from God even now. We may not being making golden calves to worship, but we do have to make sure we are prioritizing our relationship with God.
Reading out loud together is a great way to encourage family bonding. We started reading to our 13-year-old when she was about 3 months old, and we haven’t stopped since. We’ve read through a variety of picture books and chapter books together. Our family has particularly enjoyed the Harry Potter books and The Mapmaker Chronicles books. My son and I are reading the Wings of Fire series together and really enjoy it as special one-on-one bonding time.
The fun with reading fiction together is your family has a chance to enjoy the story, root for characters, loathe villains and more together. My son and I even come up with our own role play of sorts for many of the books we read.
Along with reading, we also started praying together with our children before bedtime when they were babies. That has continued to this day, and our kids are 10 and 13. Even though our daughter gets to stay up later than her younger brother, we have family prayer time every night. It isn’t elaborate and doesn’t have to be. Most of the time, our kids each say prayers out loud. Sometimes we do also.
Praying together helps our family draw closer. When we pray for each other, it helps strengthen our relationships as well. If one of us is sick or struggling and the others pray for that person, it’s encouraging. We also join together in prayer for friends and family.
9. Reminisce.
Doing things together creates memories. Talking about those memories together can draw your family closer to each other and strengthen your relationships. There is something special about a shared memory or inside joke.
And, here’s the thing, you don’t even have to reminisce solely about the big things like vacations. Talk and laugh about the small everyday moments that nobody will forget. My family, for instance, laughs together about the time I came across mice in our garage and started yelling and ran back into the house faster than they thought I could even move. It was certainly a memorable moment!
Just be careful that in your reminiscing you aren’t putting down each other or hurting each others’ feelings.
10. Cheer for each other.
When you have a team mentality about your family, it’s even easier to cheer for each other. Cheering for each other can look like listening when a family member is talking about something he or she is passionate about. It can look like your whole family showing up for concerts, performances or games and cheering loudly.
Feeling happy for and/or proud of each other only increasing your bond as a family. We want to celebrate life’s wins together so that whenever something good happens to one of us, we all are excited. This encourages our kiddos (as well as my husband and me) to share our good news with our family. And that’s a good thing!
I love a good chicken dinner. A lot. As I’m making more and more chicken at home for my daughter and me (my husband and son don’t eat chicken), I’m branching out into different flavors. This honey mustard chicken with bacon and cheese is completely inspired by a favorite dish I’ve had a chain restaurant from down under.
The mix of honey mustard, cheese, chicken and bacon is so good. I decided to try making it myself. You could also make this into a quesadilla by cutting up the chicken pieces and piling them into a tortilla with honey mustard, bacon and cheese. I haven’t yet done that, but I am definitely going to try it! (You can easily bake quesadillas to get them nice and crispy without being greasy.)
I’m telling you, this is one chicken dinner idea you’re going to add into your line-up. It’s easy and tasty!
Preparing the chicken
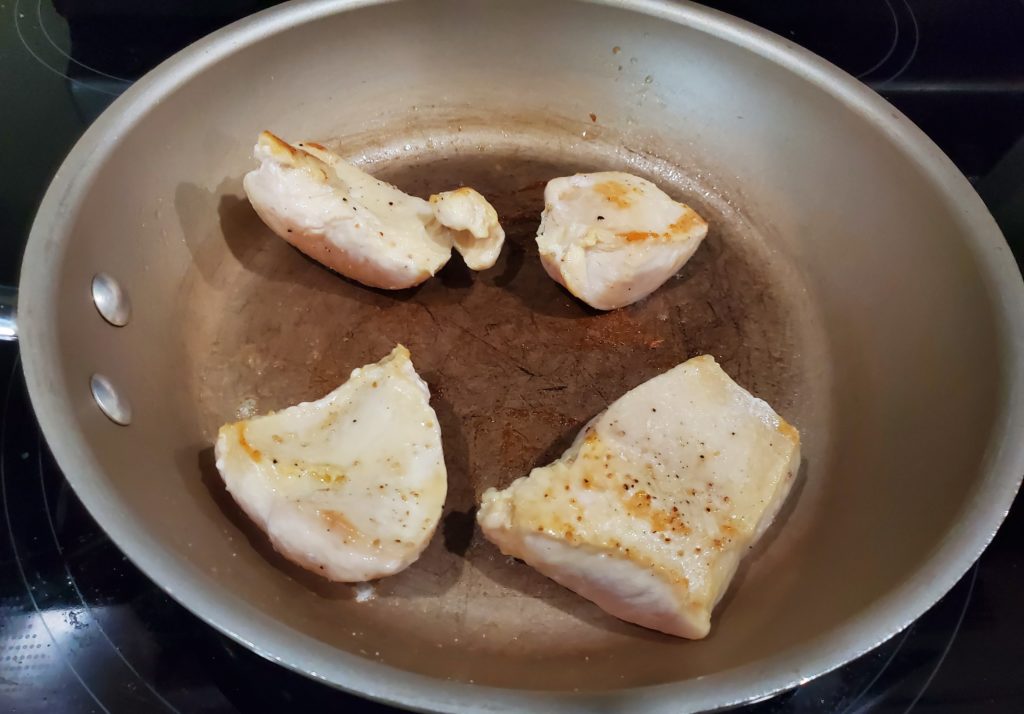
When I made this honey mustard chicken with bacon and cheese to take photos, I had four small pieces of chicken. So, that’s what I went with. Next time when I haven’t totally messed up the chicken breasts I previously bought, I’d make it with larger pieces of chicken.
Heat a skillet over medium-high heat. Then pat your chicken dry and season it with salt and pepper to taste. Spritz your skillet well with non-stick cooking spray and place the chicken into the pan. Cook it for 4 to 6 minutes per side, depending on the size and thickness of your chicken. I always temperature check mine in the middle to be sure it’s at least 165-degrees (F).
While the chicken is cooking, make your precooked bacon. I used three slices between these four small pieces of chicken. You can definitely use regularly cooked bacon as well. The precooked just saves time by making it in the microwave. We like bacon crispy around here, so I cooked it until it was crispy.
Baking the honey mustard chicken
When the chicken is cooked through, transfer it to a baking sheet lined with parchment paper, non-stick aluminum foil or sprayed with non-stick cooking spray. Spread about 1 tablespoon of honey mustard on top of each medium chicken breast.
Next, take your cooked pieces of bacon and break them apart to fit in slices on top of each piece of honey mustard chicken.
Then, for two servings, divide 1/2 cup shredded cheese between the chicken breasts. I use Colby jack cheese, but cheddar would also be great for this. You might notice half the chicken has more cheese than the other. That’s because my daughter isn’t big on melted cheese, but I am!
Put the prepared honey mustard chicken with bacon and cheese into your oven and turn the broiler on low. Broil the chicken for 2 to 5 minutes until the cheese is bubbly and browned. Keep an eye on it so it doesn’t burn.
Heat a skillet over medium-high heat on your stovetop.
Pat the chicken breasts dry and season to taste with salt and pepper.
Spray the skillet well with non-stick cooking spray, then add the chicken. Cook each side for 3 to 5 minutes until a thermometer inserted into the middle of the chicken read 165-degrees (F) and all pink is gone.
While the chicken is cooking, cook the bacon in the microwave until it is at your desired crispness.
Once the chicken is finished cooking, place it on a baking sheet lined with parchment paper or non-stick aluminum foil or sprayed with cooking spray.
Top the chicken with 1 tablespoon each of honey mustard. Distribute the bacon slices and shredded cheese between the two chicken breasts.
Place the chicken in the oven and broil on low for 2 to 5 minutes until the cheese is bubbly and golden. (Keep a close eye on it to keep it from burning!) Serve immediately.
As moms, we can be hard on ourselves. This is true for us Christian moms as well. I can’t tell you how many times I’ve wondered if I even have a clue what I’m doing. I question whether God should have blessed me with two such awesome kiddos. Am I honoring Him? Am I being a good mother to them?
I do know I’m doing my best, and I’m showing up every single day. Having been raised by a good, Christian mom, I have some insight as to what it looks like. And through the 13 years I’ve been a mom myself, I’ve learned a bit of what good mothering looks like.
None of us get it right all the time. We fall short. But those times give us a chance to model grace to our children, including what giving ourselves grace looks like. (Ouch! That’s a challenge for us when we are so good at giving ourselves a hard time!) And we keep at it. Motherhood never stops.
Check out these five characteristics of good mothering as a Christian mom. Give yourself some credit where it’s due and challenge yourself to improve where you need to. Through it all, love your kids and love God. You’ve got this, mama!
Be present.
We can spend a lot of time with our children and still not be present with them. Our kiddos need our love and attention. Good mothering means finding ways to focus on your children and nothing else. We need to be intentional about disconnecting from other things (hello, electronics!) and focusing on our children. They don’t always need our focus, but they do need to know we are truly listening to them.
One strategy that’s worked well for our family is giving each of our two kiddos two nights a week dedicated to them. After our family prayer and reading time, one child gets to hang with my husband and me solo for about 30 minutes. We focus completely on that child. It’s been a great way to intentionally be present and connect with our children.
Set boundaries.
Most Christian moms have heard the verse from Proverbs 22:6 that says, “Start children off on the way they should go, and even when they are old they will not turn from it.” (NIV) We want to start our children off well both in their faith and in life in general. Raising our children to love God, respect themselves and respect others is important.
In order to do that, our kiddos need boundaries. Boundaries actually help our children feel safe and allow them to grow in a healthy way. Set rules and boundaries — and enforce them. My husband and I made a pact when we first had children to not use empty threats. If we are going to tell our kids they’ll have a consequence for a misbehavior, it’s one we must be willing to follow through on.
And, honestly, sometimes good mothering means we have to say “no,” even when we don’t really want to because it’s the best decision for our child. I have this trouble sometimes even in small ways like when my son begs to read another chapter in the “Wings of Fire” series we’re reading together. I want to find out what happens, too, but I also know he needs enough sleep to have a good following day. So, I say “no.”
Be patient.
Ah, patience. Good mothering means being patient, which can be easier said than done! Whether our children are being challenging or we are just out of sorts, patience can be hard to come by. But, we want to be patient and grace-filled parents. So, we need strategies in place to help us during the difficult times.
One of the things I often do is take a deep breath and repeat the first part of 1 Corinthians 13:4 to myself: “Love is patient. Love is kind.” (NIV) Seriously. It helps me refocus and get outside of myself. There are other times when I get old school rapper with it based on a meme I once saw that said, “Love is patient. Love is kind. Ya’ll gonna make me lose my mind. Up in here! Up in here!”
Listening to Christian worship music throughout the day also helps me. It’s easier to be patient when I have Jesus music playing. Find a strategy that works for you. Our children need us to be patient with them because they are learning and growing. They’re going to mess up — just like we do! Our patience and understanding will go a long way in helping them feel loved and valued.
Be flexible.
I’m a planner through and through. However, I’ve learned a lot about flexibility in motherhood. A lot. I’m a decade out from newborn days, but I still remember how out of control life feels with a baby. Just when you think you can predict the baby’s schedule, it changes. Or right as everyone is ready to leave the house, you end up having to change a dirty diaper.
Sometimes the best thing we can do is let go of our plans and expectations. Living with chronic illnesses taught me this lesson, but motherhood has driven it home. Being flexible when plans change also allows our kids to see what it looks like to keep moving forward.
Over spring break this year, for instance, we had plans to go to a national park. A big storm went through the area two days prior, and the park was closed for the day our first tour was scheduled. The second choice we made also ended up being closed. But, our third choice option ended up being one of our favorite parts of the trip that we wouldn’t have even done without being flexible. (We got to feed kangaroos!)
Our kids are watching and learning from everything we do and say. They learn how to act and react based on how our actions and reactions. Good mothering involves modeling good behavior and values. If we don’t want our children to call each other names, then we shouldn’t call anyone names either. If we want our children to encourage each other, then we should encourage those around us. We want our children to have the tools they need to live productive, faith-filled lives as adults. One of the best ways we can help teach them is by modeling that to them.
Choosing our words wisely is also incredibly important. Proverbs 31:26 says this about how a virtuous woman should talk, “She speaks with wisdom, and faithful instruction is on her tongue.” (NIV) I try to choose my words wisely. As an introvert who tends to think before she speaks, I am pretty decent at this. But, I’m not perfect. And those times are ideal for me to model what apologizing looks like.
Good mothering requires grace.
None of us are perfect moms. We all fall short. However, knowing what good mothering looks like and striving to achieve it is exactly what we should be doing. One bad moment doesn’t make you a bad mom. It doesn’t define you. Pray about and learn from your mistakes, then move forward. Give yourself grace, because God gives it freely to you.
Just keep going, mama. You are the perfect mom for your kiddos!
7 Bible verses and prayers that work well for graduations
Graduation is a time when new grads and their families look forward to the future and what comes next. For Christian moms, dads and grads, seeking out Bible verses for guidance and encouragement is important.
These seven Bible verses are ideal for graduation. You can use them in a graduation card, at a graduation celebration, in a graduation speech or wherever you can think of. The verses are all from the NIV Bible unless otherwise noted.
Find a set of seven Bible verses and related graduation party printables in various styles in the Families with Grace Etsy store.
Each graduation Bible verse also includes two prayers: one to pray about the graduate and one for the graduate to pray. You can pray these prayers or use them as inspiration for a graduation card message.
“Commit to the Lord whatever you do, and he will establish your plans.” – Proverbs 16:3
Prayer about the graduate: Heavenly Father, I ask that you be with my graduate. Help them to stay committed to you in whatever they do. Lord, establish their plans and guide them as they embark on this new phase of life. In Jesus’ name I pray, Amen.
Prayer for the graduate: Heavenly Father, please be with me as I enter into this new phase of life. Help me to stay committed to you in all that I do. Lord, establish my plans, guide me and direct me in all that I’m doing. In Jesus’ name I pray, Amen.
“Whatever you do, work at it with all your heart, as working for the Lord, not for human masters.” – Colossians 3:23
Prayer about the graduate: Lord, help my graduate to stay focused on you. As they work in their education and career going forward, keep them motivated to work hard as though they are working for you. Encourage them and bless the work you have for them to do. In Jesus’ name, Amen.
Prayer for the graduate: Lord, help me to stay focused on you. As I move forward with my education and career, I ask that you motivate me to work hard as though I’m working for you and nobody else. God, help me to stay encouraged, and bless the work you have for me to do. In Jesus’ name, Amen.
“May he give you the desire of your heart and make all your plans succeed.” – Psalm 20:4
Prayer about the graduate: Heavenly Father, thank you for my graduate. Thank you for the blessing of their life. I ask that you give them the desires of their heart that glorify you. Open the right doors so their plans succeed. In Jesus’ name I pray, Amen.
Prayer for the graduate: Heavenly Father, thank you for this phase of my life as I get to change and grow from here. Please help me to desire the things that glorify you and give me those desires of my heart. Lord, open the right doors so my plans succeed. In Jesus’ name I pray, Amen.
“Your word is a lamp for my feet, a light on my path.” – Psalm 110:105
Prayer about the graduate: Lord, I praise you for your word and its guidance. I ask that you place your word on the heart of my graduate to light their way moving forward. Give them just the right verse they need at just the right time as they enter this new stage. In Jesus’ name I pray, Amen.
Prayer for the graduate: Lord, I praise you for giving me your word and the guidance I find in it. I ask that you place your word on my heart to light my way moving forward. Father, lead me to the right verse at the right time as I enter into this new stage. In Jesus’ name I pray, Amen.
“‘For I know the plans I have for you,’ declares the Lord, ‘plans to prosper you and not to harm you, plans to give you hope and a future.'” – Jeremiah 29:11
Prayer about the graduate: Heavenly Father, thank you for loving my graduate enough that you have plans for them to prosper. Continue to protect them from harm. Lord, help them to live in your hope and trust in the future you have for their lives. Guide them on every step. In Jesus’ name I pray, Amen.
Prayer for the graduate: Heavenly Father, thank you for loving me so much that you have plans for me to prosper. Continue to protect me from harm. Lord, help me to live in your hope and trust the future you have for my life, even when the way seems difficult or unclear. Please guide me on every step. In Jesus’ name I pray, Amen.
“Being confident of this, that he who began a good work in you will carry it on to completion until the day of Christ Jesus.” – Philippians 1:6
Prayer about the graduate: Lord, thank you for the good work that you have begun in my graduate’s life. Continue that work in their life so that it’s carried on to completion. Reassure my graduate that you are always there and have good work for them to do in this new stage of life. In Jesus’ name I pray, Amen.
Prayer for the graduate: Lord, thank you for the good work you’ve started in my life. I ask that you continue to carry on that good work until it’s completed. Please be there every step of the way as I move forward in life. Guide me and direct me to the good work that you have for me to do. In Jesus’ name I pray, Amen.
“In all your ways submit to him, and he will make your paths straight.” – Proverbs 3:6
Prayer about the graduate: Heavenly Father, soften the heart of my graduate to submit to you and your will. Lord, make their paths straight and keep them from harm and bad choices. Protect them in every way and watch over them. In Jesus’ name I pray, Amen.
Prayer for the graduate: Heavenly Father, help me to submit to you and your will. Keep me in your will and out of the way. Make my paths straight and protect me. Lord, help me to make good choices that honor you and honor myself. Protect me in every way, everywhere that I am. In Jesus’ name I pray, Amen.
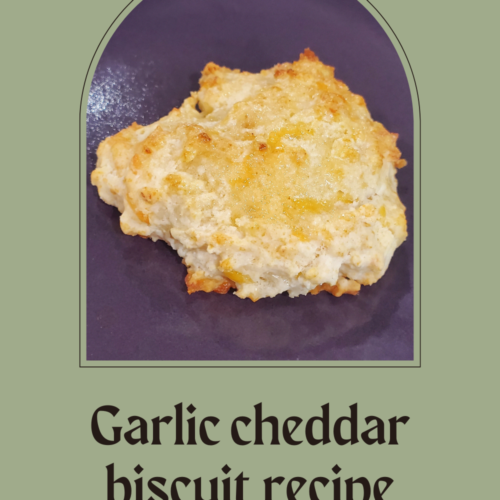
An easy recipe for garlic cheddar biscuits that taste better than the ones from that well-known crustacean restaurant!
My husband, kiddos and I are not big seafood eaters. My guys don’t eat any seafood; my daughter and I eat a small amount. But there is that well-known chain crustacean restaurant we sometimes go to mostly because we really want the garlic cheddar biscuits. But then I figured out how to make them easily at home — and found they were more moist to boot. So now we can enjoy them pretty much any time!
One of the things I most love about this garlic cheddar biscuit recipe is that it’s simple enough for weeknight dinners, and I usually have the ingredients on-hand. I’ve tried a few varieties of this recipe, and finally found one I liked pretty well. I made a few teaks and now I’m in love!
Making the biscuit dough
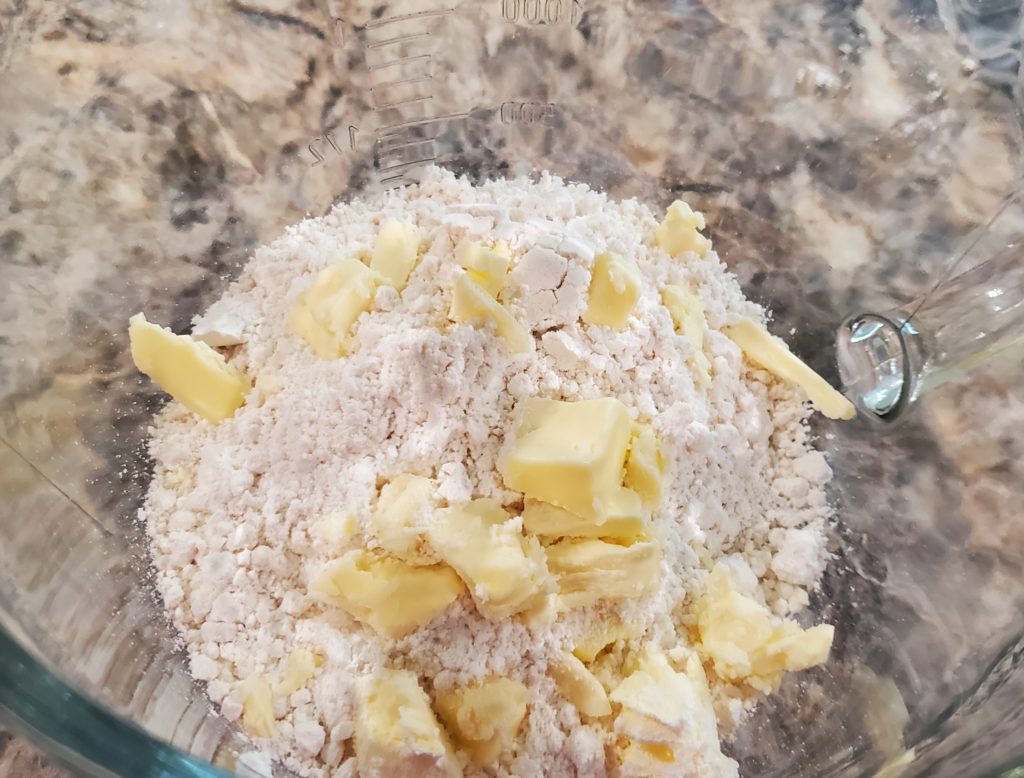
The thing that sets these garlic cheddar biscuits apart from all the others is using butter in small pieces so you get buttery bursts as you eat them. You can make these using vegetable oil instead of butter, but they don’t have that nice buttery pop that is so decadent.
For eight to nine biscuits (depending on the size you make them), cut 2 tablespoons of cold butter into pieces.
Next, put 1-1/4 cups of baking mix into a large mixing bowl. The name brand option is Bisquick. I have used the Kroger store version for this recipe as well and had it turn out perfectly fine. Add the butter into the bowl with the dry mix.
Use two forks to mix the butter pieces into the dry mix. You want to keep the pieces of butter about the size of a pea or smaller so they are dispersed throughout the dough.
Next, add 1/2 cup of shredded cheddar (or cheddar jack) cheese, 1/2 cup of milk and 1/4 teaspoon of garlic powder into the mix.
Stir the ingredients together until they are combined without any dry pockets of baking mix. It should form a dough that is soft and moist.
Baking the garlic cheddar biscuits
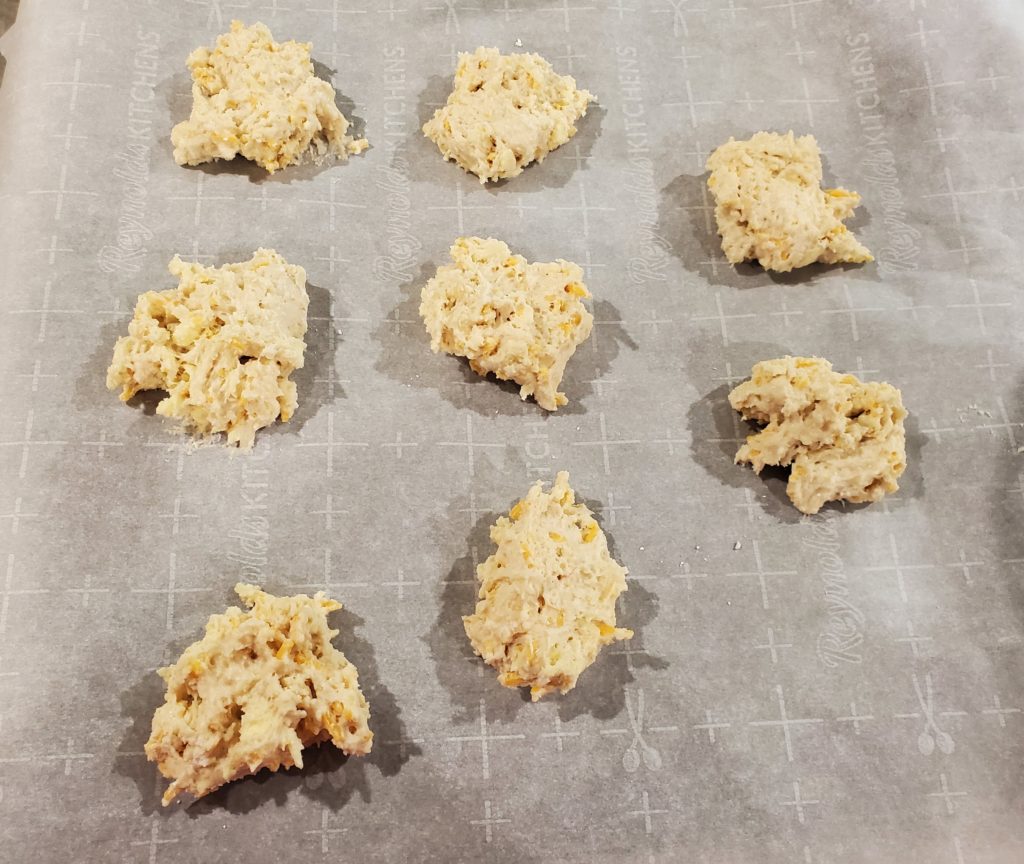
Dollop the dough on a baking sheet that is lightly greased or lined with parchment paper (my pick!). I usually get about nine biscuits from this recipe. I don’t roll or round the biscuits in any way. The nooks and crannies that form when the dough is dropped get a bit of extra crispiness. And that’s worth the more rustic look to me!
Bake the biscuits in the oven at 400-degrees for 11 to 13 minutes until the tops start to turn light brown. A couple of minutes before the biscuits are ready to come out of the oven, put 2 tablespoons of butter and 1/4 teaspoon of garlic powder into a microwave safe bowl to melt. (Or you can add the garlic powder after the butter melts; either way works!)
Once the butter is melted, stir it so the garlic powder is all mixed in. Pull the garlic cheddar biscuits out of the oven.
Immediately brush the tops with the melted garlic butter. Get into all the nooks and crannies!
Finally, lightly sprinkle the biscuits with salt. Serve them hot! Leftovers can be stored in the refrigerator or at room temperature.
Garlic cheddar biscuits
An easy, weeknight recipe for garlic cheddar biscuits that actually taste better than the ones at the chain crustacean restaurant!
Balancing work and family can be difficult. Even for those of us who work from home (like me!), the balance is still precarious. Colleen Stewart, a mom of two, has some ideas for how to make that balance a bit easier when you work from home. Stewart, creator of Playdate Fitness, shares some of her best tips with us in this special guest post.
Affiliate links are used in this post. If you make a qualifying purchase via my link, I receive a small commission at no additional cost to you. This helps support my blog. Thank you for your support! Read my full disclosure here.
Working from home can be the ideal way to balance your family and career. No more long hours commuting, after-hours meetings or missing work on those days when school is out of session.
But that doesn’t mean your at-home work office is an easy-peasy alternative, either. Small children don’t always make the easiest coworkers. However, working from home is still the better of the two circumstances. So let’s look at how to make it a more ideal work situation for you.
Getting some help
Getting some help with your children in-house is probably the most ideal solution to help with balancing work and family. A spouse who works different hours or has a job with more time flexibility time-wise is one solution, though not the most doable. Hiring a sitter who can stay with your child for some or all of the hours you’re working can be the best answer to your situation. Sites like Care.com can make it easier to find help near you. Most of the candidates have gone through background checks and are open to working flexible hours and days.
Creating a safe space for your child
If your child is an infant, then you at least have the luxury of long nap times. And baby monitors are getting more revolutionary every year. They’re available at every price point and offer a wide array of features, including night vision, two-way audio or wearable baby monitors that monitor baby’s heartrate, oxygen, sleep patterns and more.
Pack-and-play yards can give your little one a safe place to play near you. Pack-and-plays are also easy to move from room to room. If your little one needs a larger crawling space, consider using a baby gate in a room that has been thoroughly baby-proofed. It’s critical, of course, to ensure all hazards have been moved out of harm’s way, like electrical cords and wires, trash cans and sharp edges.
Recycle toys every few days to keep your child interested. And although you don’t want to keep the television on all day, for those times you need your child to be engaged and quiet while you’re busy on a call, if you do some research you can find some really good programs for children of all ages.
Other ways to keep your toddler occupied include learning toys that captivate a child’s attention for a while. When looking at toys like play kitchens or building blocks, look at online reviews to check for safety recommendations, types of materials and price to ensure you purchase safe, nontoxic toys your toddler will enjoy.
Using your time wisely
You don’t have to necessarily dress for success, but you don’t want to spend your workday in sweat clothes either. For instance, since you’re not pressured into having a different outfit every day, you can take that blouse, blazer and pant combo and mix and match them. And although you don’t have to wear heels to your home office, having nice ballet flats instead of house shoes can make you feel more professional.
Prepare meals ahead of time on your weekends and thaw them for dinner or lunches. You’ll find yourself eating healthier that way, too. Even breakfast can be healthy and quick by preparing fruit and veggie smoothies. Oatmeal is quick, easy and, as long as it’s not loaded with sugar, healthy. It’s lots faster to prepare than bacon, eggs and biscuits.
Considering a career boost
This time when you’re home and raising your child can also be the ideal time for you to make a career change. Whatever career move you’re considering, having a business degree can let you hit the ground running by learning key business concepts and skills. Online degrees allow you to choose a bachelor’s business degree in accounting, business, communications or management. And you can also receive a certificate to match your particular career goal. Some online programs can be completed in as little as five weeks.
Making time for family time
Make a childcare schedule just as you do for any of your business tasks, too. Harvard Business Review suggests keeping a calendar for your childcare time, like the hours after they first wake up and before they go to bed for the evening. Write in the activity you’ll do together, like feeding the ducks at the park, baking cookies or reading bedtime stories. You and they will both find the rhythm of the day that way, and your child will be more patient when you’re busy with work, knowing they have their own special time with you, too.
You can make this work-from-home opportunity both productive for your career and an ideal way to spend more time with your children as long as you make a plan, get help when possible, have the right home environment and even use the time to create your future with online classes. Balancing work and family really can be a way for you to have it all.
About the guest author:
Colleen Stewart loves giving her two kids a healthy example to live by. Her passion for community and wellness inspired her and her husband to team up with their neighbors and create a playgroup that allows the adults and their kiddos to squeeze in a workout a few times a week. She created Playdate Fitness to help inspire other mamas and papas to prioritize their well-being and set a healthy foundation for their little ones in the process.
Connecting with other moms who are balancing work and family is also helpful. Be sure to check out the Moms with Grace private Facebook group to connect with moms like you!
Tips for Christian moms with a good dose of encouragement
The “Moms with Grace” series takes a look at modern Christian moms and how they handle daily life with raising children. You’ll find monthly posts from moms with older kids, younger kids and all those in between. Let real-life moms encourage and uplift you!
I’m excited to bring you another mom with grace. Recently, I connected with Linda Mendible when I was chosen to be a speaker at her Monetizing Mompreneurs Summit taking place throughout 2023. Linda is a web designer and podcaster with a passion for mompreneurs. She also works with momprenuers to grow both their businesses and their communities.
Linda is also a mom to three kids who are 4, 6 and 9. This year, she and her husband, Franklin, will happily celebrate their 13th wedding anniversary. With three young children, a husband and a successful business, Linda is in the thick of parenthood, marriage and life in general!
Linda has great advice and encouragement for Christian moms.
How have you changed from the beginning of your mom journey until now?
I’m learning so much from being a mom. My kids definitely make me a better person. I’ve learned that we must always keep God first.
What are some challenges you’ve faced as a mother? How have you worked to overcome them?
Andy has been one of my kids that God has definitely tested me with. Aside from a very difficult birth, he was born with the umbilical cord wrapped around his neck and they had to call in other nurses to get him to breath. He was also born with a hole in his heart, which by God’s grace, is now completely healed.
When he was just a few months old, he had RSV and was admitted to NICU. At times he gets so sick that it makes it difficult for him to breath. During those times, I see him struggling and have to go through the process of helping him breathe and get some rest. Those days are tough. I do everything I can in those moments but they are the toughest moments when my little ones are sick. I’ve learned to say to myself, “I’ve been here before.”
I cast my cares on Jesus. My children aren’t mine, they are God’s children. I pray God gives me the strength to take care of them, love them and raise them in the way they should go, keeping God first and knowing the truth in Christ.
One of my go-to verses is Psalm 27:25 which says, “I was young and now I am old, yet I have never seen the righteous forsaken or their children begging bread.” (NIV)
Jeremiah 29:11 reminds me of God’s promises to us. And I remember God’s Word and what He said to Abraham. God told Abraham that his faith was accounted to him as righteousness. My faith is God and in Christ and I know I’m covered by His blood. I remind myself nothing is by my strength, and God does not see my flaws — just as when God told His people to take the lamb’s blood and put it over their door post. God didn’t see the people He saw the blood. It is by Christ’s sacrifice on the cross that allows me to have life and live it more abundantly. God’s Word is the living Word.
In what ways have you and do you share your faith with your children?
My kids know the Lord’s prayer, and we pray at night with them when things are not to hectic. At first I was the one praying the Lord’s prayer and they would repeat what I would say; now they lead the prayers with it. It’s been amazing to see. Sometimes life can give us surprises. They know Jesus loves them, and when things don’t go their way I ask them to pray to God about it. I tell them to ask God for what they want and thank God for all that they have. It really calms them down.
What are some of your favorite parts of motherhood?
That’s a tough question. All moments are my favorite, especially the times we create core memories from. One of my favorite times are when we go to the beach. I just love seeing them play and enjoy themselves; we collect seashells. We have a whole glass vase full of the shells we collected over the years. I can’t wait for summer again.
But then, I also love it when they help me with the garden. We have a small garden we started in our small apartment, and now that we have a house and a bigger yard it’s so much fun. They love it. Then there’s the everyday small moments that make me laugh. Or I see their little hands and hear their little voices, and I’m so thankful for them.
God is so gracious and good to us. Thank you, Lord, for all that you have done for us!
How does grace play a role in your daily life?
It’s a necessity. More of Him, less of me. I’m not perfect — far from it — and I need Jesus daily just for me to get up in the morning and pour a cup of coffee. So you can imagine how I need Him in all areas of my life! I just cast my cares to Him and pray daily, because I need Him all the time. But I’m so thankful I can just cast it all on Him. I do my best, God does the rest.
Do you have any tips or advice for how moms can show more grace to their families?
Motherhood is one of the most fulfilling things you can ever do in your life, and it’s one of the toughest and hardest things. From mom guilt to moments you just need the pause button. From play dates to baseball, classes and karate. To teacher conferences, bullies and amazing times. Find peace in the everyday. What do I mean? Try to sit still and just be thankful for the moment. Whenever life gets too hectic, I know it’s the most important times for me to sit still, slow down and listen. To be grateful.
Have you ever had your kids running around and you just know someone is going to end up crying? So you tell them to slow down, calm down or stop? And when they don’t listen, what happens? Someone ends up crying. Imagine if that’s what God does with us. So, if you’re ever feeling the rush, slow down, calm down and sit at His feet. He’s waiting for you.
What are you most proud of as a mom?
Oh gosh, what a question! I think I’m most proud of is my kids knowing Jesus.
Do you have any resources that help you be a mom with grace?
As a mompreneur I like listening to Terri Savelle Foy. As a mom who needs more grace I like listening to Joyce Myers. And as a family woman I like listening to Jentezen Franklin from Free Chapel. Resources will always be God’s Word. There’s nothing better in life than reading God’s Word daily. Remembering His promises and casting our cares to Jesus. I’m very blessed to know just how real God and Jesus is.
I also have a free 30 Days of Grace Challenge moms can take to help them grow in grace. It’s a Bible study, devotional and visibility challenge all rolled into one.
Do you have anything else to add that we haven’t talked about?
Live your life with the knowledge and reality that God is truly real and Jesus truly saves. God bless!
Connect with other Christian moms for support and encouragement in the private Facebook group, Moms with Grace!
Looking for more resources to start a new business as a mom? Join me this year at the Monetizing Mompreneurs Summit!
Read more in the series:
Mandy Farmer, a blogger, children’s book author, pastor’s wife, mom and grandma shares encouragement for Christian moms, including those with blended families.
One of the simplest recipes I make is deviled eggs. In fact, it’s one of the only recipes I never measure ingredients for. I’m generally big on measuring ingredients! I first learned the recipe from my mom and then tweaked it slightly through the years. And now I just feel it in my soul.
OK, that’s probably a bit too dramatic. But, I am pretty good at telling when I have the amounts just right. So I set out and figured out the correct measurements for ingredients in order to put together this recipe. I’ve put it off for a while because I knew I’d have to do that.
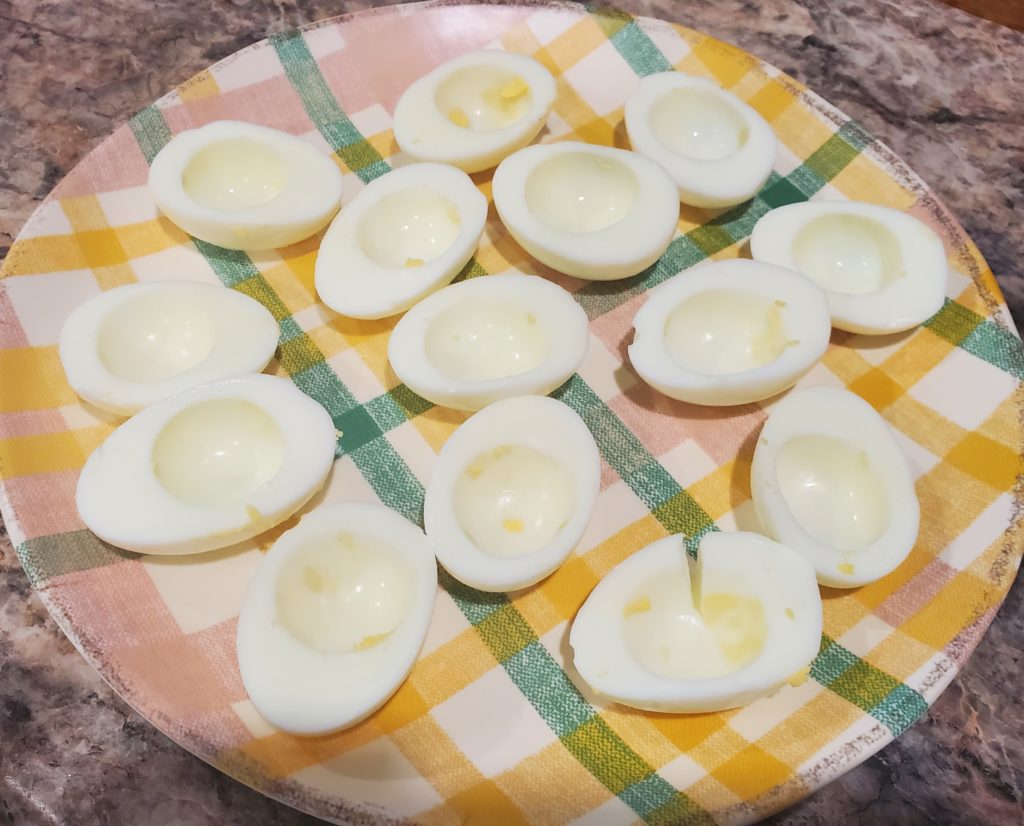
However, with all that said, sometimes I make mistakes. And when I do, I continue to do a bit of tweaking to get the deviled eggs just right. I like my deviled eggs pretty basic without fancy extra ingredients. When I was making them for this post, my 13-year-old daughter wanted to make them instead. I guided her through the recipe, but when it was time to add the honey mustard, she added in double the amount I usually use.
If these eggs look like they have a looser filling than usual, that’s why. We ended up having to add some extra mayo, extra mustard and even some sour cream to get them right this time. But they weren’t ruined. And they were still gobbled down by my daughter, my father-in-law and myself!
How to boil eggs
One of the first things I had to learn in making good deviled eggs was to boil them correctly. I didn’t want them to be over-boiled and get that dark tint to the yolk. Having them be soft boiled also wouldn’t work. Like Goldilocks, I want boiled eggs that are just right. So, here’s what I’ve found that works best.
First, start with older eggs. I’m not saying expired eggs, but the fresher your eggs are, the more difficult they are to peel so they’re smooth. Next, fill a pot about 2/3 full with warm water and add a dash or two of salt. (The salt will help the shells come off a bit easier.)
Put the pot on your cold stovetop. Carefully place the number of eggs you want into the pot. I used seven eggs for this batch, but this works for any amount of eggs you’re using as long as you have a big enough pot and enough water!
Put a lid on the pot, and turn the stove on high heat. Leave them be. When the water begins boiling, turn off the heat. Leave the eggs on the warm stovetop for 10 to 12 minutes. Transfer the eggs to a bowl and fill it with cool water. Add in ice cubes and let the eggs sit until they are completely cool.
Prep the eggs
Once your eggs are cooled, you’re ready to start prepping them. I usually tap them on the countertop to crack the shells and then peel them over a paper towel. When I’m finished, I rinse the egg to be sure I have gotten off all bits of shell, and then I place them onto a clean paper towel to dry.
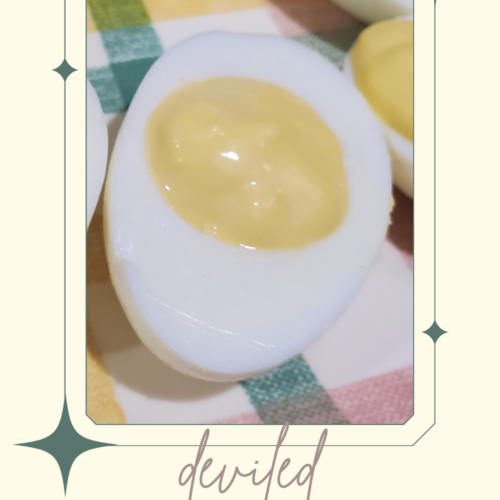
Next, you want to cut the eggs in half lengthwise to make two large ovals. I use a sharp knife or even a butter knife for this.
Look at that beautiful yolk!
Gently “pop” the yolk out into a large mixing bowl. I put it in the mixing bowl of my stand mixer. You can use any bowl you’d like that works with a mixer. I’ve found using a mixer makes the deviled egg filling creamier and smoother.
Use a fork to mash the egg yolk up into smaller pieces.
Making the deviled eggs
Once the yolks are mashed pretty well, add in the mayonnaise, yellow mustard and honey mustard. This photo shows about twice as much honey mustard as you actually need to use.
Using a stand or handheld mixer, mix the ingredients together until they are creamy and relatively smooth.
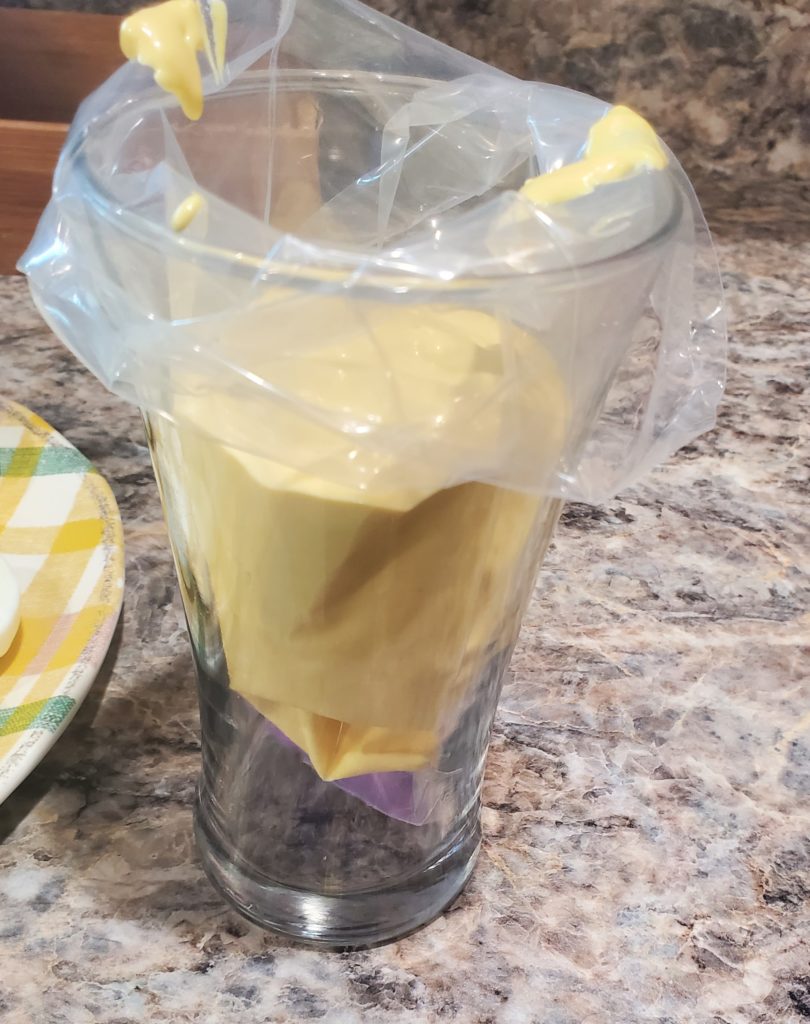
Next, you just need to fill the eggs. You can do this with a spoon or, if you want to be fancier, use a piping bag. Since I was making these for Easter dinner and for this post, I went with the piping bag. I use a tall drinking class to hold my piping bag while I fill it — whether for icing or for deviled egg filling!
I use the star tip and then pipe the filling into the eggs. This time around, the shape didn’t hold quite as well as usual since we ended up having to add extra ingredients to counteract the too much honey mustard my kiddo added. So, the filling was looser than it should be. But, they still tasted delicious!
Serve the deviled eggs immediately, or store them in the fridge until you’re ready to serve them. You can easily make deviled eggs a day ahead of your event and save yourself time by working ahead!
Deviled eggs
This simple, straightforward deviled eggs recipe doesn't take lots of ingredients or expertise. But you end up with a crowd pleaser!
Start with boiling the eggs. Place warm water into a large pot, and put the pot onto a cold stove. Salt the water and then carefully add the eggs. Turn the heat on high and cover the pot.
When the water begins to boil, turn off the heat and leave the pot on the still-warm burner with the lid on for 10-12 minutes.
Remove the eggs from the hot water and rinse with cold water for a minute. Then add ice cubes and let the eggs sit until cooled.
Once the eggs are cooled, cut them apart lengthwise. Gently "pop" or scoop the yolks out into a large mixing bowl. Place the egg whites onto a plate.
Use a fork to mash the egg yolks a bit. Then add the mayonnaise, yellow mustard and honey mustard.
Mix a mixer on medium to medium/high for a couple of minutes until creamy and smoother.
Fill the egg whites with the yolk mixture by using a spoon or a piping bag with a star tip.
Serve the deviled eggs immediately, or refrigerate them.
10 ways to keep your marriage strong when life gets hard
When my husband and I got married back in 1999, we were young at 20 and 22 and excited for the life ahead of us. We looked forward to years of having a happy married life. We didn’t, however, think about the challenges of life.
You never know the hard times that are coming. Hard times usually arrive without much warning and — bam! — your life changes. In the more than two decades we’ve been married, we’ve been through a lot of challenges in life from chronic health issues to death to job loss and more.
Through all of our struggles, we’ve learned how to continue having a happy married life in spite of the problems we face. Life certainly isn’t always easy, but my husband and I have found our way through so many challenges.
Maintain a team mentality.
We weren’t far into our marriage when we learned that maintaining a teamwork mentality is important for having a happy married life. (In fact, we’ve continued the teamwork mentality in family life with our kiddos now.) When hard times come, we need to be more united than ever.
Life stressors can either drive a wedge in your relationship or draw you closer to each other. Having a team mentality leads to a closer relationship. It becomes you and your spouse against the world, so to speak. And it also helps you avoid casting blame. Whether the difficult situation is the result of something one of you did, the reality is, you still have to navigate through the situation together. Approaching that as a team is vital. Our motto is: “I’d rather go through hard times with you than good times without you.”
Find ways to laugh together.
While it’s always important to keep a sense of humor in marriage, you need to even when life is difficult. My husband can make me laugh more than anyone else in the world. There are definitely times laughter isn’t appropriate, but when you get a chance to laugh together take it. You can even utilize gallows humor.
My husband and I have shared chuckles in hospital rooms. We’ve joked as one of us is recovery from an injury or surgery. Sometimes just a bit of humor can help you bond together even as you face challenges.
Show grace to each other.
You know I’ve got to include grace. Part of a happy married life means having a grace-filled marriage. When you’re going through something difficult, you need even more grace than usual. Some situations have impacted my husband and me equally. But many situations impact one of us more. When that happens, then the person most impacted needs the most grace.
In our humanness, we have moments of being jerks. We don’t always use the right words or have the patience we need when we are stressed. While that’s definitely something to continue working on (and we have both gotten much better at), it’s also something that deserves grace sometimes. I know when my husband is struggling that he may get shorter with me than usual. And vice versa. Instead of lashing back at each other, we give grace.
Use compassion just like when your spouse is ill.
When my husband is ill, I have extra compassion for him. He does the same for me. So, if one of you is going through a difficult time, then the other can treat them in much the same way as if they are physically ill. Give them a pass or way out on family activities if needed. Do some of their chores for them. Make their favorite food.
We most need to be cared for when our hearts our broken. Feeling love and care through small acts of service make a hard time just a bit easier for our spouse.
Pray together and/or separately.
During challenging times, you probably are already praying about the situation itself. But be sure to also pray for your spouse and yourself. Ask God to give you both strength, wisdom, peace, compassion, patience and grace as you navigate the situation. Many times I have prayed and asked God to help me be the wife my husband needs in the midst of a difficult moment. You can try a prayer like this:
Heavenly Father, I ask that You continue to be with us as we deal with this challenge. Lord, draw us closer to one another. Give us grace and compassion for each other. Show us what Your will is for us as we go through this. Open and close the right doors, according to Your will. Father, wrap us in Your arms to give us peace and comfort as we deal with this. Thank You that we are able to face this together. Thank You for never leaving us and always remaining faithful. Continue to cover us with your protection, love and grace. In Jesus’ name I pray, Amen.
Know when to just listen.
Sometimes we just need to vent or talk through something without getting advice. Usually you can tell when your spouse is feeling this way, but it’s also OK to communicate that. I have started conversations with my husband like this: “I don’t want advice. I just need to talk about this.”
Of course, sometimes there aren’t solutions to give. Sometimes there’s just broken hearts that need to be heard. Just listening can be the greatest gift we can give our spouse when they’re going through a difficult time.
Distract yourselves.
We need breaks from hard times. Unfortunately we can’t wave a magic wand and make everything disappear for a few hours or days. But, we can find ways to distract ourselves. One of the things my husband and I do together is watch a movie. For a couple of hours, we are immersed in another world.
In fact, a few years ago on the day he got down-sized from his job, we went to a movie. We still had problems waiting for us after the movie, but for two hours we were able to forget about what was happening. Our brains and hearts need that!
We also enjoy playing games together. When we’re gaming, we’re focusing on the game nothing else, which is refreshing.
Communicate with each other.
Communication is certainly the key to a happy married life, and this is even more true when you’re going through a hard time together. My husband is an awesome guy who can do many things, but one thing he can’t do is read my mind. So, unless I share what I’m thinking, needing or struggling with, he’s not going to really know.
A few years ago, for instance, we had to put our beloved dog, Buckles, to sleep quite suddenly thanks to aggressive cancer. I remember a couple of nights later that my husband asked what I most needed that evening. Was it OK for him to play a video game or did I need him to just sit with me? He was sincere in asking, and I was sincere in answering. We had to work together to move on, and communicating made that much easier.
Go to church together.
Keeping God in the midst of your hard time is important. Going to church together is a great way to do that. Not only do you get spiritually fed, but you get to do so together. In fact, it can even serve as a distraction from reality for a little bit. Don’t stop attending church when life gets hard. That’s when you need to be there most.
So many times I’ve gone when I didn’t feel like it and then felt the sermon was just for me. My husband and I have talked after church and shared how we were impacted, which can be in different ways. God has used church to encourage and strengthen us when we are going through a struggle.
Show kindness in small ways.
Small acts of kindness are some of my favorites. They can be the most impactful. Buy your spouse their favorite candy bar. Fill up their car with gas so they won’t have to deal with it in the morning. Take their dishes to the sink. Give them a hug at a random time. Send a text in the middle of a workday just to say “I love you and am praying for you.”
One of the most memorable small act of kindness my husband has done for me is leaving a note on our son’s changing table when our son was a newborn. I was having a really hard time, because our baby boy didn’t sleep at night. Our daughter was 3 and needed me during the day. I told my husband about a particularly rough night and how I had a breakdown while he was asleep. That night, I found a note he left for me telling me to wake him up, and he would help any time. (He had a 60-mile commute at the time, so I tried to avoid waking him unless necessary.) He reminded me that I wasn’t in this alone. I felt seen, heard, understood and supported with just the one simple note.
Hard times are going to come regardless. We can choose to go through them together and grow stronger in our relationship as we come out on the other side. Because even in the midst of strife and challenges, we can still have a happy married life. And then will be the difficult times just a bit more bearable.