Easy-to-make buttercream frosting so scrumptious everyone will think you got it from a bakery!
Affiliate links are used in this post. If you make a qualifying purchase via my link, I receive a small percentage of the sale at no additional cost to you. I only recommend products and services I use and love. It helps support my blog, so thank you for your support! Read my full disclosure here.
Oh. My. Gosh! I am still flabbergasted about this buttercream frosting recipe. I’ve tried various recipes for buttercream frosting and didn’t love any of them. I don’t want my icing to taste too buttery. But, I don’t want it to be so sweet that it makes my teeth ache.
Finally after tweaking with recipes, I’ve done it. I’ve created the best buttercream frosting! Even better is that it really is easy enough for anyone to make. This is completely doable for anyone with some basic ingredients and a mixer (handheld or stand).
I’m an icing lover. LOVER! I love cake and cupcakes, especially if they are moist and delicious. I told you a couple of days ago about the four tweaks I use to make cupcakes (and cakes) better than the bakery. But all that yummy cake needs something special on top of it. I have eaten icing from so many bakeries and so many different types. Some are so super sugary. Some are greasy. This one is just right.
Now I’m going to guess you’re thinking that of course I love it because I love icing. And that’s true to an extent (I have tasted some mediocre icing, to say the least!), I have even more proof: My husband loves this buttercream frosting! I have never, ever, ever made an icing that my husband likes or encountered one from a bakery that he likes in the 20-some years I’ve been baking for the guy.
I am beside myself with joy! My husband is a nice guy and doesn’t say things to be mean, but he is also honest and will tell me if I make something he doesn’t care for. The fact that he not only told me the icing was the best he’s ever had but then proceeded to eat a few cupcakes with it on top has made me swoon!
So, of course, I’ve got to share the recipe with you. You already know how to make yummy sponge (as they say on all the baking shows!) thanks to the tweaks I’ve shared. Now you can make yummy icing for the top with just a few ingredients. While you can top your cupcakes with the buttercream frosting by smearing it on with a butter knife or spatula, I use a pastry bag and star tip. It used to intimidate me, but it looks pretty and it really does take less time to frost cupcakes. I have no cake decorating skills and I can make them looked swirled OK. You can do it, too!
While I whip up this icing using my beloved Kitchenaid stand mixer, you can also make it with a handheld mixer. The recipe below makes plenty of icing for one cake or 24 cupcakes. (And if you have a bit extra and want to lick it from the bowl, I won’t judge you because I totally did the same thing!)
Making the frosting
Listen, I know that shortening isn’t so healthy. Of course, neither is butter, but you really do need both for this recipe. I buy baking sticks and then store them in the fridge. Honestly, this is the only recipe I use them for, but it’s so worth it!
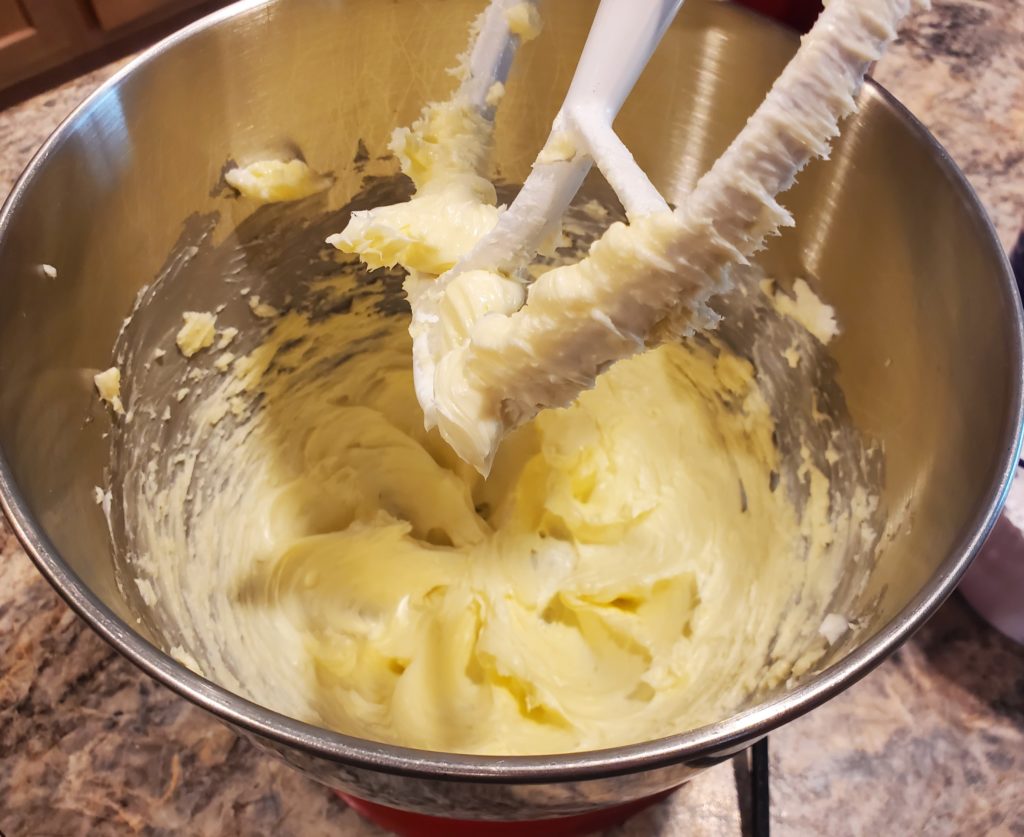
Put the butter and shortening into a large mixing bowl or the bowl of your stand mixer and cream them together. Basically, beat them together until they are smooth and fluffy.
Next, gradually add in the confectioner’s sugar until it’s fully incorporated into the butter/shortening.
Once the confectioner’s sugar is incorporated, then add the vanilla and stir it in. Next, add in the milk on low speed (otherwise it will splash out and hit you). Once the milk is stirred in, then beat the buttercream icing on medium to medium-high speed for three to four minutes until it’s nice and fluffy.
Use the butter cream to frost completely cooled cakes or cupcakes. You can add food coloring if you’d like. One batch makes enough icing for one 9×13-inch cake, two 9-inch round cakes (with icing between the layers) or 24 cupcakes.
Just look at this creamy, yummy deliciousness!
Quick and easy buttercream
This quick, easy and oh-so-delicious buttercream frosting recipe is so scrumptious that everyone will think you bought it from a bakery!
Affiliate links are used in this post. If you make a qualifying purchase via my link, I receive a small percentage of the sale at no additional cost to you. I only recommend products and services I use and love. It helps support my blog, so thank you for your support! Read my full disclosure here.
My son loves cake and icing as much as I do. I’m thankful for that since my daughter and husband don’t share that love! So, I am happy to make cupcakes for his birthday parties. He likes to have both vanilla and chocolate. I can whip them up for a fraction of a cost from the bakery and thanks to some tips I’ve gotten from others and learned on my own, they usually are fresher and taste better than a bakery!
Even better, none of my tips require you to be a professional, highly-skilled baker. I certainly am not. They also don’t require lots of kitchen equipment or weird ingredients. With just a few tweaks, you can turn a boxed caked mix into scrumptious cupcakes!
Doctor up a cake mix. A few years ago, my baker friend, Kayla, shared with me her tip for making delicious cakes and cupcakes. I told you about her with her pillowy soft yeast rolls that make me swoon. This cupcake recipe has been in my life even long and I swear by it! You can use it for cakes or cupcakes. I’ve done both and had excellent results with both.
Instead of baking from scratch, start with a cake mix. It actually saves money and makes your life easier. (Another tip from Kayla!) Dump out a regular cake mix into your mixing bowl. (I use my beloved stand mixer, who I’ve named!) Add in 4 eggs, 1 cup of water, 1/2 cup of vegetable oil and one small pudding mix that matches the cake. Stir until combined and then stir vigorously by hand or on medium with your mixer for 2 minutes.
Reduce the bake time. My great-aunt shared a tip years ago to never bake a cake or brownies as long as the directions say to. She definitely knew her stuff! Of course you don’t want raw batter, but taking your cupcakes or cake out 2-5 minutes earlier than the box says is usually perfect. Check on your cupcakes to see if they are done enough and if not leave them in for 2 more minutes then check again. I check mine by using inserting a toothpick into the middle of a couple of them. If the toothpick comes back clean or with crumbs, the cupcakes are finished. If it comes back with wet batter, they are not finished.
Fill all tins the same. In order for all 12 of your cupcakes to need the same bake time, they need to be the same size. I usually fill my cupcake tins about 3/4 full, which is a little more than the box mixes say because I usually get 22-23 cupcakes from a box mix instead of 24. No matter how much you fill them, though, make sure they are all pretty equal. You could totally measure the batter for even better accuracy, but I totally just do it by eye.
You can see the moist deliciousness of these chocolate cupcakes!
I bake out my cupcakes my Rachael Ray muffin tin because it really is so awesome. I have realized that it’s time for me to invest in a second muffin tin for making so many cupcakes because it would make my life a bit easier. If I’m making a cake, I reach for my Rachael Ray 9×13 cake pan, which nothing sticks to!
Use cupcake liners. You can totally bake cupcakes without liners, but I like them for a couple of reasons. The first is they are easier to handle for decorating. The liners also make them easier to distribute when it’s time to serve. And the second reason leads us to the next tip…
Remove the cupcakes from the pans immediately. If you use liners, then you can remove cupcakes from the pans immediately. Then the hot pan doesn’t keep cooking them. (It is also good if you are baking more cupcakes because you can move on quicker to the next batch!) I use a butter knife to gently pop the cupcake up and transport it to a cooling rack or wax paper to start cooling. Sometimes I use a couple of fingers to hold it steady on the knife, and sometimes I wear an oven mitt to do so. I’ve found my fingers are easiest and I really don’t get burnt, but do whatever you’re comfortable with.
Store them well. Because of time constraints, most often I bake cupcakes the day before the party when we need them. As long as they are stored out of the air they are just as moist and fresh the next day — if not more so! My current favorite solution is the large, disposable roasting pans. They fit 24 cupcakes each and usually come with plastic lids. I love these also for easy transport to the party.
Looking for an icing recipe? Be sure to check out my recipe for quick, easy and oh-so-delicious buttercream. With just a few basic ingredients and a mixer (handheld or stand), you can whip up this delectable icing in just minutes!
Last April we moved into our new house with a wood-burning fireplace in the living room. By the time we were settled enough to use it, it was too warm to think of building a fire. However, over these last few weeks that has changed. This past weekend we had incredibly frigid weather and my husband built a fire for us three days in a row. We loved the heat and warmth and coziness of it.
Today I was walking through the living room and noticed that the fireplace is no longer clean. Until recently, the brick inside the fireplace looked pretty much the same as the brick around the fireplace. It wasn’t marred. It was clean. Now, though, it has black soot in spots and has ashes in the bottom. It’s lost its pristine state. I didn’t notice those blemishes so much when it was burning bright with fire and warmth. I was too busy enjoying it.
Now I see them. I could say the fireplace is no longer as beautiful as it once was. But the fireplace got those marks from fulfilling its purpose, and is there anything more beautiful than that? After all, we didn’t plan for a wood-burning fireplace for it to just be an unused showpiece. We looked forward to the extra warmth it would bring our family on cold winter days and evenings. It couldn’t provide any of those things without getting dirty and scarred.
We are so much the same way! In a few months, I’m hitting a milestone birthday and turning 40. I haven’t lived through 40 years of life without scars and blemishes. Some of them you can see like the scar on my knee from a cut I had as a child. I’ve got freckles on my skin from being out in the sun. My abdomen has scars from numerous surgeries. I’ve also gotten unseen scars through the years. I hesitate to open myself up to new people, because I have scars reminding me of the pain the happens when trust is betrayed. I’ve got the scars left from losing loved ones to death, even when I know they are in a better place. And I have scars of fear for how my health is going to be each and every day.
I’m not pristine by any stretch of the imagination. But I don’t want to be scarred and blemished just for the sake of being scarred and blemished. Just like I didn’t throw dirt into my fireplace to make it dirty for no reason, so I don’t want to do that in life. I want my scars and blemishes to be used for my God-given purpose in life. I want to use them to honor Him. Those scars from my surgeries are times I can praise God that He brought me through safely and helped me recover each and every time in spite of the challenges that came my way as a result. They are reminders of His faithfulness and because I have them, I can better minister to those facing surgery or health issues. I can pray for them in more personal ways.
And those emotional scars of being betrayed by someone I thought was a friend serve to remind me that I have a Friend who will never betray me. Those scars of losing loved ones remind me how very precious life is. I still struggle with grief because my most recent loss was only three months ago. These last few years have been a season of loss for my family and those scars ache. But I remember lives lived fully. I remember God’s faithfulness, strength and peace even when my heart has been broken into pieces. Those scars allow me to minister to those dealing with loss more empathetically.
I want to live my life scarred and blemished but still praising God. He didn’t create me to sit on a shelf and not get messy. He could have made life without pain, but then how would we ever really know we needed Him? We appreciate the light so much more once we have been in the darkness. I want to be used up. Am I excited and wanting more hurt and hard times? Not especially. However, I know they will come. Life works that way. It is filled with highs and lows. But my scars remind me that no matter the high or the low, God is good and He is ever faithful. He holds me close and has scars of His own to prove how much He loves me.
I want to be burned up like my fireplace. I want to serve my purpose. I don’t want to be so afraid of getting dirty and scarred that I stop trying. I don’t want to let emotional scars keep me from making new friends. I don’t want to let physical scars keep me from trying new activities. I want to remember the lessons I’ve learned, share them as much as I can and know that through it all — every bump, bruise and cut — God is always faithful. He sees the beauty in my brokenness and in my scars.
My son’s birthday is next week. Boy that comes quick! We’ve been doing some birthday planning around here. I try to work ahead with my kiddos and ask them a month or two ahead of time what theme they have in mind (both have picked themes previously that didn’t have party supplies made commercially and required me to get creative). That also gives us time to talk about and fine-tune the theme to make sure it’s practical and do-able as well!
We have some of our own birthday traditions our whole family really does enjoy. Along the way of having kiddos and planning parties, I’ve learned a few things that work well and figured I’d share them with you, because we’re in this together!
My overall birthday party philosophy is to make sure I plan a party my kids and their friends will enjoy. I have found numerous decor ideas and snack table ideas and so forth on Pinterest that I know kids won’t really care about. I don’t care if I impress the other moms who come to my kids’ parties. I care if my kids and their friends have fun! This perspective helps me remember what matters most (my kiddo feeling special and having fun on his or her birthday) and reduces my stress level and pressure I feel to create a perfect party with lots of small details.
Think about your budget. This is pretty much where everything always starts, isn’t it? You’ve got to know how much money you are comfortable spending in order to plan well. Personally, I tend to stick with a lower budget because it just makes sense to me for a kid’s party and there’s so much you can do without breaking the bank. Consider costs for the location, food, paper products and treat bags.
Figure out your space. Obviously you’ve got to have somewhere to have the party. For me, not having it at home is the very best plan. Having it at home adds lots more stress for me. I’m not sure that’s true for everyone, but I’m guessing it’s true for most of us. So figure out where you’re going to have the party. Go back to your budget and decide if you want to pay for a venue and if so what might work with your budget as well as how much space you need and how many people you want to include.
For the first friend party we threw for our daughter, we went to a local bowling alley. It was fun for her but it also meant that we had to keep the guest list smaller and that we weren’t able to have ice-cream because they didn’t have a freezer. But on the other hand we didn’t have to have plan any activities (because bowling!). Since then we have opted to have our parties in our church gymnasium. It’s been a great fit for us because there is lots of space inside, great parking outside and a kitchen we can use.
Decide on your guest list. Before you mention it to your kiddo, think first about your budget and where you are planning to have the party. Are you having it at a venue that offers a limited number of spaces for kids parties? Are you having it at home and only have room for a few kids? Are you having it somewhere that you can invite as many kids as your child wants? Once you have an idea of about how many kids you are thinking to have, start talking to your child about it. I have done both options of giving my kids a specific number that we have to stay with and just asking them who all they want to include. It totally depends on your situation. Now that we use the gym at church, I don’t give them a set number, but we do pay attention to who they want to invite.
I try to encourage them to include friends they spend time with and enjoy. I’m less inclined to invite the entire class. I like the kiddos to pick kids they will play with, interact with and have fun with. Of course, I’m also an introvert, so I tend to think smaller gatherings are better anyway. That may be just the opposite for you and your family and that’s totally fine! You just need to know up front.
Get out invitations at least two weeks before the party. I think the earlier invitations go out, the better. If you can get them out a month ahead of time, go for it! I have done invitations three different ways. For my daughter’s first friend party, I sent them out via email with a Google form to RSVP. That wasn’t as successful.
Facebook has worked well for some party invitations. I have done that more for my daughter because she has been with the same basic group of kids since kindergarten. And now that she’s in third grade, I am either friends with their parents on Facebook or can easily find them. So I just make a Facebook event and invite people that way.
Paper invitations also work. In fact, for my son’s party I went the paper route. You can buy invitations and fill them out or make your own and print them. I printed ours. Be sure you don’t forget information and include the date, time, location (with address) and contact information for RSVPing (I usually do my cell phone number and email address). I have also included before whether parents were welcome to drop off and leave the kiddos or if they needed to know anything else. For example, when my daughter had an art party a couple of years ago, I noted on the invitation that they might want to wear something that would be OK to get washable art supplies on.
Decide on activities. We have a pretty set format for our parties. One of the popular stations that works no matter what the party theme is a coloring table. I print out some coloring sheets are geared toward the theme and put out some crayons. When the kids come in, they immediately have something they can do. Good to see you! Want to color? I leave it set up throughout the party so that if kids want to go back to their coloring they have that option.
I try to plan about two organized activities or games thinking about the age range of kids I have. My daughter (for whom we’ve had the most friend parties because she is older) tends to like activities more than games, but we have done both. For her art party, we had craft stations. For her baby doll party, we basically played lots of pretend and asked the guests to bring a doll or stuffed animal and they could do different things like a diaper toss game but also sit at a table with doll food and feed their “babies.” This past year, she wanted a Barbie and beauty theme, so we had nail painting and lip gloss making.
My son, on the other hand, is younger and more active. He likes games. We have done a version of pin the tail on the donkey that was pin the fire on the dragon for his dragon-themed party. At the same party, the kids swung at a dragon pinata with a toy sword to slay it. I try to keep it simple. But, I do find that having one or two organized activities helps keep the kids engaged and having fun.
Once you’ve decided what to do, then decide your order. We typically do games and activities first, which take about an hour. Then we have snacks for about 30 minutes before finishing the final 30 minutes with opening gifts.
Don’t forget food! Of course you need food at a party. I usually plan my parties for 2 to 4 p.m. so we can offer snacks but don’t have to serve a meal. This is my plan for two reasons. First, my own kids don’t like stopping their playing and fun for eating all that much. So they want things quick and easy rather than having to sit longer and eat a meal. Second, it’s cheaper.
The biggest thing I do with food is make sure it is what the birthday kid likes. My daughter — bless her heart — doesn’t like cake or icing very much. (I’m still trying to figure out how she belongs to me!) So we don’t have cake. The last two years we had doughnuts instead. (I got all the same yeast doughnuts and then got her a bigger one to put a candle in.) One year we did an ice-cream sundae bar.
These are the cupcakes I made for my son’s dragon party. I topped enough of the kids’ ones with small dragon figures so they got an additional party favor that way. I’ve also used rings as cupcake toppers. This year I’m using small cake pop sticks with printed images of Miles Morales from “Spider-man into the Spider-verse” on them at my son’s request.
My son, on the other hand, loves cake. I usually bake the cake for him because I love baking and it does save funds. Cupcakes are my go-to for kid parties because they are easier to serve. I usually do chocolate and vanilla cupcakes with vanilla icing. They look fancy if you use an icing bag and just plop it on top with a tip so it kind of swirls, but you can totally just use a butter knife or spatula and smear it on. I also like the individual ice-cream cups to serve the ice-cream instead of having to scoop it out. But, you can definitely scoop it out as needed or into small plastic cups or bowls ahead of time.
Along with the sweets, I offer other kid-friendly food. Goldfish are always popular. Sometimes I do pretzels, too. For my daughter’s party we also had cheesy puffcorn and it was a huge hit. I try to offer a fruit of some sort as well like grapes or strawberries. My husband and I station ourselves at the food table when it’s time for snacks and help the kids make their plates, especially at younger ages. We also simplify where we can. Like for my son’s party last year, we used punch cups and filled them with some pretzels and Goldfish so the kids could just grab a cup of them instead of having to scoop them out.
For drinks, we keep it simple and usually have a pitcher of lemonade (with back-up to refill the pitcher) and a jug of water. For my daughter’s baby doll party I did make punch and floated some brand-new, clean rubber ducks in it, though.
Decorations don’t have to be elaborate to be fun. Some moms are super great at decorating and crafting. I am not one of them. While I can easily make the cupcakes because I love baking, I can’t easily make lots of decorations. Maybe you’re the opposite. If so, go with what works for you. Almost always it’s easier on the budget if you can make something versus purchase it.
This was our table setup for the dragon party last year as well. I found the inflatable dragon for a couple of dollars to add some fun. And my son played with that dragon for a couple of months afterward!
My decoration plan is simple. I buy a plastic table cloth for the food table that matches the theme or colors. I buy the matching plates and napkins and cups of a similar color. I buy a birthday banner that matches the theme and hang it. Sometimes I use crepe paper and balloons we blow up ourselves for the door leading into the gym so people know where to go. I will say that I’m not a mom who lets the kids play with balloons because I have crazy balloon anxiety and can’t handle it. Otherwise, we usually end up making some decorations to hang up that are coloring pages for the theme that we color and glue to construction paper. The kids like being involved with this and it’s fun to see their artwork on display.
Plan for some extras. Once I’ve made the list of kids to invite, I tally our numbers, including siblings for families we know. For example, when we invite children from church, we usually know the entire family and expect all the children will come. When we invite children from school, we know they may or may not bring a sibling along. So I always make sure to plan for a few extras, because if someone brings a sibling or a cousin visiting for the weekend or whatever, I don’t want them to feel left out when it comes to treat bags or activities. I also make sure to have an idea in my head of how many parents may be there and plan enough food to make sure everyone can have snacks.
I like to fill treat bags with stuff I know my kids would like and actually use. I try to stay away from all candy, because I don’t like all-candy treat bags for my own kids. I like things like stickers, notebooks, temporary tattoos, fun erasers, pencils and small toys. I do usually include a couple of small pieces of candy as well. I look for things I could say yes to my kids eating one or two of after going to a party and eating sweets there.
Make sure you have enough help. As you assess your venue, number of children, activities and food, think about how much help you’ll need. While my husband and I work well together and get things covered, I’ve found that having my parents come along as well is incredibly helpful. For my daughter’s party last fall, for example, I ran out of time to clean and cut the strawberries, so my mom did that while I set up the party. She also helped with nail painting while I manned the lip gloss making table. Sometimes asking extended family or friends to come along and help makes life so much easier.
Assign someone to take photos. Who doesn’t want lots of photos of their kids’ birthdays?! With the digital age we don’t have to worry about going through too much film either. Sometimes I use my cell phone, but for their parties I tend to take our digital camera instead. Either way, though, I ask someone else to take some photos. My parents are helpful with that. I want photos, but I can be so busy helping the kids through games, activities, snacks and opening gifts that I don’t get a chance to take many. Having someone else do that for me has been invaluable. With that said, think about what kind of photos you want to have. I always like one of the kids by the birthday banner before everyone arrives. I usually try and take photos of the decorations that way as well. And, of course, I want photos with the candles on the cake (or doughnut!) and while they’re opening gifts. I also like to get a photo of all the kids together. Usually I bribe them and do this after activities, but before snacks so I can say something like, “If you want cake, come over here for a photo first.” Ha! It works!
Affiliate links are used in this post. If you make a qualifying purchase via my link, I receive a small percentage of the sale at no additional cost to you. I only recommend products and services I use and love. It helps support my blog, so thank you for your support! Read my full disclosure here.
This lemon squares recipe is one of my favorite things to make and take places. They sound complicated and taste so yummy, but they couldn’t be easier. I’ve taken them to numerous carry-in dinners and friends’ houses.
Every October, I make a batch of these lemon squares for my father-in-law’s birthday because he loves them. Even better, they don’t require a single lemon or lemon zest, so the ingredients are easy to always have on hand. The batter itself only takes three ingredients. That’s it!
I found this recipe years ago in one of my favorite cookbooks, “101 Things to do with a cake mix” by Stephanie Ashcraft. I have the sequel cookbook as well. Both are loaded with lots of yummy and super easy recipes that I love!
Literally all you do is mix together the cake mix, two eggs and 1/3-cup of oil in a bowl. I use my trusty stand mixer many times just because it makes my life easier in so many ways, but I have also mixed this by hand many times. The mixture will be thick and a bit stiff.
After it is mixed well, you spread the lemon square dough into a 9×13 pan that’s been sprayed with non-stick cooking spray. I use a spatula to spread pretty well. Then many times, I use my clean hands to pat it into place so that it is even throughout the pan.
And, of course, I use my beloved Rachael Ray cake pan. I really love her non-stick bakeware line. It is my absolute favorite because nothing sticks to it! I got it as a gift and have since give it to a gift for both my mom and mother-in-law.
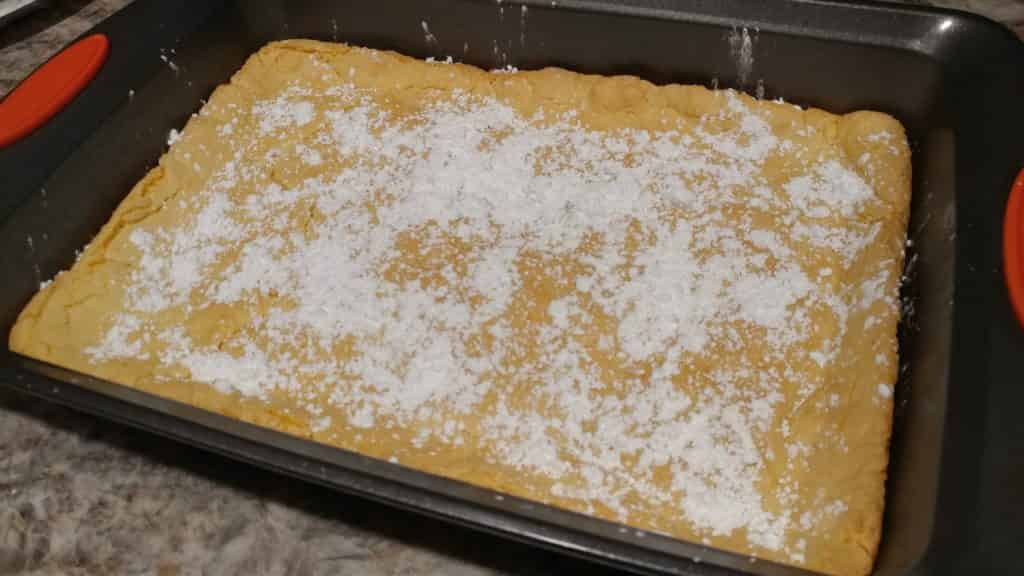
Bake it for 13 to 15 minutes until the lemon squares are slightly golden on top. Here is what mine looked like fresh from the oven:
Once it has cooled for 10 minutes or so, sprinkle with some powdered sugar.
All that’s left is to cut, serve and enjoy delicious lemon squares!
In a bowl, mix together cake mix, eggs and oil. Mixture will be stiff.
Spread the mixture evenly into a greased 9×13-inch pan.
Bake 13-15 minutes until slightly golden on top.
Cool for 10 minutes then sprinkle powdered sugar over the top.
Join the Families with Grace Acts of Grace challenge and receive a FREE devotion book today! In just a few minutes each day for seven days, you can focus on what giving grace looks like and how to put that grace into action.
Studies abound about the benefits kids glean from having predictable routines at various ages. For example, a 2016 study from The Journal of Applied Developmental Psychology found that people who had predictable routines in childhood were more likely to have better time management skills and attention spans in adulthood.
The studies continue on and on from researchers who specialize in such things. I can just tell you that as a mom, I’ve found routines to be invaluable to our family’s happiness. My kids thrive when they know what to expect and how things will go. I think we all end up happier and even getting better rest with maintaining a few routines.
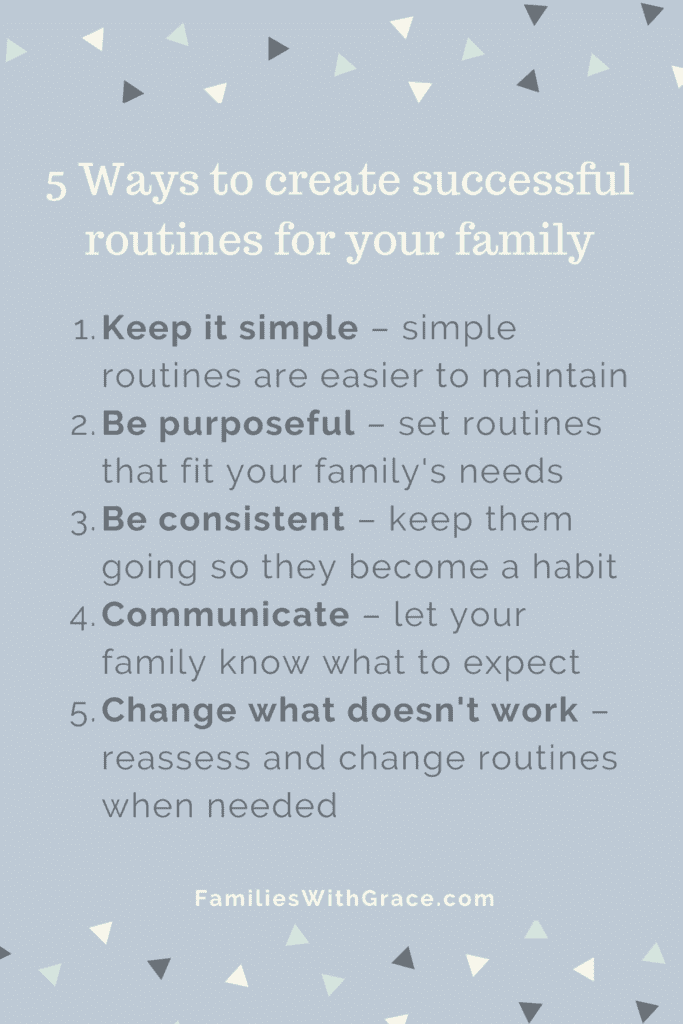
1. Keep it simple.
When it comes to routines, the simpler the better because that makes them easier to maintain. During my daughter’s toddler days as we were really getting settled into a bedtime routine, my husband and I talked about what we wanted to do each night and how to keep it simple. We opted not to include a bath in our nightly routine because giving a bath every single night just wasn’t going to happen.
So we decided on prayer, a book, two songs and then being tucked in. Nine years later that routine is almost exactly the same. We don’t do the songs any longer, but we pray, read and tuck in every single night.
This has varied a bit through the years as the kids have grown. When they had different bedtimes and were farther apart cognitively, we did things differently. They each had their own version of this bedtime routine.
Since moving into our new house, we have shifted so that both kids do their bedtime hygiene routines and then head to a bedroom where they both pray, we read a book out loud (usually a chapter of a book these days) and we exchange hugs and kisses all around.
2. Be purposeful.
Don’t create a routine just for the sake of creating one. Our bedtime routine, for example, helps our kids wind down each evening because they know what’s coming and it’s how they’ve always gone to bed.
Other routines are more out of necessity. Like school mornings mean I wake up the kids and they go to the bathroom, get dressed and style their hair before coming to breakfast. The night before, I lay out clothes for them (complete with undies and socks) so there is no scrambling around in the morning trying to decide what to wear.
Everything has a purpose. They get dressed first because they can take their breakfast in the car if they have to but they can’t change clothes in the car on the way to school. It also gives me time to make their breakfast while they are doing their tasks. And every morning they know what to expect so our mornings are pretty calm.
3. Be consistent.
This sounds obvious, but in order for a routine to work and stick, you have to be consistent. While research can’t completely agree on how long it takes to form a habit (anywhere from 7 to 66 days!), it does take time. And that means you have to be consistent even when you don’t feel like it.
Our bedtime routine, for example, took us working at it every single night to make it happen. I won’t even pretend that it always runs smoothly even now, because kids are kids and get distracted. Just the other night I had to tell my son to stop foot attacking his sister and brush his teeth because the kiddos were goofing off a bit.
BUT, they were still sticking with routine. He had his toothbrush in his hand as did she. That also means that when I don’t feel like following through with what my kids expect then I need to.
Of course there are exceptions to the rule. Life happens. People get sick. Schedules get changed. But be consistent as possible and routines will get ingrained, stick around and be effective.
4. Communicate.
I’m not sure I can think of a family topic that doesn’t include communication. Communication is so incredibly important. It is important when setting and sticking to routines as well.
For example, my husband and I have discussed what some of our routines will be. We’ve discussed what will work for bedtime or getting ready in the mornings. We’ve made plans of action together so that we are on the same page.
When the routine changes up, like our one night of the week that the kids have gymnastics and ninja class, we make sure to remind the kids of it. We tell them how and why things will be different and what to expect. So even if our routine switches up they know what to expect and handle it much better as a result.
5. Change what doesn’t work.
Sometimes you start a routine and even if you’ve been purposeful, communicated about it and stuck with it, it just isn’t working. Don’t stick with it just to stick with it. Adjust it to make it work.
We recently changed up a bit of our bedtime routine to move from our room to our son’s room to see if it will help him settle into bed a bit easier. (The verdict still isn’t in on that one, but we will continue to tweak as needed.) Life changes, kids and their needs change, so sometimes routines need to change and adjust as well.
Once I started with thinking of the advice I’d give to a couple of friends who got married last year if they asked me, I kept coming up with ideas. It’s grown into two blog posts with all the unsolicited advice I have to offer from my 19-1/2 years of wedded bliss. I shared my first 10 on Friday, and I’ve got eight more for you today!
11. Don’t stop dating. Once you’re married, it’s easy to become complacent, but never stop dating, wooing and romancing your spouse. Of course these things will change a bit once you’re married. And they’ll change when you have children. But, don’t forget the things you loved doing together before you were married. Go see a movie, go to dinner, go for a walk, play a game, color in a coloring book — just do something together that you enjoy. You can get creative when money is tight. It doesn’t have to be anything fancy. A date on the couch with a movie and microwave popcorn can work. Going out for a bagel instead of a full dinner when funds are tight can work. Just do something to date each other and reconnect.
12. Fight well. You are going to fight. It happens. But, make your fights productive. Don’t run away from them when things get tough. Don’t resort to name calling. Do try and listen to the other person. Do stick with it until you’ve come to a resolution you both are OK with. Do be willing to compromise sometimes. Do know that there are times you might need to take a break to cool down, but always come back to the topic. Don’t let issues go unresolved. Even the smallest issue will fester and cause problems if you let it go without resolution. Don’t press each other’s buttons. You know your spouse so well. You know what will hurt him or her deeper than anyone else. Never breech that trust and use it against them during a fight. Remember even in anger that words spoken can never truly be erased. No amount of apologizing and forgiveness can remove those words and the feelings they evoked. Just don’t go there.
13. Don’t try to change one another. Some things you know about your spouse before you’re married, and you think they’re cute. Then you’re married, and you find they lost some cuteness. Other things you maybe didn’t know until after you were married and you don’t find those things cute at all. Work through them. You can talk about them with your spouse, but the only person you can really change is yourself. Many times that means getting on your knees and asking for God to change you. And that’s OK. Remember my gaming example from last time? When we were first married, I sometimes wanted my husband to play games less often. It didn’t work. I just made myself miserable. This was a part of him I knew about before I said “I do.” Once I changed my attitude, then it all worked out. And now it’s a hobby we enjoy together. It’s also a hobby he still enjoys on his own sometimes, and I embrace having the time to myself to do things I enjoy alone like reading. Does it help that he makes our family a priority over his games? Most definitely. If not, we’d have a problem. We’ve learned how to work it for the good of both of us.
14. At the same time, be aware that you both will change, just make sure you change together. My husband and I got married young. I was 20; he was 22. We’ve gone through many life transitions together. We started as college students. Then we evolved into young professionals. Then we morphed into parents of babies. Now we are settled into parenthood of school-aged children. I’m not the same Stacey I was when we got married. My husband, Chris, is not the same Chris he was when we got married. We’ve both grown and changed as we’ve lived life. But we’ve grown together. Each stage of our life has brought its own challenges. In the early days, we’d struggle to connect in the midst of going to classes, studying and working. Then we struggled to connect when I dealt with some health issues. Recently we’ve struggled to connect while being in the fray of having young children. But, we’ve figured out — sometimes through trial and error — how to adjust to each phase as it’s come and how to stay connected when life changes and when we change. Some changes are pretty easily resolved, like how we’ve learned to ask each other if the timing is good before starting a serious discussion. Other changes are more challenging, like figuring out how to stay connected to my husband when we are exhausted at the end of the day after dealing with work, kids and responsibilities. We’re always learning and always growing. The key is to make sure that you’re learning and growing together and never ever forgetting your spouse or taking him or her for granted.
15. Respect each other’s privacy. Trust is a huge part of a relationship. If you work hard to be a team, to communicate well and to fight well, trust remains. Act in a way that your spouse has nothing to worry about in trusting you. Be honest. Be up front. Expect the same from your spouse. Give space sometimes. Respect and trust go a long way in a relationship. I have nothing to hide from my husband, but I still appreciate that he asks me before getting in my purse to get something. I give him the same courtesy and don’t go rifling through his wallet or cell phone unless I ask. Neither of us have secrets, but we are still human beings. We do still have belongings that are ours alone, and it’s important to respect that even within a marriage. If I went through his text messages or e-mails, all I’d do is communicate to him that I don’t trust him. And I do trust him — completely. Plus, who has time for that? If your relationship is at the point where you feel like you have to do those things in order to trust someone, then you’re not actually trusting them at all and need to work through the underlying issues.
16. Enjoy one another in every way. I’m not going to go into details of the physical aspect of a marriage, but enjoy that, too. Never use that against one another. Just enjoy your relationship. Enjoy your physical bond, your emotional bond, your spiritual bond and your friendship bond. Marriage is meant for the long haul. Enjoy it!
17. Keep a sense of humor. Laughter can diffuse any situation. When I was in college, one of my professor’s had a theory that if he was going to laugh at something later then he might as well laugh about it now. That’s not always an easy thing to do, but it can be helpful. We put this to the test on our second day of marriage when we ran out of gas right as we rolled into the visitor’s center in Gatlinburg, Tenn., where we were going to spend our honeymoon. We’d both been so distracted and excited about being married and getting to go somewhere together out of town that we completely forgot to fill up the gas tank. It gave us a bit of a chuckle then and still makes me smile to remember those kids we were. Never take yourselves too seriously.
18. Don’t listen to others. Yeah, I’m ending with this one, because it seems contradictory since I’ve been dispensing advice and now I’m telling you not to listen to others. What I mean, though, is don’t listen to others’ opinions about your relationship or marriage when it comes to little things. If multiple people you love and trust who know you and your spouse are sending up red flags, pay attention. But at the end of the day in most situations, it doesn’t matter what anyone else’s opinion is on how you’re doing things other than your spouse. If you’ve talked through your issues, if you’ve come up with your own game plans and if you’ve figured out what works best for the two of you, then so be it. Everyone else can butt out. It really isn’t their business. Do whatever it takes to protect your marriage. Go to counseling if you need help working through problems. Don’t allow others to plants seeds of doubt that don’t need to be planted. Cut off conversations if you need to. Cut off friendships if you absolutely have to. You know in your gut what is best for your relationship. Follow that instinct together with your spouse.
Marriage is an awesome journey. I can’t imagine my life differently. I love being a missus and wouldn’t change it for one second. Enjoy the journey. Enjoy one another. Enjoy the journey together!
In 2018, two of my good friends got married. Each time we go to a wedding or know someone getting married, I think of things I’d say to them if they asked me. I try not to just spout off unwanted advice, which is why I’m blogging about it instead! I don’t have a perfect marriage, because those don’t exist, but my husband and I have learned a few things along the way in our 19-1/2 years of being married. Today I’m sharing 10 of them. Once I got started, I had trouble stopping, so I’m breaking this up into two blog posts. Check back Monday for more!
1. Forgiveness. Learn it. Live it. Embrace it. Remember that the person you’re sharing your life with is human. He or she is going to mess up along the way. You have to learn to forgive easily and often. Never hold grudges. It’s not worth it. Love can prevail, if you let it. And, remember, your spouse is going to have to do a lot of forgiving of you. Sometimes I can feel all high and mighty that I don’t get mad at my husband for certain things he does. Then I think about how the crazy things I do and how he reacts so well, and I knock myself right off my pedestal.
2. Communication is sooooo important. I love superheroes these days. Some of them have the power to read minds. But, your spouse isn’t one of them. He or she has no idea what you’re thinking unless you tell them. Communicate often about everything from money to dinner to work to chores. Share what you’re thinking. Share what you’re expecting. See if it lines up with what your spouse is thinking and expecting. If it doesn’t, then communicate some more until you figure it out. Sometimes the best thing you can do is sit down together over a meal, focus on one another with no distractions and talk. My husband and I started our relationship with long phone calls. I wasn’t old enough to go on dates with him. Now, 25 years later, I feel like we still need to have those times that we just talk. If you find yourselves missing chances to connect, make them happen. Planning is OK.
3. Never compare workloads. This was especially an issue for me after the birth of our first daughter like I recently shared in “How to keep your relationship strong with a newborn.” We were 10 years into being married when it really cropped up, but I had to deal with it. Sometimes you’re going to do more than your spouse. And sometimes your spouse is going to do more. One of you may have to work longer hours at work. One of you may have to pick up slack at home. One of you may do all the cooking. But as long as both of you are contributing, let it go.
4. Going along with number three, appreciate one another. Say thank you often and mean it. My husband takes out the trash for us. I thank him almost every time he does. Sure it’s sort of his “job” around here, but it keeps me from having to do it. And I know that my husband doesn’t enjoy this task; he just does it because it has to be done. He thanks me for making dinner. Everyone wants to be appreciated for what they do, no matter how small. Saying a sincere thanks goes a long way.
5. Learn to enjoy or at least respect things your spouse enjoys. My husband has been a gamer since before I knew him. He loves role playing games, tabletop games and video games. He can spend hours playing games. I learned early on to let it go and let him enjoy his gaming time (as long as we still got plenty of couple time and everything else that needed done was getting done). We had our fair share of discussions of what this would look like. We set some parameters like designating one evening a week for him to get together and game with his friends. I realized that gave me one evening to do whatever I wanted to do. Along the way, I started asking questions about what he was doing. If it was important to him, then I wanted to hear about it. I slowly developed an interest in gaming, too. Now it’s a hobby we often enjoy together. And I sincerely wish we had the time and gamer buddies around to get back to the gaming once a week like he did in college. I’ve evolved. Our relationship has evolved and it’s better because of it.
6. Don’t forget who YOU are. While it’s important to do things together as a couple, you still need to remember that you’re individuals. In my dad’s speech to us on our wedding day he said, “Remember that you are Chris. And you are Stacey. And together you are Chris and Stacey.” It sounds a bit abstract, but I think what he meant was that we are a couple together. We do things together. We must spend time together to grow our relationship, but we can’t forget the individuals we are and the things we enjoy doing on our own. We can’t lose ourselves. After all, if I lost myself then I’d no longer be the person my husband fell in love with.
7. Talk about how you’re going to navigate extended family affairs before conflict arises. Each of you have your own family traditions. Each of you have your own expectations of how things are going to go. For example, my family used to get together to celebrate everything all the time. Come the month of June with a ridiculous amount of birthdays and you’d find us eating out and celebrating each and every one. That’s mellowed out as we’ve gotten older, but in the early days, I fully expected my husband would participate in every single family gathering and celebration. If he had a long day at work, too bad. If he had just been with my family the night before for something else, too bad. And that time didn’t count as our time of doing stuff together. Anyone else picking up on the unfairness here? I learned through the years to listen to my husband. I learned to communicate back to him what was important to me. Maybe he needed some downtime for one family activity but I really wanted him to participate in another one instead. We’d do that. I’ve learned that’s OK. We don’t even have to be tied at the hip for family activities. Let’s not even get started on holidays. Seriously, start figuring out your game plan for your first married Thanksgiving and Christmas by September at the latest. It’s tricky. Also know you probably can’t make everyone happy. Do what works best for you, but don’t forget to communicate that to your families and offer alternative days to celebrate if necessary.
8. Don’t put your business in the street. What I mean is if you’re having a problem with your spouse, talk to him or her about it. Don’t talk to your friends about it. Don’t talk to your parents about it. And definitely never post about it on social media. Keep your personal business personal. Your friends and family will remember all the negative things you said long after you and your spouse have let something go. Your relationship doesn’t involve anyone else besides your spouse and God. The only business you can share is positive affirmations. Go ahead and brag about your spouse to others sometimes. You get bonus points for bragging on them when they’re around. My husband and I aren’t a mushy, gushy couple, but I do like when chances arise that I can point out his good qualities or things I appreciate about him, which leads to number nine.
9. Be each other’s biggest cheerleaders. The world can be a cruel and harsh place filled with lots of naysayers and people who are thrilled to knock you down a notch. Your spouse is the person who should build you up the most. Take time to listen, support and encourage one another. Celebrate good news together. The first person I want to call or talk to when I have good news is my husband. I know he’ll be happy with and for me. Sharing good news with your spouse should just make the good news feel even better.
10. Be a team. Once you are married, you are a team. You are a united front. You will find lots of distractions ready to tear down your team. You will find people who will try to get you to talk negatively about your spouse and complain about your marriage. Don’t fall into those traps. Avoid them like the plague. Remember always that no matter what you’re facing, you’re facing it together as a team. You have to be a team to get through hard times. I remember very clearly the day my husband lost his job 12 years ago. I remember sitting together on the floor of my home office and just sort of holding each other up. We faced that challenge and so many others before and since then as a team. Don’t place blame when there is none to be placed. Support one another and move through life as a unified front. My husband and I have sincerely said to each other, “I’d rather go through hard times with you than good times without you.” Being a team — being together — makes any hard time so much easier to bear. And when times are good again, your relationship will be stronger for having survived the hardship.
Check back on Monday for part two! You won’t want to miss it.
Today is World Introvert Day! Usually at least one or two of my friends will share this information with me each January 2, because it’s no secret that I’m an introvert. I’d guess most of us introverts are excited to celebrate today individually in our own homes. (Ha!)
While information about introverts abounds way more these days than ever before (seriously, as a kid and teenager I had no clue why I behaved the way I did and why many others didn’t understand me), people still get confused about introversion. We still get mistaken as being people who are shy and quiet. And sometimes we are. Most times, we just come across that way to other people (usually extroverts). We are really just people who re-energize with time alone and quiet rather than with other people and talking. We can get worn out, irritable and moody when we are with people too long.
But what does introversion look like? I can’t speak for every introvert, but I can speak for myself. One of my best examples of introversion happened the past two summers. An amusement park a couple of hours away offers a package for families of four to camp in their park overnight. Campers arrive just before closing, have some time to do things after hours, sleep in their own tents and are served breakfast before the park opens. We did this in both 2017 and 2018 and had fun.
Amusement parks are noisy and crowded. They’re an environment in which I can get easily overwhelmed and overloaded. In fact, at events like these I usually end up exhausted with a headache after a few hours. Both years, I felt a bit stressed as we arrived, lugged all of our stuff to the area where we could camp (right in the center of the amusement park!) and kept track of the kiddos. After we decide where we’re pitching our tent, we get it set up and I head into it to get the beds all made up and ready. Both times going into the tent gave me a strong sense of relief, and my stress began to dissipate.
And that’s because inside the tent, I can still hear all of the noise outside. I can still hear people talking as they walk by and other campers setting up their camp sites, but I am out of sight of them, and they are out of sight from me. I get to be in my own little bubble of sorts with my family, and it’s wonderful. I immediately relax.
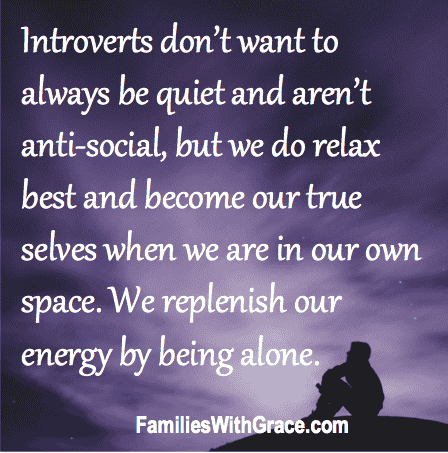
That’s introversion. We don’t want to shy away from experiences or other people. Introverts don’t want to always be quiet and aren’t anti-social, but we do relax best and become our true selves when we are in our own space. We replenish our energy by being alone. If I could take a tent with me to every large event or gathering, I would. (But I’m not trying to be a freak, I promise!) I wouldn’t stay in it the whole time; I don’t at the amusement park either. But I would go in when I just needed a few moments alone to decompress.
I can’t take a tent in places, but I have found other
escapes. When we go to a gaming convention in a nearby city each year and are
exploring the exhibit hall packed with booths, vendors and other gamers, I get
on overload. I have learned to avoid a headache and utter exhaustion, my best
bet is to take about 20 minutes here and there to sit out. My husband will keep
going through the booths and I’ll go sit on the side of the convention hall
(most often on the floor) and just close my eyes. I don’t usually fall all the
way asleep (though I totally did the year we went and I was eight months
pregnant). I just have my eyes closed and am able to be in my own head space
for just a while. I can still hear the noise, but it gives me a chance to
regroup and go inside of myself rather than be totally involved with all that
is going on around me.
Other times I can’t sit on the sidelines with my eyes
closed without seeming like a crazy, anti-social person, so I find other ways
to regroup. Sometimes it just means going to the bathroom and staying in there
an extra two minutes alone. (This is where having bladder problems comes in
handy, because I really do have to go to the bathroom a lot!)
And this is life as an introvert. It’s not bad. It isn’t
weird. It’s just how I’m wired, and it’s not all that different or unique.
There are quite a few of us around. We tend to understand extroverts perhaps a
bit more than they understand us, but that also may be because we tend to be
quieter and listen more. It could also be because our world and culture are
geared very strongly toward extroverts as the norm.
So when your introvert friends say that they just need a few minutes away or when they head to the bathroom at a party and don’t return for five minutes, just leave them be and know they are going into their own tent, their own bubble to regroup. They don’t want to be away from you or not be part of the group. They just need a minute of downtime to process information and relax. It’s not shy or weird. It’s OK. That’s just how they’re wired.
This website uses cookies so that we can provide you with the best user experience possible. Cookie information is stored in your browser and performs functions such as recognising you when you return to our website and helping our team to understand which sections of the website you find most interesting and useful.
Strictly Necessary Cookies
Strictly Necessary Cookie should be enabled at all times so that we can save your preferences for cookie settings.
If you disable this cookie, we will not be able to save your preferences. This means that every time you visit this website you will need to enable or disable cookies again.