I originally wrote these words in May of 2013 when my son was 4 months old and my daughter was 3 years old. Having a baby changes everything and finding myself again after having a baby was challenging. Even now that my kids are 9 and 12, I still have trouble with loses my unique identity in the busyness of motherhood.
When my daughter was born 3-1/2 years ago, I remember once the fog lifted a bit, I wondered when or if I’d ever feel like myself again. In a way, I mourned the Stacey I once was. I didn’t know if I’d ever feel anything like her again. I was both OK with that and sad about that. But I had to wonder whether if finding myself again would ever happen.
I remember the first day I returned to my home office to work for a couple of hours while my mom watched my baby girl. Even though my breast pump came with me and I did a pumping session whilst typing away, I felt for those couple of hours like the me I used to be and it was glorious.
During her lifetime, I’ve found a way to sort of balance it all out. I’ve gotten breaks and chances to be a journalist. I’ve gotten breaks and chances to be a wife. And I’ve gotten breaks and chances to be more than a mom. Because, if all of us moms are honest, sometimes we need to be someone other than mommy. Sometimes we need to be more than a kleenex, jungle gym, dairy cow, bottom wiper, clothes changer, laundry doer and food maker. Sometimes we need to be a woman. We need moments to just be silent. And we need to have a moment to think in peace.
Losing myself again with a second baby
I knew I’d deal with these feelings again when I had a second baby. And I have. I love my son just as completely as I love my daughter, even when he’s being high maintenance as he sometimes is. I love him even now when he’s kicking me in the arm while I’m trying to type this blog post as my daughter is distracted working on a bracelet (and never you mind that they’re both still in their pajamas and it’s almost 11 a.m.). I’m now getting just enough sleep and have been in this mom-of-a-baby phase long enough that I’ve started on the journey of finding myself again. Or trying to.
Last week I had a chance to be in the car by myself for a few minutes while my children were at my parents’ house before our birthday celebration. It was just a few minutes. I realized I could not only listen to the music of my choosing but I could turn it up. I could sing along at the top of my lungs and not have to try and have an ongoing conversation with a constantly chatting 3-year-old. For those few minutes I realized that I was still me. And I also realized the old, old Stacey is gone. I am now Mom Stacey. Somehow I’m OK with it.
Finding myself in a new way
Though being a mom drains me sometimes. Though it sucks my energy and occasionally makes me want to run away screaming, it also makes me who I am now. And it makes me happy. I’d be lying if I told you I was happy every single moment of motherhood. I’m not. But at my very core, being a mother is now who I am.
Being with my children can also re-energize me. Looking at their faces and meeting their needs sometimes keeps me going and moving on days when I otherwise would want to just crawl into bed and pull the covers over my head. When I act strong and calm for them when I’m frustrated, I actually feel stronger and calmer. It turns out that if you fake it long enough, it rubs off on you. I want them to see me smile. So, I keep smiling even when I don’t feel like it. And I end up being happier in the end. It could have to do with their sweet smiles back at me.
This time around, I know there is no going back. I’ll never be the Stacey I was before having children. Being a mom changes you forever. And I will forever be their mother, no matter what. This time around I’m not longing for that old Stacey. I do still sometimes crave alone time. I do still need time alone with my husband. But, I also realize that when we are all together I feel the happiest and most complete. This is my family. We’re continuing the journey my husband and I started when we got married.
Just as I adjusted to the title and role of wife, I have now adjusted to the title and role of mother. It is my identity. It won’t ever be my complete identity, but it’s a big part of me. Right now Mommy is 95 percent of who I am and what I do. But there’s still 5 percent reserved for just Stacey. That percentage will wax and wane in the years to come, I’m sure. I’m sure I’ll have times of finding myself all over again. That’s how life works. For now, I’m fully embracing my role as mother. Now it makes me who I am.
I love summer dinner ideas that are pretty healthy while also being quick and easy. So I’m running a series for a few simpler summer dinner ideas over the next few Tasty Tuesdays. I’d love to hear from you and any suggestions you have for what you make for your family during the hot days of summer!
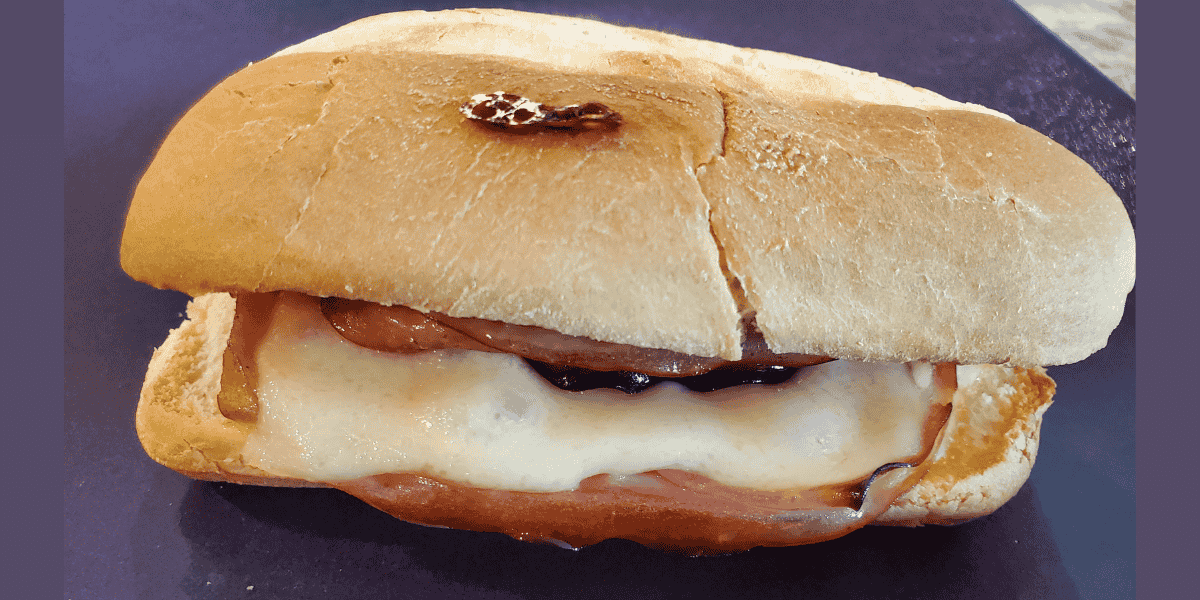
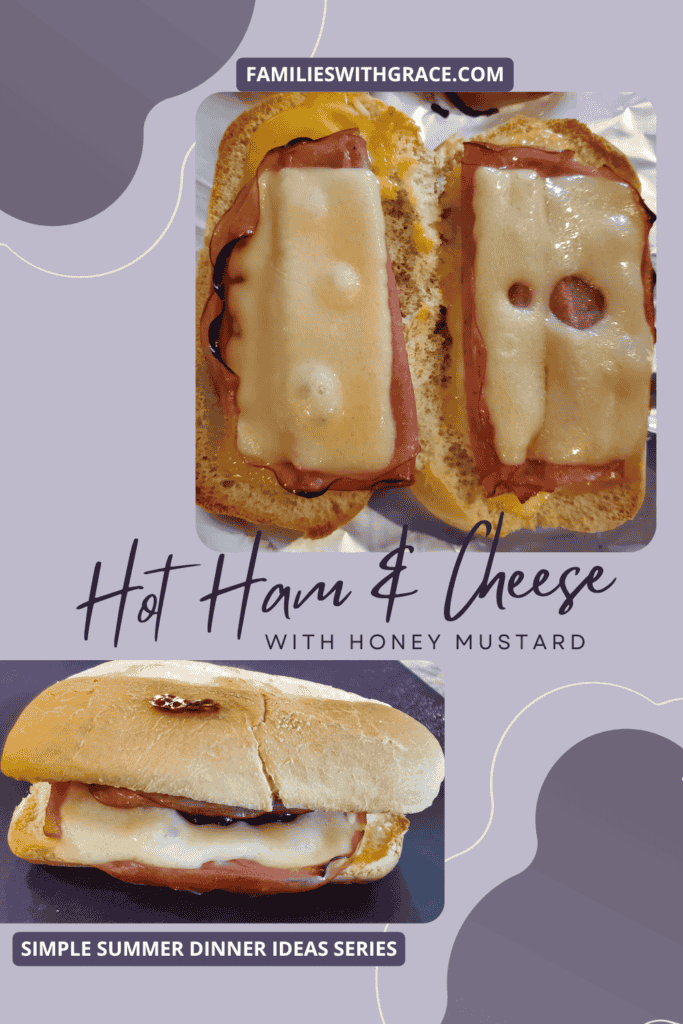
As we’re continuing our simple summer dinner ideas, I had to share this hot ham and cheese sub recipe. It does use the oven, which isn’t ideal for the hottest summer days, but it doesn’t need the oven long. Best of all, this simple summer dinner idea is quick and easy, which is perfect for busy (or lazy) summer days! It’s so simple, I often make one or two for lunches!
These hot ham and cheese subs with honey mustard are a lot like the pizza subs I make for my family. In fact, some of my family members who are more particular eaters don’t eat ham, so I usually make them pepperoni pizza subs whenever I made these hot ham and cheese subs. It’s easy enough to customize them for whatever your family likes most.
Getting started
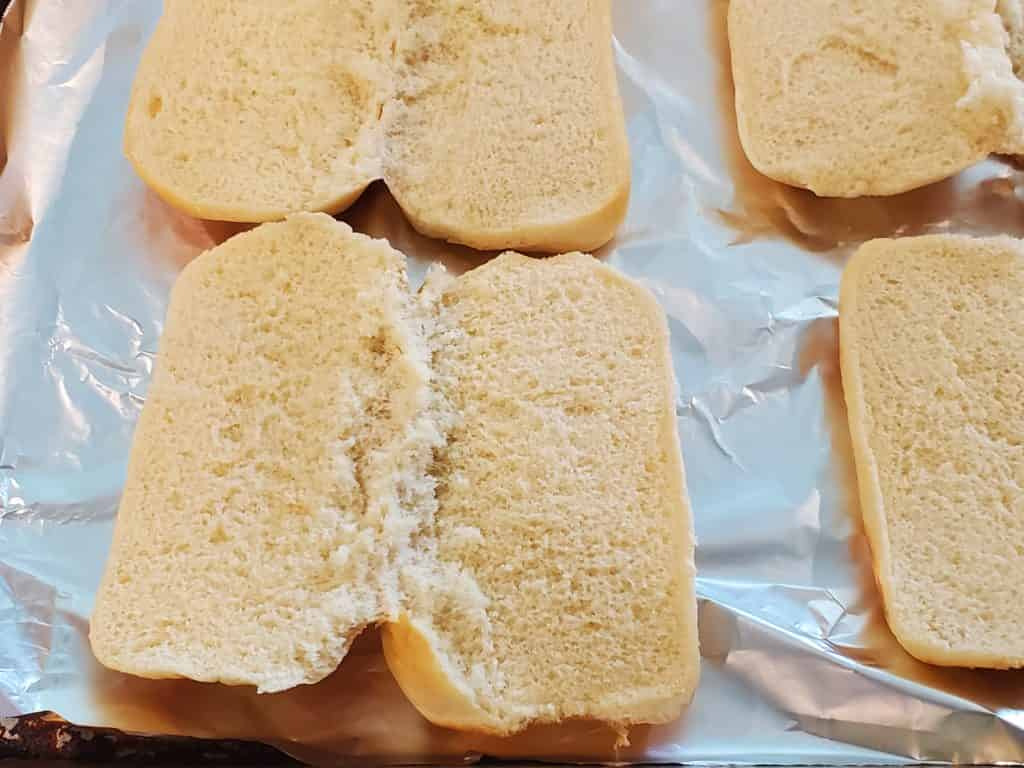
Start off with preheating your oven to 400-degrees (F). Prep your baking sheet for your subs. I am a huge fan of non-stick aluminum foil to make for easy clean-up. Parchment paper also works as does spraying your baking sheet with a bit of non-stick cooking spray. Then, Split your sub buns in half.
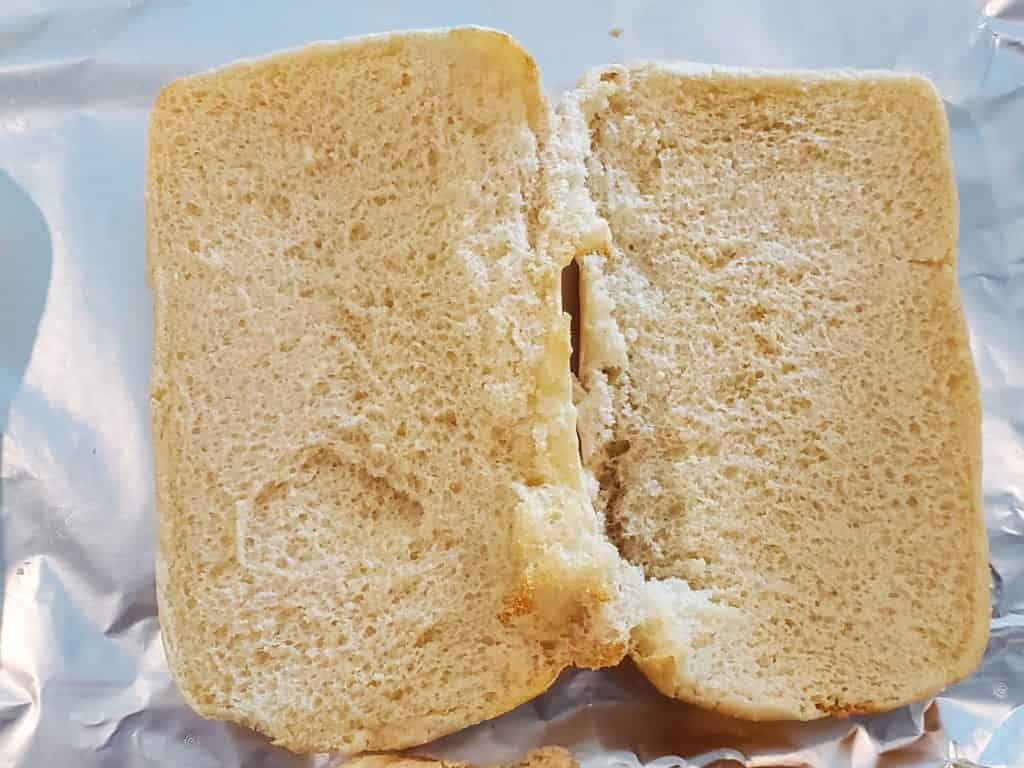
Put the open, plain sub buns into your preheated oven for three to five minutes. You want them to start to toast a bit but not get brown. Basically, you’re firming them up. They should look like this:
Putting the sandwiches together
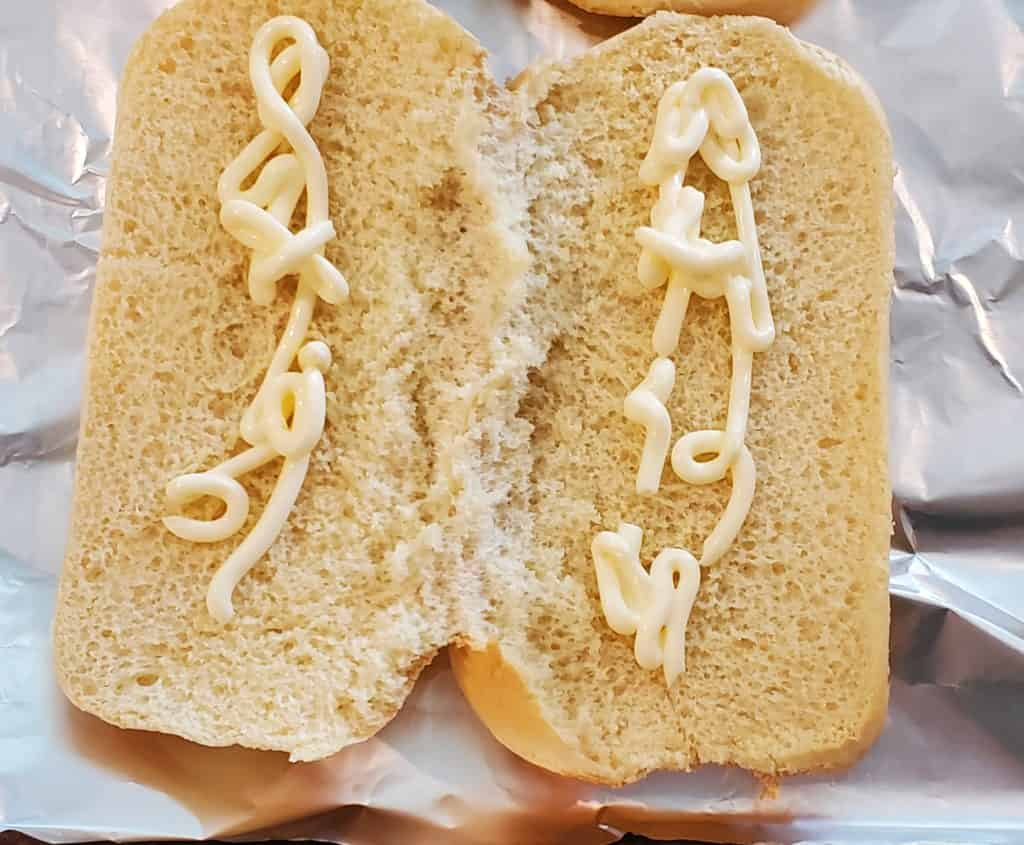
Once your sub buns are ever so lightly toasted, you’re ready to start building your sandwiches. First, spread mayonnaise on both sides of the bun. I squeeze mine on, but I think it’s about 1 teaspoon per side.
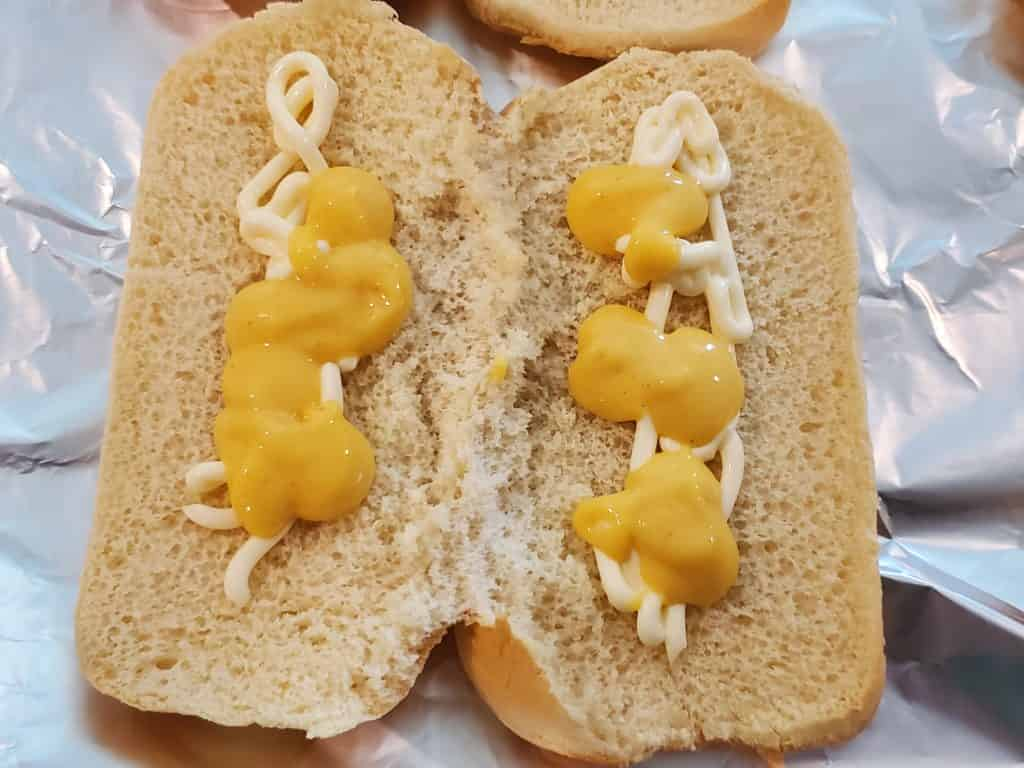
Next, put the honey mustard right on top of the mayonnaise. Again, I estimate about 1 teaspoon per side, but I kind of just dollop it on out of the bottle. It looks like this:
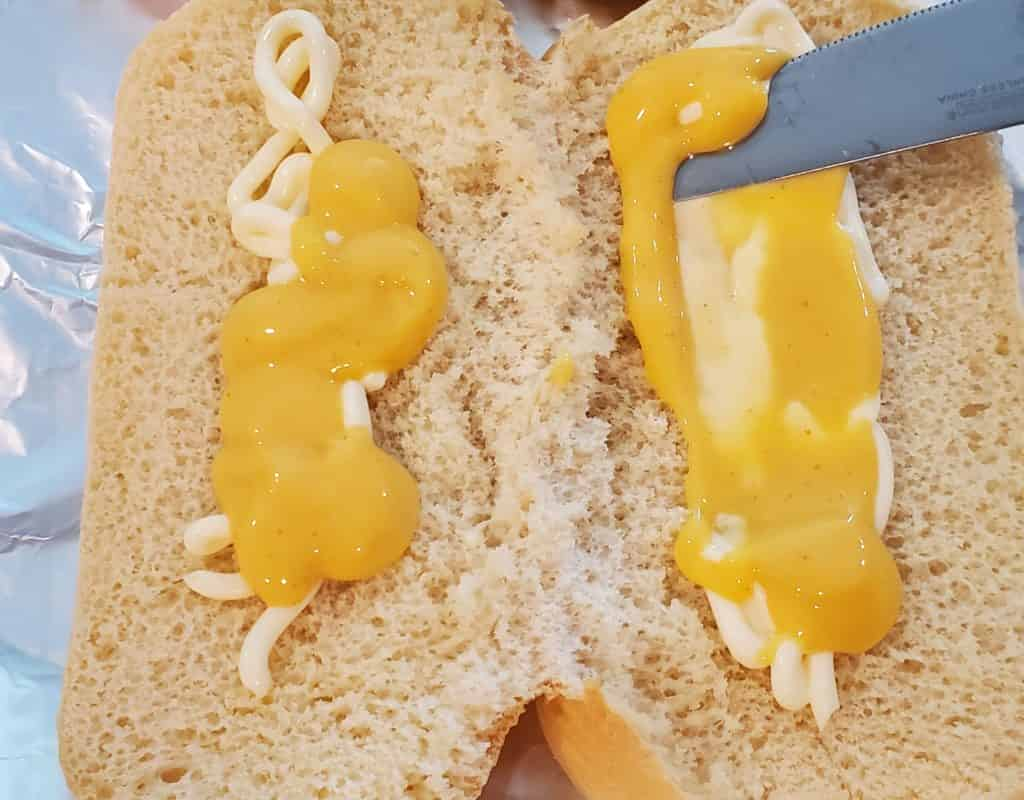
Then you want to smear together the mayo and honey mustard. The two sauces mixed together are what take these hot ham and cheese subs up a notch!
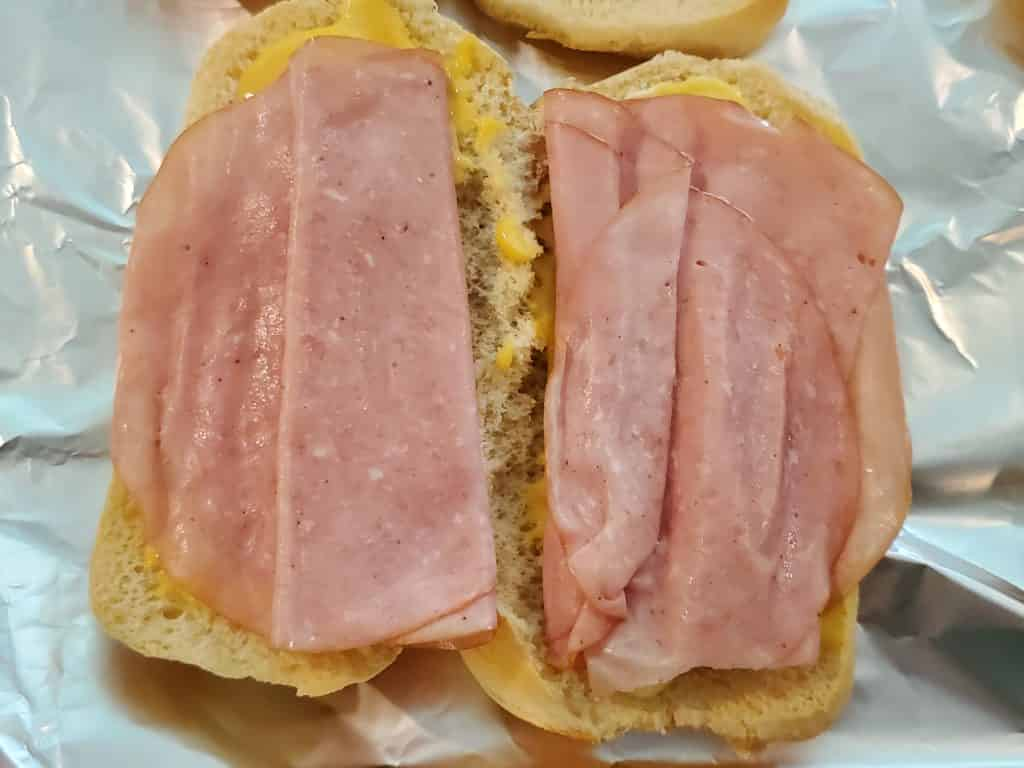
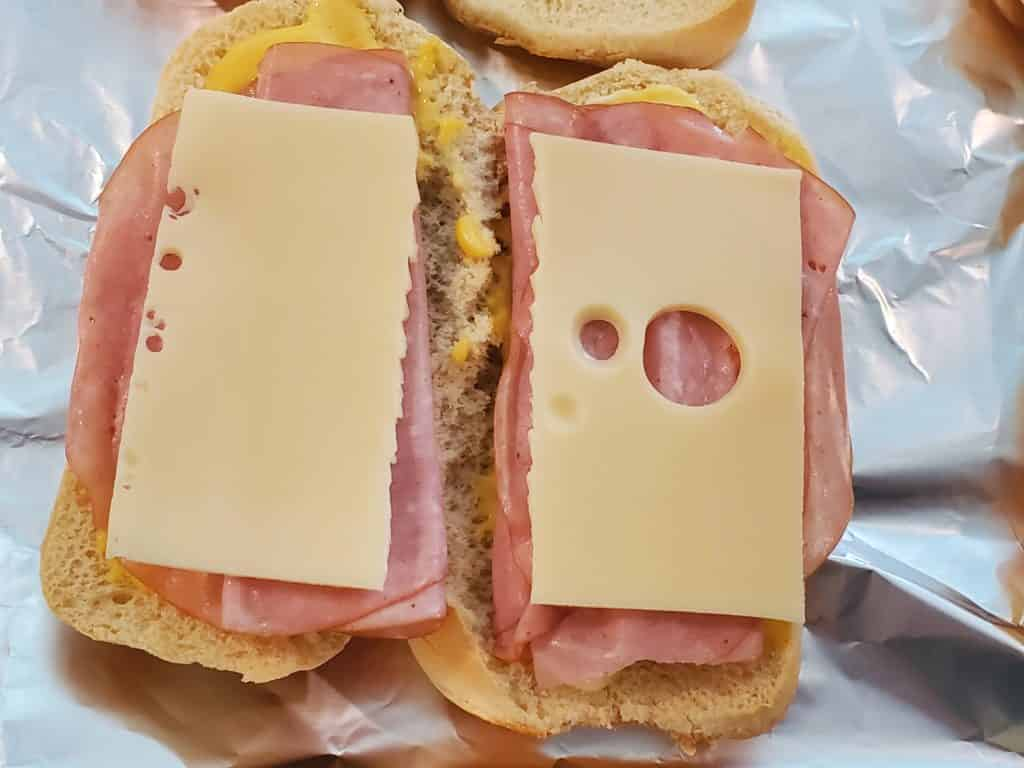
Next up is stacking on the ham. Put 3 to 5 slices of deli honey ham on each side of the bun. The amount of ham you use really depends on how thick your ham is sliced and your own preferences.
Then you’ve got to add on cheese. I love Swiss cheese with ham, but cheddar or American also work. To be easier, I use slices, but shredded cheese would also work. And I split one slice per sub, so each half gets a half slice of cheese. But you can do it as you prefer.
Baking time
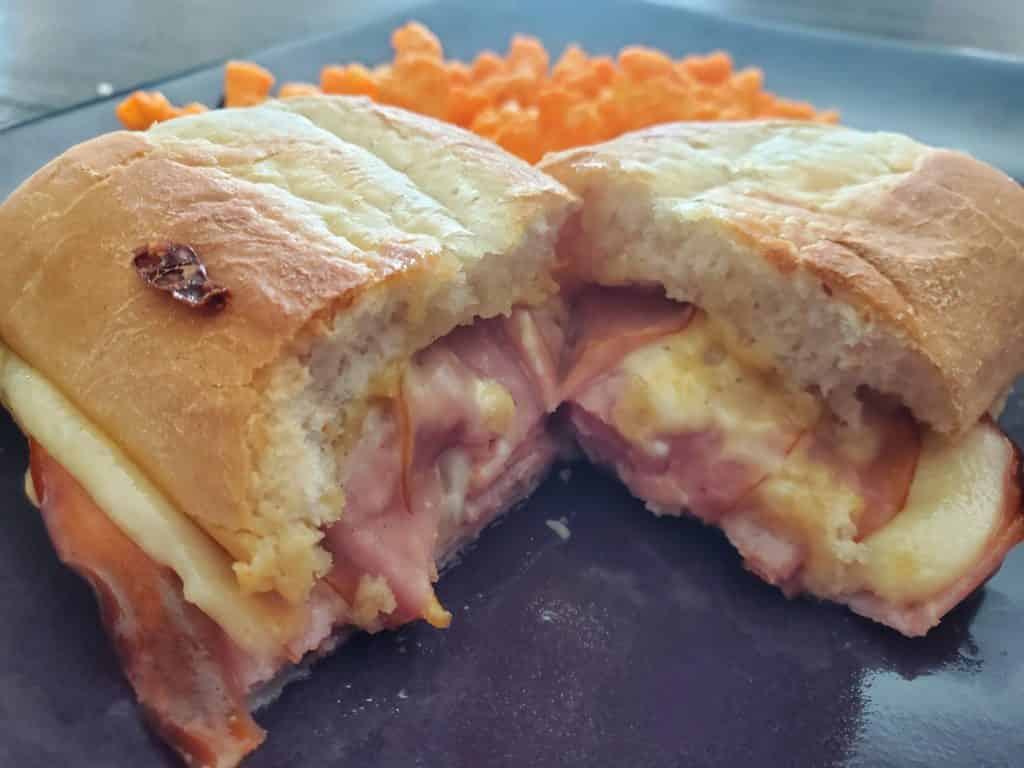
That’s all the prep needed. Your hot ham and cheese subs are ready to go into the oven. Bake them at 400-degrees (F) for 10 minutes until the cheese is bubbly and some of the edges of the ham are crispy. (If you are really in a hurry, bake them for about 6 minutes and then switch to broil on low for about 2 minutes. Only broiling leads to a soggy bun and burnt edges on top.)
These hot ham and cheese subs are best served right away. I usually put mine together as a sandwich and cut it in half to make eating easier. You can leave them open face if you prefer.
I suggest pairing the hot ham and cheese subs with an easy side to keep dinner easy for your family this summer — or any time! We often go with chips. A tossed salad or potato salad would also go well with these subs as would fresh vegggies and dip. Enjoy!
Split the sub buns in half so they are open. Place the buns on a baking sheet sprayed with non-stick cooking spray or lined with non-stick aluminum foil or parchment paper.
Put the buns in the preheated oven for 3 to 5 minutes until they are very lightly toasted and just barely starting to brown around the edges.
Spread about 1 teaspoon of mayonnaise on each side of the open faced buns.
Add about 1 teaspoon of honey mustard on top of the mayonnaise and smear together with a knife or spoon.
Place 3 to 5 slices of deli honey ham on top of each half of the buns, on top of the mayonnaise honey mustard mixture.
Add a half slice of cheese per half of side of each sub. (Or you a whole slice per side if you prefer for a total of two slices of cheese per sub.)
Put bake in the oven at 400 degrees (F) for about 10 minutes until the cheese starts to bubble, the edges of the ham are crispy and the buns are golden.
Put the buns together to make into sandwiches and serve immediately.
A couple of weeks ago I had an appointment with my urologist. I walked out of his office with tears in my eyes. I stood before the elevators and tried to grasp what had just happened.
This wasn’t the first time I’d felt teary and overwhelmed after leaving his office. I’ve been seeing the guy for two decades to treat my interstitial cystitis. I’ve seen his receptionist and nurse retire. At one point I went so often that I noticed any small change to the waiting room layout and pretty much the entire office knew me by name.
I’ve left there in significant pain. In the past, I’ve walked out of there disheartened because I knew there were not answers for my pain and discomfort.
But I had tears in my eyes following my recent visit for a different reason. After going down to yearly appointments to keep up with my medications, my urologist said something I truly never thought I’d hear him say. He told me it’s up to me whether I return to see him again. He was releasing me because I didn’t really need him any more.
Even now those words choke me up. This journey I’ve been on started when I was 3 years old. There have been highs and lows. I’ve had times that were miserable and a short period of time in high school and college when I was in a remission. But since my symptoms returned when I was 23, they have taken me on a journey I wouldn’t wish on anyone.
About healing
Being in your early 20s with health struggles is difficult. None of my friends really, truly understood where I was coming from. I sought out others with IC and others with chronic pain. We knew the struggle. We understood feeling left out, trying to juggle appointments, figuring out how to pay for everything and praying desperately for healing.
When I was younger, I thought cancer would be better. Cancer is something you either get better from or don’t. It doesn’t just continue indefinitely. Through the years I’ve learned that’s not even close to being the case, but when you are struggling with finding hope through constant pain that nobody has a solution for, thoughts get crazy.
I won’t bore you with details of all the various treatments and medications I’ve tried. However, I do want to share with you my journey about healing and my faith. In my mid-20s, God showed me I was putting my hope in the next line of treatment or medication instead of putting my hope in Him. I wasn’t truly living faith. I shifted my perspective and began keeping my hope in God and trusting that whether any treatment worked, God would be with me every moment. And He has been!
But then that begs the question of supernatural healing. I have seen God heal people. My dad is alive today thanks to the divine touch of our Heavenly Father. I know God has and can heal people. He wasn’t healing me, though, and that was something with which I struggled. A part of me thought since I’d put my hope in God more than in medicine, then I’d learned my lesson, and He’d heal me.
I’ve prayed for healing. I know others have prayed for healing on my behalf. However, God said no. Eventually, the Holy Spirit led me to pray for healing from the need to be healed. That sounds confusing, I know. I was just struggling so much with wanting to be healed that it was getting in the way of my relationship with God. It was affecting me in many ways, and none of them were good. When sermons were about being healed or I felt like other Christians were implying anyone would be healed with enough faith, then I got upset. My heart ached and I’d feel discouraged. I thought I was living faith, yet sometimes I didn’t feel like it.
My prayer for healing from the need to be healed was answered pretty quickly. Over time, I became OK with the fact that my healing would come in heaven rather than on earth. Of course I’d love to be healed before I die, but if not, then I was OK with that. I knew beyond a doubt that God would continue to be with me every step of the way. That was what living faith looked like to me.
And God has been with me every step. He has strengthened me when I was weak. He’s comforted me when I was alone because I didn’t feel up to leaving the house. God surrounded me with a loving, caring family who have been there through the difficult days. I am so blessed and thankful.
Learning from having a chronic illness
Having a chronic illness has taught me many things. I’ve made friends I wouldn’t have otherwise and I’ve done work I wouldn’t have otherwise. One of my best connections has come through the IC Network, a group who advocates for IC patients and works to educate and help us. I am blessed to write for them regularly as I have been for the past nearly 20 years.
My work has also given me the ability to do research about IC and learn about the latest treatments and theories. I’ve interviewed leading researchers in the field and listened to their presentations at various urology conferences. I spent my 40th birthday at a urology conference and loved it. Each urology conference I went to was overwhelming to me to see medical professionals working hard to find answers and help for us.
I’ve seen treatment for IC come a very long way through the years. I could give you all sorts of details and information that I geek out over, but I will refrain. However, this very research has led me to different urologists through the years. My local urologist has been so kind and good to me. I’ve seen a handful of them who have been far from kind and helpful. This urologist has been so compassionate and helpful, but he doesn’t specialize in IC.
So I have driven out of town and out of state in order to seek out urologists who are leading experts. I was more motivated to do this after having children when I had a newfound desire to feel the best I could to be able to do more with them. The Women’s Urology Center at Beaumont Hospital in Michigan blew me away. I’ve been there a few times and had a couple of surgeries there and am thankful for their help and compassion.
Doing article research, though, also led me to interview people in related fields. In researching an article about Pelvic Congestion Syndrome, I connected with an Interventional Radiologist. During the interview he said to me, “I think I’ve found a cure for IC.” I was polite, but internally I scoffed. I’ve heard promises of cures for years and none of them ever panned out.
After the article released, he and I stayed in contact a little bit. I mentioned to him that the patients he was describing had histories a lot like mine. He sent me his patient questionnaire. I completed it, and he told me over the phone that he suspected I had blocked veins in my pelvis that were causing my symptoms. He told me he truly thought he could help me feel better. I remained skeptical. I was wary of getting my hopes up and being disappointed yet again.
Undergoing another procedure
The doctor I interviewed referred me to his colleague who sent me for imaging to determine if I had blocked pelvic veins. Lo and behold, I did. My left iliac vein was 70% blocked. His solution was an outpatient procedure to put in a stent. By that time, I’d had three major pelvic surgeries and four minor ones. What was one more? So in March of 2021, I spent my kids’ spring break out of town having an 11 mm stent inserted into my left iliac vein.
I didn’t feel any difference at first. Of course at first my pain was much worse, but it was overall the least painful recovery I’ve had for any procedure. Life returned to my version of normal. Then about 10 months in, I started noticing that I hadn’t been having my usual bladder symptoms for a while. A couple of months later, I tried going off of the bladder medication I had been taking since I was 23 (other than while nursing or pregnant). It was the same medication I took for about a year during middle school as well.
That was six months ago. I haven’t had any trouble since then. None. I am going to the bathroom the same amount of times as a “normal” person. I’m not even having to be as vigilant about the things I eat. (Foods and beverages often flare IC symptoms.)
Remission or healing?
So where does that leave me now? Am I in remission or am I healed? Honestly, I’m not sure. I just know that I feel well. I still have other chronic health issues that have come up through the years that cause me trouble and pain, but for the first time, my bladder isn’t at the top of the list. That is so incredibly significant in my life.
When my local urologist told me a couple of weeks ago that I don’t need to come back unless I start having problems, it began to really sink in to me that this is real. I called my mom on the way home from the appointment, and we both cried. I had made peace with the fact that my healing would be in heaven. But here I am on earth right now not having to struggle as much.
While I’m perhaps in a bit of shock, but I just praise and thank God. He is the One who led me to connect with the work I do and the doctors I’ve met. He has been with me every single step of the way.
Can my symptoms return? Yes. I’ve certainly learned that nothing with my health is a guarantee. But maybe my bladder symptoms really were caused by the lack of blood flow to my bladder. Having that blood flow restored and allowing time for my bladder to heal itself may be what worked for me in the end.
Long ago I had to learn to enjoy the good days without stressing about the bad days that were sure to come. (It’s an important lesson when you have a chronic illness.) Right now, I’m going to enjoy the good days. I’m going to praise God for taking care of me as He always has. I’m going to bask in His goodness and rejoice over finding relief I never expected to come.
For years, I’ve waited for this. I keep thinking it is too good to be true, but recently seeing my urologist and his reaction helped me understand even more that this is real — at least for now. God was with me in the wait and surprised me beyond what I could have hoped for so many years later. My heart is full of gratitude today!
A series of easy, quick and healthy summer dinner ideas you’ll love
Summertime dinners often need to be quick and easy. Some days are busy with activities and others are just busy spending time as a family or even being a bit lazy! I love summer dinner ideas that are pretty healthy while also being quick and easy. We have central air conditioning, but I still like some dinner ideas for summer that don’t require use of the oven or stove.
So I’m running a series for a few simpler summer dinner ideas over the next few Tasty Tuesdays. I’d love to hear from you and any suggestions you have for what you make for your family during the hot days of summer!
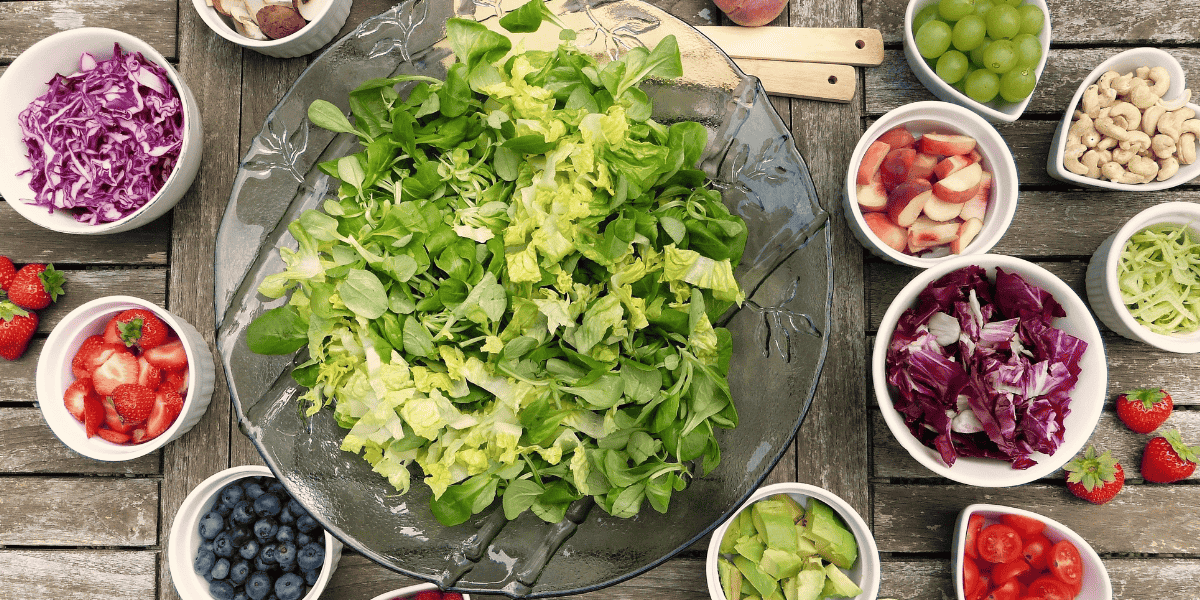
With that in mind, I’m excited to share the first simple summer dinner idea my family enjoys: a DIY salad bar. One of the things I love most is that I can prepare ingredients ahead of time and then just pull them out at dinner for easy, quick serving.
DIY Salad Bar
For a DIY salad bar, put all the salad fixings out on your kitchen counter and let each family member build their own tasty salad. It’s pretty straightforward, and you can totally customize it with what you family likes. I like to get some special salad treats for us that we don’t always have like sunflower seed kernels or a salad topper mix. My husband also loves the crunch of chow mein noodles on his salad, so I include those as well. (And leftover chow mein noodles can be turned into yummy butterscotch haystacks!)
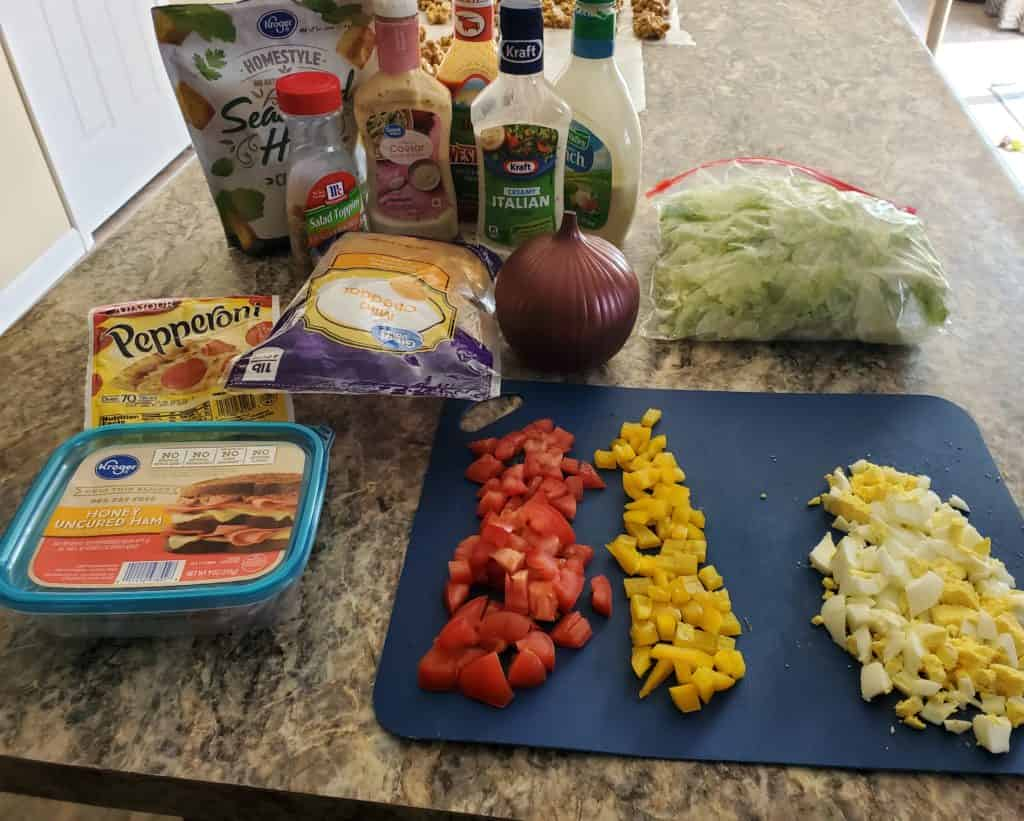
Our salad bar toppings often include the following:
Lettuce
Shredded cheese
Boiled egg
Diced onion
Diced bell pepper
Diced tomatoes
Shredded or chopped carrots
Diced cucumbers
Turkey or ham
Pepperoni
Croutons
Bacon bits
Chow mein noodles
Sunflower kernels
Various salad dressings
My salad bar toppings are often diced because that’s how I prefer them, but obviously you can do them however you like! As you can see from the photo below, I put out the ingredients and let each person fend for themselves. We are not at all fancy with this. In fact, sometimes if I’ve just cleaned the lettuce, it’s laid out on paper towels across the counter to air dry a bit!
You can make your life easier and buy pre-cleaned lettuce or salad mix if you want. I usually get a head of iceberg lettuce, which is what my family likes most, and then plan other meals around the same time that use lettuce like tacos or BLT pizza.
Salad bar sides
I do usually serve up something on the side when we do a salad bar at home. Check out these ideas to go along with your salad bar:
Crescent rolls
Garlic bread
Texas toast
Crackers (oyster, saltine, butter, etc.)
Fresh fruit
Homemade bread (This happens less often around my house!)
Basically, my favorite salad bar side is something I can use to scoop out the residual salad dressing that’s left in my bowl when I’m finished eating! I love a good salad dressing. My all-time favorite is poppyseed salad dressing. It’s so sweet and yummy!
Serving up salad for picky eaters
I’ve mentioned quite a few times that I have some particular eaters in my family. For example, when I make delicious pecan crusted chicken for dinner, my particular eaters would rather have frozen pizza or peanut butter sandwiches. Neither of them like chicken.
So for DIY salad bar nights, I get a little creative. My husband is a fan of salads and salad bars, so that only leaves my son as a picky eater. His biggest complaint is lettuce. He just doesn’t like lettuce. Instead I make him a deconstructed salad with some of his favorites like pepperoni, cheese and croutons. Usually I stick some baby carrots on his plate as well, but we were out of them for the most recent DIY salad bar night we had. And then he’s happy with whatever is on the side. This time it was crescent rolls.
Simple sweets
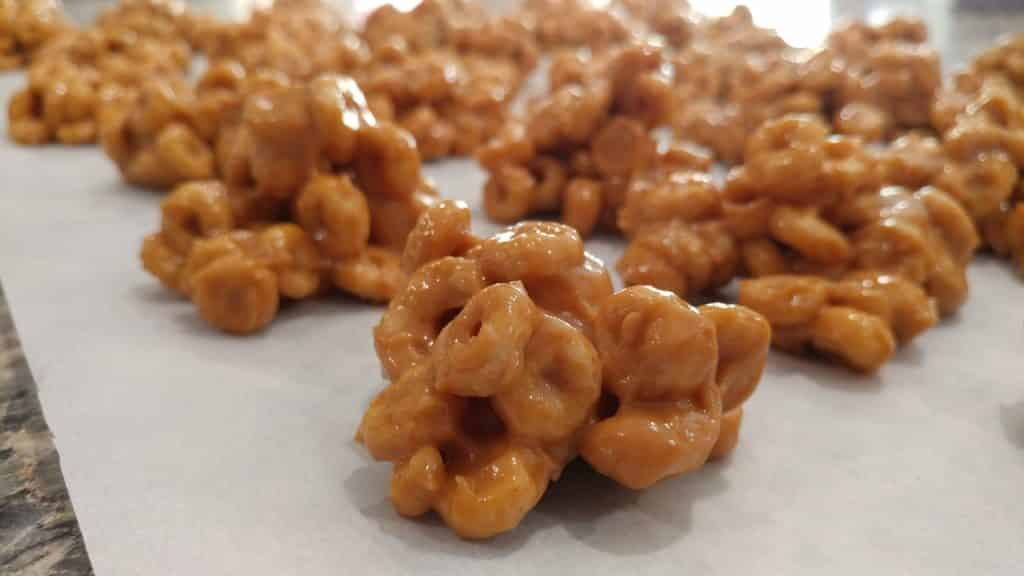
And then if you’re going with simple summer dinner ideas, you need a simple sweet as well. For DIY salad bar nights, it seems wrong to eat something heavy or rich. Plus hot weather calls for lighter foods, I think. So if I make a sweet for us, it’s usually either oat and honey granola or peanut butter honey nut cereal clusters. I’m a little partial to peanut butter honey nut cereal clusters for simple summer dinners because they only use the microwave and not the oven.
What are your family’s favorite simple summer dinner ideas?
Plus a free printable Father’s Day coloring card page!
Finding the right Father’s Day gift is often challenging for me. One of the things I’ve learned through the years is that personalized Father’s Day gifts are often the most memorable. My husband likes gifts that show we know him well and want to give him something related to his interests. On Father’s Day, that focuses on our kids!
So rather than try and come up with all sorts of generic Father’s Day gifts ideas this year, I’ve put together a list of last-minute personalized Father’s Day gifts that he’s sure to love. And I’m including a free printable Father’s Day coloring card page to get you underway as well. It works as a gift by itself or paired with another gift.
If you’re looking for a personalized Father’s Day gift that doesn’t have to be ordered in advance, doesn’t cost much and you can have immediately, then digital downloads (aka printables) are your best choice! Listen, I create printables that I both give away for free and sell on the Families with Grace Etsy store, so I am totally partial to them. But they make adorable gifts that you can easily personalize for the dad in your life. And they work incredibly well in a time crunch! I’ve pulled together a list of my best personalized Father’s Day gift printables that are inexpensive and memorable.
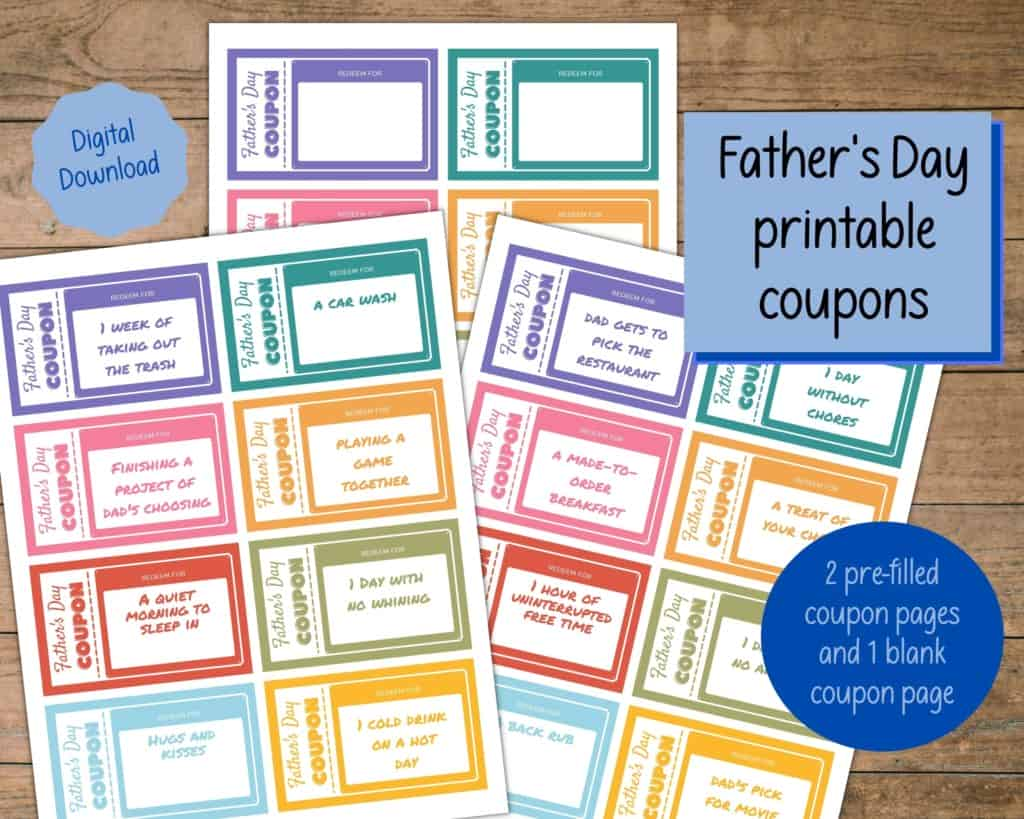
Father’s Day printable coupons
These Father’s Day printable coupons are adorable. Two pages come pre-filled with ideas, but they also come with a third page that is blank so you can write in whatever works best for the dad in your life! The prefilled coupons include things like: a quite morning to sleep in, a car wash, one day without chores, playing a game together and a made-to-order breakfast.
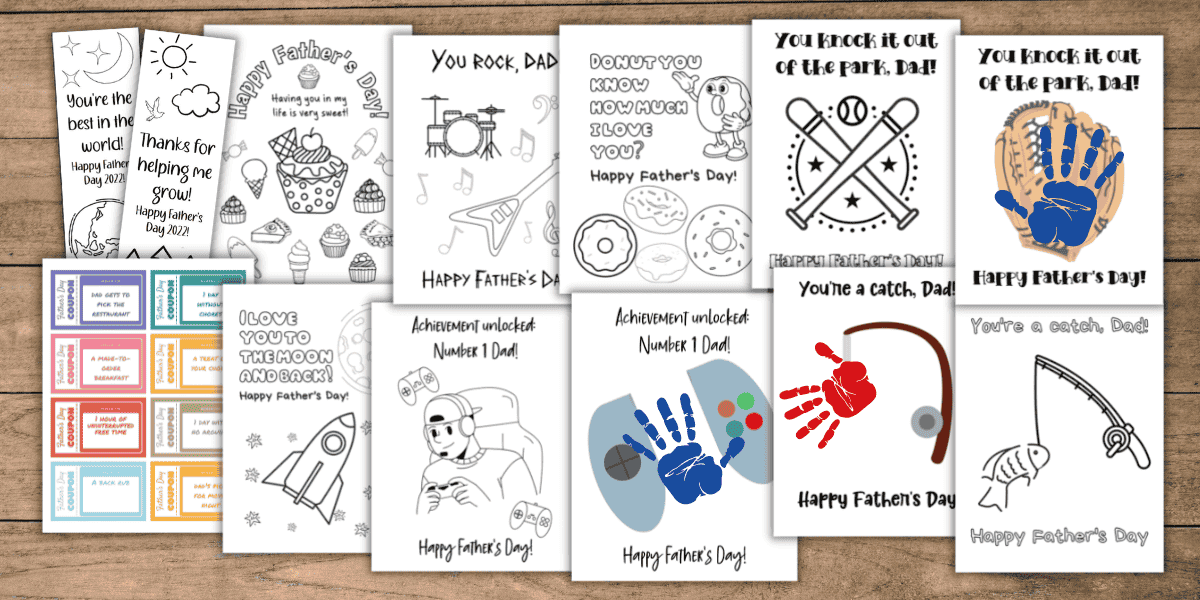
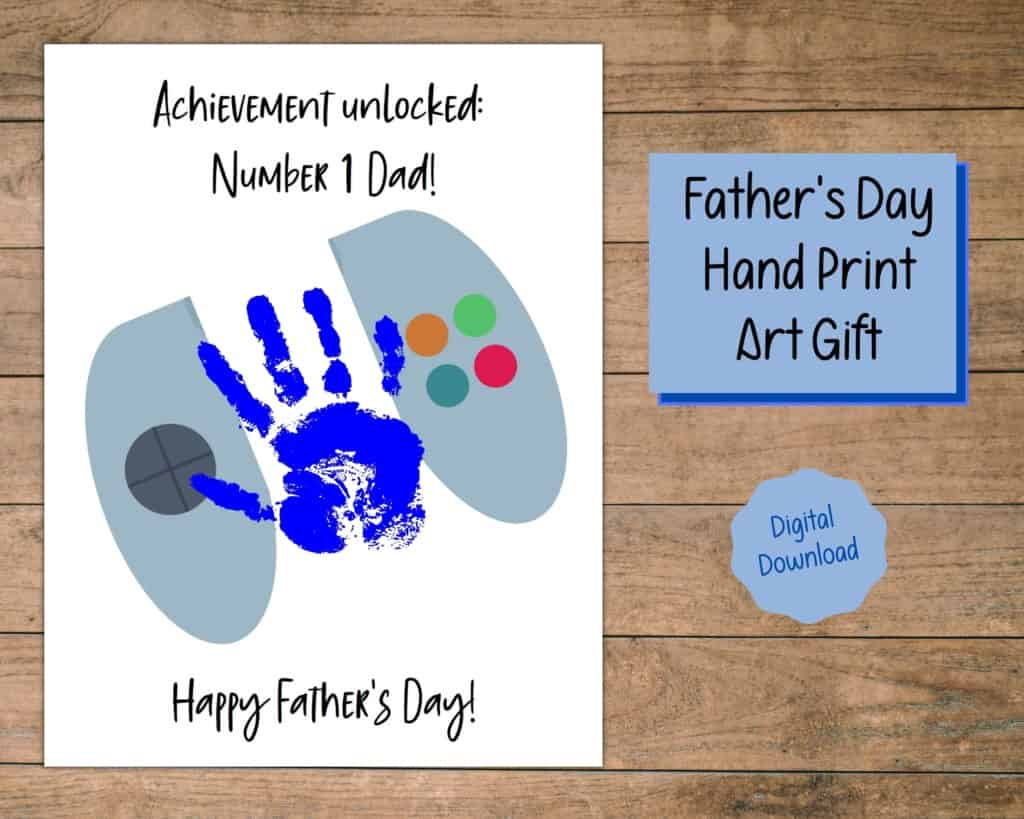
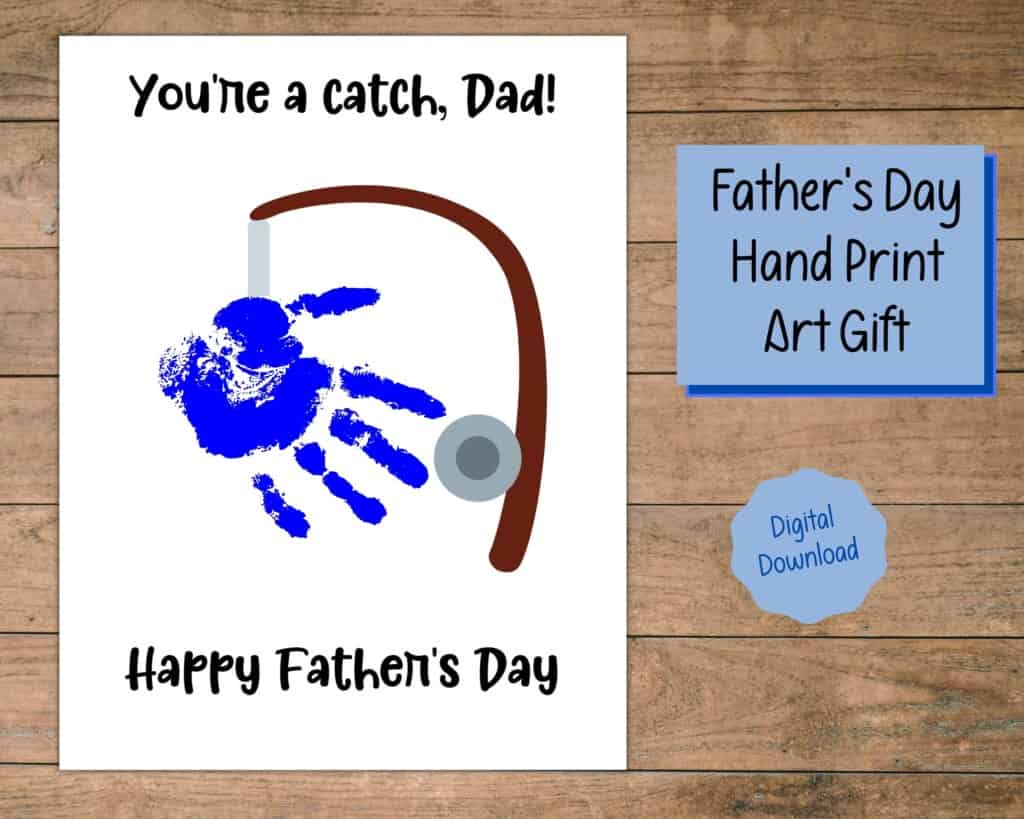
Father’s Day handprint art
Another great choice is handprint art. Not only is it adorable, but it’s fun for dads to hang on to and look back to how small their kiddos’ hands were. All you have to do is print them on cardstock, add your child’s handprint and give it to dad! You can put it in a frame for safe keeping.
Of course the handprints on this artwork is personalized, but you can also find Father’s Day handprint art that is personalized to your guy’s hobbies and interests. There’s handprint art pages for those who love baseball, fishing, gaming, superheroes, music and more.
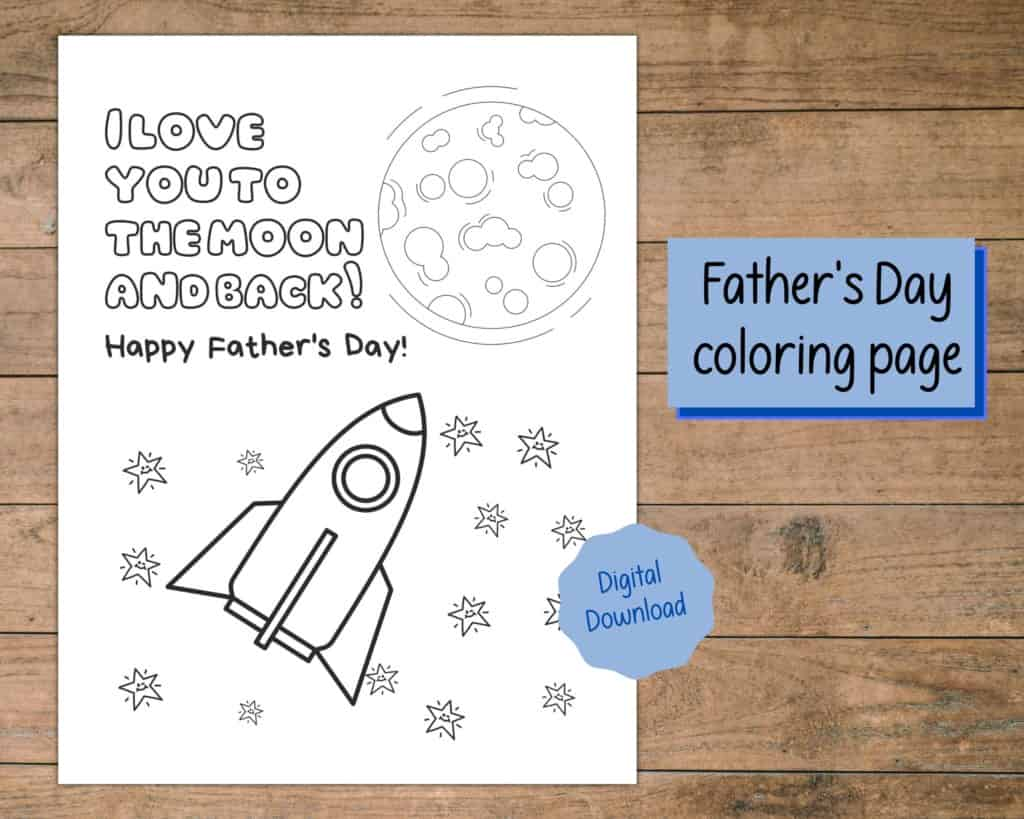
Father’s Day coloring pages
Even better is to pair the handprint art with a matching coloring page to give dad two personalized Father’s Day gifts he’ll love without breaking the bank. You can give just the coloring page as a card as well — whatever works best for your family! Just like with the handprint art, you can also get a variety of hobbies to make the coloring page card even more personalized. There’s handprint art pages for those who love baseball, fishing, gaming, superheroes, music and more.
But if you’re not looking for a specific hobby, there are some more general coloring pages that work for many father figures and dads as well. They become a personalized Father’s Day gift when your kiddos color them!
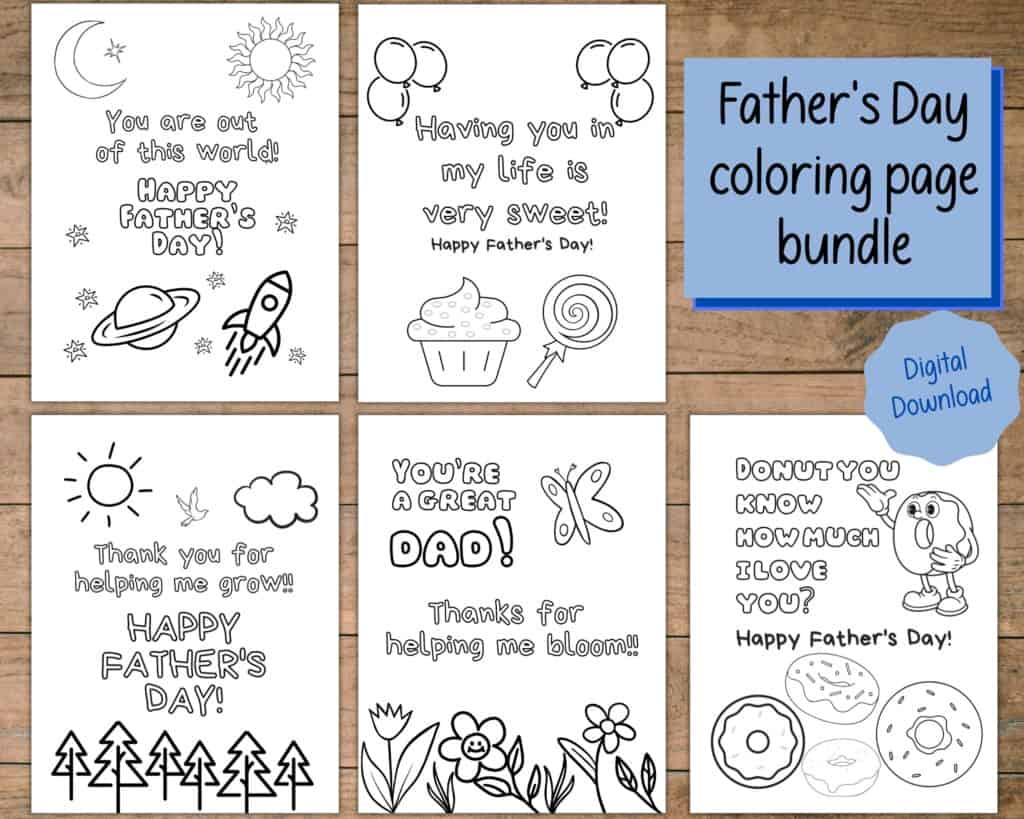
And then there are also bundles of Father’s Day coloring pages that make great cards and can be a good activity for a Sunday School class or your own kiddos.
Another fun and easy printable that your kiddos can make a personalized Father’s Day gift is printable bookmarks they color in and make just right for dad.
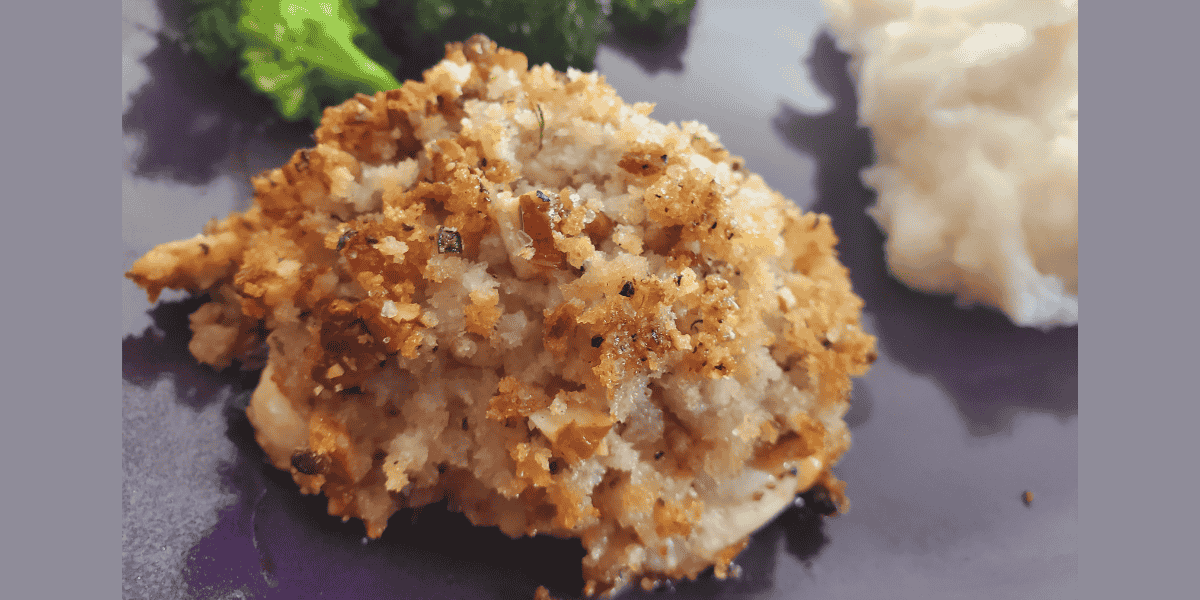
A surprisingly easy weeknight chicken recipe your family will love!
When it comes to meat, chicken is my all-time favorite. I really like bacon, but chicken is what I can eat pretty much any time. I think that’s because it’s so versatile. During our recent home meal kit delivery service trial, I found quite a few chicken dishes I fell in love with. One of them was a pecan-crusted chicken recipe. But, the recipe and ingredients were harder to come by not using the meal kit, so I played around with it and figured out my own version that’s just as tasty!
Besides the chicken, you just need a few ingredients to pull of this super easy and delicious weeknight chicken dinner. This is the kind of dinner that makes me feel like I’m eating out.
When I make this recipe, I use two chicken breasts to serve just my daughter and me. My husband and son don’t like chicken, so they have something else. However, I’ve written this recipe to make four chicken breasts or servings to feed a family of four. You can adjust it up or down as needed for your own family.
Prepping for the chicken
Get your oven preheating at 450-degrees with the rack in the center. Then, since it’s pecan-crusted chicken, you may need to prep pecans. If you’ve bought pecan pieces, you don’t have to do anything. I got pecan halves most recently (I store them in the freezer to keep them fresh), so I had to break them up. You can use a knife, your fingers or even a food processor to break them into smaller pieces. You need 2/3-cup of roughly chopped pecans for four chicken breasts.
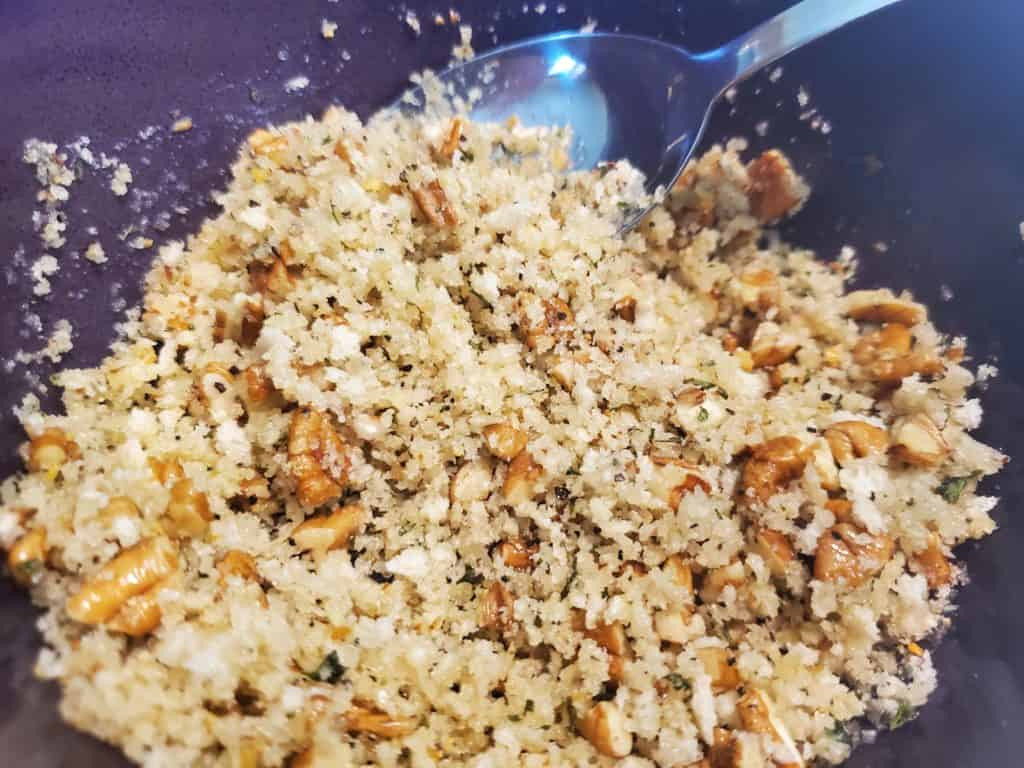
Once your pecans are ready, melt 2 tablespoons of butter in your microwave and then stir in the pecans, 1/2 cup Panko (I used seasoned Panko, but either works), salt and pepper. If you want a strong flavor, you can also stir in 1/4 to 1/2 teaspoon Montreal steak seasoning. While the mixture should be moistened, it should remain with a crumbly texture, like so:
Putting the chicken together
Once your pecan mixture is ready, it’s time to move on to the chicken. If your chicken is frozen, make sure it’s thawed. For even cooking times, I usually pound my chicken inside a paper towel or plastic wrap with my hand or rolling pin, because I have yet to get a meat mallet! Either way, I try to get the breasts to a similar thickness.
Pat your chicken dry with paper towels and place it on a baking sheet liberally coated with non-stick cooking spray or covered with parchment paper or non-stick aluminum foil. I went the non-stick aluminum foil route for easy clean-up of this pecan-crusted chicken recipe.
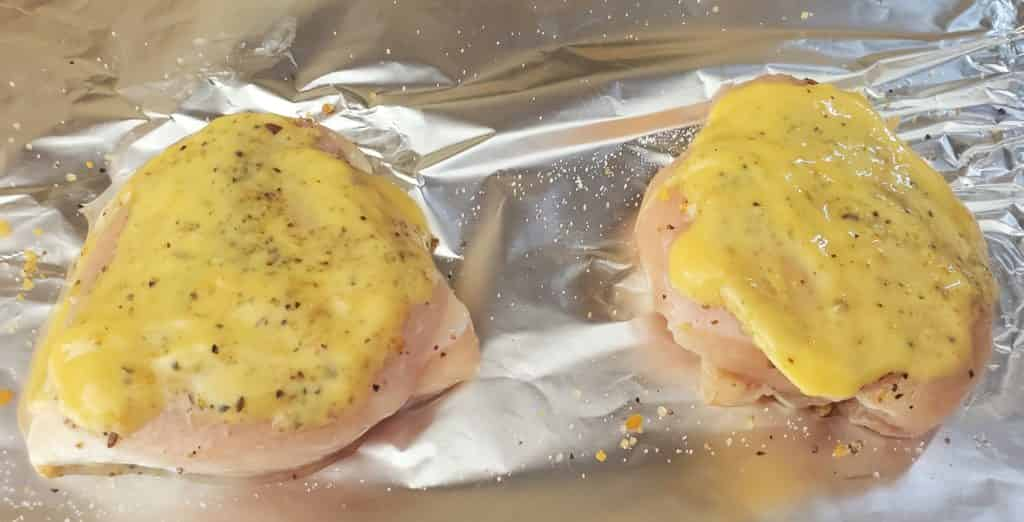
Season your chicken breasts with either 1 teaspoon total of Montreal steak seasoning or just use salt and pepper. When I made it the first time on my own, I used the Montreal steak seasoning because I had it for another recipe and figured I’d give it a try. It is a strong flavor, though, so spreading 1 teaspoon among four chicken breasts is more than enough.
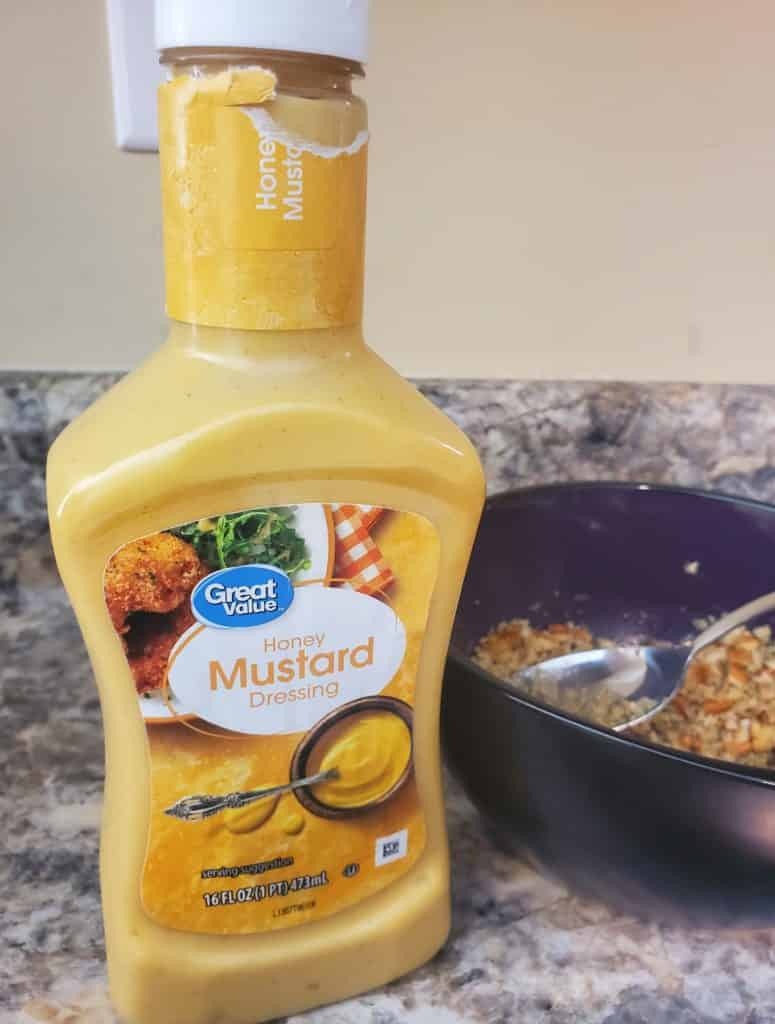
Next is one of my favorite flavors to go with chicken: honey mustard! I use premade honey mustard salad dressing, because we eat it around my house anyway.
If you don’t have honey mustard, you can make your own with 4 tablespoons mayonnaise, 4 teaspoons honey and 4 teaspoons Dijon or yellow mustard. Either way, you want to top each chicken breast with honey mustard. I used about 1 teaspoon of honey mustard per chicken breast, swirled it on top and then used a spoon to spread it.
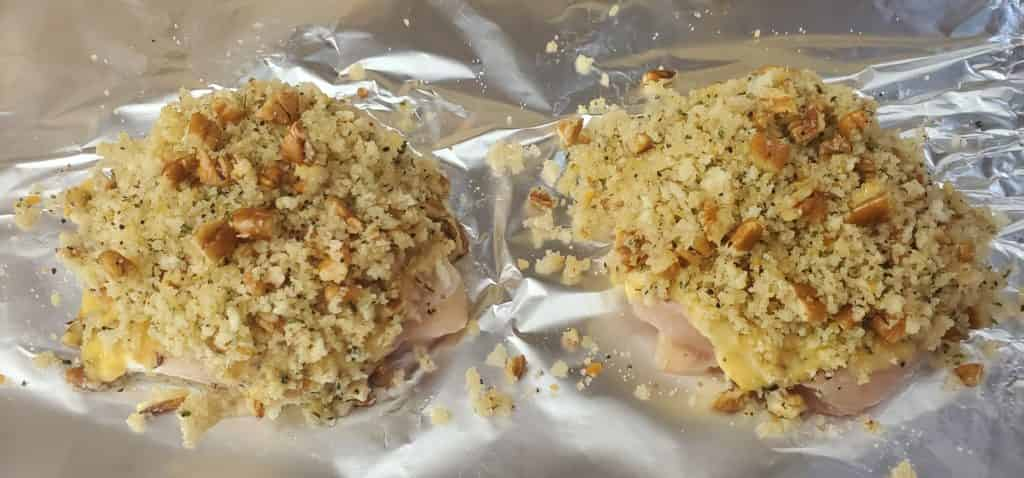
These photos are from when I over-seasoned the chicken with Montreal steak seasoning. Your chicken should not be this covered with seasoning!
Finally, you add the pecan crust to the chicken. Use a spoon to pile the pecan mixture on the top of each chicken breast and cover it well. Press down a bit to make sure it sticks. You only need to put the pecans on the top.
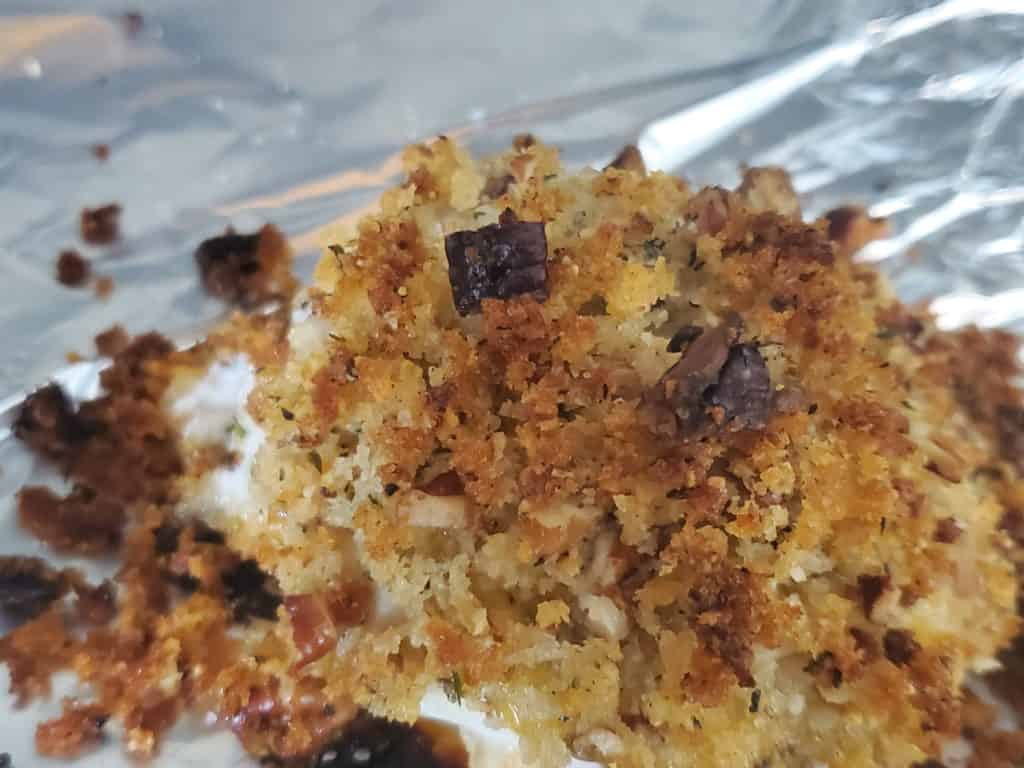
That’s it. Stick your pecan-crusted chicken into the preheated 450-degree oven for 15 to 20 minutes until the crust is brown and the inside middle of the chicken is at least 165-degrees.
Make it a dinner
While the pecan-crusted chicken bakes, I usually prep our sides to go along with it. One of our favorite pairings is oven-roasted broccoli and mashed potatoes. I have learned that scratch mashed potatoes aren’t nearly as difficult to make as I once thought, but to make weeknights easier, I usually make boxed or pouch mashed potatoes. It makes for a delicious plate of food!
1teaspoonMontreal steak seasoning or salt and pepper
4teaspoonshoney mustard salad dressingor mix 4 tablespoons mayonnaise, 4 teaspoons honey and 4 teaspoons Dijon or yellow mustard together
Instructions
Preheat your oven to 450-degrees (F) with the rack placed in the center.
If you are using pecan pieces, skip to the next step. Otherwise, use a knife, your fingers or a food processor to break your pecans into pieces. They don't have to be small, but they do need to be at least roughly chopped.
Melt the 2 tablespoons of butter in the microwave.
Stir the pecans, Panko and some salt and pepper into the butter. If you want an extra kick, sprinkle in some of the Montreal steak seasoning as well. It should form a moist, yet crumbly mixture. Set it aside.
Use your hand or a meat mallet to pound your chicken to the approximately same thickness. (A rolling pin also works. I suggest putting the chicken in paper towels or plastic wrap to do this.)
Pat the chicken dry with paper towels then place each chicken breast on a baking sheet liberally sprayed with non-stick cooking spray or lined with either parchment paper or non-stick aluminum foil. (I go the non-stick aluminum foil route for easy clean-up.)
Season the top of the chicken with the Montreal steak seasoning by spreading the 1 teaspoon among the four chicken breasts. Or season the chicken with salt and pepper.
Put about 1 teaspoon of honey mustard on top of each chicken breast; use a spoon to spread it over the top of the chicken.
Mound the pecan mixture on top of each chicken breast and press down gently so the mixture sticks. You only need to coat the top side.
Place the chicken in the preheated oven and bake for 15 to 20 minutes until the crust is browned and the inside center of the chicken is at least 165-degrees (F).