Families With Grace

Helping Christian moms create homes filled with grace, love & faith

Meal planning made easy

7 Ways to make meal planning easier, faster and more practical for your family

Every single day my family needs to eat. And they insist on three meals a day plus sometimes snacks as well. It can be a lot. The biggest challenge for me is figuring out what to make. By the end of the day, I’m tired and usually my brain is on overload. That’s where meal planning comes to the rescue.

Through the years, I’ve tried different strategies for meal planning. Unfortunately some of them made me feel like a failure. Others just didn’t work. And still others took too much time that I didn’t have. For the last few years, my simple meal planning strategy has worked well for my family.

During these last few months of being at home and only picking up groceries once a week, I’ve had to be even more intentional with meal planning. It keeps my family fed and me sane!

Decide how often you’re going to the grocery store

The first step for meal planning is deciding how often you’re going to the grocery store. Whether you go once a week, three times a week or once every other week is going to make a difference in what you buy.

In general, I go once a week. Sometimes I end up with a trip in between there, but my goal is once a week. That’s been even more true during this year of social isolation when I’m only doing grocery pick-up. I’ve found that knowing I can’t just pop into the grocery store and pick up a forgotten ingredient or a fresh ingredient makes a difference in my planning.

While I know not everyone is staying out of the grocery store in person like I am, keeping trips to a minimum and not having to go back over and over for forgotten ingredients just makes life easier!

Keep a running grocery list

Being able to pick up everything you need during your grocery shopping trip is also key for effective meal planning. While my grocery list includes items for specific meals I have planned, it also includes everyday items that we go through like milk, bread, yogurt, eggs, cheese, fresh fruit, etc.

My favorite way to keep a grocery list is through using an app called Our Groceries. It is connected to our Alexa, so as I’m working in the kitchen, I can tell Alexa to add items to my grocery list. The list is also shared on both my phone and my husband’s. Pre-pandemic there were times one of us added items to the grocery list while the other was in the store shopping!

My mom uses a different strategy for her grocery list by adding items to her grocery cart for pick-up. That also works as does pen and paper, which is what I did before we started using the Our Groceries app.

Think practically about what you will make

When I first started meal planning, I’d come up with all sorts of ideas. I listed recipes new to us. I planned on cooking every night of the week even though I wasn’t doing that before I began meal planning. I had high hopes, I guess.

The reality is I don’t cook every night. Some nights I need something easy to make like frozen pizza, canned soup or grilled cheese. It may be a busy day or a crummy health day. So I learned to plan a few meals to cook each week and also to plan a few meals that don’t take as much effort. You just have to be practical about what your family actually does.

Make a list

Write down what you are planning to make over the next week (or two or however long you go in between grocery store trips). Add the ingredients to your running grocery list so you are prepared.

Be sure to go through the ingredients you have already for inspiration of what to make and use. Try also to plan items using similar fresh ingredients in the same week. For example, I often do tacos for dinner one night and salads within a day or two since both use fresh lettuce. Or I utilize the ground beef with chili one night and sloppy joes within a day or two.

Also add meal ideas that you always have on hand to your list. For my family this includes things like frozen pizza, chicken nuggets, mac and cheese, frozen or homemade waffles and homemade pancakes.

Decide what list format works for you

Perhaps my biggest meal planning secret is that I don’t plan meals for specific days. I tried doing that and it never worked well. So now I make a list and have found three ways that work well.

This is how simple my list looks.

Prior to the pandemic, I made a list that was divided in two with meals that I had ingredients for and those that required ingredients to be bought fresh. For example, if I planned tacos, I might need to buy lettuce. Or if I had my daughter’s favorite slow cooker potato soup on the list, I might need to buy a loaf of fresh french bread.

Now that I can’t stop by the store for just a few fresh ingredients, I make one big list of meals I have ingredients for. In my head, I know which of those meals have ingredients that need to be used sooner than later, but I don’t break up the list any more.

You can also add a section for meal ideas that you always have on hand. Again, nowadays, I just put it all on one big list. So part of my meal planning list doesn’t usually change. But seeing those ideas of other things we have helps me when I’m deciding what to make for dinner.

Add details if you want

You can get more detailed with your list if that helps you. You can add side dish items along beside your main dish or even in a separate section. I don’t usually do that simply because the main dish is the hardest one to pick! Once I know what it is, the sides fall into place.

You can also include recipe notes like a URL to a recipe or where you saw it. I have even printed out new recipes and kept with my list in the past. Now I have a drawer in my kitchen where I put the recipes instead.

Put the list where you’ll use it

I like having my list visible where I need it most: my kitchen. So I post my list on my fridge with a magnet. I usually have mine typed up (which is just easier for me and I can keep the recurring meals on there). I trim the paper down to the size of the list so it’s not a full sheet of paper and stick it on the fridge. As we have dinners, I mark off what I no longer have ingredients for.

The list works well because my family can also see it and put in their thoughts for dinner sometimes.

If it works better for you, keep the list on your phone. Or put it in a drawer. You could stick it in your pantry. I’ve even kept my list on Google Drive and shared it with my husband before. Find the spot that works best for you and your family and go with it!

How to look back at a hard year

Learning to move on from the challenges

This year has brought challenges that most of us didn’t expect when we rang in the new year on January 1. My blog post published on January 2 talked about how I wanted to make sure I kept focused on the things that really matter in life like making memories with my family. I had no idea those memories would include months and months of being at home and helping my kids virtual school full-time.

Of course 2020 has been collectively a difficult and challenging year. Its challenges aren’t going to go away any time soon either. But, like all of us, I’ve had other difficult years. I’ve lived through years I thought really, truly might break me.

I recently went back and read something I wrote at the end of 2013. Even now seven years later, my husband and I still say the only good thing that came out of that year was the birth of our son — and that happened at the end of January.

The rest of the year included all sorts of difficult struggles. It was a year during which we survived. We certainly didn’t thrive. We dragged ourselves to Dec. 31, 2013 with hopes 2014 would be better.

Some years are like that. This year has been like that for many folks. We’ve survived the year, but we haven’t done a lot of thriving. I don’t think anyone is going to hate seeing 2020 finally come to an end.

Finding the good in the midst of bad

However, 2020 wasn’t only bad. Whenever I have a bad year, that’s what I’ve learned I must remember. Each year has both good and bad parts. For the years with more bad than good, we struggle to remember the good stuff sometimes.

Back at the end of 2013, I remember sitting down to write about it and deleting half of what I first typed. I didn’t want to focus on the negative. I wasn’t sure the positive would take many words. But I surprised myself with how many good memories I had from the year.

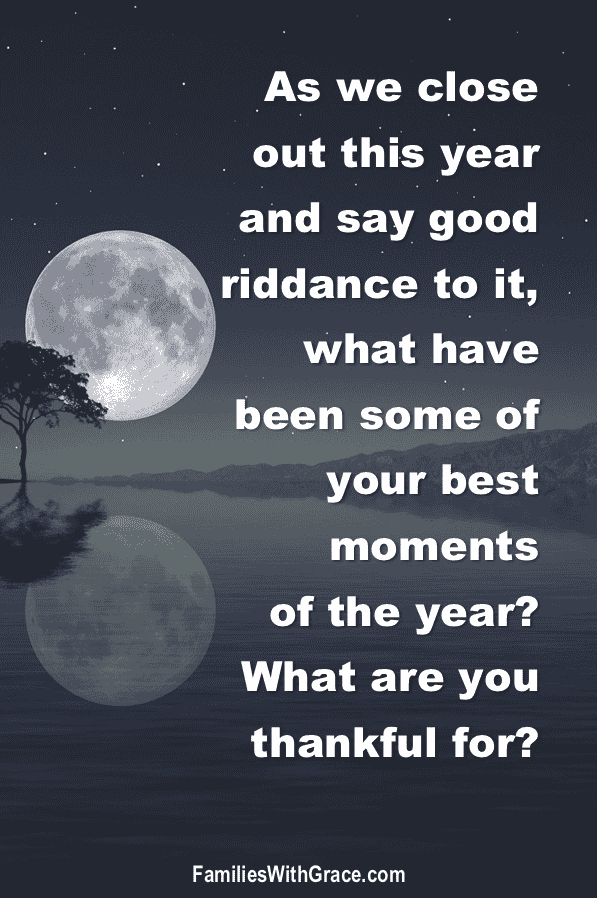
That’s the challenge for 2020. I know you have good memories from this year. I do. As we close out this year and say good riddance to it, what have been some of your best moments of the year? What are you thankful for?

I can’t speak collectively for all of us. Some moments this year were good for some and not for others. But I can speak for myself.

Good moments of 2020

My children have an early spring break, so we were able to have a spring break trip this year before things went completely sideways. We spent a couple of days at an indoor water park and then they went on a short trip with my parents. Those water park memories were good, but they are even better when viewed with the perspective of the rest of the year!

Being at home more, we did more fun things like playing games together.

We got creative in celebrating Easter this year and ate tacos for Easter dinner.

At the end of June, we spent a week at the lake with my parents and a few days with my brother and his family. My son caught his first fish. I delighted in watching my kids go tubing for their first time. My daughter and I pretended to be otters floating in the lake, completely relaxed. It was a restorative time and a bit of a break from reality. (We still only got food as take-out and made bathroom trips incredibly fast and masked up on the way there and back.)

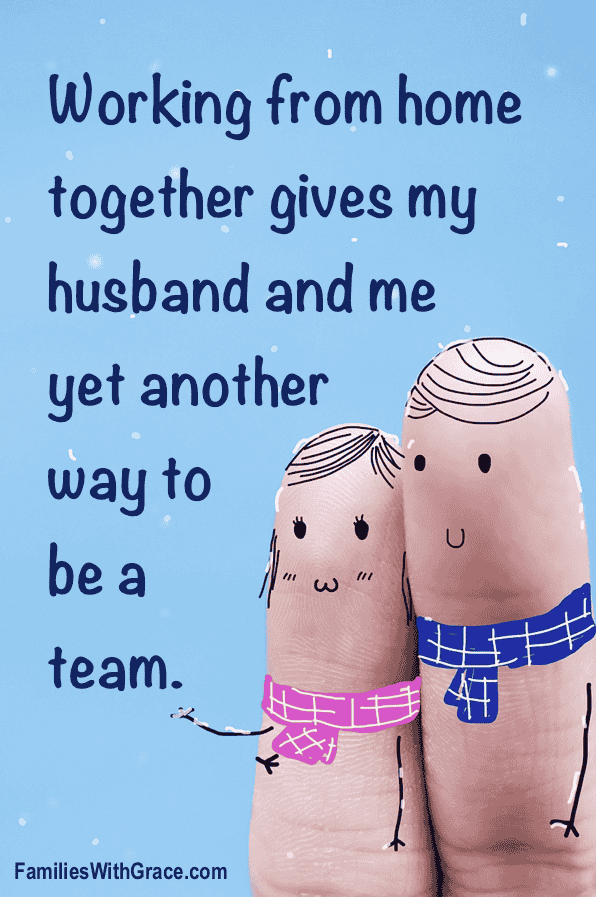
My husband and I got to be a bigger part of our kids’ first day of school than usual, because we set up for school at home from the start of this school year.

We watched lots of movies and shows together at home.

Our family has laughed and come up with more inside jokes than usual.

We’ve had some great conversations as a family around the table and anywhere we are.

The puppy got in on the action with even more snuggles than usual, which has made all of us happy.

We’ve read through numerous books as a family and not only had more time to read them but also to talk about them.

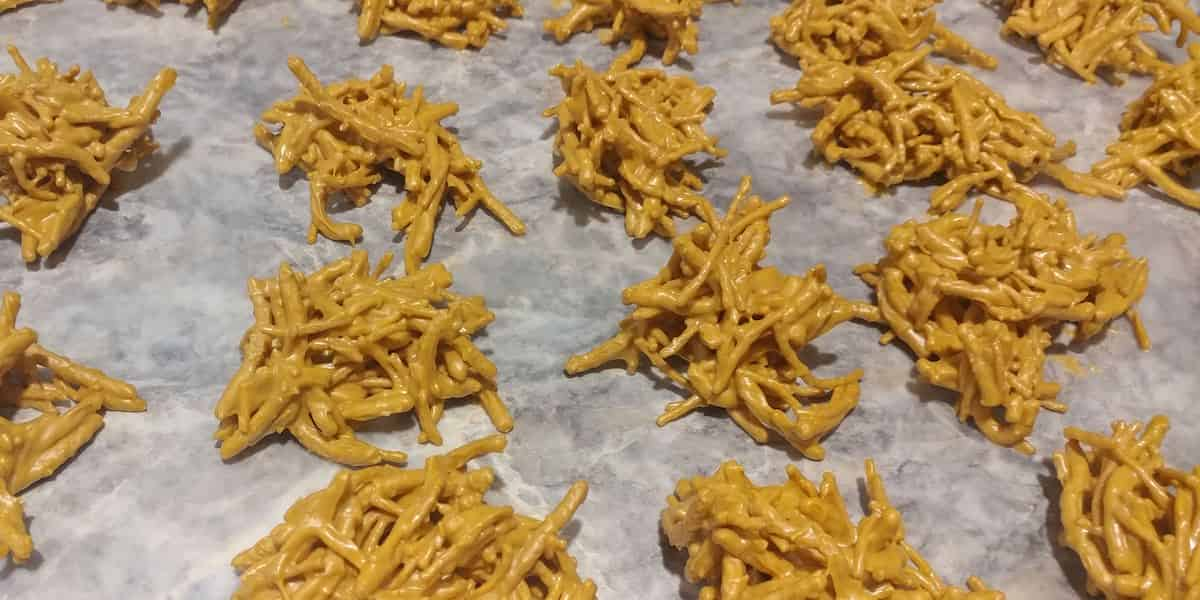
We got creative for Halloween and hosted a party and Halloween hunt for our parents in lieu of trick-or-treating. We had such fun coming up with snacks and making decorations and games.

I played hostess for Thanksgiving this year with my parents and in-laws. We all contributed food and enjoyed each other’s company. Being together was a blessing!

The list could continue on of the good memories from this year!

Thankfulness in 2020

Along with good memories, the year has many things for which to be thankful. The first thing that pops into my head is that I’m thankful to end this year with a healthy family. My loved ones whom I have most been concerned for have had some other health issues not related to the pandemic, but we are all healthy overall.

I am also thankful for the strength God has given me to get through the year. We started out the pandemic with my husband completely incapacitated after having rotator cuff repair surgery. The first few weeks of quarantine and virtual school were quite intense.

This year I’ve become even more thankful for our new home and the space we have now to spread out for things like virtual schooling.

I’m thankful for our puppy as well. We celebrated his first birthday in May. He brought us lots of love, laughter and cuddles throughout everything this year has held.

I am very grateful for pick-up at stores. While I appreciated grocery pick-up before, I REALLY appreciate it now. I haven’t been inside a store to shop in months. I completed all my Christmas shopping online and had items delivered to me or picked them up without getting out of my car.

Above all, I am thankful for God. He has been faithful, as always, through every moment of this year. God wasn’t surprised or caught off-guard by anything in 2020. He remains faithful and good through every single moment.

Acknowledge the challenge

Looking back at a difficult year to find the positive doesn’t mean that we aren’t acknowledging the negative. This year has also held heart-wrenching moments. We do have to acknowledge those.

As we are doing so, though, we must also take note of what we learned and how we grew through those difficulties. I’ve learned some of the most important lessons of my life through hard times and difficulties. I’m thankful for those lessons, because they serve me well the next time a hard time comes around.

This year may also require mourning for what we lost. I am not even speaking of the loss of life. That is a whole other level of mourning and grief that doesn’t even compare to anything else. I know that. I pray for those who have lost loved ones this year whether because of COVID or because of other reasons.

What I mean by mourning in this instance is acknowledging what we missed out on this year. I think of family events that were canceled. Graduations that were different. Proms that weren’t held. I think of fun at recess that’s been missed. And school programs that were canceled. There were church services held online instead of in person.

So many things were challenging about this year. We had to change our way of life — and that doesn’t come without growing pains.

What I’ve learned, though, is that while we must acknowledge the hard times, we don’t want to get stuck there. Getting stuck in the hard stuff for too long is the problem. And that’s when we go back around to remember the good parts of the year. That’s when we start going through what we’re grateful for.

So let’s process what we went through in 2020 and look forward to what another year will bring.

2-Ingredient, no-bake butterscotch haystacks recipe

This butterscotch haystacks recipe is as easy as it gets!

I’m a fan of simple recipes, and this butterscotch haystacks recipe is one of the most simple ones I make! With only two ingredients and no oven or stove required, they come together quickly and easily. They make a great addition to holiday baking or any time of year.

Of all the sweet treats I make, this is one of my husband’s very favorites. He isn’t a big chocolate fan, but he loves butterscotch. They’re a crunchy butterscotch treat. You don’t have to tell anyone how easy they are to make unless you want to!

You may notice in the photo above that I have both chow mein noodles and Asian style crunchy noodles. Either one works for the butterscotch haystacks recipe. You can mix them together, which is what I did this time. The chow mein noodles are a bit bigger.

Pour the butterscotch chips into a microwaveable bowl and microwave in 30-second intervals stirring each time until melted. Then pour in your chow mein and/or crunchy noodles and stir gently until they are all covered in butterscotch.

And that’s it. You can add in some peanuts if you want, but I always keep this butterscotch haystack recipe simple with just these two ingredients. I stir in the noodles in intervals to make sure they are all covered with a good amount of butterscotch.

Dole them out with in heaping tablespoons onto parchment or wax paper and let them cool. Store them in an airtight container to keep them fresh and yummy for days — if they’ll last that long without getting eaten!

Butterscotch haystacks recipe

Ingredients
  

  • 1 11- ounce bag of butterscotch chips
  • 3 to 3-1/2 cups of chow mein noodles

Instructions
 

  • Pour the butterscotch chips into a microwaveable bowl.
  • Heat the chips in 30-second increments in the microwave, stirring after each 30 seconds.
  • Once the chips are melted and smooth, pour the chow mein noodles into the melted butterscotch about 1 cup at a time. Gently stir to cover the noodles in butterscotch.
  • Place parchment paper or wax paper on the counter. Dole out the mixture one heaping tablespoon at a time to form the haystacks.
  • Let them cool and harden. Enjoy!

Looking for more sweet recipes? Check out these:

Easy peanut butter cookies recipe

The BEST toffee cookies recipe

4-ingredient whipped pudding pie

The one hack you need to make box mix brownies so fudgy delicious

The perfect yeast roll recipe

Prepare for carb heaven with these delectable yeast rolls!

Affiliate links are used in this post, if you make a qualifying purchase via my link, I receive a small percentage of the sale at no additional cost to you. I only recommend products and services I use and love. It helps support my blog, so thank you for your support! Read my full disclosure here.

There is nothing as good as a soft, scrumptious, warm yeast roll! I started trying to find a good yeast roll recipe back in 2013 after I’d gotten a stand mixer for Christmas 2012. I found a few OK recipes and a couple of good ones.

Then I asked my friend, Kayla, who is a professional baker, what recipe she uses. I tried it and her yeast roll recipe has become my go-to. In fact, I often double this yeast roll recipe for family gatherings and they never go to waste!

Proof the yeast

Like most yeast recipes, you start with proofing the yeast. Combine the yeast, sugar and water. I used quick rise yeast, which says the best temperature is between 110- and 115-degrees. I really do get out my thermometer and check the temperature of the water before adding it into the yeast.

Once the yeast, sugar and water are in your mixing bowl, let it set until it is all bubbly and poofy, usually 6-9 minutes. (Mine took 8.) My doubled-recipe looked like this:

Add more ingredients

Once the yeast is proofed, add the egg, milk and butter. I heat my milk a bit it doesn’t go in cold. I also softened my butter and tried to make sure my egg was pretty near room temperature.

Slowly add in the flour and mix on low so it won’t fly up and make a mess. For my doubled yeast roll recipe, I ended up using 6 cups of flour. Depending on where you live and the humidity and all that jazz, you may not need as much.

For a single recipe, use 2-1/2 to 3 cups. For doubled, use 5 to 6. After I got to 5 cups, I added in a 1/4 cup, a 1/2 cup and then another 1/4 cup, mixing well after each time to make sure that I wasn’t getting the dough too stiff or dry. You want it to be nice and soft but not liquid-y. This dough is a little sticky.

Once you have in all the ingredients, it’s time to mix with the dough hook on your mixer. Mix for about 5 minutes on speed 8 (basically medium-high speed). Add in the salt. (If you add the salt sooner, it will kill the yeast.)

Mix for another 2 minutes. Once the dough starts gathering around the hook and pulling away from the bowl, then it is finished. It looks like this:

Let it rise

Now it’s time to rise. Cover your bowl and let it sit somewhere warm. I use Glad Press ‘N Seal to cover mine.

The dough in the bowl before being covered and rising.
The Glad Press ‘N Seal covers the bowl snugly to help it rise.

I let mine sit in my kitchen for about 40 minutes to rise. Here is what it looked like when I removed the cover:

Knead, form and rise again

Next is time for some kneading. I spread out a sheet of wax paper on my kitchen counter and douse with some flour. Place the dough on your prepared surface and sprinkle some flour on top as well. Knead it lightly for a couple of minutes.

After kneading, cut and roll the dough into balls and place them in 9×13 pans sprayed with non-stick cooking spray. You can also use muffin tins by placing two small balls in the bottom of each muffin cup.

Once the rolls are formed, they need to rise again. I usually do my rising in the oven. I turn my oven on to 200-degrees. Once it is preheated, I turn it off and put the rolls in for about 10-15 minutes.

When they’re risen and ready to bake, they’ll look something like this:

I totally love this Rachael Ray 9×13 pan. It’s as awesome and non-stick as all of her other cookware. 

Bake the yeast rolls for 12 to 18 minutes at 400-degrees.

Make your butter

When the yeast rolls are almost finished, I usually prep butter to brush over their tops. For the doubled recipe, I used an entire stick, but for a single batch, a half a stick of butter or margarine would work fine. I like to mix some honey and cinnamon into mine for a touch of sweetness. I use about a tablespoon of honey and a 1/2 teaspoon of cinnamon for a whole stick of butter.

Here is what mine looked like before I melted it on low power in the microwave:

When the rolls are golden, pull them out and brush with the honey and cinnamon butter, if you’d like. Remove them from the pan once they have cooled about 5 minutes. They travel well and reheat well. The delicious results of this yeast roll recipe will make it your go-to for holiday dinners and any other time as well!

The perfect yeast roll recipe

Ingredients
  

  • 2-1/2 to 3 cups flour
  • 1/4 cup sugar
  • 1/4 cup butter or margarine softened (almost melted)
  • 1 teaspoon salt
  • 1 package yeast 2-1/4 teaspoons
  • 1/2 cup warm water heat to temp according to yeast packet or jar
  • 1/2 cup milk warmed
  • 1 egg
  • 1/2 stick butter or margarine optional
  • 1/2 tablespoon honey optional
  • 1/4 teaspoon cinnamon optional

Instructions
 

  • Put the yeast, sugar and warm water in your mixing bowl. (Make sure water is heated to the correct temperature for your yeast. For example, my quick-rise yeast says 110- to 115-degrees is best. Use a thermometer to be sure it's not too hot to kill the yeast but it hot enough to activate it.)
  • Let the yeast mixture set until it is all bubbly and poofy (usually around 6-9 minutes).
  • Add in the egg, warmed milk and softened butter.
  • Slowly add in the flour. If the dough is still wet or very sticky after adding 2-1/2 cups, then add in 1/4-cup at a time to equal 1/2-cup more total until the dough is soft and only a bit sticky but not wet.
  • Mix using a dough hook on your mixer at medium-high speed for about 5 minutes. (I used speed 8 on my stand mixer.)
  • Add in the salt and mix for about 2 minutes more until the dough is gathering around the hook and pulling away from the sides of the bowl.
  • Cover the dough and let it rise in a warm place for 30-40 minutes. (I usually cover mine with Glad Press n Seal.)
  • Once the dough is risen, dump it onto a floured surface and gently knead it for about 2 minutes. Cut it into pieces and roll it into balls. Place the dough balls in a 9x13 pan that has been sprayed with non-stick cooking spray. (If you prefer, you can use a greased muffin tin and place two small dough balls in each muffin cup.)
  • Let the shaped dough rise again. You can leave it somewhere warm or use your oven by turning it to 200-degrees. Once it is preheated, then turn it off and put in the dough. In the oven, it takes 10-15 minutes to rise. On the counter, it takes a bit longer depending on the temperature in your kitchen.
  • Bake the rolls at 400-degrees for 12-18 minutes until light golden on top.
  • Optionally, just before the rolls are due out of the oven, put the 1/2 stick butter or margarine in a bowl. Add the honey and cinnamon on top. Melt in the microwave for 1 minute on 40 percent power. Brush over the top of the rolls when they come out of the oven.

Looking for more bread recipes? Check out these:

Bacon ranch cheese bread

The only pumpkin bread recipe you need

Protein-packed banana bread recipe

Working from home with your spouse

9 Things I’ve learned in the last three years sharing a home office with my husband

When I started working as a freelance journalist back in 2003, I was the only person in my family working from home. Since then, I’ve always worked from home. Eventually my only co-worker was our pooch and I worked from a home office with just him around.

Then in October 2009, we had our first baby. I didn’t do as much work or spend as much time in the office after she was born. My husband got to periodically work from home but not very often.

When I was pregnant with our second baby in 2012, I boxed up many of my work things in the home office because my husband was working from home a bit more often, and I knew I’d be working less once I had two little ones on my hands.

By 2014, when we had a 1-year-old and 4-year-old, my husband’s job changed so that he was working from home most of the time. He spent the first few years working from home nearly solo as I was taking care of our kiddos and only doing a bit of work here and there.

When we built our home in 2017, we knew I’d be able to start working more again because our son was heading to kindergarten that fall. We tweaked the floor plan so what was the formal living room became the home office. And, for the first time, my husband and I were going to share office space.

Getting on the same page

As we began planning the layout for our home office, I realized my husband and I had different ideas. I suggested we get matching desks and have them connected, facing each other.

My husband suggested we take a page from “I Love Lucy” and put masking tape down the center of the room to keep our sides — and our belongings — separate.

So we had to figure out how to best arrange the space to meet both our needs. As a writer and the manager of our family, I deal with a lot of paperwork. As a computer security consultant, my high-tech husband has very little paperwork. He didn’t want my paperwork (mess) spilling over onto his desk. Fair enough.

We decided that we’d each have desks facing the same direction (the door) with mine on one side and his on the other. Basically, we are sitting side-by-side but with a good-sized “aisle” between us.

I’ve got a filing cabinet behind me and one in my desk to help organize my paperwork. We have a shelving unit with our printer and other office supplies in one corner. We each have a large bookshelf as well for our books and other knick-knacks we like.

Working together but separately

One of the issues we’ve had to tackle is working together in the same room but doing completely different jobs. Because we aren’t doing the same work for the same company, we had to figure out how to make that work together.

We had some practice with this before sharing an office. If I had to schedule an article interview while the kids were home, I coordinated with my husband to make sure he could be available for kid duty.

Sharing the office works much the same way. If I’m scheduling an important interview, I check in with my husband’s schedule to avoid us both having important calls at the same time.

Every so often, we do have calls that overlap. In those instances, I leave the office and head to the kitchen table to do my call. I work from a laptop plugged into a monitor and am much more mobile than my husband in that regard.

Being noise considerate

One of the biggest issues in working from home together is dealing with noise. Work can be noisy. I generally work best with music on. My husband often needs to watch videos for work or has them on for background as he’s working. Other times, we need quiet.

But, our times for each of these things don’t always line up well. Sometimes I need my writing music while he is watching a video. Sometimes he needs to watch a video for work while I’m doing a phone interview. Headphones are awesome for helping us stay noise considerate of each other.

We don’t always use our headphones. There are times we don’t need to, but it’s nice to be able to pop in my noise canceling earbuds when I’m working on a big deadline and need to type to the soundtrack of “Riverdance” without distraction.

Being aware of call etiquette

Working from home almost always means that you’re going to have to make and take calls. Some are scheduled and some are random. I know, for example, that my husband has a conference call every weekday morning at 9 a.m.

So if I need to print something (which is a bit noisy), I’ll try and do so before or after his call. If I’m working in the other room (which happens more right now because I’m helping my 2nd grader with his schoolwork), I will try to get things I need from the office beforehand or wait until afterward.

We also pay attention if the other one gets or makes a call. If we have volume going on music or something else, we either pause it or switch to headphones.

The person on the phone or video call also usually uses headphones. We avoid speakerphone because neither of us needs to hear the entire conversation going on with the other person’s work.

If we have calls scheduled outside of usual times, we will often share that with one another just as a heads-up so we both know what to expect during the day.

Deciding on priority

This can be a touchy subject, but there are times we have to decide on whose work has the most priority. Right now when we are also virtual schooling, this is even more the case. For example, I have a weekly deadline on Mondays at noon. My husband knows this, so he will check in with me in between his work tasks to see if I need any help with schooling so I can work uninterrupted.

Speaking of schooling, we had to talk about who would be the point person in virtual schooling the kids. (For the majority of this school year, we have been virtually schooling by choice.) We talked ahead of time about how to make it happen along with our work. We determined I was in the better position to deal with schooling.

In our family, my husband’s job has higher priority because his is the steady, consistent income that also provides our family with health benefits. He also has a more rigid schedule for work than I do. So, we prioritize that higher. Each family and situation is different, but for us that’s what works best.

Finding good times to talk

While we give each other space and peace and quiet to work, we also do want to and enjoy talking with one another. The guy is my best friend! We’ve found one phrase that has helped so very much in working from home together: Is this a good time to talk? (Check out this post on improving communication in your marriage.)

We might want to run work-related ideas by each other, share a story about our kids, tell the other something funny we just read, go over finances or just about anything else. And all of that will go better if we both have the time and are in the head space to do so.

Because we usually have an idea what’s going on with the other’s work, we are almost always aware when is definitely NOT a good time to interrupt the other. And then we usually just wait. (Sometimes I make a note in my planner or set a reminder so I don’t forget to talk with my husband about the topic later. I get distracted by work, kids and life and thoughts can get lost!)

Helping each other

One of the neat things about working at home together is getting a chance to help each other with work. Back when I was the only one of us working from home, if I needed to bounce an idea off of someone or needed tech help, I’d have to wait until my husband got home. And then that only worked if we didn’t have anything else going on and if I remembered!

Working at home together, we have a co-worker with an outside perspective, which can be helpful to talk through an issue. We also can use our skills to help each other. Because my husband is a technology guru, he’s always been my tech guy. Nowadays he can even help me with smaller issues that pop up. Like if I’m having website trouble or need help figuring out a formatting issue in Excel.

And I can edit documents he has to write for work. Earlier this year, I was literally his hands after his shoulder surgery when he couldn’t type. He told me what to type for a report and I did so.

Working from home together gives my husband and me yet another way to be a team.

Knowing when to keep our mouths shut

Lest you think that working from home together is all roses, there are times we irritate with one another. I hate the sound of people chewing, especially crunching. So I’ve had times when my husband was having a snack that I popped in my headphones and cranked up the volume to not be so irritated.

I know I’ve irritated him as well. But just like with majority of time in our relationship, usually we’re irritated about something else that has nothing to do with our spouse!

Getting to see each other as professionals

Before we spent every day working from home together, I knew a bit of what my husband did and that he was good at it. Now that I hear him interacting with clients and doing research, I have a whole new appreciation for his work.

In the 26 years we’ve been together, I’ve seen him in many roles. Getting to regularly see him in his professional role is pretty cool.

Working from home together lets us celebrate our small work successes together. We get to cheer each other on. Having a co-worker who is always on your side and rooting for your best is priceless.

14 Ways we made Elf on the Shelf work for our family

How to use Elf on the Shelf in a fun, positive way PLUS ideas for poses and a free printable Santa letter!

Affiliate links are used in this post. If you make a qualifying purchase via my link, I receive a small percentage of the sale at no additional cost to you. I only recommend products and services I use and love. It helps support my blog, so thank you for your support! Read my full disclosure here. This post is in no way sponsored by or affiliated with Elf on the Shelf or any of its products.

My husband and I were originally resistant to Elf on the Shelf. When our oldest child was in preschool, she loved sharing the antics the school elf got into. She loved seeing what the elf was up to each day and wanted one for home.

The next Christmas season, we had a Kindness Elf show up who was plush. I loved the idea of a Kindness Elf that comes and gives the kids ideas of nice things to do throughout the holiday season. Our Kindness Elf was also OK to touch since he was a bit different. (And our youngest was a toddler!)

However, by the next Christmas season, our daughter was so looking forward to a naughty elf that she decided to write Santa a letter about how she appreciated the Kindness Elf but hoped he could go to someone else so she could have a fun elf.

That Christmas, our Elf on the Shelf showed up. But, my husband and I had a few plans for how we wanted to make our Elf on the Shelf fun but a bit different.

Ditch the book

When the Elf on the Shelf showed up, he came with a book explaining all about how he works. The book tells how the elf will monitor the kids’ behavior and report back to Santa each night. It emphasized how touching the elf will make him lose his magic.

We decided our elf would arrive with a note instead explaining how he would work. That way we could personalize it for our family and how we wanted the elf to work.

No behavior monitoring

We kept the note simple and explained the magic of the elf meant no touching ON PURPOSE and that the elf needed a name.

But our elf also explained that he’d be hanging out to help our family get in the Christmas spirit throughout the season and sometimes leave notes with ideas of nice things to do. Instead of reporting their bad behavior back to Santa, the elf would report their good behavior and kind deeds.

We liked this idea better, because we wanted our kiddos to behave well since they are supposed to and not because they were afraid of not getting presents or having Santa be angry with them.

Decide when the Elf on the Shelf arrives and leaves

Some elves arrive the weekend after Thanksgiving. Most go back to the North Pole with Santa on Christmas Eve. Our elf has a slightly modified schedule. He arrives on Dec. 1. He does go back to Santa on Christmas Eve.

However, our first year with an elf our kids were sad he wouldn’t be around to see them open gifts, so he was able to convince Santa he could stay that year for Christmas Day and then fly back to the North Pole on his own.

Avoid naughty pranks

Part of the draw for the kiddos with Elf on the Shelf is his antics. And I agree. That little guy can get up to all sorts of things! But one thing our elf hasn’t ever done is something naughty. He may do silly things and pull pranks like wrapping the table in wrapping paper, but he’s in no way destructive.

Have Elf on the Shelf focus on Jesus

Another component of our elf is that he focuses on Jesus and His birth. He doesn’t mention it every day, but at least once during the season he shows up in the manger scene. And he mentions in his note on arrival how much he’s looking forward to spending another season celebrating the birth of Jesus with our family.

We want our children to enjoy all of the fun of Christmas with gifts, decorations, Santa and elves. But more than anything we want them to remember we are celebrating Christmas for God’s gift of Jesus.

Our family also reads through the Christmas story one verse a night through December and this year is pairing it with a devotion book, “A Family Christmas: 25 Days of 5-Minutes Christmas Devotions.” Our elf always comments in his final note about how much he enjoys hearing our family go through the Christmas story each evening.

Use the elf for kindness

While our elf gets up to some silly antics, he does also suggest nice things for the kids to do. For example, last year he organized the shoes in our mudroom then suggested the kids do a chore for someone else that day.

Let the elf bring treats

Our elf also likes to brings treats throughout the holiday season. It can be anything from Santa hats to Christmas crafts to candy coal. Our Elf on the Shelf comes with some treats throughout the season and gives the kids ideas to do with them or shares them just for fun as well.

I know our elf has liked shopping at the Dollar Tree and Five Below.

Make the elf posable

Elf on the Shelf has lots of accessories available to purchase. Our family has only gotten one accessory for our elf that I highly recommend: Elf Flex. It’s basically bendable wire that you help put into your Elf on the Shelf so that he or she can more easily stay in position.

Have a plan for touches

Invariably the elf is going to get touched. It was stressful to our kids, especially when they were younger. During the time we had a preschooler and toddler, our elf was OK to be touched. Once he wasn’t, we did our best to have him where he wouldn’t be easy to touch.

But, we also developed a system to counteract accidental touches or help him move if he falls. For accidental touches, we sprinkle a few grains of sugar on him and blow him a kiss. To help him reposition safely, we use gloves. The contact with human skin is often what can take away the magic from an Elf on the Shelf, after all!

Plan ahead

Sometimes helping the elf decide what to do each evening can be a chore. For some of us who do our best thinking earlier in the day, it can be particularly challenging to come up with creative ideas in the evening.

Going through posts like this one and others is helpful. Doing so before the elf even arrives is better. I make a list each November with ideas to help our Elf on the Shelf decide what to do each evening. I include any treats he’ll be bringing as ideas so I don’t forget them.

Set a reminder or alarm

By the end of the day, my brain tends to be shutting down. I have a reminder set for each evening to pop up and remind me to help our Elf on the Shelf with his plans.

Come up with a code name

Because adults sometimes need to talk about things related to the Elf on the Shelf, having a codename for him or her is a good idea. I use our elf’s code name on my reminder, on my list and when talking about him with my husband once the kids are in bed.

(Fellow geeks might appreciate the code name is Legolas.)

Keep the elf out of the way

One of the issues I struggled with before our Elf on the Shelf arrived was all the elaborate set-ups I saw online. I didn’t understand how the elf wouldn’t get in the way. I still don’t understand some of them. But I do help our elf come up with ideas that will keep him out of the way.

He doesn’t, for example, fill our bathroom sink up with marshmallows or sit on top of the gallon of milk I know we will need throughout the day. Even when he had some fun in our washing machine last December, he was smart enough to do it when laundry wasn’t going to be happening.

Have some fun!

I’ve heard many different adjectives from other parents from creepy to annoying. I get it. But once you’ve decided to welcome an Elf on the Shelf into your home for the Christmas season, have fun with the process.

When we were staying with my parents over Christmas while our house was being built three years ago, all four of us adults enjoyed the elf’s antics nearly as much as the kiddos!

In the end, there’s no better feeling than seeing your kids get excited to see what the elf has been up to and speculate about what he might do next.

Some ideas for your Elf on the Shelf

I’m neither a crafty nor an overly creative mom. Below are a few simple ideas our elf has done over the past few years if your elf is in need of inspiration.

First up is one from this year when our elf hung out with my son’s mailbox he’d been playing with and left the kids a letter template to write to Santa. He promised to take the letters straight to Santa if the kids left them in the mailbox before bedtime. You can download the Santa letter template and even a note from your elf as well by clicking on the images below.

The two elves on the left are elves my grandma had up at her house for so many Christmases when I was a child. When she passed away, I received them and put them up every year. Our Elf always spends at least one night hanging out with them.
When one of the kiddos had strep throat, the elf left a get well note and moved to the cabinet top to stay away from germs.