Families With Grace

Helping Christian moms create homes filled with grace, love & faith

The best tunic tops for moms under $30

20 Tunic tops for leggings that moms will love!

Affiliate links are used in this post, if you make a qualifying purchase via my link, I receive a small percentage of the sale at no additional cost to you. I only recommend products and services I use and love. It helps support my blog, so thank you for your support! Read my full disclosure here.
Leggings are incredibly comfortable and these 20 tunic tops for moms under $30 will have your rocking your leggings and looking good! #TunicTops #Leggings #MomFashion #FamiliesWithGrace #Style #MomStyle #womenstunictops #affordablefashion

I was slow to the legging trend. It took a couple of years after leggings became popular for me to really get into the groove of wearing them. Now they’re pretty much all I wear and work for casual and dressy times. But, as a mom who is also fluffy, I’m all about having the right top to go with it. Sometimes finding the best tunic tops for moms can be difficult, but lately I’m coming across all kinds of them.

While I’ve found tunic topics in a variety of places, my favorite place to find them is on Amazon. Most stores offer free returns that I can drop off unpackaged at my local UPS store if something doesn’t work. I love tunic tops that are comfortable to wear and comfortably long.

I also refuse to spend more than $30 on a tunic top to wear with leggings, because I’d rather spend the money on my kids or something else. So, I’ve pulled together some of the best tunic tops for moms that are under $30. I have most of these tunic tops myself and love the way they fit, feel and cover. Even better, none of them need special washing or get super wrinkly.

(And if you don’t like the color or designed shown, rest assured that all of them come in various designs and/or colors! Many of the styles come in both long and short sleeves as well.)

Long-sleeved tunic tops for moms

A tunic top with a black and white plaid top that has a cowl neck and a solid black bottom
A ruby tunic top for moms with a heathered look and lace trim on the bottom front of it
Tunic top for moms that has three solid horizontal stripes or color blocks. Shown in black, green and gray.
A tunic top for mom that is longer and more of a dress style. It is knit with pockets and large buttons down one side. It is shown in orange.
This tunic top for moms is a sweater style top with a solid body and striped sleeves. It's shown in a dark teal body with orange, gray, green and purple striped sleeves.
A sweatshirt style tunic top for moms that is dark gray with a blank animal print.
A cozy tunic top for moms that is a muted color with the cuffs, hem and color being darker. Shown in red.
A solid color tunic top for moms that has a scoop neck. It is shown in a deep purple.
A v-neck tunic top for moms that has a different color of cuff, neck and hem from the body of the top. Shown in light pink with gray trim.
A solid gray tunic top for moms that has a ruffle hem line
This tunic top for moms is a solid color (show in blue) with a hem line in the front that looks like it has a different shirt of a similar color underneath.

Short-sleeved tunic tops for moms

This tunic top for moms has a rounded neck and is a solid color. It is shown in green.
This is one my all-time favorite tunic tops! I have it in multiple colors.
A dress style tunic top for moms that has pockets. It is shown in black with white lines that are spaced apart and have a tie-dye look.
A solid color tunic top for moms with a round neck and an uneven hem. The trim of the sleeves and the hemline are in an accent color. Shown is a purple tunic top with black trim.
With a rounded neck and pleated bottom, this tunic top for moms is flowing and has a variety of patterns. It is shown in black with white dots and accents.
A tunic top for moms shown in a solid olive green with stitching (of the same color) around the sleeve trim, hem and collar.
A solid tunic top for moms with a round neckline and swing style. Shown in steel blue.
This tunic top for moms has crochet trim details on the sleeves. It is shown in a sage green with black and white polka dots.
This tunic top for moms is a henley style with three buttons on the collar. It is shown in black with a blue floral pattern around the bottom third.
This tunic top for moms has a more open neck and is henley style with three buttons on the collar. It is loose fitting and is shown in black, red and white floral pattern.

Looking for leggings to wear with your tunic tops? Check out these leggings my daughter and I love. They fit well, feel great and wash up well!

A set of leggings that are great for women and teens. They come three to a set in different colors. All black is shown.

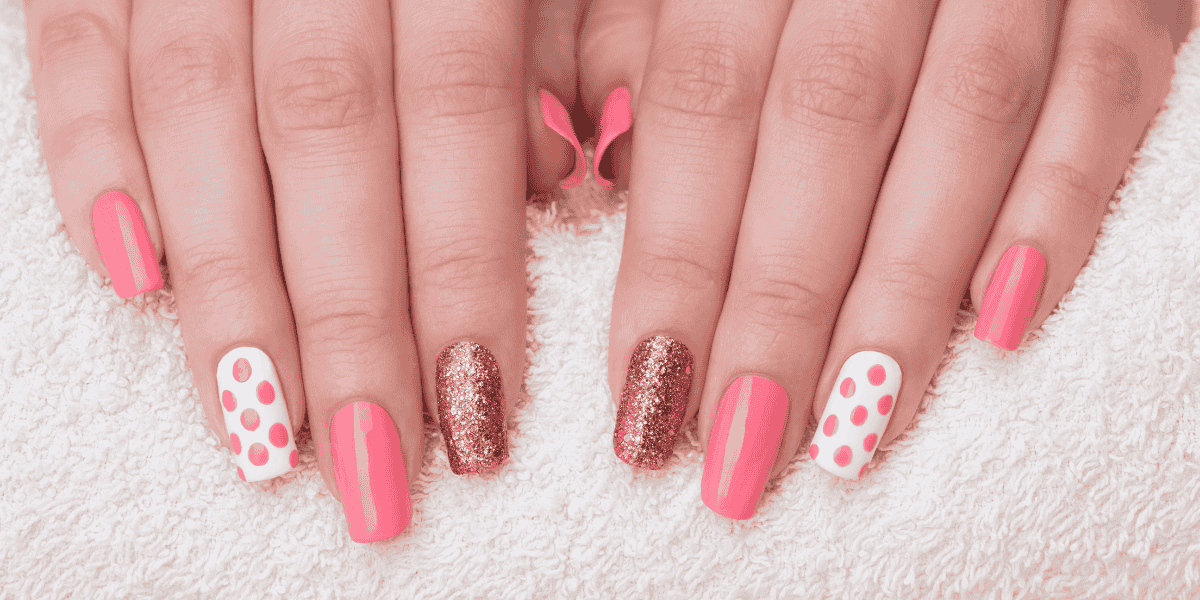
10 Nail wrap tips and tricks

Tried and true nail wrap tips to keep your nails looking good longer!

Affiliate links are used in this post, if you make a qualifying purchase via my link, I receive a small percentage of the sale at no additional cost to you. I only recommend products and services I use and love. It helps support my blog, so thank you for your support! Read my full disclosure here.

A couple of years ago, I tried nail wraps for the first time. While I really liked them, I also found them too pricey to be a regular thing. But a few months later, I found all sorts of all nail wrap brands that were much more affordable. Thus began my nail wrap journey. Now nail wraps are all that I wear. I LOVE them! I have also learned some nail wrap tips and tricks along the way I’m excited to share with you.

(Also, I have zero affiliation with any of the nail wrap companies or brands. Nada. My only affiliate links are for related products on Amazon. )

Nail wraps 101

Nail wraps are like stickers made of nail polish that you put on your fingernails and/or toenails in place of wet nail polish. They come in all sorts of colors, designs and themes. While I have used nail wraps that sell through representatives, I don’t like them as much. They’re too expensive, and they are flimsier than the other nails I find for MUCH cheaper.

I’ve got a few favorite nail wrap vendors that I love. The nails average around $3 per set, but there are some cheaper and a few more expensive. None are more than $6, though! Here are links to a few of my favorites that I highly recommend (none of these are affiliate links):

The Flamingo Lady Nails offers free shipping on orders over $20. Shipping otherwise is usually just a couple of dollars. The Flamingo Lady Nails usually sends an extra set or two of nails along with some other little treats like a plastic flamingo and stickers.

Lily and Fox Nails has free shipping to the United States and Canada regardless of order size. Lily and Fox also usually sends along an extra set of nails as well. Each order comes with a personalized note and origami fox.

Lovely Hello Nails includes free shipping for orders of $15 or more. They have colorful envelopes that are personalized and has a weekly wrap for $2.

Nails Mailed offers free shipping on all orders. Its nails are a bit pricier at usually $5.49 a set, but each week has three nails of the week on sale for $2.74. Since they do all free shipping, I have literally just ordered one set for $2.74 and had them sent.

Pink Raindrop Nails has free shipping for orders $25 or more. This site is a blend of prices. You can get sets for 99-cents. These sets don’t stay on quite as well, but with the right base coat, they last at least a few days. (More about that to come!) My favorites from this shop, though, are the pricier $3.49 to $4.99 sets that include pop culture themes such as superheroes, movies and video games!

Tip 1: Use nail polish remover on your nails before applying your nail wraps.

This nail wrap tip is one I discovered more recently. Even if you don’t have nail polish on your fingernails, swiping over your nails with nail polish remover takes off some of the natural oils. Honestly, I use an acetone nail polish remover. If you take your wraps off with nail polish remover, the acetone will work best. Either way, a swipe over your nails with nail polish remover helps prep them for the nail wraps. But you MUST wash your hands afterward.

Tip 2: Wash your hands with dish soap.

After you have cleaned your nails off with nail polish remover, try washing your hands with dish soap, especially Dawn dish soap. It’s good for everything from laundry to nails! My nails do fine washing them with regular hand soap, but my daughter’s nails have more natural oils on them. Washing with Dawn dish soap helps wraps stay on better for her. If you aren’t sure, give it a try. The worst that happens is you end up with extra Dawn for cleaning!

Tip 3: Buff your nails.

While I’ve loved doing my nails for years, I never buffed them. Then my husband ended up with extra buffing blocks from a project he was working on and gave me one. I gave it a try and now I use it often before putting on nail wraps. Gently buffing your nails is a good way to prep them for the wraps and helps remove some of the oils. I do a light buffing before applying the basecoat.

Tip 4: Use a basecoat.

When I first started using nail wraps, I didn’t think about combining wet polish with the wraps. Then I learned that a basecoat can not only help the wraps stay on longer but also protect your nails. I love the Orly Bonder Rubberized base coat. I apply it to my nails after they are cleaned and buffed then wait a couple of minutes before putting on the wraps.

Another bonus I’ve found with the basecoat is that they protect my nails well enough that I can peel off my wraps slowly and carefully when I’m ready to change them without them hurting my nails.

Tip 5: Use a topcoat.

If one of my nail wrap tips is to use a basecoat, you probably aren’t surprised that another one is to use a topcoat! Once your wraps are applied and filed, swipe over them with a topcoat. I love Zoya Armor topcoat, but pretty much any topcoat will work. Basically the topcoat just helps seal the wraps and they stay on longer.

Tip 6: Buy a glass nail file.

For years, I heard about how great glass nail files were. But I didn’t try one until a couple of months ago. It was worth the hype, you guys. I ordered a pack of three glass nail files on Amazon. They are different than cardboard or metal nail files in that they file more gently. (I know that sounds weird!) What’s nice is that the gentler file edge works to help you get rid of the excess nail wraps without tearing the nail wrap. I’d definitely recommend giving them a try!

Tip 7: Place the nail wrap above your cuticle.

When you’re placing your nail wraps, place them slightly above your cuticle. You want the wrap to adhere directly to your nail itself. To help with this, I push back and remove excess cuticles before doing my wraps. I do this just before applying the basecoat.

You also want to make sure the wrap isn’t hanging over onto your skin. If it is, trim it with nail scissors. A tiny bit hanging over isn’t such a big deal, but I still make sure to push it down as much as I can so that it isn’t on my skin. This also gets easier the more you use nail wraps and figure out what size works best for each of your nails.

Tip 8: Use nail scissors or clippers for trimming the wraps.

After I put the nail wraps on my nails, I trim them with nail scissors or nail clippers before filing them down. I don’t try to trim them right to the end of my nail. I don’t think that would work. But I trim them down so I have just a small amount to file off. I prefer nail scissors for my fingers and nail clippers for my toes.

Tip 9: Apply your wraps at night.

This is one of my very top nail wrap tips. Nail wraps do best when they have time to “cure.” If you apply them at night before going to bed, then you’re going to go hours without getting them wet or doing anything else to do them. They have more time to set and adhere. I promise this works!

I do my nail wraps after the kids are in their rooms for bedtime and before I go to bed. Usually I sit on the couch with my lap desk and do them while my husband and I watch something on TV. Then I only need to wash my hands once after I use the restroom before bed. They have all night to set.

Tip 10: Don’t put lotion on your hands afterward.

While I would wait and do my nails before bed, I noticed that if I put lotion on my hands before going to bed, as I often so, it affects my wraps. So I wait about putting lotion on my hands until at least 12 hours after putting on new nail wraps.

Tips and tricks you need to know to manage your thick hair

5 Must-try products and tips for thick hair care

Affiliate links are used in this post, if you make a qualifying purchase via my link, I receive a small percentage of the sale at no additional cost to you. I only recommend products and services I use and love. It helps support my blog, so thank you for your support! Read my full disclosure here.

I always thought I had thick hair. I do. My hair is naturally curly and sort of has its own plan for how it should go when I let it roam free. I’ve learned how to manage it throughout the years.

And then, about 11 years ago my daughter was born. She spent the first two years of her life without a lot of hair, but it was worth the wait. It came in a beautiful red that was first a crown of spiral curls. By the time she was 7, her curl loosened as her hair got heavier and heavier.

Her hair is thick beyond what I knew thick hair could be. I have often teased her that she — like our Lhasa Apso pooch — has a double fur coat. We have to make sure we get through the top, middle and bottom layers when managing her hair.

I once said every mother of a daughter with curly hair deserves an extra jewel in her crown. I still concur with that statement. Even though her hair isn’t as curly as it once was, it’s now its own beast thanks to its thickness. She prefers her hair long, so we have a lot of hair to manage!

Along the way, we’ve learned a few tips and tricks to make managing thick hair easier.

1. Use a Wet Brush.

A few years ago, I was chatting about my daughter’s hair with the hair stylist trimming my hair. She asked if we’d tried a Wet Brush. She told me it works well on both dry and wet hair. I was dubious, but I decided to buy one and give it a try.

In spite of having extra thick hair, my daughter also has a sensitive scalp. Getting out her tangles was rough in so many ways. It was to the point that I was going to make her get her hair cut so there was less to manage. She didn’t like that idea, but I was at a loss.

The Wet Brush made a huge difference. It was dramatic beyond what I expected. Hands-down, the Wet Brush is the best purchase I’ve made for managing my daughter’s extra thick hair.

Suddenly, it wasn’t a fight as I brushed her hair. She could brush her hair and get tangles out, too! It made our lives so much easier. We’ve used it with her hair wet and dry and it works great both ways.

As someone with curly hair, I don’t use hair brushes and had no idea that some are better than others. I use a hair pick, which I had used on my daughter as well when her hair was so curly, but it was so small compared to all the luscious locks on my daughter’s head.

The Wet Brush made a huge difference. She now owns two and my mom even bought one to keep at her house for my daughter. It was a game changer!

2. Don’t wash your hair every day.

Though my hair isn’t as thick as my daughter’s, it is still thick and curly to boot. So that means we’re dealing with hair that doesn’t get greasy easily or quickly. In order to keep your thick hair from drying out, washing every other day just does better.

Though I use products on my hair to counteract frizz and such, my hair can easily get into cotton candy texture if I wash it too often. It sounds weird, but it’s true!

My daughter doesn’t have the cotton candy texture problem, but her scalp can get really dry if she washes her hair daily because she doesn’t have as much oil right by her scalp. Since thick hair tends to be dryer, washing it too often only makes it more dry and harder to manage.

3. Try a leave-in conditioner.

While I use a wash-out conditioner in the shower and then a leave-in conditioner thanks to my curls and hair texture, my daughter’s thick hair doesn’t need as much conditioning. L’Oreal Paris Elvive Leave In Conditioning Treatment and Heat Protectant works super well of all the leave-in conditioners we’ve tried.

Because thick hair isn’t as oily, we use a dollop about the size of a quarter and work it through her hair while it’s wet and brushed after a shower. We pay particular attention to the underside of her hair and make sure it gets covered with the leave-in conditioner. I use it the same way, but a little less since my hair isn’t as long or quite as thick as hers.

The leave-in conditioner helps my thick hair combat frizz. It helps my daughter’s extra thick hair combat tangles, frizz and fly-aways.

4. Dry with a diffuser.

I first got a diffuser attachment for my hair dryer to help combat frizz and manage my curls. I then used it for my daughter with her curls. Now that her hair is more wavy, we continue to use the diffuser when we need to dry her hair.

Curly and wavy hair do well to air dry, but it’s not feasible much of the time to let it air dry. First, if you washed your hair in the evening then go to bed with wet or damp hair that’s curly, you won’t know what you’ll wake up to!

Second, since we live in a climate that is frigid part of the year, having wet hair for a while is chilly, even if you don’t have to go outside! So, using a hair dryer is sometimes necessary.

Adding the diffuser was another one of those game changers. It makes such a difference that any time I travel, I bring along my own hair dryer and diffuser! You can buy hair dryers that come with diffusers, but you can also just buy the diffuser attachment alone.

Use the diffuser by gently pushing the hair up toward your scalp and then hold it for 20 to 30 seconds at a time before moving on. Move around until you’ve gotten your hair dry enough all over.

5. Buy the right hair accessories.

My daughter and I recently cleaned out her hair accessories. Being nearly 11, she’s tried all sorts of things in her hair. We got rid of many things that no longer work and determined what she needed: ponytail holders. She has plenty of scrunchies but needed something heftier for ponytails.

We’ve struggled with ponytails. I thought we had tried every style of ponytail holder available. Some are way too lose. Others are so small they can only go around her thick ponytail only once or twice. None of them would keep her ponytail in place for long at all — and definitely not all day.

I’ve had many ponytail holders snap in my hands as I tried to get them around her hair.

Then I came across these Revlon maximum hold ponytail holders. They work so well. I can wrap them around her ponytail three times and the ponytail stays in place for the entire day until she is ready to take it down. She doesn’t have to keep redoing it — and it survives her being active as well.

I’ve only found them in black right now, but it’s easy enough to use them to hold the ponytail and then put a more decorative scrunchie or other accessory over top of it.

What modest swimwear says about my body image

A swimwear lesson I wish I’d have learned years ago

Affiliate links are used in this post, if you make a qualifying purchase via my link, I receive a small percentage of the sale at no additional cost to you. I only recommend products and services I use and love. It helps support my blog, so thank you for your support! Read my full disclosure here.

I can’t remember the last time I was excited to go shopping for swimwear for myself. Maybe when I was a young child? But at least from high school on, shopping for swimwear has been a nightmare. I’d daresay my feelings are shared by the majority of women.

If ever there were a time to be self conscious about your body, wearing a swimsuit is one of them. Swimwear isn’t as forgiving as clothes. It is certainly much more exposed. The whole thing is stressful to me.

But, here’s the rub: I like swimming. I always have loved the water and feel at peace in and near the water. I grew up swimming constantly during warm weather. Even though I sometimes get sun poisoning (a rash from sun exposure), I still love swimming. On family vacations to the ocean, I’d often wear a long-sleeved T-shirt or my aunt would take me to the indoor pool.

And that’s also in spite of being sensitive to chlorine thanks to my bladder. You’d think with all of that going on PLUS being uncomfortable in a swimsuit that I wouldn’t like swimming. Yet, I do.

Not a sideline mom

Even more importantly these days, I want to enjoy water activities with my children. I don’t want to have to sit on the sidelines unless absolutely necessary. I’ve had times that I’ve had to sit on the sidelines because of chlorine, but I don’t want to do so just because of my body issues. And, let’s be honest here, getting older combined with having two babies hasn’t improved my phsyique.

However, I determined when my daughter was a preschooler and first asked to go to a community pool and splash pad that we often drove by that I wouldn’t be stuck on the sideline. I decided to put on my swimsuit (a one piece that was probably a decade old since I hadn’t been swimming so much) and just have fun with my kiddo. The last thing I wanted was to have her end up feeling self conscious in a bathing suit as well.

The other moms around me wore all sorts of swimwear styles. I could pick out those who were also uncomfortable but were trying to just enjoy the time with their kids. I decided then and there that I didn’t want to have any discomfort about being in a swimsuit. Everyone else was too busy with their own body issues to worry about my body, and even more importantly, their opinions don’t matter to me. What matters to me is my kiddos. I won’t get this time back with them!

A swimwear update

After that day at the community pool, I decided to update my suit. So I did some shopping. I hadn’t had a two-piece bathing suit for myself since I was a preschooler myself. But, I found that tankinis were popular but also nice for if you need to make a bathroom break and such. I also liked that with a black bottom I could have different tops and have more options.

So I got my first two-piece bathing suit as an adult and liked it. I found another tankini top on clearance at Target at the end of summer and picked it up. However, I found that I still didn’t feel so great even in the new swimwear. I was still more exposed than I was comfortable with.

The next summer on a beach trip, I got a sunburn on my chest in spite of all the sunscreen I lathered on. That skin wasn’t usually in the sun. But, I kept the same suits for a couple of years. After all, they were better than what I’d had before. I didn’t love them, but they were OK.

Then last summer, I found my daughter a swimsuit that came with a rash guard (T-shirt style top) instead of a tank top for the first time in a few years. While I have sensitive, fair skin, my redheaded daughter has even paler skin. I loved that the more coverage of the rash guard meant less skin to worry about slathering in SPF 50. My son has always liked wearing rash guards instead of going shirtless and I like the benefit of sun protection for him.

Somehow for the first time last summer, I realized I could also look for a rash guard for myself. I knew locally I had never seen any, but now I lived in the age of online shopping. I could change my way of thinking.

A new swimwear perspective

I did some searching on Amazon and found a women’s rash guard I liked. So, I ordered it. It arrived the day I was packing up my kids to go swimming at my cousin’s pool. I put it on over my bathing suit top and LOVED it! The rash guard gave me more coverage for sun protection and was a T-shirt style, more like my usual clothes. (I don’t even wear tank tops.)

When a family friend stopped by to chat, I was comfortable to just stand there and talk without feeling the need to quickly grab my cover-up. I felt well-covered with my modest swimwear.

The rash guard was awesome but didn’t have a built-in bra. I didn’t want to always have to wear a tankini top underneath, so I did some more research and looking. Before an indoor water park trip last fall, I bought a swimsuit bra, a loose tankini top with a scoop neck instead of being lower cut and boyshort swim bottoms.

Being able to wear a T-shirt and shorts to go swimming made me relax. Even the new tankini top was great because I didn’t have more chest exposed than I was comfortable with. I was able to relax more. The more modest swimwear was great for me.

Modesty doesn’t mean shame

What I learned throughout this process is that wearing modest swimwear, just like in my regular clothes, doesn’t mean I’m ashamed of my body. My body doesn’t look like I want it to. I have some extra pounds, but it’s the body that carried my babies. And it is what it is. If someone is appalled by it, they don’t have to look at it. I’m too old and have too many memories to make with my family to worry about the opinions of others.

I also, though, don’t buy into the popular thought that I have to prove I’m OK with my body type by showing it off. I have nothing to prove to anyone. I’m happy in my more modest swimwear because that’s what makes me more comfortable. Am I judging other moms in bikinis and more revealing swimwear? Nope. I just know what I feel good about for myself.

Honestly, my next swimwear purchase will be longer swim short bottoms that are more longer swim shorts, which is the length I wear for my regular clothes anyway.

The age of the Internet is a great one for giving us different options. I still haven’t see any of the modest swimwear I most like for sale in-person around where I live. But, I’m happy to have the option to order it online and feel better about what I’m wearing for water fun. I only wish I’d have done this sooner!

Pamper yourself without breaking the bank!

8 products under $13 to help you feel better about you

Affiliate links are used in this post, if you make a qualifying purchase via my link, I receive a small percentage of the sale at no additional cost to you. I only recommend products and services I use and love. It helps support my blog, so thank you for your support! Read my full disclosure here.

Mom life is awesome — and challenging and exhausting! I keep saying to my husband, “I wish I had one more day in each week. Then I could get everything done!” Of course that’s not going to happen. But taking care of ourselves all the time, especially when busy and stressed, is important for our own good and mental health. I’ve found a few small products and ways to help treat myself in small ways that add up.

Low-maintenance face care
As I told you a couple of weeks ago, I love makeup and always have. I’m also not a fan of dropping a lot of cash on makeup or makeup that constantly has to be retouched. Who has time for that?! I’ve found a couple of products I really truly love that you can get just about anywhere.

CoverGirl Outlast lipstick has been my favorite since I was in graduate school way back in 2002. And for the last 16 years, it is the only brand I’ve used. I love the stuff. It stays on so incredibly well. I really can put it on in the morning and have it last through the whole day almost every single day. My current color of choice is Wine-to-Five. I first used Brazen Raisin. I’ve also tried some other colors and liked them. Wine-to-Five is my daily, though.

When it comes to my entire face, I really love a daily moisturizer with SPF in it. I found this one from Oil of Olay and use it daily (I used to get this in Target’s Up&Up brand, but they stopped making it). I struggle with dry skin, especially in the winter, thanks to some medicine I take. This combats that nicely without being greasy. I don’t want my face to feel or look greasy and shiny. 

Each morning, I top that moisturizer with Loreal True Match liquid foundation, which I’ve been using about as long as the CoverGirl lipstick. I like that it has 15 SPF in it, because that’s just a good idea. But I also like how well it smooths on and smooths out my face. It really does match well with my pale skin. (Seriously. The color that best matches my skin tone is called Soft Ivory!) I don’t have trouble with the makeup coming off and getting onto things. I really do just put it on and let it go.

My blush, mascara and eye shadow brands and choices change the most regularly, but I’m faithful to my eyeliner. A couple of weeks ago, I was shopping and the store was out of my usual CoverGirl Perfect Point Plus eyeliner in Charcoal, so I picked another brand. I regretted it. I was going to make myself use it and not be wasteful, but it was so bad that I just couldn’t. So I ordered my favorite online and didn’t risk the store being out again!

And all of that makeup leads to how to remove it. Again, I don’t want a long, complicated process. I especially don’t want that at bedtime when I’m exhausted. I love, love, love these makeup remover wipes from Target’s Up&Up brand. They have gotten even cheaper in the last year and are only $1.99 for 30 wipes, which makes them even better! They are pre-moistened. I wipe over my entire face, including eyes and lips and just like that my makeup is gone and my face is clean but not dried out. I can tell you that it takes me 30 to 40 seconds to remove all my makeup with these wipes because I do so while swishing my mouthwash around and count the time for that.

Body care that rocks
When it comes to the rest of my body, I am the same way as I am with my makeup: I like low-maintenance, easy-on-the-budget items. A few months after my daughter was born nine years ago, my sister-in-law suggested Schick Intuition razors. Since she had triplet babies and a toddler at the time, I figured anything she could easily work into her routine would work in mine. And she was right. I love these razors and use them exclusively. It takes me only a couple of minutes at most to shave my legs in the shower now. 

After shaving, nothing is nicer than applying lotion. I was using random store brand lotion until a couple of years ago when my mom gave me a tube of Bath and Body Works’ Beautiful Day-scented body cream. Just that one small switch to something that felt and smelled so good made me feel pampered. I loved the clean scent so much that I bought the shower gel and body spray. I continue to use them now. I love Beautiful Day! I recommend the body cream over the lotion because it is thicker, you use less so it lasts longer and it moisturizers better and longer lasting. I also found that after I can’t get any more out of the tube that I can cut off the top and get enough lotion out of the tube to last for at least four or five more uses. Another hack for this body cream is that it retails at Bath and Body Works for $13, but you can get it for $12.63 with free shipping for Prime members on Amazon.

I’m going to add nail polish into body care because nails certainly aren’t face! Ha! Along with makeup, I’ve loved nail polish since forever. Actually, I’ve probably loved it longer because I was allowed to wear nail polish way before I was allowed to wear makeup! I’ve tried all sorts of brands and types through the years. But my hands-down favorite for the last few years is Zoya nail polish (Aurora is one of my favorite colors!). This is my splurge item because I have to order it and it costs $10 a bottle. But, it’s worth it. I first tried with with a free promotion Zoya was doing and have never looked back. They offer decent deals throughout the year and awesome deals on Black Friday, so they are worth paying attention to if you are at all a nail polish lover.

Zoya polish is big 10 free, meaning it doesn’t have a lot of the harsh chemicals other polishes do. But that isn’t why I tried it or fell in love with (though it’s a super nice bonus, especially when I’m doing my daughter’s nails). I love it because it stays on so incredibly well, even the dark colors. I usually go for colors that have a bit of glitter in them because they stay on even better. I also pay attention to the opaqueness rating when picking out colors. The more opaque it is, the easier it is to do touch-ups. I love the Zoya topcoat as well to lock in the color. While I still have some other brands of nail polish in my rotation, Zoya is what I use at least 80 percent of the time. It’s really good stuff!

What products do you use and love that make you feel pampered? 

What I learned from not wearing lipstick for a week

Affiliate links are used in this post, if you make a qualifying purchase via my link, I receive a small percentage of the sale at no additional cost to you. I only recommend products and services I use and love. It helps support my blog, so thank you for your support! Read my full disclosure here.

A few months ago, I noticed a small, dark spot on my bottom lip. I assumed I’d bitten my lip and it was bruised. I am always hurting myself, getting bruised and having no idea how it happened. But the spot never went away. So when I was at my checkup with my doctor, I mentioned it. He referred me to a dermatologist to have it checked.

So last Tuesday afternoon, I went to the dermatology office. The doctor couldn’t be positive that it wasn’t precancerous, so he wanted to remove it. I’m not about to argue with that and agreed. After the quick procedure was finished, the nurse was telling me what to do. I need to keep Vasoline or Aquaphor on it for 10-14 days. After then, it should be healed enough that I can resume using my usual lip stuff. BUT, that also means I can’t wear lipstick for 10-14 days. (And no worries; the biopsy results came back completely benign.)

I’ve had a love affair with makeup for as long as I can remember. I once got in trouble for finding some makeup samples in the drug store and applying them all over my face when I was maybe 6. When I was in third grade, a friend brought in some of her sister’s makeup on picture day. Again, I found myself in trouble when my parents got my photos that included blue eye shadow smeared up to my eyebrows. (It was the 1980s; makeup was far from subtle back then!) So, makeup and I are old friends. I put it on daily, even when I’m not leaving the house. My mom is the same way.

I don’t necessarily feel like I’m need makeup to impress anyone, but I feel better with it on. And I think lipstick more than anything makes me feel good. I love the lipstick I use because it really does stay on all day. (Shout out to CoverGirl Outlast lipstick!) I still tend to check it out and make sure it doesn’t need a touch-up before heading off to pick up the kids from school or take them to an evening class. It’s just habit. Heck, I even wear makeup going fishing with my dad.

I maybe didn’t realize how much it was going to bother me not wearing lipstick. I was paranoid when I made a quick stop by Walmart after my appointment. Of course, that was also because the corner of my bottom lip was bright white and a bit swollen then. The next day, I took my kids to school, feeling a bit embarrassed by not having on lipstick. For almost every activity this past week, not being able to wear lipstick has crossed my mind. First Sunday at church with no lipstick. Doctor’s appointment with no lipstick. Meeting our new neighbor with no lipstick. Going to my daughter’s gymnastic class with no lipstick. Making a vlog post with no lipstick (scroll down to see my first debut on video without lipstick).

I have a bit of an issue, don’t I? And I realized whether it’s literal makeup or figurative, we all have a face we put on for the outside world. For me, it usually includes Covergirl Wine-to-Five lipstick. I haven’t stopped wearing my other makeup, but having one chink in my face has made me feel more exposed. While I feel more exposed, I’m not sure that I actually am more exposed. Nobody seems to have noticed I’m not wearing lipstick. Only my parents and husband even know about me not being able to wear lipstick. But no one has said a word. No one has gasped in horror at my lips without color on them either!

I don’t think there’s anything wrong with makeup. I also don’t think there’s anything wrong with the face we put on for the outside world. Not everyone needs to know the full us and all the details of what is going on in our lives. But, we do need to have people with whom we can take off our makeup and be our real selves. You know where I haven’t thought of not wearing lipstick? At home with my family. Hanging out with my husband and kids doesn’t have me feeling exposed. They see me without makeup. They look beyond the surface and see the real me. It also hasn’t crossed my mind when I’m spending time with God. He sees way more of me than anyone, even myself!

We need that. We need safe places to take off our faces and just relax into who we truly are with those we love and those who love us. Our families can be that safe place. God is always that safe place. What damage we can do to our relationships if we get so focused on having our faces on just right that we forget to actually connect with those who love us!

Will I go back to wearing lipstick when I’m able to? Absolutely. I enjoy it and feel better with it. Have I learned from this experience? Absolutely. Lipstick and makeup don’t define who I am. They don’t define my beauty or worth. But I will appreciate all the more the relationships I have that aren’t impacted by whether I’m wearing my makeup or have on my face for the world. I will relax and just be me — with and without lipstick.

Never want to miss any Families with Grace content? Sign up for our mailing list and receive a FREE tip sheet on 10 ways you can start living as a family with grace right now! It’s chock-full of good, practical ideas to help bring peace to your home. Don’t miss out! Go here now! 

Content © Written Creations, LLC 2023