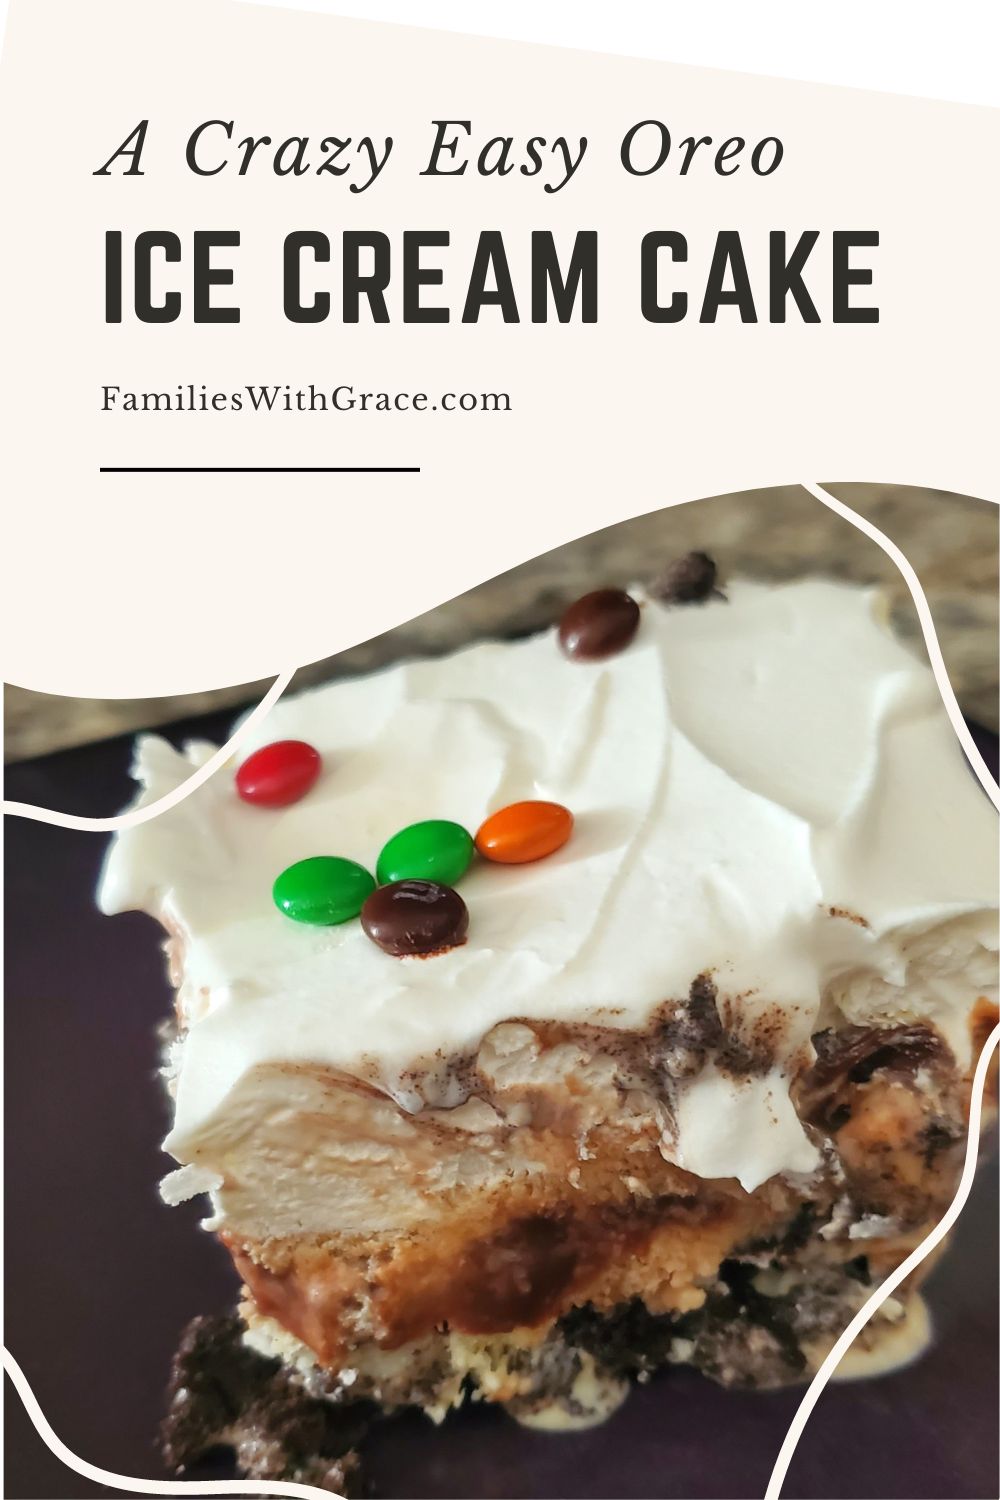
Your family will go crazy for this Oreo ice cream cake!
This Oreo ice cream cake recipe has been a family favorite since I was child. The recipe has evolved a bit through the years and now is a heck of a lot easier to make with only four ingredients.
We still love this recipe. In fact, my daughter asks for this each year as her birthday dessert. It’s delicious, easy and is made ahead of time!
And, in the spirit of complete honesty, I’ve never made this Oreo ice cream cake recipe myself. My mom is who usually makes it these days.
In spite of her moving a few states away, she ended up being in town to make it for my daughter’s birthday this week, so I had her walk me through it and took some photos.
I no longer live in the land of sweet oblivion when it comes to making this dessert, but I don’t mind a bit. Because I knew I had to share this recipe with you guys and make sure I can re-create it myself in a pinch since my family loves it so much.
My mom actually made two of these this week so my daughter had one for her family birthday party last night and will have one for her friend birthday party this weekend. Her friends look forward to it every year as much as my daughter does.
Affiliate links are used in this post, if you make a qualifying purchase via my link, I receive a small percentage of the sale at no additional cost to you. It helps support my blog, so thank you for your support! Read my full disclosure here.
Cookies and cream
This is an ice cream cake recipe, so you don’t need to preheat the oven, but you do need to let your ingredients thaw a bit. Thaw your whipped topping.
Your ice cream needs to be softened. You can leave the ice cream sitting on the counter for 10-15 minutes or pop it in the microwave. We usually go for the countertop method because some of my family members think microwaving the ice cream gives it a different taste.
Once your ingredients are thawing, pull out a 9×13-inch or 3-quart baking dish. I love my glass 3-quart baking dish with a lid for this Oreo ice cream cake recipe because it’s easy to store in the freezer. And when we are finished, I can stick it in the dishwasher!
Fill the bottom of the pan with Oreo cookies. We use Double Stuf Oreos for this to have some extra cream in the mix. But regular Oreos work also!
I buy the family size pack of Oreos that is 20 ounces. We usually end up with about 10 to 15 cookies left and happily eat them. But, you can get a smaller pack if you don’t want any leftover Oreos.
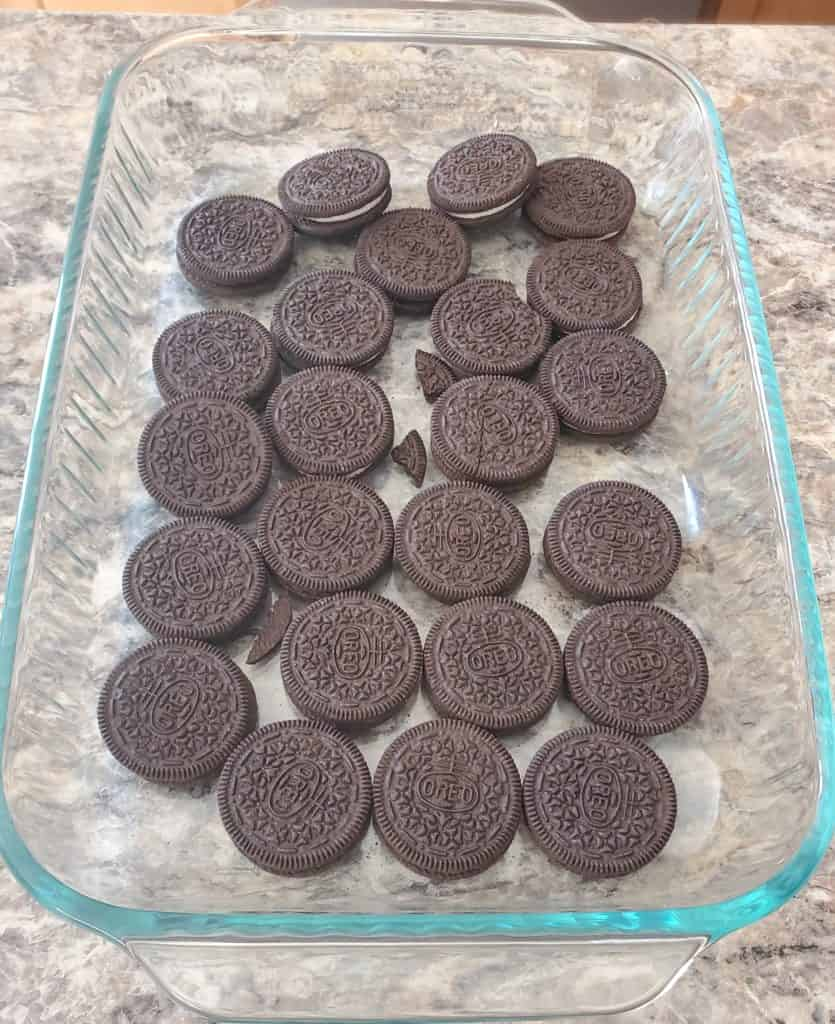
We added three more cookies after taking this photo. Mostly, you just want the bottom covered and then you’re ready to start smashing the cookies.
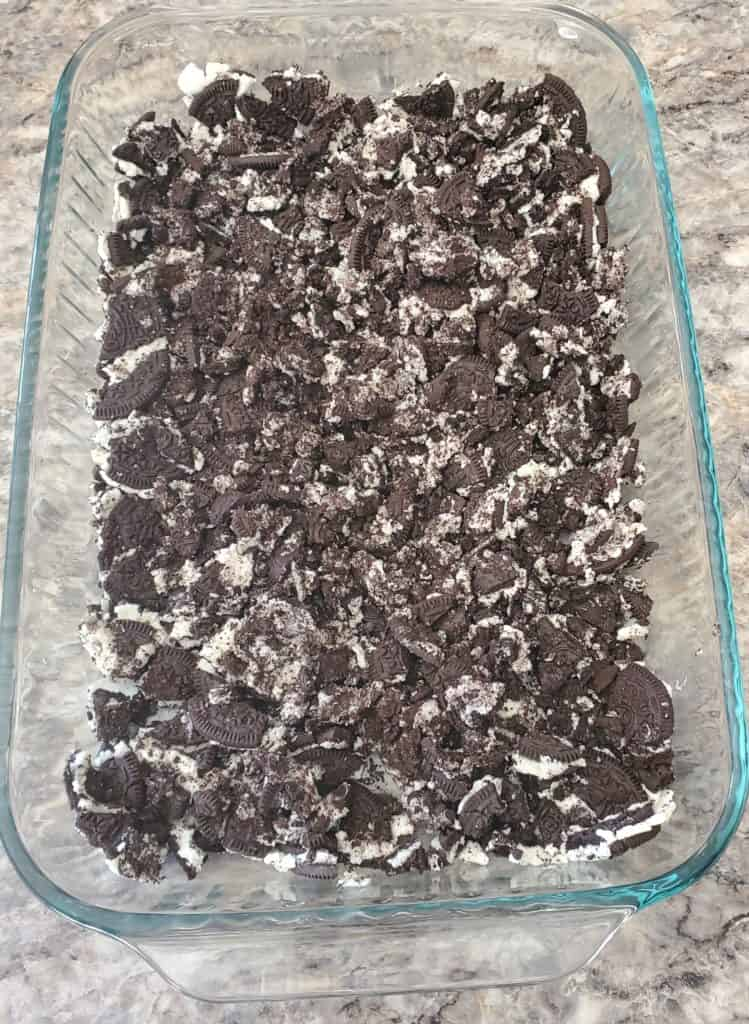
Like I said, my mom is the pro of this Oreo ice cream cake recipe. Through the years, she’s found the easiest way to crush the cookies is with the bottom of a drinking glass. Then she uses a butter knife to remove the excess from the bottom of the glass. Easy as that!

You want the cookies to be crushed but still chunky. Move them around in your pan to so the bottom is completely covered. (If not, add more Oreos!)
Add the layers
Next up, you layer on the ice cream. The original recipe for this used butter pecan ice cream. We now use vanilla. But you could use chocolate, cookies and cream, mint chocolate chip or whatever sounds best to you!
Either way, make sure your ice cream is softened. Then dollop it in mounds over the top of the cookie layer.
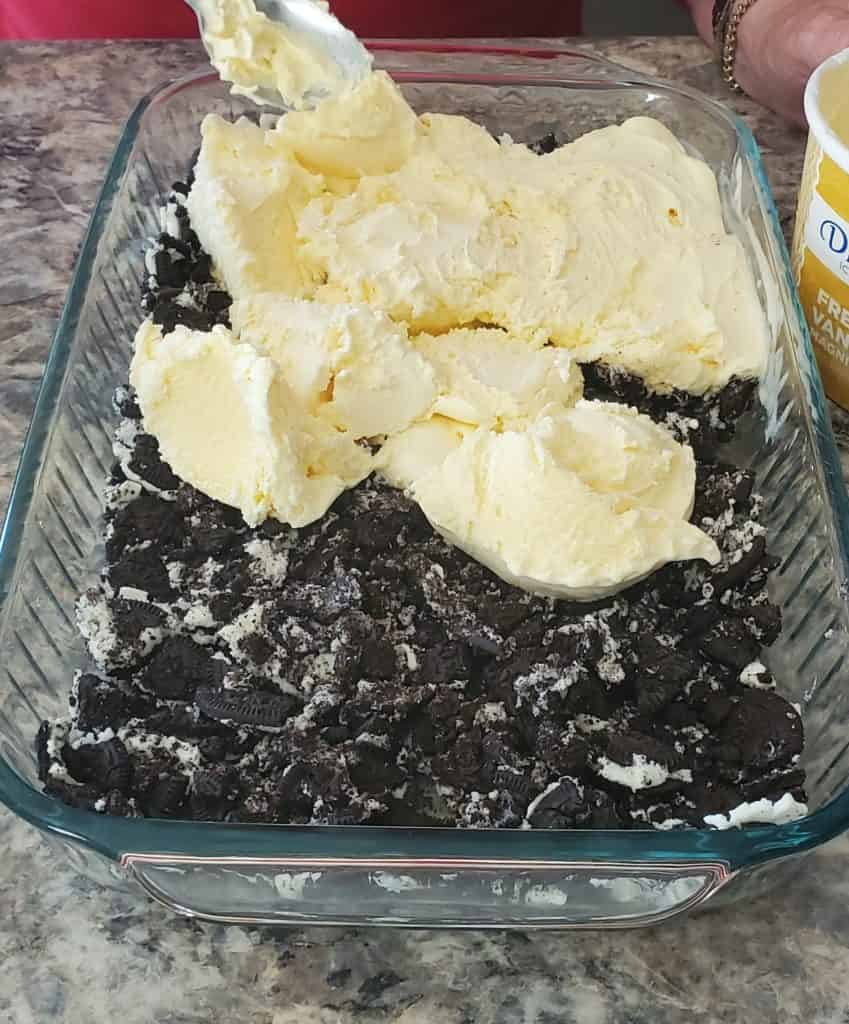
Carefully smooth the ice cream over the cookie layer.

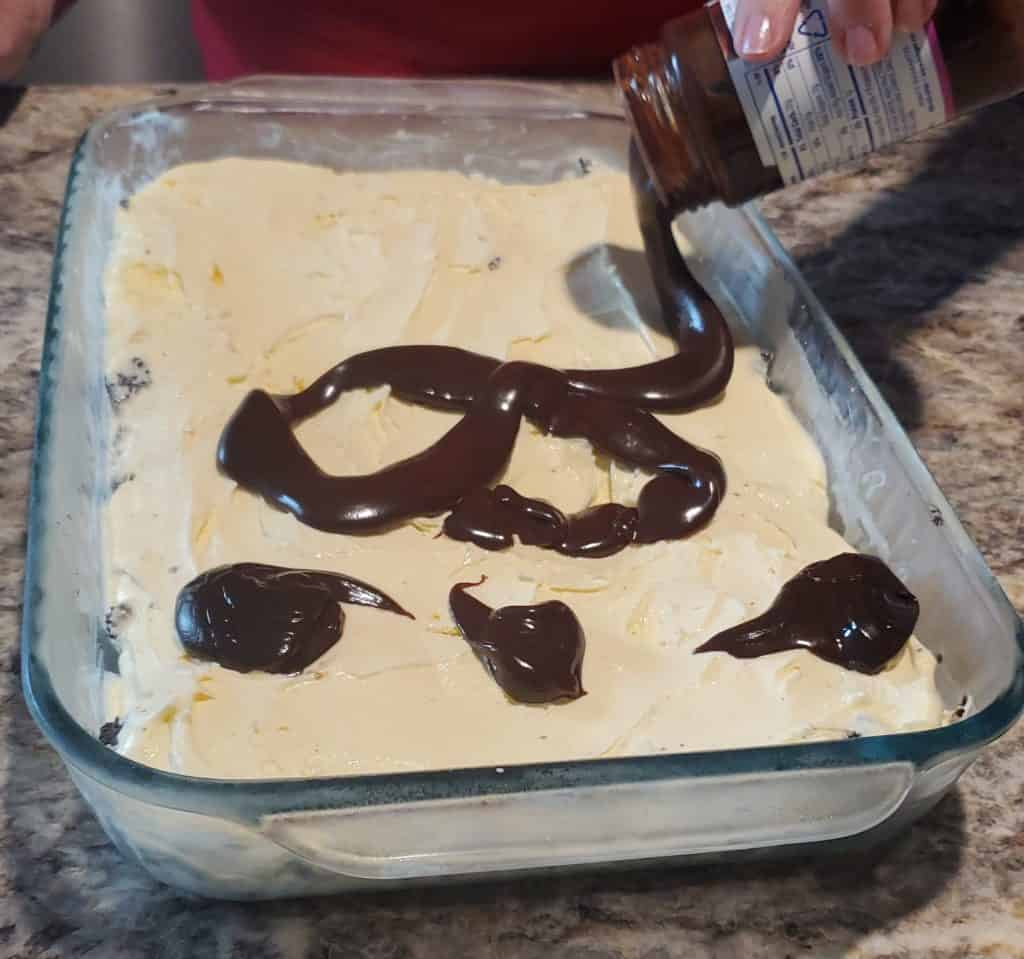
Put the pan into the freezer to chill and harden for about 10 minutes. While the ice cream is freezing, get out the hot fudge sauce.
I got a store-brand hot fudge sauce that was 11.5 ounces in the jar. My mom usually gets Hershey brand, which is 12.8 ounces per jar. Both worked well.
In order for it to spread over the ice cream layer, the hot fudge sauce needs to be warmed up. It doesn’t need to be as hot as if you were making a hot fudge sundae. The sauce just needs to be hot enough to be pourable.
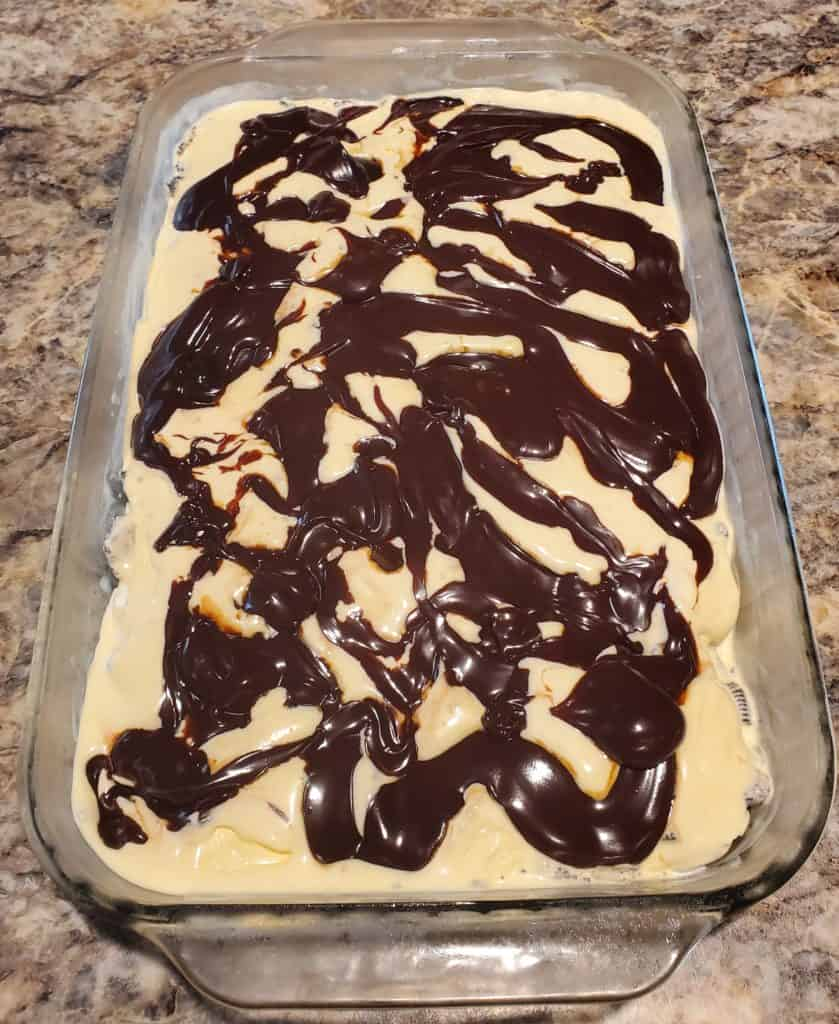
My mom says the best option she’s found is removing the lid and heating the hot fudge sauce in the microwave for 30 seconds. However you heat it, once it is nice and warm, pull your Oreo ice cream cake out of the freezer. Drizzle the hot fudge sauce all over the top. It doesn’t need to cover every inch, but should coat well.
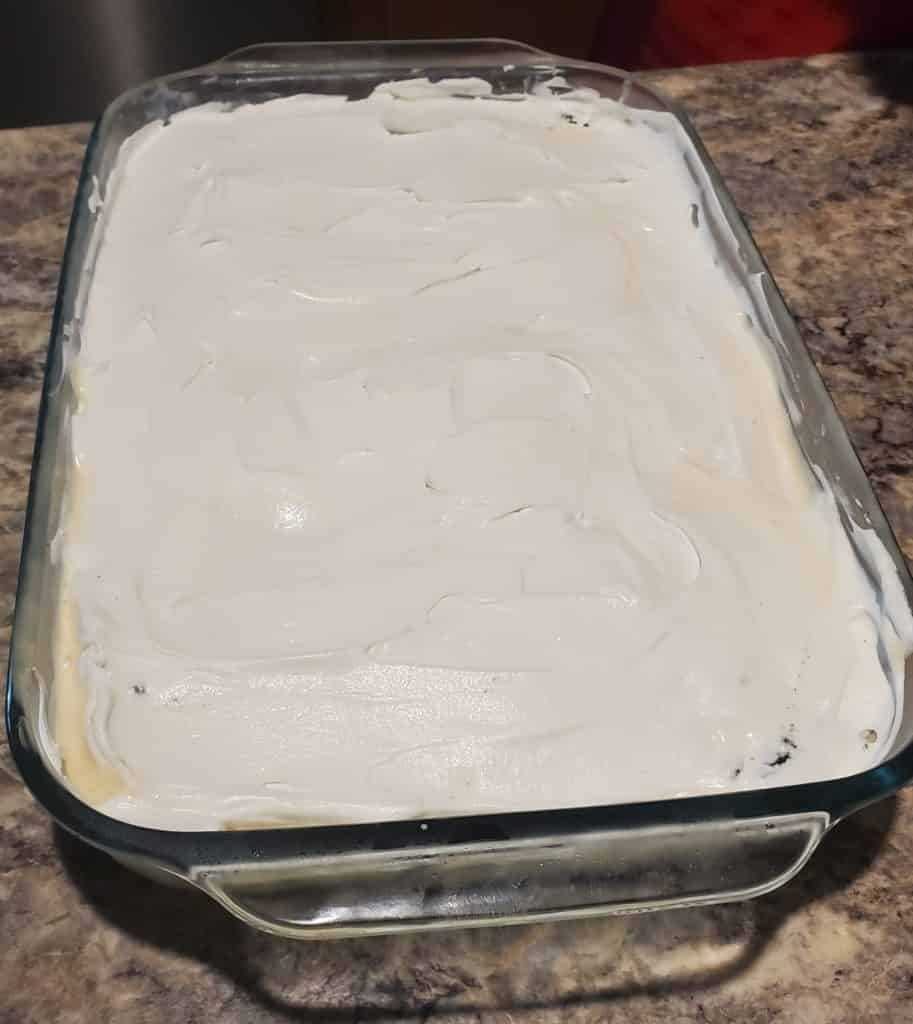
The final layer
The warm fudge layer softens the ice cream again. So, put the cake back in the freezer for about 10 minutes to let it refreeze some more.
Then carefully spread the whipped topping over the top of the fudge layer.
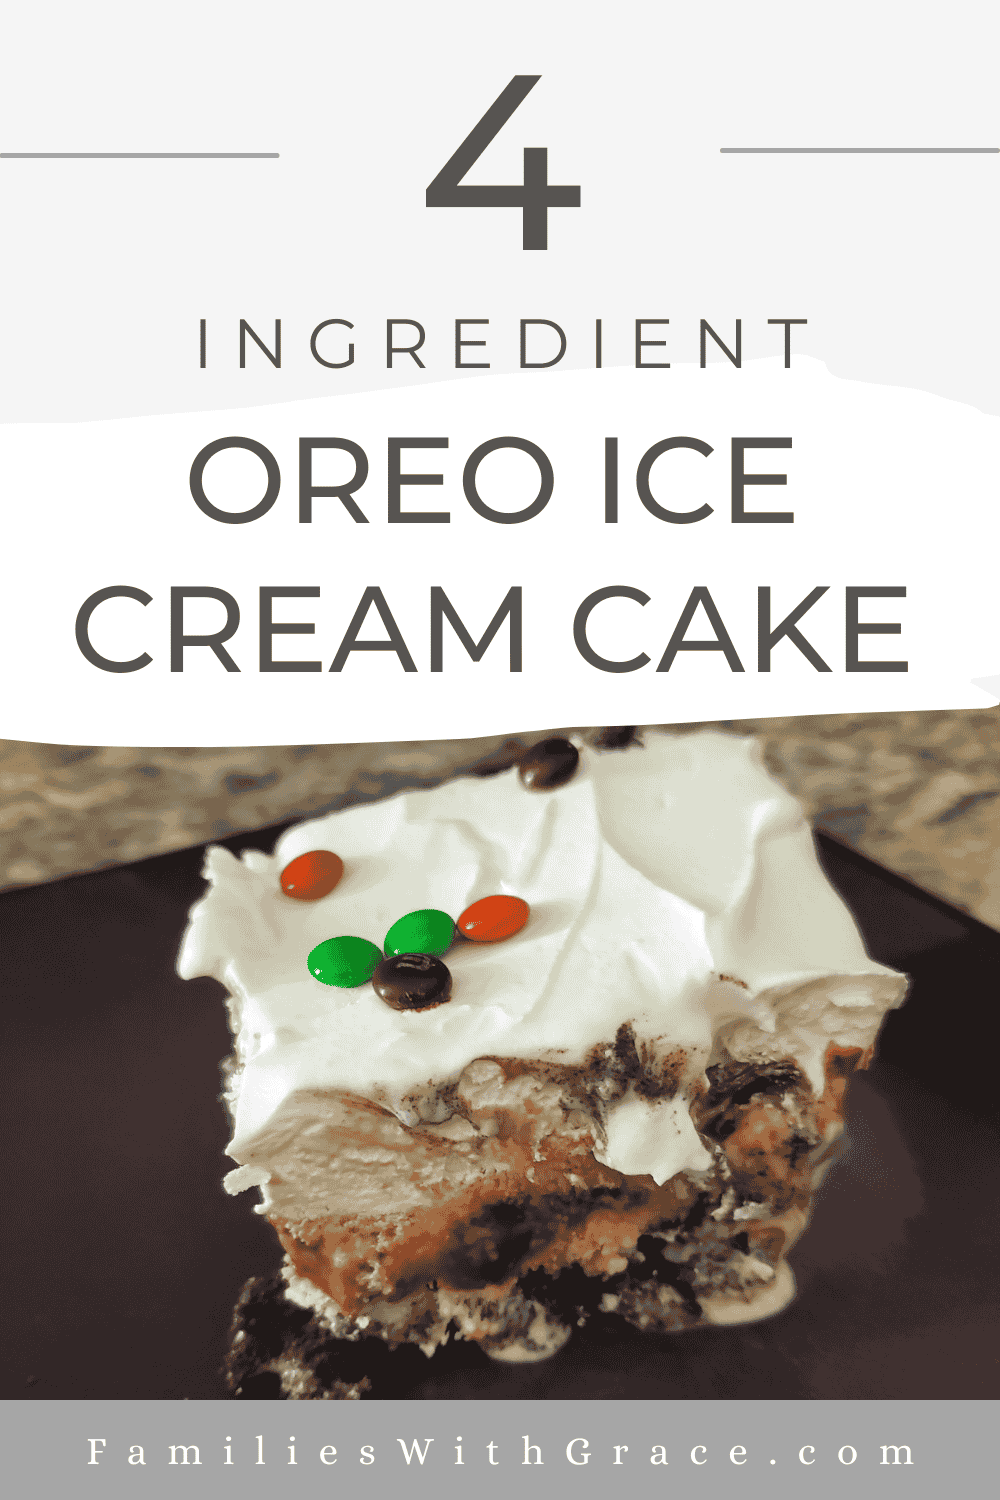
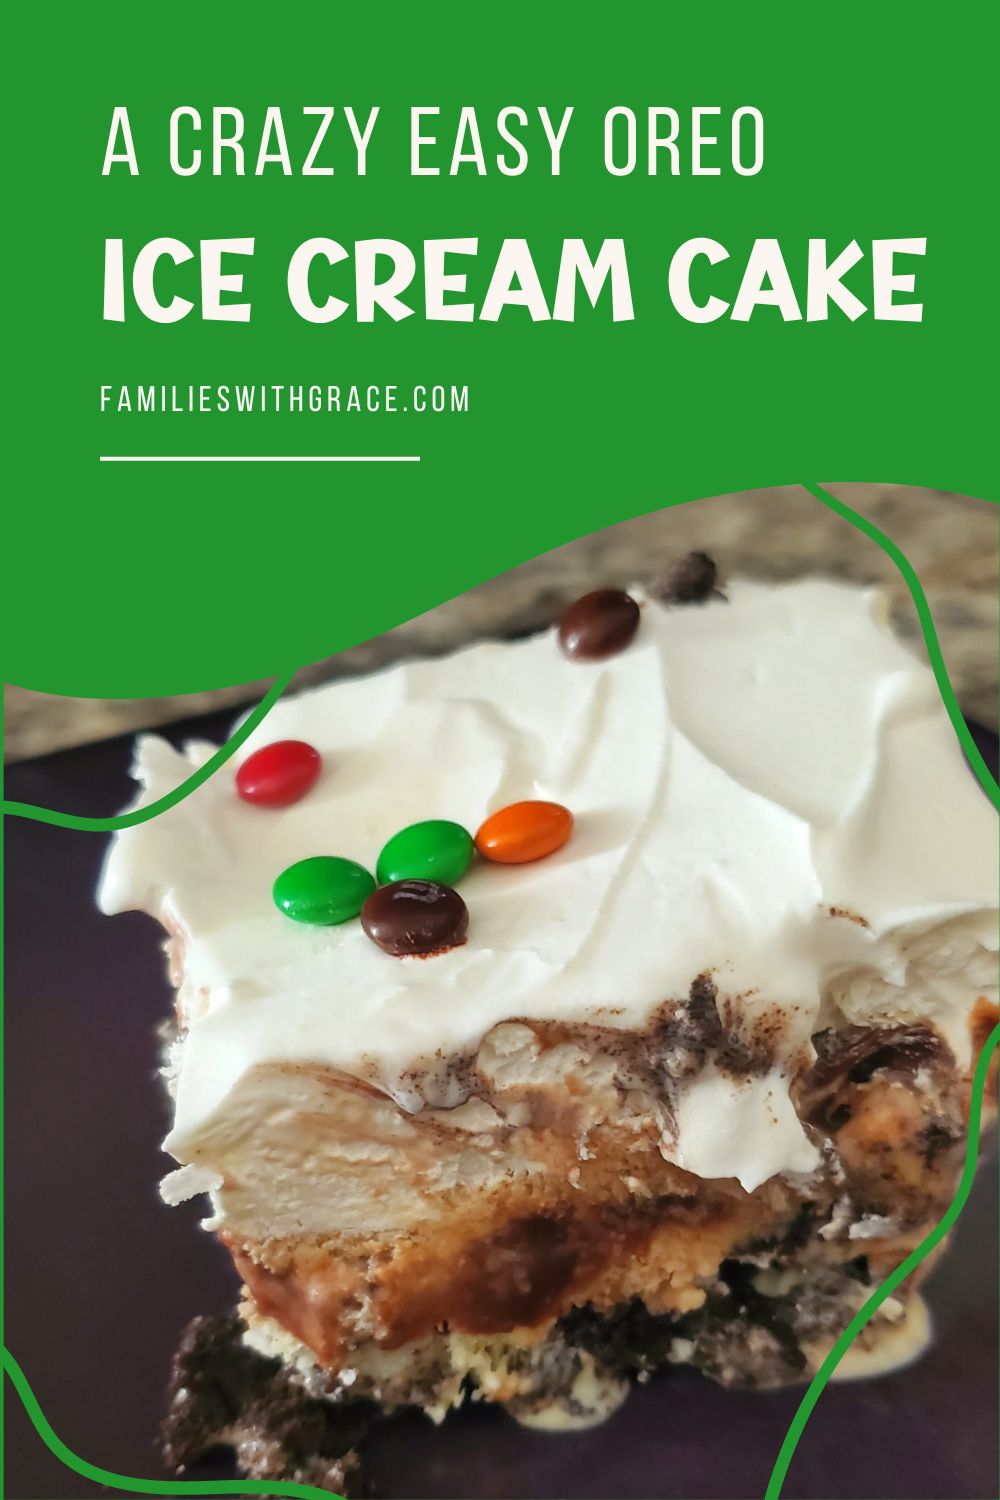
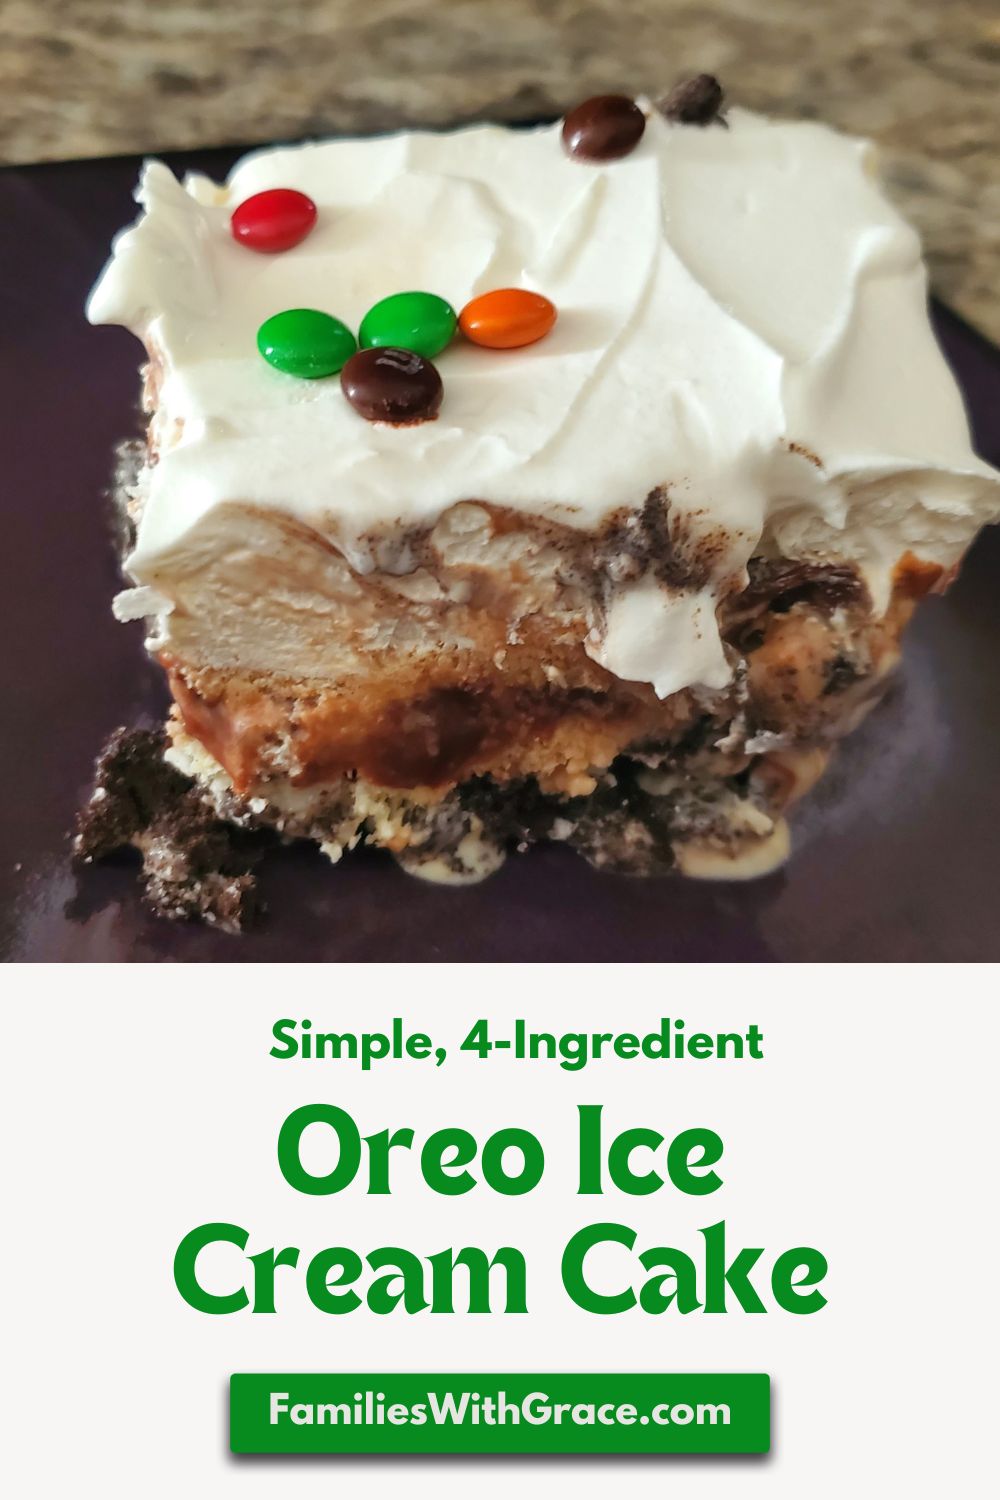
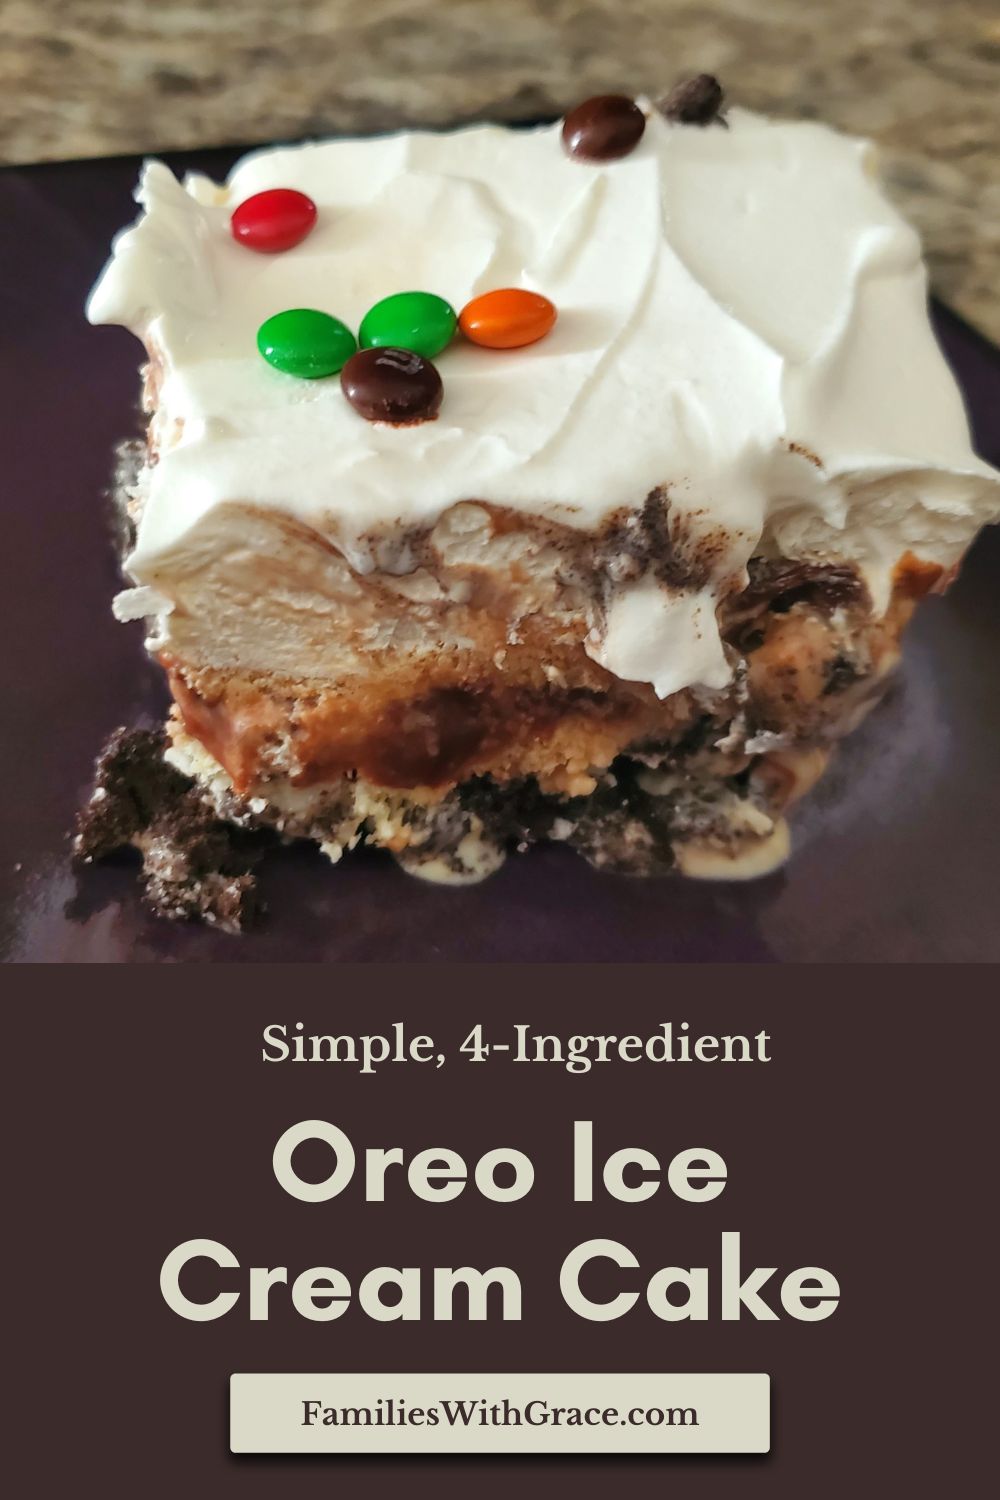
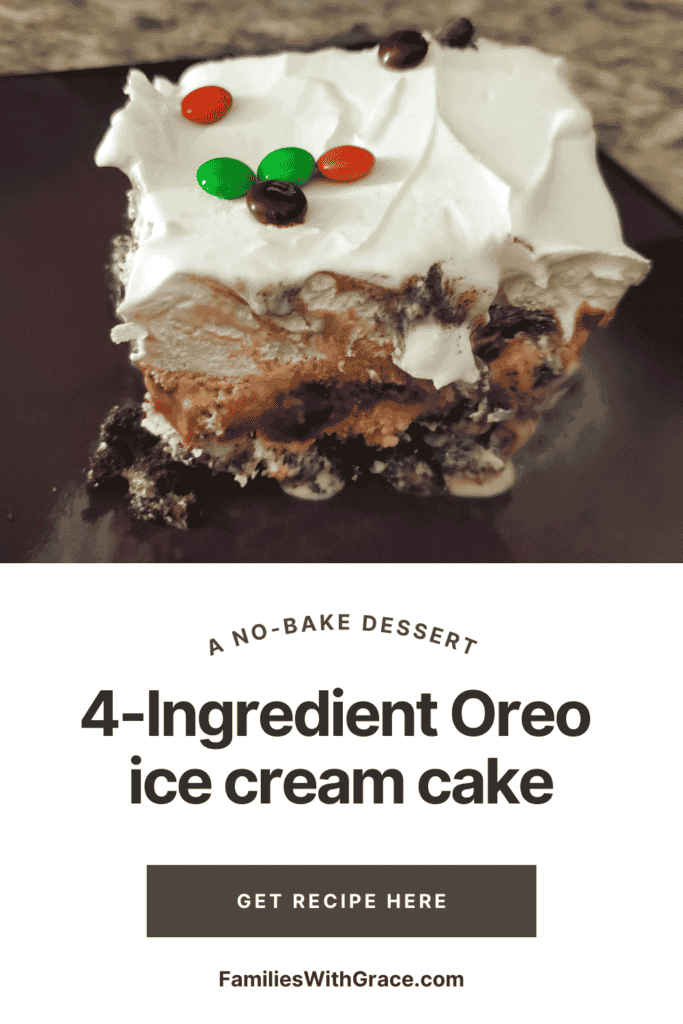
And that’s it for this Oreo ice cream cake recipe. Simple, easy and delicious! For birthdays, we often sprinkle some miniature M&Ms on top of the cake before serving. You can also used crushed Oreo cookies on top just before serving (any sooner and the cookies will get mushy) or chocolate chips.
Store the Oreo ice cream cake in the freezer and remove it 10 to 15 minutes before serving.

Oreo Ice Cream Cake
Ingredients
- 1 package Oreos, regular or Double Stuf
- 1 1.5 quart vanilla ice cream
- 1 11.5 – 12.8 oz. jar hot fudge sundae sauce
- 1 8 oz. container whipped topping
Instructions
- Thaw the whipped topping and soften the ice cream by setting it on the counter or using the microwave.
- Cover the bottom of a 9×13 or 3-quart oblong baking dish with Oreo cookies.
- Use the bottom of a glass to press on the cookies and break them into large chunks. Make sure the bottom of the pan is fully covered with cookie pieces.
- Dollop the softened ice cream in large globs over the top of the cookies. Use a spoon or spatula to spread the ice cream out evenly.
- Put the ice cream cake in the freezer for about 10 minutes to harden a bit.
- In the meantime, heat the hot fudge sundae sauce. It doesn't need to be as hot as for a sundae, but it does need to be hot enough to be pourable. I suggest removing the lid and heating it in the microwave for 30 seconds.
- Pour the hot fudge sauce evenly over the top of the ice cream layer. It won't cover the ice cream completely,
- Return the Oreo ice cream cake to the freezer for 10-15 minutes.
- Dollop the whipped topping to make the top layer. Spread it gently and evenly over the fudge layer.
- Serve immediately or place in the freezer. Let the cake thaw 10 to 15 minutes before cutting to serve.