Stacey A. Shannon is a freelance journalist and blogger who has been published internationally. She's also a Christian, a wife and a mom of two school-aged children. She started Families with Grace in 2019 to encourage Christian moms as they create homes filled with grace, love and faith.
Be sure to get the FREE family devotion book, "Finding Grace at Home: 7 Days of 5 Minute Devotions for Families." It's a great way to help your family draw closer to each other and to God.
Motherhood can be lonely. You weren't meant to go on your motherhood journey alone. Connect with Stacey and other Christian moms like you in the private Facebook group, Moms with Grace!
And check out the books from Stacey A. Shannon as well!
A series of easy, quick and healthy summer dinner ideas you’ll love
Summertime dinners often need to be quick and easy. Some days are busy with activities and others are just busy spending time as a family or even being a bit lazy! I love summer dinner ideas that are pretty healthy while also being quick and easy. We have central air conditioning, but I still like some dinner ideas for summer that don’t require use of the oven or stove.
So I’m running a series for a few simpler summer dinner ideas over the next few Tasty Tuesdays. I’d love to hear from you and any suggestions you have for what you make for your family during the hot days of summer!
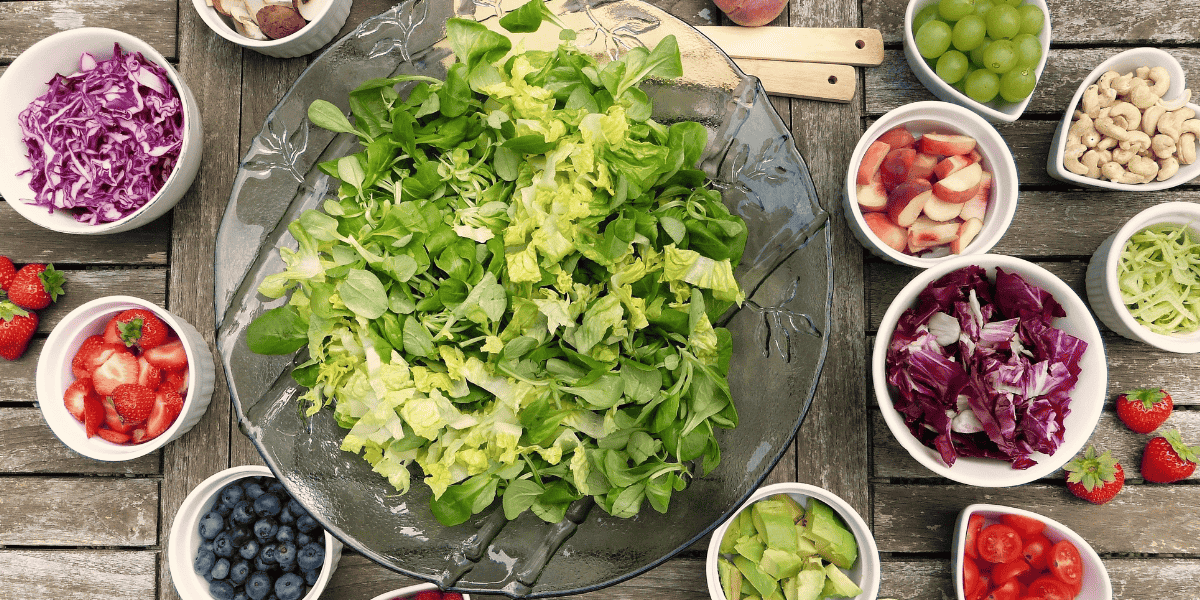
With that in mind, I’m excited to share the first simple summer dinner idea my family enjoys: a DIY salad bar. One of the things I love most is that I can prepare ingredients ahead of time and then just pull them out at dinner for easy, quick serving.
DIY Salad Bar
For a DIY salad bar, put all the salad fixings out on your kitchen counter and let each family member build their own tasty salad. It’s pretty straightforward, and you can totally customize it with what you family likes. I like to get some special salad treats for us that we don’t always have like sunflower seed kernels or a salad topper mix. My husband also loves the crunch of chow mein noodles on his salad, so I include those as well. (And leftover chow mein noodles can be turned into yummy butterscotch haystacks!)
Our salad bar toppings often include the following:
Lettuce
Shredded cheese
Boiled egg
Diced onion
Diced bell pepper
Diced tomatoes
Shredded or chopped carrots
Diced cucumbers
Turkey or ham
Pepperoni
Croutons
Bacon bits
Chow mein noodles
Sunflower kernels
Various salad dressings
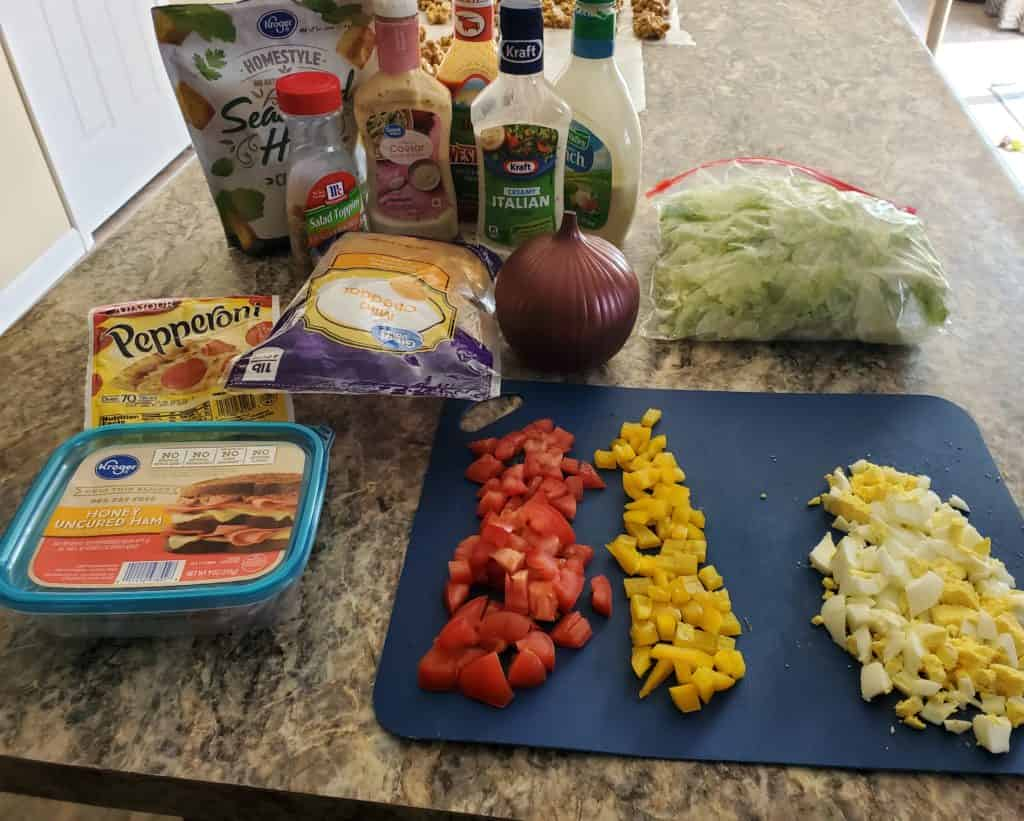
My salad bar toppings are often diced because that’s how I prefer them, but obviously you can do them however you like! As you can see from the photo below, I put out the ingredients and let each person fend for themselves. We are not at all fancy with this. In fact, sometimes if I’ve just cleaned the lettuce, it’s laid out on paper towels across the counter to air dry a bit!
You can make your life easier and buy pre-cleaned lettuce or salad mix if you want. I usually get a head of iceberg lettuce, which is what my family likes most, and then plan other meals around the same time that use lettuce like tacos or BLT pizza.
Salad bar sides
I do usually serve up something on the side when we do a salad bar at home. Check out these ideas to go along with your salad bar:
Crescent rolls
Garlic bread
Texas toast
Crackers (oyster, saltine, butter, etc.)
Fresh fruit
Homemade bread (This happens less often around my house!)
Basically, my favorite salad bar side is something I can use to scoop out the residual salad dressing that’s left in my bowl when I’m finished eating! I love a good salad dressing. My all-time favorite is poppyseed salad dressing. It’s so sweet and yummy!
Serving up salad for picky eaters
I’ve mentioned quite a few times that I have some particular eaters in my family. For example, when I make delicious pecan crusted chicken for dinner, my particular eaters would rather have frozen pizza or peanut butter sandwiches. Neither of them like chicken.
So for DIY salad bar nights, I get a little creative. My husband is a fan of salads and salad bars, so that only leaves my son as a picky eater. His biggest complaint is lettuce. He just doesn’t like lettuce. Instead I make him a deconstructed salad with some of his favorites like pepperoni, cheese and croutons. Usually I stick some baby carrots on his plate as well, but we were out of them for the most recent DIY salad bar night we had. And then he’s happy with whatever is on the side. This time it was crescent rolls.
Simple sweets
And then if you’re going with simple summer dinner ideas, you need a simple sweet as well. For DIY salad bar nights, it seems wrong to eat something heavy or rich. Plus hot weather calls for lighter foods, I think. So if I make a sweet for us, it’s usually either oat and honey granola or peanut butter honey nut cereal clusters. I’m a little partial to peanut butter honey nut cereal clusters for simple summer dinners because they only use the microwave and not the oven.
What are your family’s favorite simple summer dinner ideas?
Plus a free printable Father’s Day coloring card page!
Finding the right Father’s Day gift is often challenging for me. One of the things I’ve learned through the years is that personalized Father’s Day gifts are often the most memorable. My husband likes gifts that show we know him well and want to give him something related to his interests. On Father’s Day, that focuses on our kids!
So rather than try and come up with all sorts of generic Father’s Day gifts ideas this year, I’ve put together a list of last-minute personalized Father’s Day gifts that he’s sure to love. And I’m including a free printable Father’s Day coloring card page to get you underway as well. It works as a gift by itself or paired with another gift.
If you’re looking for a personalized Father’s Day gift that doesn’t have to be ordered in advance, doesn’t cost much and you can have immediately, then digital downloads (aka printables) are your best choice! Listen, I create printables that I both give away for free and sell on the Families with Grace Etsy store, so I am totally partial to them. But they make adorable gifts that you can easily personalize for the dad in your life. And they work incredibly well in a time crunch! I’ve pulled together a list of my best personalized Father’s Day gift printables that are inexpensive and memorable.
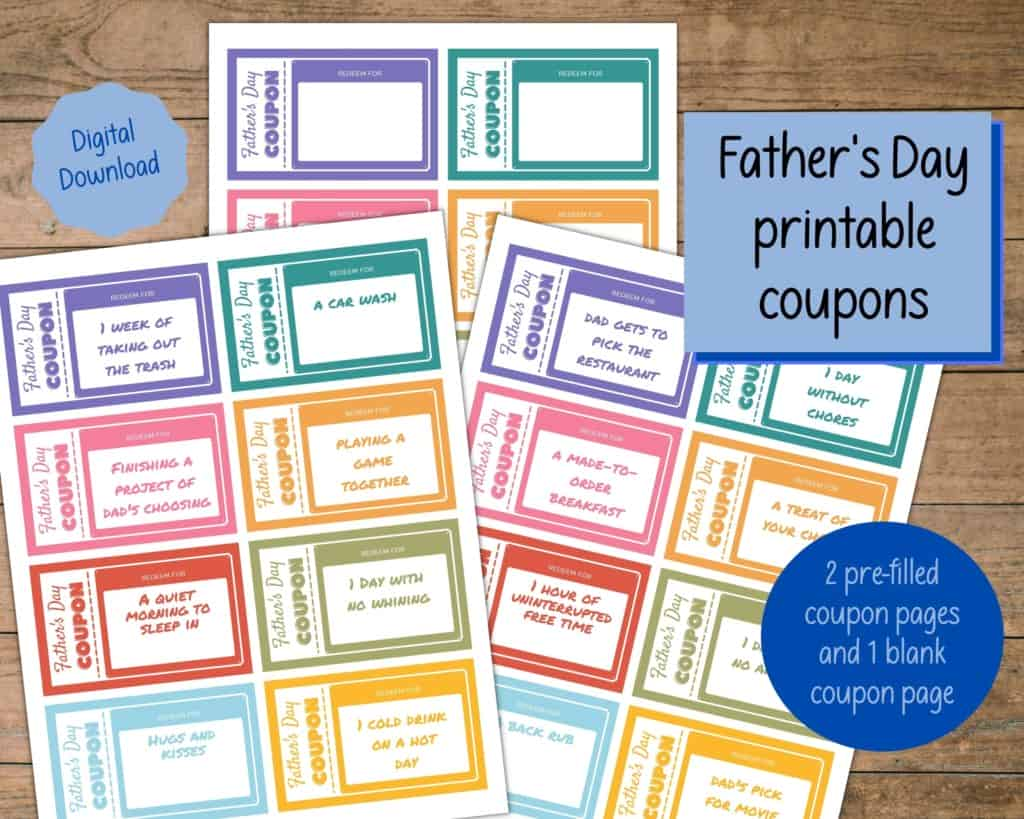
Printable coupons
These Father’s Day printable coupons are adorable. Two pages come pre-filled with ideas, but they also come with a third page that is blank so you can write in whatever works best for the dad in your life! The prefilled coupons include things like: a quite morning to sleep in, a car wash, one day without chores, playing a game together and a made-to-order breakfast.
Father’s Day handprint art
Another great choice is handprint art. Not only is it adorable, but it’s fun for dads to hang on to and look back to how small their kiddos’ hands were. All you have to do is print them on cardstock, add your child’s handprint and give it to dad! You can put it in a frame for safe keeping.
Of course the handprints on this artwork is personalized, but you can also find Father’s Day handprint art that is personalized to your guy’s hobbies and interests. There’s handprint art pages for those who love baseball, fishing, gaming, superheroes, music and more.
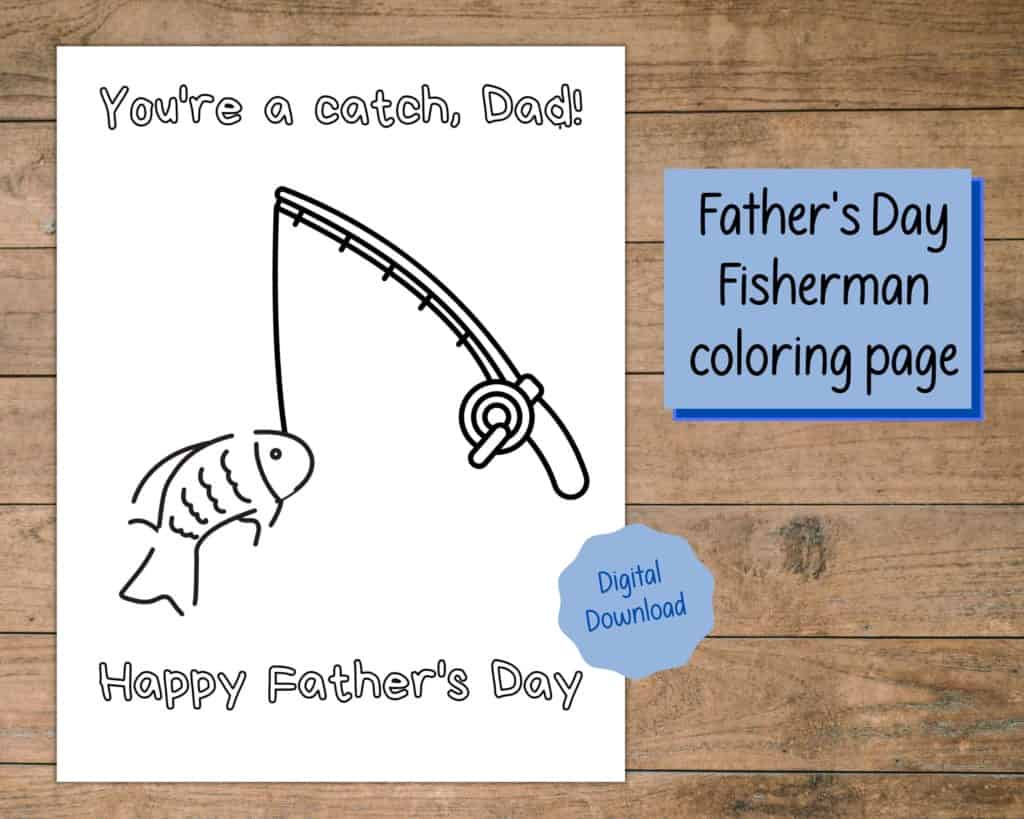
Father’s Day coloring pages
Even better is to pair the handprint art with a matching coloring page to give dad two personalized Father’s Day gifts he’ll love without breaking the bank. You can give just the coloring page as a card as well — whatever works best for your family! Just like with the handprint art, you can also get a variety of hobbies to make the coloring page card even more personalized. There’s handprint art pages for those who love baseball, fishing, gaming, superheroes, music and more.
But if you’re not looking for a specific hobby, there are some more general coloring pages that work for many father figures and dads as well. They become a personalized Father’s Day gift when your kiddos color them!
And then there are also bundles of Father’s Day coloring pages that make great cards and can be a good activity for a Sunday School class or your own kiddos.
Another fun and easy printable that your kiddos can make a personalized Father’s Day gift is printable bookmarks they color in and make just right for dad.
A surprisingly easy weeknight chicken recipe your family will love!
When it comes to meat, chicken is my all-time favorite. I really like bacon, but chicken is what I can eat pretty much any time. I think that’s because it’s so versatile. During our recent home meal kit delivery service trial, I found quite a few chicken dishes I fell in love with. One of them was a pecan-crusted chicken recipe. But, the recipe and ingredients were harder to come by not using the meal kit, so I played around with it and figured out my own version that’s just as tasty!
Besides the chicken, you just need a few ingredients to pull of this super easy and delicious weeknight chicken dinner. This is the kind of dinner that makes me feel like I’m eating out.
When I make this recipe, I use two chicken breasts to serve just my daughter and me. My husband and son don’t like chicken, so they have something else. However, I’ve written this recipe to make four chicken breasts or servings to feed a family of four. You can adjust it up or down as needed for your own family.
Prepping for the chicken
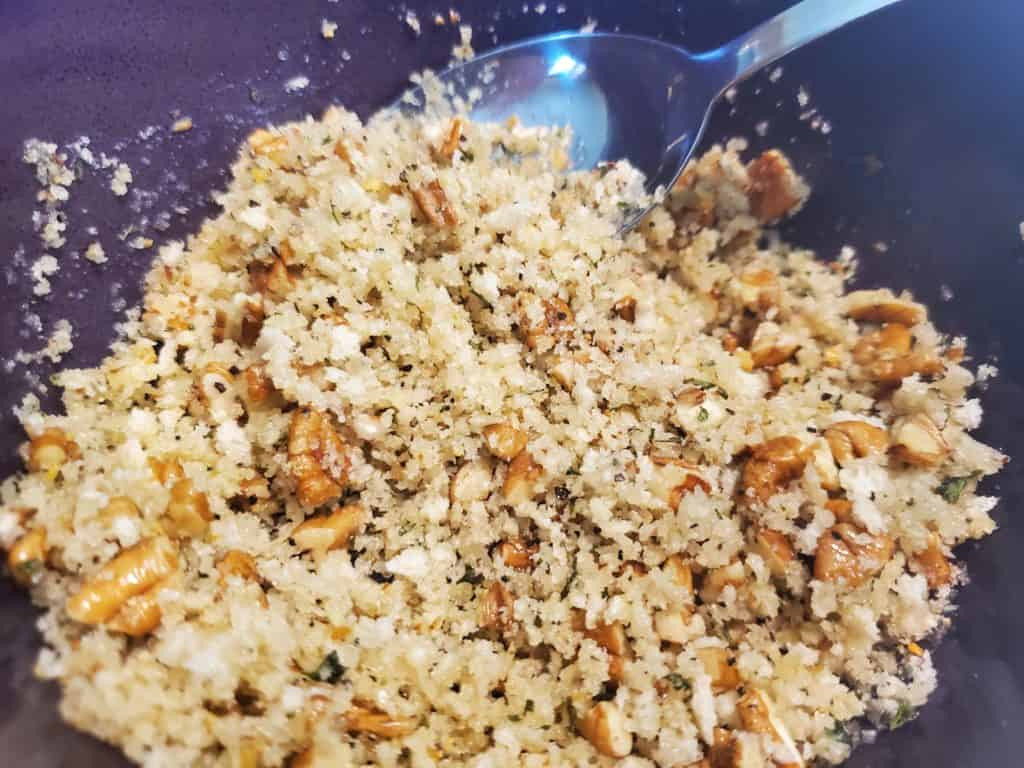
Get your oven preheating at 450-degrees with the rack in the center. Then, since it’s pecan-crusted chicken, you may need to prep pecans. If you’ve bought pecan pieces, you don’t have to do anything. I got pecan halves most recently (I store them in the freezer to keep them fresh), so I had to break them up. You can use a knife, your fingers or even a food processor to break them into smaller pieces. You need 2/3-cup of roughly chopped pecans for four chicken breasts.
Once your pecans are ready, melt 2 tablespoons of butter in your microwave and then stir in the pecans, 1/2 cup Panko (I used seasoned Panko, but either works), salt and pepper. If you want a strong flavor, you can also stir in 1/4 to 1/2 teaspoon Montreal steak seasoning. While the mixture should be moistened, it should remain with a crumbly texture, like so:
Putting the chicken together
Once your pecan mixture is ready, it’s time to move on to the chicken. If your chicken is frozen, make sure it’s thawed. For even cooking times, I usually pound my chicken inside a paper towel or plastic wrap with my hand or rolling pin, because I have yet to get a meat mallet! Either way, I try to get the breasts to a similar thickness.
Pat your chicken dry with paper towels and place it on a baking sheet liberally coated with non-stick cooking spray or covered with parchment paper or non-stick aluminum foil. I went the non-stick aluminum foil route for easy clean-up of this pecan-crusted chicken recipe.
Season your chicken breasts with either 1 teaspoon total of Montreal steak seasoning or just use salt and pepper. When I made it the first time on my own, I used the Montreal steak seasoning because I had it for another recipe and figured I’d give it a try. It is a strong flavor, though, so spreading 1 teaspoon among four chicken breasts is more than enough.
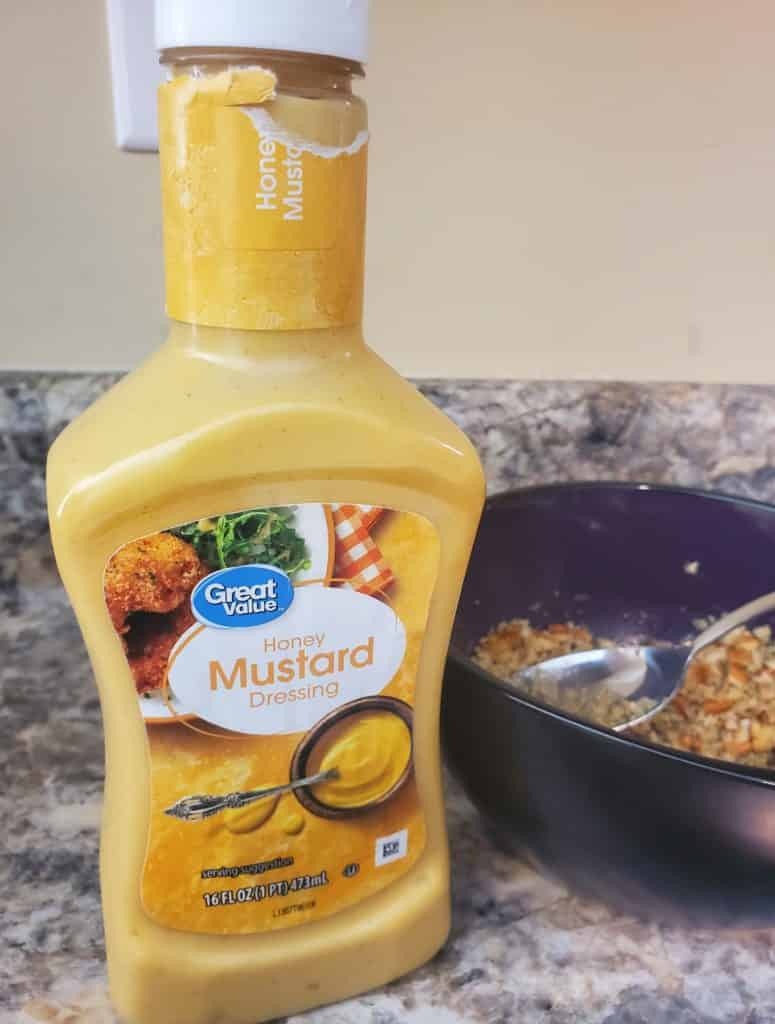
Next is one of my favorite flavors to go with chicken: honey mustard! I use premade honey mustard salad dressing, because we eat it around my house anyway.
If you don’t have honey mustard, you can make your own with 4 tablespoons mayonnaise, 4 teaspoons honey and 4 teaspoons Dijon or yellow mustard. Either way, you want to top each chicken breast with honey mustard. I used about 1 teaspoon of honey mustard per chicken breast, swirled it on top and then used a spoon to spread it.
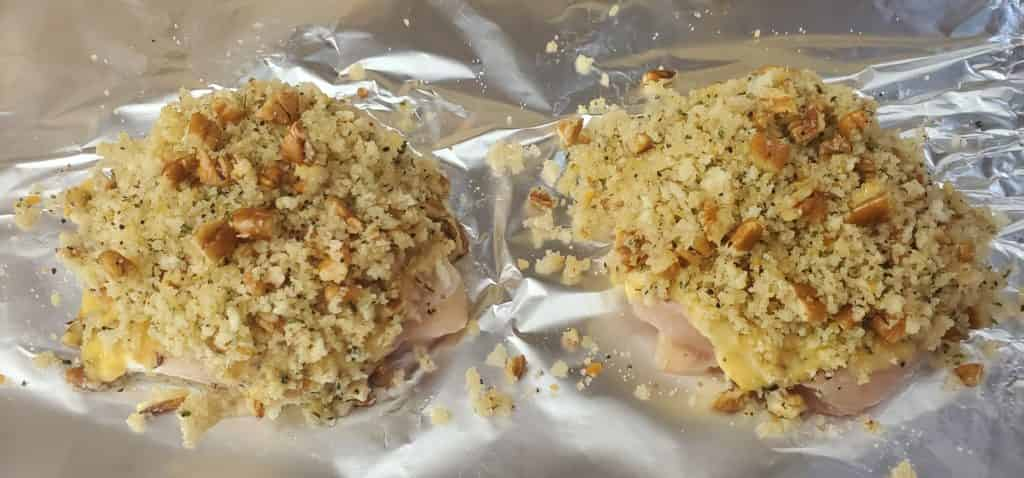
These photos are from when I over-seasoned the chicken with Montreal steak seasoning. Your chicken should not be this covered with seasoning!
Finally, you add the pecan crust to the chicken. Use a spoon to pile the pecan mixture on the top of each chicken breast and cover it well. Press down a bit to make sure it sticks. You only need to put the pecans on the top.
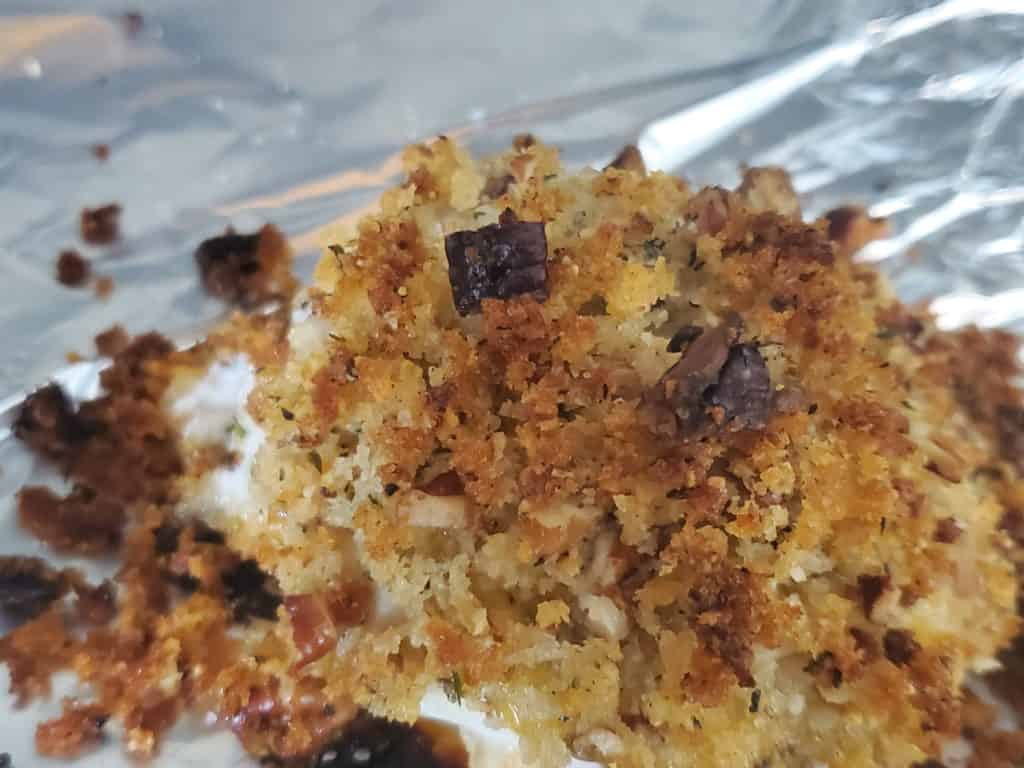
That’s it. Stick your pecan-crusted chicken into the preheated 450-degree oven for 15 to 20 minutes until the crust is brown and the inside middle of the chicken is at least 165-degrees.
Make it a dinner
While the pecan-crusted chicken bakes, I usually prep our sides to go along with it. One of our favorite pairings is oven-roasted broccoli and mashed potatoes. I have learned that scratch mashed potatoes aren’t nearly as difficult to make as I once thought, but to make weeknights easier, I usually make boxed or pouch mashed potatoes. It makes for a delicious plate of food!
1teaspoonMontreal steak seasoning or salt and pepper
4teaspoonshoney mustard salad dressingor mix 4 tablespoons mayonnaise, 4 teaspoons honey and 4 teaspoons Dijon or yellow mustard together
Instructions
Preheat your oven to 450-degrees (F) with the rack placed in the center.
If you are using pecan pieces, skip to the next step. Otherwise, use a knife, your fingers or a food processor to break your pecans into pieces. They don't have to be small, but they do need to be at least roughly chopped.
Melt the 2 tablespoons of butter in the microwave.
Stir the pecans, Panko and some salt and pepper into the butter. If you want an extra kick, sprinkle in some of the Montreal steak seasoning as well. It should form a moist, yet crumbly mixture. Set it aside.
Use your hand or a meat mallet to pound your chicken to the approximately same thickness. (A rolling pin also works. I suggest putting the chicken in paper towels or plastic wrap to do this.)
Pat the chicken dry with paper towels then place each chicken breast on a baking sheet liberally sprayed with non-stick cooking spray or lined with either parchment paper or non-stick aluminum foil. (I go the non-stick aluminum foil route for easy clean-up.)
Season the top of the chicken with the Montreal steak seasoning by spreading the 1 teaspoon among the four chicken breasts. Or season the chicken with salt and pepper.
Put about 1 teaspoon of honey mustard on top of each chicken breast; use a spoon to spread it over the top of the chicken.
Mound the pecan mixture on top of each chicken breast and press down gently so the mixture sticks. You only need to coat the top side.
Place the chicken in the preheated oven and bake for 15 to 20 minutes until the crust is browned and the inside center of the chicken is at least 165-degrees (F).
When I learned I was pregnant with my first child, I was excited. I was also overwhelmed and nervous. Some people are just naturally great with all kids. (In fact, that same first child of mine is that way!) I was never that way. I was not sure what motherhood would actually be like, but I was excited to be part of it. Not once did I think about how grumpy I’d be with my baby. Instead, I planned to be a grace-filled parent. I planned to be calm, have a sense of humor and show lots of love.
The reality of parenthood sets in quickly. Those first few months were exhausting and an adjustment beyond anything I could ever have prepared for. Parenthood is a total upheaval of life. Added to the exhaustion is stress and pressure and it’s a perfect mix for cranky parents. But none of us what to be those cranky parents. We desire to be a grace-filled parent who is patient, caring and loving.
I’ve never been a perfect parent, just as I’m not a perfect person. I have stories about my behavior that make me cringe and feel ashamed. However, I’ve also worked (and had God work in me!) to become a more grace-filled parent. I’ve learned through my years as a mom that my kids need grace from me as much as I need grace from them. Today I’m sharing 10 lessons I’ve learned about how to be a more grace-filled parent.
1. Listen to your children.
From the time they are babies, our kids are using their voices to tell us what is going on with them. True, they start out with crying that can be perplexing. (I remember the days of trying to sort out what could possibly be making my baby unhappy when they were clean, fed and well rested and still crying sometimes!) But once they start talking and expressing themselves, we get to learn about them and their point-of-view.
Understanding where they’re coming from can help you have more patience with your kiddos and give them more grace as a result. I remember when my daughter was 3 and spilled an almost full bottle of hand soap on the hallway carpet. I was angry that she’d made a mess and didn’t understand why in the world she was carrying the soap dispenser out of the bathroom. She explained to me that she wanted to show our new Minnie Mouse soap dispenser to the Minnie Mouse toys in her bedroom. Oh my heart!
She still got in some trouble, and we definitely talked about how soap dispensers stay in the bathroom, but her punishment wasn’t as severe because I understood where she was coming from. She wasn’t just carrying around soap for no reason and trying to make a mess. Listening to her helped me understand her and address what was really going on.
2. Observe your kids.
But, kids don’t always express themselves with words. Sometimes their feelings are too big or they just plain don’t have the words. I mean, I’m just over four decades into my own life and still can struggle to find the right words to explain how I’m feeling sometimes! Sometimes we need to stop and observe our kids to figure out what is really going on with them and why they are behaving a certain way.
Recently my parents were in town for a visit. (They moved away last winter.) We made a quick trip to the grocery store for just a couple of things. My son stood in the chip aisle and argued with me for a moment about buying Cheetos. I get it. I love Cheetos, too, but I told him we had some at home and to stop being difficult. Indeed I was frustrated. Later that evening, my dad mentioned to me that my son had noticed all the rest of us had picked up some sort of snack or something to purchase and seemed to be feeling left out. It made perfect sense as I looked back on the situation. I wasn’t a very grace-filled parent in that moment, but I did at least understand my son a bit. He never said he was feeling left out; however, his actions told the story if I’d have just paid closer attention.
No matter what, of course my son shouldn’t be allowed to argue with me. If I had realized what was really going on with him at the time, though, I could have reacted differently and resolved the situation in another way. I could have suggested he pick another snack instead. Just two minutes after the Cheeto disagreement, I did concede to getting a box of Cheez-Its at my son’s request that both my kids love. His attitude disappeared after that.
3. Communicate with your kids.
Another way to be a more grace-filled parent is to communicate with your kids. Listen, my kids talk a lot. A lot. But, what I mean is to actually communicate with them. Let them know what plans are for after school or what you expect from them on an outing. Just a few sentences ahead of time can help them also understand you better and allow you both to have more patience with and grace for each other. It helps you avoid yelling at your kids or getting otherwise upset with them.
For example, as my children have gotten older, they have had more plans for what they want to do during their downtime. My daughter may be planning to come home after school and spend a couple of hours writing. Or my son might be looking forward to playing with a friend in the neighborhood when he gets home on a nice day. If I throw a wrench into their plans with an extra activity, that can lead to grumpy attitudes at the least and meltdowns at the worst. Simply communicating about plans ahead of time helps tremendously.
My husband and I also talk with our kids about why they are being punished or when we observe a behavior we don’t like. Of course there are times they get in trouble immediately, but other times we have found it’s helpful to communicate with them about why we are unhappy with what’s happened. Communication really does go a long way!
4. Know when to discipline and when to hug.
The definition of grace is not getting what you deserve. Meaning if I do something wrong, you show me kindness instead of anger. Being a grace-filled parent means that sometimes when our kids do something wrong, we let it slide or give them a hug instead of a punishment.
I mentioned in point two that my parents moved away last winter. Their move a few states away has been a big adjustment for all of us. So when they headed back out after visiting us recently and my youngest had a difficult attitude the next day, I gave him a bit of grace. He needed grace and love more than discipline in that moment.
When we are listening to and observing our kiddos, we can more easily discern when they are just out of sorts and need love and attention more than punishment.
5. Remember that you are a teacher.
One of the biggest jobs we have as parents is to be our kids’ teacher. We teach them everything they know about navigating life through our words and actions. Remembering that we are teaching them is an important part of being a grace-filled parent. Our kids are still growing and learning. If we take the time to teach them rather than just get mad at them, we’re all happier in the end.
Our goal is to help them grow and learn. Growing and learning are difficult when we’re being yelled at or in trouble. Instead, use some mistakes as teaching moments. I’ve also learned to expect that I will have to repeat myself and repeat lessons. My kids are kids. They aren’t perfect and they’re not going to always remember what to do in a moment.
6. Set realistic expectations.
When I expect more from my kids than they are capable of, then I lose my patience and my feelings of grace. One trick I’ve learned is to remind myself how old my kids are when I start to impose unrealistic expectations on them. If I stop to think that my daughter is only 12 or my son is only 9 when they mess up, then I can realize when I’m expecting them to act like adults.
I also set expectations out loud to my kids when we are going into situations. For example, if we are going to visit a friend, I remind them I expect them to help clean up toys and not give me a hard time when I say it’s time to leave. When they know what I expect of them, they are more likely to behave accordingly.
7. Guard your time.
I cannot say enough how important guarding your time is. I’m an introvert, so finding downtime comes naturally to me. Both introverts and extroverts need to be wary of overscheduling. Who can be a grace-filled parent when you are stressed out trying to get everyone in multiple places at the same time every night of the week? (Maybe some of you can, and that’s awesome. But I know I sure can’t, and I don’t think I’m alone.)
I’d rather say no to an activity than lose my patience with my kids. We started in elementary school with the rule our kids can do only one regular activity per week. That changes as they get older and can both handle more and stay up later. But it’s what works best for us, and I gladly stick to it.
8. Have fun together.
Eight months old. That’s the age that babies start getting more interactive and you can have a bit of fun with them. (Or at least that was our experience.) From that point on, find ways to have fun with your kiddos. Do things they enjoy with them and let yourself go and enjoy them, too. Now that our kids are older, we enjoy playing games together. When we go to the playground, I swing with the kiddos (unless the swings are busy or other kids want to swing). Just have fun.
We are much more inclined to give grace when our children need it when we have good feelings of making good memories with them. Find ways to sincerely enjoy spending time with your kiddos. Parenting is a lot of work and requires a lot of us, but don’t forget to enjoy moments along the way!
9. Ask for help.
Another important thing to remember about being a grace-filled parent is that you aren’t meant to do it alone. Start always with asking God for help. I pray daily to be the mom my children need. In fact, this parents’ prayer is a great place to start.
Other times you need to ask for help from those around you: your spouse, your extended family, friends and even your kids! For example, I am the one mostly in charge of laundry in our family. Sometimes I get overwhelmed, more frustrated and certainly less grace-filled when I am sitting with a pile of laundry surrounding me that needs to be folded. I’ve learned to make laundry a family chore. I get it gathered, washed and dried, then we all fold it together and everyone is responsible for putting away his or her clothes.
10. Apologize when you mess up.
Being a grace-filled parent doesn’t mean you always have it together. You aren’t perfect. Along the way, you’re going to mess up. Let your kids see what it looks like to mess up gracefully. Apologize to them when you are wrong, because sometimes you are. I have gotten short with my kids for no good reason other than being tired or cranky or whatever. And then I tell them I’m sorry. I want to model asking for forgiveness for them as well as reminding them none of us are perfect.
Looking for more grace-filled posts? Don’t miss these!
An incredibly easy and delicious taco pizza recipe you’re family will love!
Affiliate links are used in this post; if you make a qualifying purchase via my link, I receive a small percentage of the sale at no additional cost to you. I only recommend products and services I use and love. It helps support my blog, so thank you for your support! Read my full disclosure here.
Two of the most popular foods my entire family likes are tacos and pizza. So when I came up with the idea for this taco pizza recipe, I was pretty sure it would be a hit. While it isn’t a replacement for either tacos or pizza, it’s definitely a great way to shake up dinner.
I love recipes that are easy and delicious. This taco pizza recipe is both. While we ate it as the main course for dinner one weeknight, you could also serve it as an appetizer or bring it along to a potluck. It’s also be a great snack for watching sports if that’s your family’s thing.
Originally I was trying to come up with another way to use a crescent roll crust like my BLT pizza recipe does. My daughter loves BLT pizza, but my husband wanted something different. And so this taco pizza recipe was born. And, as you might guess, it all starts with a crescent roll crust!
The crust
I suppose you could use regular pizza dough for this recipe, but the crescent roll crust gives it a buttery, flaky goodness that just can’t be beat! For our family of four, I used two cans of crescent rolls spread out on a baking sheet lined with parchment paper (easy clean up!). I smushed the seams together decently enough. It really doesn’t have to be perfect!
Once it’s prepped, then you bake it in your preheated oven according to the temperature your crescent rolls say. I have found the crust usually bakes 3 to 5 minutes longer than it takes for the rolls to bake. Check your crust after the suggested time has passed and work from there. You want the crust to be a nice, golden color like this:
The meat
While your crust is baking, cook your meat. I used about one pound of ground chuck for my family. You could use more or less depending on what you family likes. You could also make this with chicken if you’d rather! I used some cooked and frozen crumbled hamburger that I had in my freezer this time to make prep even easier. I thawed it in the microwave and then popped it into one of my beloved Rachael Ray non-stick skillets.
Once the meat was warm, I added taco seasoning and water. I used Old El Paso taco seasoning with 1/4 cup of it and 2/3 cup of water. I let it simmer for the flavors to come together well. Basically, season your meat however you would for tacos. Let it simmer while you prep the other ingredients and wait for the crust to bake.
The “sauce”
Every pizza needs a sauce and this taco pizza recipe is no different! I decided to go with a sour cream sauce, much like what my taco cornbread bake uses. To make fewer dishes, I mixed 1-1/2 cups of sour cream, 1/2 cup of shredded cheddar cheese and 1/2 cup of diced onion in my 2-cup measuring cup.
When the crescent roll crust was finished baking, I pulled it out of the oven and smeared the sour cream sauce all over the top of it. Then I put it back in the oven (at the same temperature the crust baked at) for 3 minutes to let the cheese start getting melty.
Putting the taco pizza together
Your taco pizza is ready to assemble once you’re finished baking it with sour cream. First, spoon your meat evenly over the top of the sour cream.
Next, crumble up nacho cheese flavored chips. I used classic nacho cheese Doritos. You could use cool ranch or spicy flavors as well — whatever your family prefers. I had two individual bags of nacho cheese Doritos, so I squeezed them in the bags before opening them. Easy peasy! If you have a larger bag, just put the chips into a zip top bag and use your hand to break them up.
Once your chips are broken up, spread them evenly over the top of your taco pizza.
Optional garnishes
The pizza is ready to cut and serve as is. There are some garnishes you might like to add, though. I kept out some extra diced onion that my husband and daughter added on top of theirs. My daughter and I also drizzled a bit of Western salad dressing on top of our slices. Honestly, this kicked the flavor from good to great, so I highly recommend it! Adding some shredded lettuce and tomato on top would also be delicious.
Preheat your oven to the suggested temperature on your crescent rolls.
Open the crescent rolls and spread them out on a baking sheet lined with parchment paper or sprayed with non-stick cooking spray. Pinch the seams together to form one large rectangle. Bake in the oven for 2 to 3 minutes longer than suggested until the crescent roll crust is a golden brown.
Meanwhile, crumble and cook the ground beef in a skillet.
Add in the taco seasoning and water; let the meat simmer.
Stir together the sour cream, cheddar cheese and diced onion.
When the crescent roll crust is finished baking, spread the sour cream mixture evenly over its top and place it back in the oven at the same temperature for 3 minutes.
Remove it from the oven and evenly spoon the meat over the top of the sour cream mixture.
Evenly spread the crushed nacho cheese chips over the top of the meat.
Garnish with French salad dressing, shredded lettuce, diced tomato and/or extra onion as desired. (NOTE: I highly recommend the French salad dressing for this!)
12 Bible verses to encourage and uplift you when you feel like giving up (With a free printable!)
One of the things I struggle most with is discouragement. Not only am I hard on myself, but I can easily get down on myself and start thinking that what I’m doing isn’t making a difference. I feel ready to give up on the task before me. Being completely honest, I’ve felt like giving up on this blog before. Every single time I start questioning whether I’m using my time wisely by pouring so much of myself into this, God reassures me that I am. Sometimes through music, sometimes through others, sometimes through a devotional and sometimes through His Word.
Turning to God and His Word is always the best place to start when you are feeling like giving up. But, I don’t always do that first. Through the years, I’ve learned to turn to Him sooner; however, it’s not always my first stop. I kind of like to wallow in self-pity a bit. So to help keep myself on track, I decided to look up some Bible verses for when you feel like giving up. I wanted to remind myself that God is for me, and He has a purpose for me. And so, I’m sharing those verses with you today.
Let them be a reminder to you (and to me!) that God is with us. He is for us and always has a plan for our good. His Holy Spirit will strengthen us each step of the way. If we are breathing, we have purpose. If the journey is difficult, we are growing. God is on the move, even when He feels far away.
Download a PDF with all 12 verses for free!
“Let us not become weary in doing good, for at the proper time we will reap a harvest if we do not give up.” — Galatians 6:9 (NIV)
What if you give up the day before God has a big move planned? How sad that would be! God’s timing is always right. Sometimes we just have to keep waiting and working until it is time for harvest. This verse reminds us that we will be blessed if we don’t give up.
“Consider him who endured such opposition from sinners, so that you will not grow weary and lose heart.” — Hebrews 12:3 (NIV)
If anyone had reason to give up, it was Jesus. He was beaten and punished while being completely innocent. Jesus is the Son of God and perfect, but He was also fully human. I have to think He was tempted to give up at times in His ministry. But He didn’t. He endured and pressed on to complete His purpose so that we might be saved. Our goal is to be like Jesus, so let us continue on even when we feel like giving up.
“And as for you, brothers and sisters, never tire of doing what is good.” — 2 Thessalonians 3:13 (NIV) “The Lord is my strength and my shield; my heart trusts in him, and he helps me. My heart leaps for joy, and with my song I praise him.” — Psalm 28:7 (NIV)
I combined these two Bible verses for when you feel like giving up, because they go together. When I think about the command to not get tired of doing what is good, I know I can’t do that fully on my own. It’s less that I’m tempted to sin and more that I just plain get tired and weary. My burdens grow heavy and I get overwhelmed. But, verses like Psalm 28:7 remind me that I don’t have to do it on my own. God is with me. He is my strength and my shield. If I trust in Him, then He will help me. That is, indeed, something for which to praise Him!
“So do not fear, for I am with you; do not be dismayed, for I am your God. I will strengthen you and help you; I will uphold you with my righteous right hand.” — Isaiah 41:10 (NIV)
This is my all-time favorite Bible verse. I’ve already shared it in six previous blog posts, in fact. But I have to share it again. When I feel like giving up, it isn’t necessarily that I’m afraid. So for this, I cling to the second sentence of this verse. God says He will make us stronger, help us and hold us up. I love to imagine myself snugly in the palm of God’s hand feeling strong, loved and protected. And when I do that, then I no longer feel like giving up.
“I press on toward the goal to win the prize for which God has called me heavenward in Christ Jesus.” — Philippians 3:14 (NIV)
Who doesn’t like a prize? This Bible verse reminds us that if we continue working toward the goals and purposes that God has for our lives, then He will reward us. He is not some miserly boss who wants us to work hard for meager pay. Jesus told us He went to prepare a place for us in heaven. That is the greatest prize and reward we have to look forward to.
“He who began a good work in you will carry it on to completion until the day of Christ Jesus.” — Philippians 1:6b (NIV)
The tasks God has given you to do He has given you for a purpose. Those tasks may seem small, like day-to-day care for our families. Or they may seem big, like running a ministry. But no matter what, God began a good work in you. He won’t stop now. He will continue His good work in you until it’s complete and you are with Him completely. We don’t have to give up when we know that we aren’t walking alone on our journey.
“Have I not commanded you? Be strong and courageous. Do not be afraid; do not be discouraged, for the Lord your God will be with you wherever you go.” — Joshua 1:9 (NIV)
Being strong and courageous is sometimes more than we can manage on our own. Our strength and courage falter and we want to throw in the proverbial towel. But, we can rest in knowing that God is always with us and will always be with us wherever we go. We don’t have to be afraid or discouraged, both of which are two good pals with giving up!
“He gives strength to the weary and increases the power of the weak.Even youths grow tired and weary, and young men stumble and fall;but those who hope in the Lord will renew their strength. They will soar on wings like eagles; they will run and not grow weary, they will walk and not be faint.” — Isaiah 40:29-31 (NIV)
I couldn’t narrow this one down to just a single verse. This whole section is full of encouragement. When we feel like giving up, we are weary and weak. Those feeling don’t make us lesser than. In fact, even the youngest and strongest get weary and fall. But, trusting and hoping in the Lord will strengthen us. He replenishes our strength. And, here’s what I really love. In true God fashion, these verses promise not only that He will give us strength, but He’ll give us strength beyond what we ask for. We will be able to keep going and not get weary. In God, we can soar like eagles.
“Come to me, all you who are weary and burdened, and I will give you rest.” — Matthew 11:28 (NIV)
Nobody feels like giving up when they are energetic and on top of the world. So, I had to include Matthew 11:28 with the Bible verses for when you feel like giving up. Maybe instead of giving up, what you really need is a break. Run to Jesus. He will catch you, hold you and give you the rest you need. Then you will be renewed to keep going.
“Whatever you do, work at it with all your heart, as working for the Lord, not for human masters.” — Colossians 3:32 (NIV)
If I’m working on something just for myself, I am much more tempted to quit. But if I’m doing something for my husband or children, I’ll keep going even when it’s uncomfortable and exhausting. (Remember the days of having a newborn? Talk about exhaustion!) So if I think about how all the work of my hands is actually for God, then I am incredibly motivated to keep going. I want to give Him my very best since He has given me everything.
“Therefore, since we are surrounded by such a great cloud of witnesses, let us throw off everything that hinders and the sin that so easily entangles. And let us run with perseverance the race marked out for us, fixing our eyes on Jesus, the pioneer and perfecter of faith.” — Hebrews 12:1-2a (NIV)
Who do you know or have you known that was a person of God? Someone who you knew was so in love with God that He radiated through them and all they did? Those people are examples for us. None of them were perfect. Not a one! But, we can still look to them for encouragement. I like to think of my grandparents and uncle hanging out in heaven and rooting for me to keep going on the journey God has for me. Regardless, I know that Jesus is rooting for each and every one of us:
Go, go, go! You can do this! You’ve got this! Here, take the Holy Spirit! He’ll help you! Keep going! I can’t wait until you get to the finish line and I can throw my arms around you! Go, go, go!
Download a PDF with all 12 verses for free!
Looking for more Bible verses and encouragement? Don’t miss these posts!
Cook-at-home kits taught me a few lessons I’ll continue to use even if I don’t continue to use the kits!
When my daughter first proposed trying cook-at-home kits a few months ago, I was certainly hesitant to give them a try. But now, after trying multiple meal kit services, I’m glad we did so! I wanted to wrap up the series with my overall thoughts, lessons learned and what we’ll do in the future.
(And, as a reminder, I have no affiliation with any of the meal kit service providers and am earning no commission from any of them. These are just my own opinions about Dinnerly, Hello Fresh, Home Chef, Every Plate and EMeals.)
One cook-at-home kit that didn’t work
Of all the cook-at-home kit services we tried, only one didn’t work out at all. Others I liked at varying degrees, but Blue Apron just wasn’t a fit for my family.
While we didn’t actually receive meals from Blue Apron, it wasn’t for lack of trying. In fact, when I saw Blue Apron offers a two meal plan a week, I decided to try them. I looked at the menu and found it iffy. But I decided to take the plunge and sign up anyway.
I discovered that some of the menu items I saw before signing up that looked good were only offered in two-person portions. And I couldn’t change portion sizes within the same box. All of them had to be the 4-serving selections. There were only eight recipe options I got to pick from by eliminating fish, lamb and shellfish.
Its website was the most cumbersome of the ones I used and not very user friendly overall. I couldn’t find meals that worked for my family. The prices seemed higher to me for what I was getting as well. Once I was clear that Blue Apron wouldn’t work for us, I wanted to cancel my subscription. I found that in order to do so, I have to email Blue Apron’s customer service. I did so, but I find that to be quite annoying. All the other cook-at-home meal kit services had options for me to click in my account to cancel or indefinitely pause my service.
The features I liked
Cook-at-home kit services definitely have likeable features. For the most part, food shows up at your door in the right portion sizes and is ready for you to cook. Some of the services made this easier than others. Overall, my favorite cook-at-home meal kit service was Home Chef. It gets props from me in that it allowed me to pick only two meals a week (best for my family), adjust the portion sizes for all selections I made and had the easiest to cook recipes of all the services that delivered food to my door.
I didn’t know these things would be a draw going in, but I quickly learned they made a big difference after I tried a few other services. Your family may not care as much if you three meals a week is the smallest amount offered or if all meals come in the same portion sizes. But, for our family it really made a difference and fit our needs the very best.
Assessing the cost
Along with concerns about whether we’d find enough foods we like in cook-at-home kit services, my other biggest concern was the cost. For each service I tried, I listed the cost in detail in the individual review posts (see links in the second paragraph or at the end.) Almost all of them offered discounts for new subscribers, but the discounts were distributed over multiple weeks, so they were much smaller on a weekly basis.
Because Home Chef was my favorite, I contemplated whether to continue with it once we were done with the cook-at-home meal kit service reviews. I even found that I could opt to get a delivery every other week or once a month. Being allowed to skip deliveries, it could be even further in between, I suppose. But what I ended up with was a box with two meals for my family (one of which was only two portions because half my family wouldn’t eat it and would need other food prepared for them) that cost around $67. I could take my family of four out to dinner twice a week for the same amount. It just doesn’t seem worth it to me in the end. So, I have indefinitely paused my service.
I know part of the fee for the cook-at-home kits is paying for the ingredients and the convenience. For my family, though, I can get the ingredient locally for less and don’t mind picking them up with my regular weekly grocery order anyway. The cook-at-home kits aren’t made to replace our entire grocery shopping for the week, so they weren’t saving me a trip to the grocery store either.
The one service I’m keeping — at least for now
While I’m not keeping any of the meal kit delivery services, I am keeping EMeals — at least for now. That’s in part because when I subscribed to the service, I had to pay for three months at a time and that time hasn’t ended, yet! But, I am thinking I will continue to use EMeals even after that and renew my plan.
I like that EMeals is cheaper and has way more food options that work for my family. It also uses more convenience items that make getting dinner on the table on weeknights much easier for me. When I first tried EMeals, I didn’t think I’d stay with it. Pinterest and other websites basically do the same thing for free. But, I found that EMeals makes finding new recipes and figuring out what ingredients I need much faster and easier. I don’t get bogged down by too many recipes like can sometimes happen to me online.
EMeals helps me stay creative and out of a rut, which I like. And it fits much better in my budget at $30 for three months. (It does offer an option to pay $60 for a year, which I will do if we continue to like and use it as much as we have been these last couple of months!)
The lessons I’ve learned from cook-at-home kits
I don’t regret trying the cook-at-home kits at all. This experience has changed the way I cook and meal plan — both for the better! We are trying new recipes on a weekly basis now (usually two new recipes a week). I have gotten outside of my comfort zone for cooking and made all kinds of foods and recipes I hadn’t made before. The cook-at-home kits taught me some kitchen skills I hadn’t used before.
I’m now pretty dang good at peeling garlic, cooking chicken and roasting vegetables. I’ve figured out how to meal plan entire meals rather than just main dishes. And my family learned that making two separate meals once a week isn’t so difficult. My husband and son are more particular eaters. Cook-at-home kits got me in the mode of making one meal a week that I knew the guys wouldn’t like for just my daughter and me. I put in a frozen pizza or make something very easy for the boys on those nights. Everybody is happy.
I have also learned that cooking from scratch is tasty, but it isn’t always practical for my family. Some of the cook-at-home kits took me at least an hour at prepare. On weeknights, especially, that’s just too much for it to be on a regular basis. I don’t want to use all convenience, prepackaged food, but I’ve found a happy medium.
Finally, using the meal kits also helped my family eat at home more and enjoy what we’re eating even more. They certainly got us out of a dinner rut. And that’s always a good thing!
What have been your experiences with cook-at-home kits? I’d love to hear from you!
I first wrote this post about how God is good back in June of 2014 when my kiddos were toddler and preschool age. Remembering that God is good is always timely. Considering this post talks about them both being sick is even more timely for me right now since they are again both sick at the same time. Thankfully right now they are just dealing with head colds and don’t need nearly as much help at 9 and 12 as they did at 17 months and 4 years!
About two years ago my son came down with a virus. Considering the dude is 17 months old, I might be exaggerating. It was actually last Friday, but since my daughter has since come down with the same virus and it lasts about a week, time is passing a bit slowly for me right now.
The good news is that neither kid has been hit super hard with this virus, just enough to make them tired, a bit grumpy and clingy. It could be way worse. However, it’s also highly contagious. Somehow they shared their germs with my mom who hasn’t seen them in more than a week. Fortunately no one else has come down with it. We’re staying in and missing out on a good week of activities to keep our germs to ourselves. Maybe by this weekend we’ll be all clear of contagions. I can’t wait. Sick kids aren’t super fun, but being sick isn’t super fun, so I don’t blame them.
The exhausting everyday moments of parenthood
Last evening, though, my son was feeling better but still grumpy. He started getting back into things he hasn’t in weeks, like the dog’s water dish, over and over again. Then he was climbing on the table. He wanted to simultaneously be in my lap and on the floor. My daughter wanted to play. Her ideas were having me mimic her dance moves. I was tired. It had been a long day. It was the kind of day that lasted longer than my patience. I debated about loading everyone in the car in their pajamas just to go for a ride. I didn’t care where, I just needed to be out of the house and not have someone hanging off of me.
It was also raining. My husband had recently repaired a gutter and went outside to check on it. Lucky duck, I thought. At least he got to get out of the house. (My son might not have been the only grumpy one!) He came back in and said he had something neat to show our daughter. She slipped on shoes with her nightgown. I scooped up the baby and we went out, too. It was raining, but we have a covered patio. The “neat thing” my husband had to show off was an intricate spider web. My son couldn’t care less, I didn’t care much and my daughter thought it was pretty cool. However, we were out of the house! We sat on the patio, listening to the rain on the metal roof for a little while. It was the change of scenery that I think we all needed.
Finding joy in the simple things
Sometimes it’s the simple parts in life that make it so good. I wouldn’t say that this has been an overall great week. It hasn’t be horrible and could definitely have been worse, but it also could certainly have been better. My daughter is missing out on her first experience with Vacation Bible School thanks to being sick. She has literally been counting down the days for a month and was looking forward to having me be with her leading around the preschoolers. I was looking forward to her having fun and learning more about God. She is so very interested in God and Bible stories right now. She has a love for Him that makes my heart burst. I don’t want to quash that. I want to encourage and nurture that. And I thought VBS would be one way to do that.
However, God had different ideas. I’d be lying if I said I understood completely or knew what He was thinking. I don’t. In fact, I’ve cried about it this week a couple of times. I’ve prayed about it. As soon as my son got sick, I prayed that somehow my daughter and I wouldn’t so we could still go. I firmly believe God heard my prayer; He just said no. Sometimes “no” is a hard answer to hear. I think I’m more disappointed than my daughter is. But, I do know that always God has a plan. God is good and always in control. I can trust Him even when hardships — whether small or big — don’t make sense.
I’ve learned that lesson time and again, even when I doubt. I’ve learned that in living with a chronic illness when I’ve not understood reasons for suffering. And I’ve learned that when proverbial doors not only closed on me but slammed shut in my face and smashed some fingers in the process. God doesn’t always make sense.
In my humanity, I sometimes get mad about it. Sometimes my feelings get hurt. Sometimes I get so frustrated that in trying to do the right thing and making choices God has led me to make that I still can get punched in the face with a hardship. It’s not always fair. But, God never said life would be fair and therein lies the rub. Therein lies the difficulty.
God is good
However, I have learned that even when life doesn’t make sense, God does make sense. I have told my daughter time and again that she doesn’t always need to understand why my husband and I ask her to do something, she just needs to do it because we said so. (Trust me, the girl wants us to explain everything all the time and sometimes she just needs to trust us.) Just like I’d never lead my children astray, just like I have valid reasons for disciplining them when they do something wrong, so God does the same for me. At the end of the long, hard day — even through my hurt, frustration and tears — all I have left (all I really had to begin with) is to trust God and lean fully on Him.
I can look back now other major hardships in my life and see how God worked them for my good. I can look back at other hard times and still not understand them, but I trust that just like I look out for my children, He is looking out for me. My toddler and preschooler can’t understand as much as I do at age 35. I can’t understand as much as God does as the maker of the universe and creator of everything in it. I just have to trust in One Who loves me more than I can fathom.
And so even in small hardships like having temporarily sick kiddos who are missing out on things they were looking forward to, I can trust. I can know that God really does work all things to the good of those who love Him even when little things (and big things!) don’t make sense.
While I wouldn’t mind a bit of a break in the craziness of life this week, I am working to be thankful in all circumstances at all times. Because God is good all the time. He is ever faithful.
A series of unsponsored meal kit reviews and comparisons
A few months ago, my daughter made a case for us to try meal kits. I wasn’t so sure at first; meal planning on my own worked. Whenever I had checked into them previously, they seemed expensive and didn’t have a lot of recipes we would actually like. I have two particular eaters in my household, and we’re pretty plain eating folks. But, I decided to check into it again and found there were many more options, so I decided we’d give meal kits a try. I started with one company, but I was anxious to do a meal kit comparison and see what we’d like most.
So after about five meal kit boxes from one provider, I paused my account and changed to another. I just wanted to see the difference. At the same time, there was a third one I was curious about as well. I figured all this trying would end up being a great meal kit comparison to share!
Before ordering, I tried looking at meal kit comparisons, but most of them seemed to include affiliate links or sponsorships with the companies. I am not affiliated with or sponsored by any of these meal kit companies. When I started writing this meal kit comparison, in fact, I had no idea which service I’d end up liking the most — if any of them. I didn’t even intend to make it a blog post!
Then, once I decided to make it a blog post, I thought it’d be just one post. Pretty quickly, I realized that I needed more than one post to include all the information to make a helpful comparison. Over a few weeks, I’m posting our experiences with Dinnerly, Hello Fresh, Home Chef, Every Plate and EMeals.
Meal planning on my own
I realized to truly be fair and give an accurate review and comparison that I needed to also include meal planning on my own. So, I wanted to include that as well. This is what intentional meal planning and looking for new recipes to try on a weekly basis on my own looks like.
The menu choices were virtually unlimited. I had the entire internet at my disposable, including Pinterest, the great mecca of recipes! The biggest challenge in meal planning on my own, in fact, was that I have so many different recipes available to me. I have a variety of meals saved on my personal Pinterest board and browsed through it. I got a couple of ideas that way, but it was hard to narrow them down.
I found that I did better by having an idea of what kind of dinner I was looking for; otherwise the options were just too many. So, for example, my daughter mentioned she’d love to have BLT pizza. My husband didn’t think that sounded as great. My daughter likes the crescent roll crust most, so I searched for recipes using a crescent roll crust and found a Mexican one that I could easily modify for our family of four.
Thanks to the meal kit services, I did better with planning entire meals rather than just a main dish. I did discover one of my favorite new recipes this way. I made this Ritz cracker chicken in the oven and added mashed potatoes and roasted green beans. My daughter, parents and I loved it!
Cost
One bonus to meal planning myself meant that I could also go with things I already had on hand. This helped keep the cost a bit lower as a result. For example, I knew I had a box of spaghetti noodles in the pantry, so looked for recipes using spaghetti noodles that were outside of a jar of sauce. I could also meal plan based on what was on sale at the local grocery store the same week. That I didn’t actually do this time around, but I have in the past.
Shipping
Shipping wasn’t an issue for meal planning on my own. I do utilize grocery pick-up service, so I did that. Easy peasy!
Ingredients
As mentioned with the cost, I could use ingredients that I had on hand. Otherwise, I went with recipes that had ingredients I knew my grocery store would have as well.
Cooking the meals
Meal planning on my own meant that I could pick recipes based on what we liked and how involved they were to make. So cooking the meals was as easy as I wanted it to be. I didn’t have any issues with any of the recipes I picked not turning out well or having complicated instructions.
Portion sizes
Again, this depended on the recipe I chose. The Ritz cracker chicken, for example, called for six chicken breasts to serve six people. Since I only needed enough for four, I used only four chicken breasts instead. Had it been just my daughter and me, I’d have used only two.
Overall rating
Overall, I would say meal planning on my own is about 4 out of 5 stars. I realized that having some help with recipe ideas for the week did make my life easier. I can also get stuck in a bit of a rut if I don’t have ideas of what I want to make or don’t have time to search out new recipes.
Honestly, that’s not the result I expected going into this whole thing!
A series of unsponsored meal kit reviews and comparisons
A few months ago, my daughter made a case for us to try meal kits. I wasn’t so sure at first. Whenever I had checked into them previously, they seemed expensive and didn’t have a lot of recipes we would actually like. I have two particular eaters in my household, and we’re pretty plain eating folks. But, I decided to check into it again and found there were many more options, so I decided we’d give meal kits a try. I started with one company, but I was anxious to do a meal kit comparison and see what we’d like most.
So after about five meal kit boxes from one provider, I paused my account and changed to another. I just wanted to see the difference. At the same time, there was a third one I was curious about as well. I figured all this trying would end up being a great meal kit comparison to share!
Before ordering, I tried looking at meal kit comparisons, but most of them seemed to include affiliate links or sponsorships with the companies. I am not affiliated with or sponsored by any of these meal kit companies. When I started writing this meal kit comparison, in fact, I had no idea which service I’d end up liking the most — if any of them. I didn’t even intend to make it a blog post!
Then, once I decided to make it a blog post, I thought it’d be just one post. Pretty quickly, I realized that I needed more than one post to include all the information to make a helpful comparison. Over a few weeks, I’m posting our experiences with Dinnerly, Hello Fresh, Home Chef, Every Plate and EMeals.
EMeals
From the beginning of this journey, I was most intrigued by EMeals. It is much cheaper because you’re only paying for the meal plans and buying the groceries yourself. They partner will various grocery stores to help make shopping easier. I do like that. As a rather DIY person, I figured EMeals would be the best fit for us.
Signing up for EMeals was pretty painless. I signed up online but then had to download the app to do much else. You can see your account and payment information online, but finding recipes and creating shopping lists has to be done through the app. I’m not anti-apps by any means, but I often have my laptop and like having the option to use it as well. Plans that have both make me happiest!
Menu choices
Since EMeals doesn’t have to source the food for its recipes like other meal kits do, they have many more menu options. There are a few that are family friendly options, and I started with those. Of all the meal kits we have tried, this one definitely had the most options that worked for my entire family. Quite a few of the meals were similar to things in our regular rotation, but there were lots of new options as well. My concern was whether I’d push outside of our comfort zone as much as I have with other meal kits!
EMeals also goes with some premade items on many recipes to make cooking time quicker. That’s a nice bonus for this mama on busy weeknights!
I’d love to have a search feature in EMeals to look for meals that utilize specific ingredients. For example, the first week using EMeals, I bought a half gallon of buttermilk for a blueberry muffin recipe. That’s not something I usually use, so I wanted to find other recipes to make use of the buttermilk.
While you do select a specific plan you’d like to go with (like family friendly, low calorie or budget), you can easily access and pick from recipes in all of the plans. I really like that!
Cost
EMeals offers 14 days for free, but you have to put in your payment information for them to start charging at the end of 14 days. Instead of being a monthly or weekly charge, EMeals charges either every three months at $9.99 a month or once a year at $4.99 a month. I opted for the three-month option when signing up, because I didn’t know how much we’d like it. Honestly, I’d prefer a monthly option at least to start with.
For additional fees, you can also add on a breakfast plan and a lunch plan (each costs additional). Unfortunately, I couldn’t find anywhere to view these plans ahead of time and they aren’t included in the free trial, so I didn’t go for them.
Shipping
Shipping wasn’t relevant to EMeals for me. I order my groceries online and pick them up. EMeals partners with a variety of retailers to help you make your list. So, I worked with Walmart, which is my go-to for grocery pick-up anyway.
Once you pick however many recipes you want for the week, then you can click and see your ingredient list in the EMeals app. It will pull up every single ingredient needed to make everything you have saved for the week. One negative to me is that it often automatically adds alcohol to pair with meals to the shopping list. We don’t drink alcohol, so I removed it from the list, but it sort of irritated me I even had to do that. However, it wasn’t difficult to remove. Each item has a box next to it to check whether you need it. It starts out with everything checked. And the list also tells you how much of an ingredient you need and what recipe you need it for. (I like that!)
Before even connecting to Walmart, I was able to remove items from the list that I had on hand. Once that was finished, then I clicked a button and it took me ingredient by ingredient through the Walmart app to add whatever choices I wanted. It pulled up a selection of items and I picked from them. It was easy!
I also was able to add on additional items as well. The items I added to my Walmart cart through the EMeals app also were in my Walmart cart in the Walmart app. For the rest of my shopping, I just switched to the Walmart app itself because that’s what I’m most familiar with.
If you really love having the groceries delivered to your house, then opt for your grocery store’s delivery service.
Ingredients
Again, this is a bit different from the others in that the ingredients being fresh or not didn’t depend on EMeals. I liked the way I made selections of ingredients in the app. However, I also wondered how difficult it would be to find and purchase the ingredients needed for recipes. With previous meal kits, we used multiple ingredients that were a bit more specialty. I wasn’t confident my local Walmart would carry some of them.
However, EMeals recipes are more simplified and use some convenience foods as well, like refrigerated mashed potatoes or mac & cheese. I had no problem finding any of the ingredients I needed.
Cooking the meals
Of all the meal kit meals I’ve made, EMeals were the very easiest. The recipes are more like recipes I usually make for my family on a weeknight. While I love making things from scratch sometimes, a lot of weeknights, I just need to get food on the table and move on. I never felt out of my depth with anything I made from EMeals. They weren’t as challenging as the other meal kits, which is both a positive and a negative. Though they were easier to make, they didn’t push me out of my comfort zone.
I don’t like using my phone to read recipes, which I thought was going to be an issue with EMeal. The recipes are only on the app. But, I discovered that if I share the recipe via email to myself, then it takes me to the recipe on the website and has a print button right there for easy printing. I loved that!
The estimated cook times seemed accurate and sometimes it took me a little less time than estimated, which was great!
Portion sizes
The portion sizes vary on the recipes you make. All of them are clearly marked. Since you purchase your own ingredients, you can adjust the portion sizes as needed. For example, my family isn’t big on eating meat. The first week, I halved our ground beef purchase for the recipes. So we got fewer portions as a result. But feeding a family four with the family plan was super easy. Many of the recipes feed up to six people. The portion sizes seemed spot on for the recipes we tried.
Overall rating
I’d give EMeals a 5 out of 5 stars. It is certainly a different type of service, but for the price, I liked it. I debated back and forth about whether it was any easier than just doing meal planning on my own using recipes I find on the internet. (Check back next week for a post about meal planning without a service.) I definitely could, but having everything narrowed down in one place is helpful. So, EMeals is definitely one of my top picks.
This website uses cookies so that we can provide you with the best user experience possible. Cookie information is stored in your browser and performs functions such as recognising you when you return to our website and helping our team to understand which sections of the website you find most interesting and useful.
Strictly Necessary Cookies
Strictly Necessary Cookie should be enabled at all times so that we can save your preferences for cookie settings.
If you disable this cookie, we will not be able to save your preferences. This means that every time you visit this website you will need to enable or disable cookies again.